Clothes Dryer Troubleshooting Guide: Diagnose Any Problem in 15 Minutes
A dryer breakdown stops laundry in its tracks. Before you panic or call a technician, most dryer problems fall into five categories that you can diagnose yourself in minutes. This guide walks you through symptom-first troubleshooting to identify the exact part that’s failing, whether your dryer is electric or gas, and what you can safely fix at home.
Over 95% of dryer failures come down to five symptoms: won’t start, runs but no heat, takes forever to dry, makes noise, or stops mid-cycle. Start with the 15-minute checks below, then jump to your symptom.
The 15-Minute Pre-Repair Checklist
- Power and breaker: Is the dryer plugged in? For electric dryers, check your electrical panel for a tripped 240V double-pole breaker (two switches together). For gas dryers, look for a 120V single breaker. Flip it off and back on. Many problems vanish here.
- Door latch: Close the door firmly until you hear a click. A door that doesn’t latch fully prevents the dryer from starting—this is the #1 false alarm.
- Cycle selection: Make sure you’ve selected a cycle (not just “on”). Some dryers won’t start if the dial or button selection is incomplete.
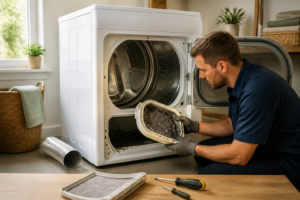
- Lint screen: Pull out the lint trap and clean it completely. A clogged screen restricts airflow and triggers thermal cutoff switches, causing heat loss and early shutoffs.
- Vent flap outside: Walk outside and check that the exterior vent flap opens freely when you blow into it or run the dryer briefly. A stuck or clogged flap mimics heating element failure.
If these five checks don’t solve the problem, proceed to your symptom section below.
Symptom 1: Dryer Won’t Start
The dryer is plugged in, power is on, but pressing start does nothing. The drum doesn’t turn.
Diagnostic Flow
Step 1: Test the door switch. This is the #1 cause of no-start failures. The door switch is a small lever or magnet on the inside edge of the door frame. When the door closes, it presses this switch to complete the starting circuit. A failed door switch cuts all power to the start button.
Unplug the dryer. Locate the door switch (usually a small plastic or metal lever on the interior frame near the latch). Set your multimeter to the continuity or ohms setting. Test the switch terminals: with the switch pressed in (door closed position), you should read near 0 ohms or see a continuity beep. When the switch is released (door open), continuity should break. If continuity doesn’t change, the switch is bad and needs replacement.
Step 2: Check the thermal fuse. If the door switch tests good, unplug the dryer and locate the thermal fuse (a small cylindrical component on the blower housing or near the heating element). Set your multimeter to continuity. Test across both terminals—you should see 0 ohms or a beep. If the display reads infinity or shows no continuity, the fuse is blown. A blown thermal fuse almost always means the dryer overheated earlier due to restricted airflow; don’t just replace the fuse—check your vent and blower housing first.
Step 3: Test the start switch. If the door switch passes and the thermal fuse is good, the start button itself may have failed. With the dryer unplugged, remove the control panel (usually held by a few screws at the top). Locate the start switch terminals behind the button. Test continuity across those terminals when the button is pressed—you should see 0 ohms. If not, the start switch needs replacement.
Step 4: Identify your dryer type and check power. Electric dryers need 240V to run; gas dryers need 120V. Check your breaker panel:
- Electric dryer: Look for two adjacent breakers (double-pole 240V). One may be partially tripped—this is a sneaky failure mode. Flip both to OFF, then back ON.
- Gas dryer: Check a single 120V breaker. If it’s tripped, reset it.
If the breaker trips again immediately after reset, you have a short circuit and should call a professional.
Step 5: Check the belt switch. Some dryer models (particularly older GE and Hotpoint) have a belt switch that prevents starting if the belt is broken. If the belt has snapped, this switch opens and blocks the start signal. Unplug the dryer and locate the belt switch (on the blower housing or drum support frame). Test for continuity with the multimeter—good switches show 0 ohms. A failed belt switch requires replacement, though you’ll want to check if the belt actually is broken.
For model-specific no-start failures, see our guide on top 20 dryer models and their common repair issues.
Symptom 2: Runs but No Heat
The dryer starts and the drum spins, but clothes come out cold. This is either an electrical heating failure or a gas ignition failure.
Electric Dryer (240V) — No Heat Diagnosis
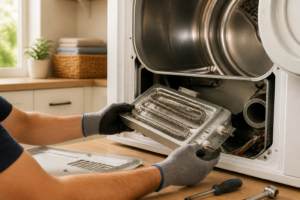
Test the heating element: Unplug the dryer and locate the heating element (a coil of wire near the blower housing). With your multimeter set to continuity, test across the element terminals. A good element shows 10–20 ohms (exact value varies by wattage). If you see 0 ohms or very low resistance, the element may have internally shorted. If you see infinite resistance, the element has failed open and must be replaced.
Check one leg of the 240V circuit: Here’s a sneaky failure: one of the two 120V legs feeding your dryer’s 240V circuit goes dead, but the dryer still runs because the motor only needs one leg. However, the heating element (which needs both 120V legs) gets only 120V and produces little heat. This happens when one breaker in the double-pole breaker is half-tripped—it looks normal but is actually in the OFF position. Flip your dryer’s double-pole breaker fully OFF, then fully ON. Confirm both switches move together.
Test the high-limit thermostat: This component shuts off the heating element if the dryer gets too hot. If it fails closed (stuck), it blocks heat. Locate the high-limit thermostat (usually a small metal disc on or near the heating element assembly). With the dryer unplugged, test it with your multimeter on continuity—a good thermostat shows 0 ohms at room temperature. If it reads infinite resistance, it’s failed and needs replacement.
Test the thermal cutoff: Similar to the thermostat, a failed thermal cutoff (found on the blower housing or heater assembly) can block the heating circuit. Test it the same way: unplug, set multimeter to continuity, and expect 0 ohms for a good component. Infinite resistance means replacement.
Gas Dryer — No Heat Diagnosis
Listen for the igniter spark: Start the dryer on a heated cycle and listen near the burner box. You should hear a clicking spark for 10–15 seconds. If there’s no spark sound, the igniter is dead and must be replaced.
Watch the igniter glow pattern: If you hear clicking, watch the igniter glow through the burner box opening (be careful—it gets hot). A good igniter glows orange, stays glowing for 10–30 seconds, then the gas valve opens and the flame ignites. If the igniter glows orange but the flame never starts and the igniter goes dark after 30 seconds, the gas valve coils have failed. You’ll need a technician to safely replace gas valve coils.
Check the flame sensor: If the flame ignites but shuts off immediately after, the flame sensor may be coated with debris. Unplug the dryer, locate the flame sensor (a thin rod inside the burner box), and gently wipe it with a soft, dry cloth. Restart the dryer.
Confirm the thermal fuse isn’t blown: A blown thermal fuse cuts both spark and gas in gas dryers. Test as described in Symptom 1—if it’s blown, check for vent blockage before replacing.
Symptom 3: Runs but Clothes Take Forever to Dry
Heat is present but drying times are stretched. This is almost always an airflow problem, not a heating problem.
Airflow Diagnosis (Priority Order)
1. Vent duct blockage: The most common culprit. Unplug the dryer, disconnect the vent duct from the back, and use a flashlight to look inside. If you see lint buildup or feel heavy restriction when you try to blow air through it, the duct needs cleaning. See the vent cleaning section below.
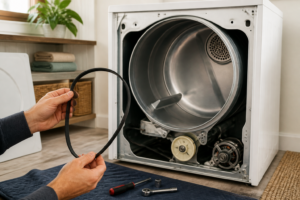
2. Crushed transfer hose: The flexible hose behind the dryer often gets pinched or crushed when the dryer is pushed against the wall. Pull the dryer away from the wall, unplug it, and check if the hose is flattened. If so, replace it or carefully straighten it.
3. Lint in the blower housing: Unplug the dryer and remove the front or rear panel (depending on your model). Look inside the blower wheel housing. Lint accumulation here severely restricts air. Use a small vacuum attachment or a brush to gently remove lint. Do not damage the blower wheel blades.
4. Long or multi-bend vent runs: If your vent run is longer than 25 feet or has more than two 90° bends, airflow capacity is exhausted. The solution is rerouting the vent for a straighter path or upgrading to a booster fan—this may require a technician.
5. Moisture sensor coating: Modern dryers with sensor drying shut off when moisture sensors detect dry clothes. If the sensors are coated with dryer sheet residue, they read false dryness and the cycle stops early. Unplug the dryer, locate the two metal bars inside the drum (usually on the front or sides), and wipe them thoroughly with a cloth dampened with rubbing alcohol. Let them dry completely before restarting.
Symptom 4: Dryer Makes Noise
The dryer runs but produces squealing, thumping, or grinding sounds.
Noise Diagnosis
Squealing sound: Usually comes from the idler pulley or drum glides (felt seals around the drum). The idler pulley maintains tension on the belt; when it fails, friction increases and the belt squeals. Locate the idler pulley on the idler assembly (usually on the front panel near the drum’s left or right side). Spin it by hand while unplugged—it should spin freely for several rotations. If it’s stiff or doesn’t spin, replacement is needed. Drum glides, felt rings that reduce friction between the drum and metal frame, wear out and squeal as the drum rotates. Both require partial disassembly to access.
Thumping or bumping sound: Usually indicates drum rollers (also called drum support rollers) have failed. The drum rides on these rollers; when they wear flat, the drum bounces as it rotates. You’ll hear thumping especially during the spin-down phase. Rollers are located on the front and rear of the drum housing and require removing the front and rear panels to replace.
Grinding sound: Could be the idler bearing, blower wheel striking lint, or the drum itself hitting metal. For idler bearing failure, listen closely to isolate the sound to the left or right side of the drum. For blower wheel, check inside the blower housing (after unplugging) for lint touching the wheel. For drum contact, the drum may be loose from failed support rollers—this requires professional inspection.
Most noise repairs require partial disassembly. Consult your model’s service manual or our brand-specific guides like Samsung DVE50BG8300V troubleshooting for exact component locations.
Symptom 5: Dryer Stops Mid-Cycle
The dryer starts fine, then shuts off after 5–20 minutes.
Diagnostic Flow
Restricted airflow causing thermal cutoff: The thermal fuse or high-limit thermostat opens when the dryer overheats, cutting power. This happens when vent is clogged or blower housing is lint-choked. Check your vent and blower first (see Symptom 3). If airflow is clear, the thermal cutoff itself may be failing prematurely.
Moisture sensor ending cycle early: Sensor-dry cycles stop when the sensors read moisture levels as “done.” If your load is mixed (some heavy, some light), the light items dry first and trigger the sensor, leaving heavy items damp. Switch to timed drying or check that sensor bars are clean (see Symptom 3, moisture sensor section).
Motor thermal overload tripping: The drum motor has a built-in thermal overload that opens if the motor gets too hot. This happens when the drum is overloaded or the blower isn’t cooling the motor adequately. Unplug the dryer, let it cool for 30 minutes, and restart with a lighter load. If it trips again immediately, the motor thermal overload may be failing, which usually requires professional replacement.
How to Test the Most Common Parts with a Multimeter
Door switch: Set multimeter to continuity (or ohms). Depress the switch plunger fully—you should see 0 ohms or hear a beep. Release it—continuity should break and show infinite resistance. If continuity doesn’t change, the switch is bad.
Thermal fuse: Set to continuity. Test across both terminals of the fuse. A good fuse shows 0 ohms. A blown fuse shows infinite resistance (∞). No in-between values—it’s either good or failed.
Heating element (electric dryer): Set to continuity or ohms. Expect 10–20 ohms on most elements (verify against your model specs). If you read 0 ohms, the element has shorted internally. If you read ∞ (infinite), the element is open and dead.
Gas valve coils: Set to continuity or ohms. Each coil should show 200–800 ohms (varies by model). If either coil reads 0 ohms or ∞, it’s failed. Gas valve replacement should be done by a technician due to safety.
Dryer Vent Cleaning: Inside and Outside
A clogged vent is the root cause of poor drying, overheating, and thermal cutoff shutdowns. Clean your vent at least yearly, or every 6 months if you use dryer sheets frequently.
Cleaning Steps
- Unplug the dryer and disconnect the vent duct from the back of the dryer. Be prepared for lint to fall.
- Use a vent brush kit (available online) designed to extend 15+ feet. Feed the brush into the vent from outside the home and work it back and forth to dislodge lint. These kits usually attach to a cordless drill for faster cleaning.
- From inside, use a shop vacuum to pull lint from the vent opening at the dryer.
- Go outside and check that the exterior vent flap opens freely and is not clogged with lint or debris. Clean the flap area with a brush.
- Reconnect the vent duct, ensuring all connections are tight and the hose is not kinked.
If vent cleaning doesn’t improve drying time significantly, your vent run may be too long or too convoluted—a booster fan or professional rerouting may be needed.
When to Call a Professional
- Gas smell: If you smell gas, stop using the dryer immediately and call your gas utility or a qualified technician. Do not attempt to repair gas lines.
- Drum motor replacement: Some dryer designs require significant disassembly to replace the drum motor. Unless you’re experienced, this is a technician job.
- Control board failures: Modern dryers have electronic control boards. Diagnosing control board faults requires specialized testing and often replacement, which is usually a professional service.
- Thermal cutoff premature opening: If a new thermal fuse or cutoff blows again within a few weeks despite clean vents, the part itself may be failing, or there’s a hidden electrical fault best diagnosed by a pro.
For specific models, see our LG DLE3400W not drying guide and Samsung dryer thermal fuse replacement (DVE45R6100W) for detailed walkthroughs.
⚠️ Safety Warning
Electrical hazard: Electric dryers operate on 240V. Before opening any panel or testing with a multimeter, unplug the dryer from the wall outlet. Even unplugged, the thermal fuse can fail suddenly due to stored heat. Allow the dryer to cool for at least 30 minutes before opening.
Breaker panel safety: If you need to reset breakers in your electrical panel, do so carefully. Never touch both legs of a breaker simultaneously. If a breaker trips repeatedly, you have a fault that requires a licensed electrician—do not keep resetting it.
Gas line safety: Do not attempt to repair gas lines, valves, or fittings. If you smell gas, turn off the dryer, open windows, and contact your gas utility immediately. Gas line work must be done by a certified technician.
High temperature: Dryer components, especially the heating element, blower housing, and burner box, retain heat for extended periods after the dryer is turned off. Wait at least 30 minutes before touching internal components.
Frequently Asked Questions
What is the most common dryer failure?
The door switch is the #1 cause of no-start failures across all brands. A failed door switch costs $20–$50 in parts and takes 15 minutes to test and replace. The second most common is a blown thermal fuse caused by vent blockage—also affordable but a sign that airflow maintenance was missed.
Why does my dryer run but not heat?
For electric dryers, the heating element or high-limit thermostat has failed, or one leg of your 240V breaker is partially tripped. For gas dryers, the igniter is dead or the gas valve coils have failed. Always check for vent blockage first, as restricted airflow causes thermal cutoffs to open and block heat.
Can a clogged lint filter cause the dryer not to start?
No. A clogged lint screen will restrict airflow and cause overheating shutdowns or poor drying, but it won’t prevent the dryer from starting. However, a severely clogged screen can trigger the thermal fuse to blow, which will then prevent starting. Always clean the lint trap before every load.
How do I know if my dryer has a broken belt?
A broken belt stops the drum from turning. The dryer will start (you’ll hear the motor) but the drum won’t rotate. Open the front or rear panel and look at the belt path—if the belt is slack, broken, or missing, it’s failed. On some models, a broken belt also opens the belt switch, which prevents the dryer from starting at all.
Is it safe to use a dryer with a blown thermal fuse?
No. A blown thermal fuse is a safety device that has done its job—the dryer overheated. Using the dryer with a blown fuse removes this protection and risks fire if overheating happens again. Always replace a blown thermal fuse, and investigate why it blew (usually vent blockage) before restarting.
Why does my dryer run but cycle stops after 10 minutes?
A thermal cutoff is opening due to overheating (caused by restricted airflow), or your moisture sensors are reading false dryness because they’re coated with dryer sheet residue. Check and clean the vent system and sensor bars. If airflow is clear and sensors are clean, the thermal cutoff itself may be failing prematurely.
Recommended Tools
Digital Multimeter
Nearly every diagnosis in this guide comes down to a continuity or voltage reading, and a basic digital multimeter handles all of them. Check current pricing on Amazon.
Appliance Repair Tool Set
A dedicated appliance tool set with nut drivers, Torx bits, and panel spudgers makes the disassembly steps in this guide far easier and prevents scratched panels and stripped screws. Check current pricing on Amazon.