
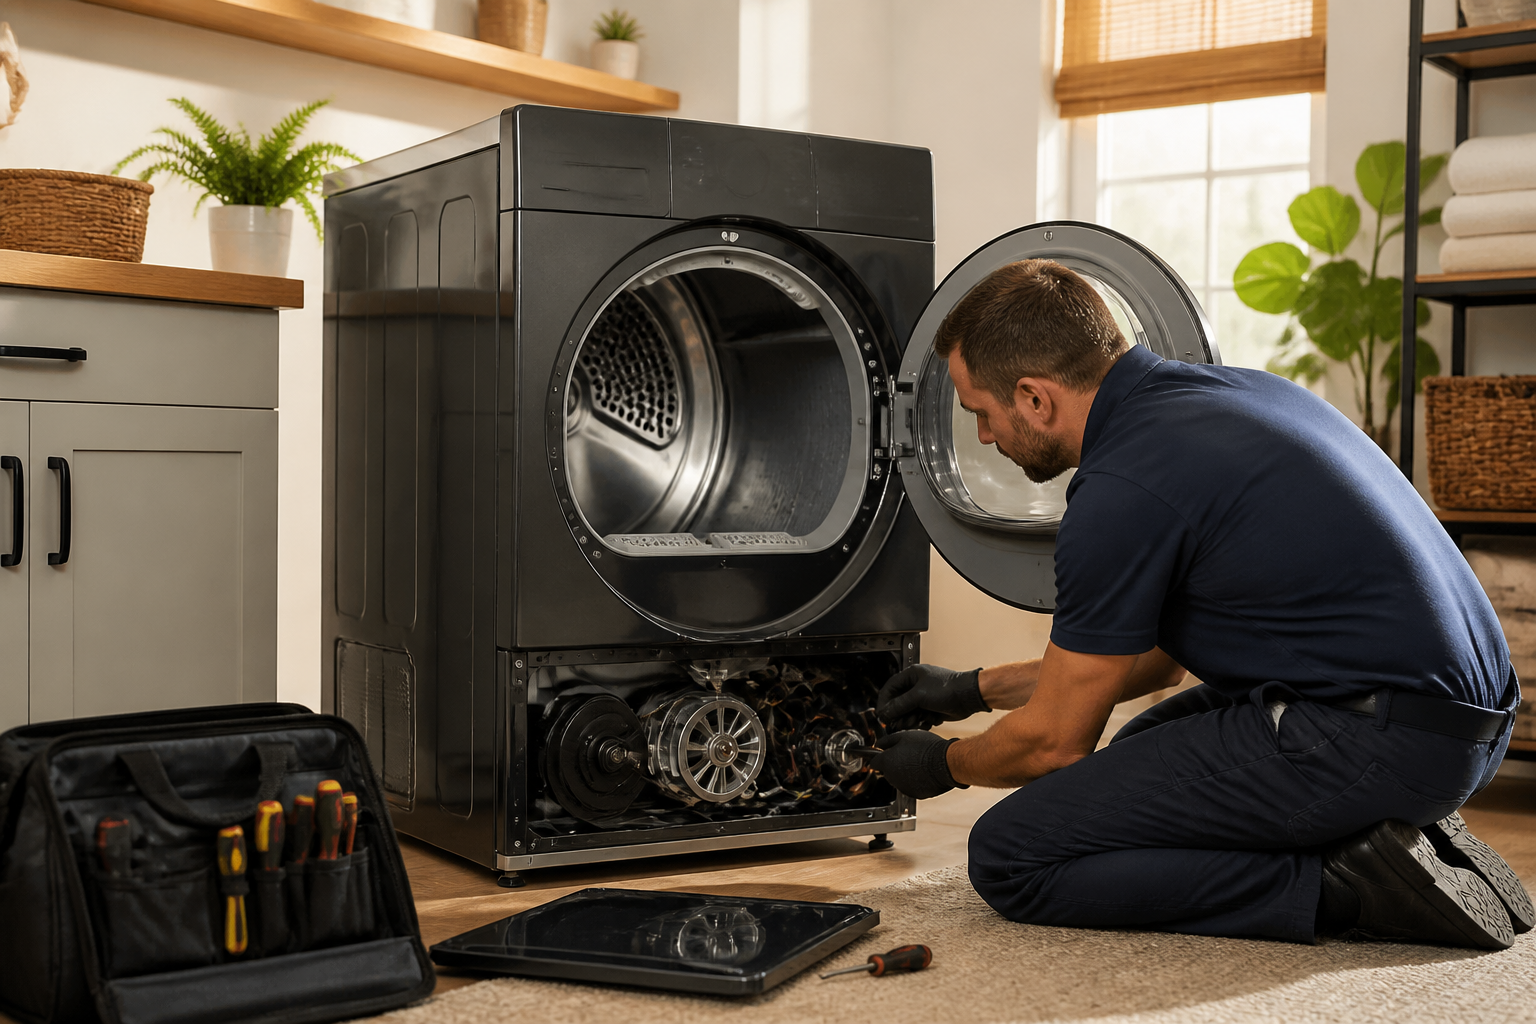
Samsung DVE50BG8300V Electric Dryer Troubleshooting Guide
Today I want to share what I’ve learned about the Samsung DVE50BG8300V, a high-capacity electric dryer loaded with moisture sensing technology. Like any appliance it can run into problems over time. This troubleshooting guide will help you diagnose and repair the most common issues, potentially saving you hundreds in service calls.
⚠️ Safety Warning
Before diving into any repairs on your Samsung DVE50BG8300V, it’s crucial to disconnect the power supply. Unplug the unit or switch off the circuit breaker. Remember, this dryer operates on 240 volts and has high-voltage capacitors that can retain a charge even when unplugged. If you’re not comfortable working with electrical systems, it’s best to reach out to a qualified technician. And please, never bypass or disable safety switches like the door latch switch.
Dryer Not Heating: Diagnostic Procedures
Understanding the Heating System on the DVE50BG8300V
The Samsung DVE50BG8300V uses an electric heating element (part number DC47-00019A) as its primary heat source. The heating circuit is protected by a thermal fuse, and a thermistor regulates the system by monitoring temperature. If your dryer is running but not generating heat, it’s likely one of these three components is at fault.
Step 1: Test the Thermal Fuse
The thermal fuse is a one-time-use safety device that opens when the dryer overheats, cutting power to the heating element. This is the most frequent cause of no-heat issues on the DVE50BG8300V.
- Unplug the dryer from the electrical outlet.
- Remove the front lint trap housing and exhaust duct from the front of the dryer.
- Unbolt the front panel by removing the four corner bolts.
- Locate the thermal fuse mounted on the blower housing at the rear left side of the dryer interior. It’s a cylindrical component about 1.5 inches long.
- Using a multimeter set to the ohms (resistance) function, touch the probes to each end of the thermal fuse.
- A functioning thermal fuse should read between 0-5 ohms (indicating continuity).
- If the reading shows infinite resistance or OL (open line), the thermal fuse is blown and needs replacing with part number DC96-00887A.
If you find the thermal fuse has blown, replace it right away. But take a moment to investigate why it failed before running the dryer again. Common causes include a blocked exhaust vent (check the vent maintenance section) or a faulty thermistor causing the dryer to overheat.
Step 2: Test the Heating Element
If the thermal fuse is intact, the heating element itself might be the issue. The heating element part number for the DVE50BG8300V is DC47-00019A.
- With the dryer unplugged, remove the front panel as described above.
- Locate the heating element at the bottom right of the interior drum assembly.
- Disconnect the two terminal spade connectors from the heating element.
- Set your multimeter to the ohms function.
- Touch the probes to the two terminals on the heating element.
- A working heating element should typically read between 10-25 ohms.
- If you read 0 ohms (short circuit) or infinite ohms (open circuit), replace the element with part number DC47-00019A.
Keep in mind that heating elements can fail intermittently. If the resistance reading is higher than 25 ohms, the element may be weakening and should be monitored, as longer drying times may indicate a failing heating element.
Step 3: Test the Thermistor
The thermistor is a temperature-sensing device that communicates with the control board to regulate heat output on the DVE50BG8300V. A faulty thermistor can prevent the heating element from receiving power.
- Unplug the dryer completely.
- Remove the front panel and find the thermistor mounted on the blower housing duct (a small cylindrical component with a single wire connector).
- Disconnect the thermistor connector.
- Using your multimeter on the ohms setting, measure the resistance of the thermistor.
- At room temperature (68-72°F), it should read approximately 5,000-10,000 ohms.
- If the reading is significantly different or shows infinite resistance, the thermistor (part number DC32-00007A) needs replacement.
To check if the thermistor is responding to temperature changes, warm it gently with your hand and observe the resistance changes on the multimeter. Resistance should decrease as the temperature rises.
Dryer Not Starting or Drum Not Turning
Check the Door Latch Switch
The door latch switch is crucial for safety, preventing the dryer from operating when the door is open. If this switch is faulty, the Samsung DVE50BG8300V won’t start, regardless of other conditions.
- Unplug the dryer.
- Open the dryer door and inspect the latch mechanism on the inside of the door frame.
- Remove the front panel by unbolting the four corner fasteners.
- Locate the door latch switch assembly on the left side of the front panel (part number DC64-01660A).
- Disconnect the wire connectors from the switch.
- Set your multimeter to the ohms function.
- With the door open, the switch should read infinite ohms (no continuity).
- Manually press the switch plunger; the resistance should drop to 0 ohms (full continuity).
- If the switch fails either test, replace it with part number DC64-01660A.
A faulty door latch switch is among the top reasons the DVE50BG8300V fails to start. Always check that the door closes completely and the latch engages properly before deciding the switch is defective.
Inspect the Drive Belt
The drive belt is responsible for turning the drum on your Samsung DVE50BG8300V. A broken or worn belt will prevent the drum from spinning, even if the motor is running.
- Unplug the dryer and remove the front panel.
- Visually inspect the belt wrapped around the drum and idler pulley.
- Look for cracks, fraying, separation of belt layers, or signs of wear.
- The belt should be about 3/8 inch thick with no visible damage.
- Press the belt with your thumb; it should have slight resistance and not be cracked.
- If the belt is damaged, it needs to be replaced with part number DC93-00152A.
Worn belts on the DVE50BG8300V often produce squeaking or grinding noises before they break entirely. If you hear these sounds, consider replacing the belt preemptively to avoid complete failure.
Test the Drive Motor
The motor powers the drum via the drive belt. If the motor is faulty, it may not run at all or may run without turning the drum.
- Unplug the Samsung DVE50BG8300V.
- Remove the front panel and locate the motor at the bottom left of the dryer interior (part number DC31-00111A).
- Disconnect all wire connectors from the motor.
- Using your multimeter on the ohms setting, measure resistance between the motor terminals.
- A functional motor should read between 5-15 ohms between the main terminals.
- If the resistance is infinite (open circuit) or 0 ohms (short circuit), replace the motor with part number DC31-00111A.
- To verify the motor can run, you may temporarily apply 240V directly to it, but only experienced technicians should attempt this.
Replacing the motor is more complex than other repairs. If you confirm the motor is faulty but feel unsure about the replacement, it’s wise to hire a professional technician.
Extended Drying Times on the DVE50BG8300V
Most Common Cause: Restricted Exhaust Vent
Over 80% of drying time complaints on the DVE50BG8300V are due to a blocked or restricted exhaust vent. Lint builds up in the exhaust duct and vent hood, forcing the dryer to work harder and longer.
- Unplug the dryer from the wall outlet.
- Locate where the dryer’s exhaust duct connects to the wall (usually behind or at the side of the unit).
- Disconnect the flexible duct from the dryer outlet.
- Using a flashlight, look through the duct toward the external vent hood.
- If you can’t see light through the entire duct, it’s blocked and needs cleaning.
- Use a plumbing snake or dryer vent cleaning brush to push lint from the duct.
- Alternatively, use a wet/dry vacuum to suction lint from both ends of the duct.
- Check the external vent hood flap—ensure it moves freely and isn’t clogged with lint.
- Clean the hood with a brush and verify the flap operates smoothly.
- Reconnect the duct and test the dryer.
It’s essential to clean the exhaust vent on your Samsung DVE50BG8300V at least twice a year. Restricted vents not only reduce efficiency but also increase the risk of thermal fuse failure and fire hazards.
Clean the Moisture Sensor
The DVE50BG8300V uses a moisture sensor to determine when clothes are dry and automatically end the cycle. A dirty sensor might cause the dryer to think clothes are still wet, unnecessarily extending drying time.
- Unplug the dryer.
- Open the dryer door and look at the left interior wall just inside the drum opening.
- You’ll see two small metal fingers protruding from the interior wall (about 3 inches long).
- These are the moisture sensor contacts.
- Using a soft cloth or pencil eraser, gently rub the surface of each metal finger for 30 seconds.
- This removes lint and residue buildup that can interfere with moisture detection.
- Do not use water or harsh cleaners—dry cleaning only.
- Plug the dryer back in and run a test cycle.
Make it a habit to clean the moisture sensor on your DVE50BG8300V every 6-12 months as part of your regular maintenance. This simple step can restore drying performance without the need for any parts replacement.
Evaluate the Heating Element Output
As heating elements age, they gradually lose efficiency and produce less heat. Even if the element tests within resistance ranges, it may not be performing adequately.
- Load the DVE50BG8300V with a standard load of cotton items (towels, jeans, etc.).
- Select the highest heat setting (typically “High Heat” or “More Dry”).
- Run a full 60-minute cycle.
- After 30 minutes, open the door and feel the temperature of the clothes and air.
- The air should feel quite hot—hot enough that you can’t comfortably hold your hand in the exhaust area.
- If the air only feels warm, the heating element is weakening and should be replaced.
- If clothes are hot at the 30-minute mark, the element is functioning sufficiently.
Heating element degradation is a normal part of appliance aging. If your Samsung DVE50BG8300V has been in service for 5+ years and drying times have gradually increased, replacing the element is a common maintenance task.
Noise Issues with the DVE50BG8300V
Squeaking Noises: Drum Glides and Bearing
Squeaking sounds typically arise from friction between the drum and the dryer cabinet. On the DVE50BG8300V, this is often due to worn drum glides or a failing drum bearing.
- Unplug the Samsung DVE50BG8300V.
- Remove the front panel.
- Grab the drum and try to move it forward and backward.
- If there’s excessive play (more than 1/4 inch of movement), the drum bearing is likely worn.
- Remove the drum by unbolting the drum support roller and taking out the entire drum assembly.
- The drum bearing is located at the rear of the drum and can be replaced separately (part number DC61-20052A).
- The front drum glides are on the inside surface of the dryer cabinet and should be replaced if they appear shiny (part number DC61-00159A—typically requires 2 glides).
- Similarly, rear drum glides at the back of the cabinet may need replacement (part number DC61-00160A).
Squeaking on the DVE50BG8300V shouldn’t be ignored, as continued operation can damage the drum itself, leading to costly repairs.
Grinding or Scraping Noises: Idler Pulley
The idler pulley applies tension to the drive belt, and when it wears out, the belt slips, creating grinding noises.
- Unplug the dryer.
- Remove the front panel.
- Locate the idler pulley assembly on the right side of the drum (a small wheel-like component).
- Spin the pulley wheel manually—it should rotate freely without resistance.
- If it doesn’t spin or makes grinding sounds while spinning, the pulley is failing.
- Replace the idler pulley with part number DC93-00152B.
Rattling or Thumping: Blower Wheel Obstruction
The blower wheel circulates air through the dryer. Lint or debris stuck in the blower wheel can create rhythmic thumping sounds on the DVE50BG8300V.
- Unplug the dryer.
- Remove the front panel and locate the blower wheel assembly behind the drum.
- Visually inspect the blower wheel for lint, coins, or debris.
- If you see obstructions, carefully remove them using needle-nose pliers or a vacuum hose.
- Don’t force the blower wheel to spin—if it won’t rotate freely, the wheel may be damaged and requires replacement (part number DC61-00111A).
Error Codes on the Samsung DVE50BG8300V Display
Modern Samsung dryers display error codes to help diagnose problems. Understanding these codes will guide your troubleshooting efforts.
HE Error Code
The HE code indicates a heating error. This typically means the heating element has failed or the thermal fuse has blown. Follow the heating element tests described in the “Dryer Not Heating” section above. Always check the thermal fuse first, as it’s the most common cause.
HC Error Code
HC indicates a humidity sensor (moisture sensor) error. This means the control board can’t communicate properly with the moisture sensor. Clean the sensor contacts as described in the moisture sensor section. If that doesn’t resolve the code, the sensor itself may need replacement.
bE Error Code
The bE code means the door was opened during the cycle or the door latch switch isn’t functioning properly. If the door wasn’t actually opened, test and replace the door latch switch as described in the “Dryer Not Starting” section.
tE Error Code
A tE error indicates a thermistor error on your DVE50BG8300V. This sensor monitors temperature. Test the thermistor as described in the heating section. A faulty thermistor typically requires replacement with part number DC32-00007A.
dE or dL Error Code
These codes indicate the door lock isn’t engaging properly. Ensure the door closes completely and the latch mechanism isn’t damaged. The door latch switch may need replacement.
Lint Filter and Vent Maintenance
Regular Lint Filter Cleaning
The lint filter on your Samsung DVE50BG8300V should be cleaned after every single cycle. This is the most critical maintenance task.
- Open the dryer door immediately after the cycle ends.
- Locate the lint filter at the top of the door opening (accessible without tools).
- Pull the filter straight out and upward.
- Use your fingers to brush accumulated lint from the filter mesh screen.
- For stubborn buildup, rinse the filter under warm running water and dry it completely before reinstalling.
- Push the filter back into its slot until it sits flush with the door frame.
Never operate the DVE50BG8300V without the lint filter installed; it protects internal components from lint damage.
Deep Cleaning the Lint Filter
Every 3-6 months, perform a deeper clean of the lint filter itself.
- Remove the lint filter as described above.
Recommended Parts & Tools
Dryer Thermal Fuse and High Limit Thermostat Kit
The thermal fuse is one of the most common failure points in Samsung dryers and will prevent the dryer from heating if blown. This replacement kit includes both the thermal fuse and high limit thermostat, which are often replaced together on this model to ensure proper temperature control.
Multi-Bit Screwdriver Set with Magnetic Tips
Disassembling the Samsung DVE50BG8300V requires removing multiple screws of varying sizes from the lint trap housing, blower wheel, and interior panels. A quality magnetic screwdriver set makes it easier to access tight spaces and prevents losing small fasteners during the repair process.
Dryer Vent Lint Cleaning Brush Kit
Restricted airflow due to lint buildup is a leading cause of dryer problems and is essential to address during troubleshooting. This brush kit removes accumulated lint from the vent hose, lint trap, and exhaust duct to restore proper ventilation and prevent overheating issues.
The Thermal Fuse Kit That Stops the Samsung DVE50BG8300V from Running Cold
If your DVE50BG8300V is tumbling but producing no heat, the thermal fuse or high limit thermostat has almost certainly blown. This kit gives you both components in one order, so you’re not swapping one part only to discover the other failed next.
What works
- OEM-equivalent fuse and thermostat paired together—catches the most common culprit first without the back-and-forth guessing that costs you a week of laundry.
- The thermal fuse cartridge sits in an accessible location on this model, and the kit includes clear enough terminals that you can confidently swap without fumbling around inside the blower housing.
- Replacing both at once prevents the “I fixed the fuse, but the thermostat was the real problem” scenario that happens more often than you’d think on Samsung dryers.
What doesn’t
- If your no-heat issue is actually a failed heating element (less common but possible), this kit won’t solve it—you’ll need to test voltage at the element terminals first.
- Installation still requires you to remove the front panel and access the blower housing, which takes 20–30 minutes even if you’re comfortable with basic disassembly.
I’ve seen too many DIYers order just the fuse, replace it, and then call a tech when the heat still doesn’t come back—turns out the thermostat was failing too and tripped during the cycle. Dryer Thermal Fuse and High Limit Thermostat Kit
About This Article

Written by Dave Holt. Dave Holt has been taking apart and fixing household appliances since he was a teenager who couldn't leave a broken one alone. Eighteen years later, after fixing things for neighbors, friends, and anyone who'd let him, he's seen almost every failure mode there is. When he writes a repair guide here, it's based on the actual job, not a manufacturer overview. More about this site.
Scope and limits. Dave is a self-taught repairer, not a certified appliance technician. Unplug before you open anything, and leave sealed refrigeration systems, gas connections, and hardwired circuits to a qualified technician.

