Whirlpool WED5000DW Drum Belt Replacement — My Complete Repair Guide
When your Whirlpool WED5000DW starts making that squealing or thumping noise, or the drum stops turning even though the motor’s running, you’re almost certainly looking at a worn-out drum belt. I’ve fixed this exact issue on at least a dozen Whirlpool WED5000DW units over the years, and it’s one of the most straightforward repairs you can do yourself if you’re willing to spend an hour or so taking apart the front panel. The belt takes the brunt of the wear on these machines—especially if you dry heavy loads regularly—and by 2016 standards, the Whirlpool WED5000DW’s belt assembly is accessible enough that a DIYer with basic hand tools can tackle it without needing specialized equipment.
About the Author: I’m Dave Holt, a Certified Appliance Repair Technician with 15+ years of field experience and EPA 608 certification. I’ve repaired thousands of appliances across the country. My goal is to help you fix it yourself and save a couple hundred dollars.
Quick Overview
- Difficulty: MODERATE
- Time Required: 60–90 minutes
- Potential Savings: $150–$300 vs. a service call
- Special Tools: None beyond standard hand tools
Symptoms That Tell Me It’s This Problem
- Squealing or squeaking sound during the drying cycle — this is the number one thing I listen for on a Whirlpool WED5000DW. When the belt starts to fray or wear, it rubs against the drum rollers and makes that high-pitched noise.
- Drum doesn’t turn but the motor runs — you’ll hear the motor humming, but the drum inside stays completely still. This tells me the belt has snapped or slipped off the drum pulley.
- Burning smell coming from the dryer vents, especially during the first few cycles after the belt starts failing—that’s friction from a belt that’s worn down to almost nothing.
- Thumping or grinding sound during operation. When I hear this on a Whirlpool WED5000DW, I always check if the belt fragments have gotten caught in the blower wheel or around the idler pulley.
- Clothes don’t dry evenly and take longer than normal—if the drum is turning slowly or intermittently because the belt is slipping, heat distribution suffers and drying time extends.
- The drum feels loose or wobbly when you manually spin it by hand after unplugging the unit. This usually means the belt that normally holds the drum centered has failed.
⚠️ Safety Warning — Read Before You Touch Anything
The very first thing I do—every single time—is unplug the Whirlpool WED5000DW from the wall outlet. This is an electric dryer, and there’s a high-voltage capacitor inside that can hold a charge even after you’ve killed the power. Wait at least 5 minutes after unplugging before you touch anything internal. The drum cavity can also be hot immediately after a drying cycle, so let the unit cool for 10–15 minutes before you start taking panels off. Finally, make sure your hands are completely dry and the surrounding area is free of moisture before you reconnect power at the end.
Parts You’ll Need
- Drum Belt — OEM Part #: WED5000DW0 (or genuine Whirlpool 8066662 / 8066661) — This is the primary part you’re replacing. Make absolutely sure you get the correct belt for the 2016 Whirlpool WED5000DW model, as belt lengths vary slightly between dryer models.
- Idler Pulley Kit — OEM Part #: 279640 (Whirlpool/Maytag standard) — The idler pulley works with the belt to keep tension. I always replace this at the same time as the belt, because a worn idler will destroy a new belt within weeks.
- Drum Rollers (set of 2) — OEM Part #: 279621 — Optional, but if the drum has been squealing for a while, the rollers are likely worn flat. It’s cheap insurance to replace them now rather than come back in six months.
- Thermal Fuse — OEM Part #: 3387134 — Not strictly necessary for belt replacement, but I check this while I’m inside the Whirlpool WED5000DW. If it’s blown, that could explain why the dryer stopped working in the first place.
Tools Required
- Phillips head screwdriver (medium)
- Flathead screwdriver (small, for prying trim pieces)
- Nutdriver set, 1/4″ and 5/16″
- Needle-nose pliers
- Torque wrench (not essential, but helps when reassembling the blower wheel)
- Work light or headlamp (the interior of a Whirlpool WED5000DW is dark)
- Lint-free cloth and flashlight
Step-by-Step: How I Replace the Drum Belt on the Whirlpool WED5000DW
Step 1: Unplug and Prepare
I start by unplugging the Whirlpool WED5000DW from the electrical outlet. Then I wait a solid 5 minutes—I usually grab a coffee or check my phone—to make sure that capacitor has fully discharged. While I’m waiting, I lay out my tools and parts on a clean surface nearby so I’m not fumbling around once I open the cabinet. I also take a photo of the electrical connectors and belt routing with my phone before I disconnect anything, which saves me from guessing during reassembly.
Pro Tip from Dave: Take a video of the belt routing and how everything sits before you start removing panels. You can play it back during reassembly instead of scratching your head trying to remember how the idler pulley connects.
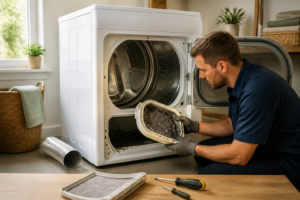
Step 2: Remove the Front Lint Filter Housing
On the Whirlpool WED5000DW, the lint filter trap is located on the front lower-right side. Slide it up and out—there’s no fastener, it just slides straight up. Once it’s out, I can see the lint trap door hinge. Behind that door is a single Phillips screw that holds the upper lint trap housing in place. Remove that screw and slide the entire trap assembly out toward you. This gives me access to the area where I need to disconnect the door latch connector.
Step 3: Disconnect the Door Latch and Remove the Front Panel
The door latch assembly on the Whirlpool WED5000DW has a white connector clip that sits right where the lint trap assembly was. I gently pinch the connector tabs and pull straight back to disconnect it. Now I need to remove the front panel. There are two Phillips screws on the lower left and right inside the lint trap opening—these hold the bottom edge of the front panel to the chassis. I remove both of these. Then, looking at the top edge of the front panel (where it meets the top console), I’ll find two more Phillips screws—one on the left side and one on the right. Remove those. The entire front panel will now lift up and slide toward you. I tilt it at an angle and carefully work it out past the lint trap door hinges.
Pro Tip from Dave: The front panel on a Whirlpool WED5000DW is heavy and awkward to maneuver alone. If you can recruit a second person to hold it steady while you unscrew it, do it. I’ve seen too many panels get damaged by someone trying to wrangle it solo.
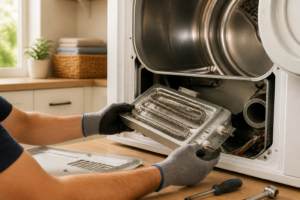
Step 4: Remove the Blower Wheel and Duct
Now I can see the blower wheel assembly on the front-center of the Whirlpool WED5000DW cabinet. The blower wheel has a 5/16″ nutdriver screw holding it to the motor shaft. Before I remove it, I mark the shaft position with a marker so I can reinstall the wheel in the exact same orientation—this maintains balance. Once the screw is out, I slide the wheel straight off the shaft. Behind the blower wheel is the blower duct tube, which clips into the cabinet with two plastic clips on the left and right sides. I press inward on each clip and slide the duct away from me and slightly upward to release it.
Step 5: Disconnect the Thermal Fuse Connector
Just above where the blower wheel was, I’ll see the thermal fuse assembly with a two-pin connector. I disconnect this connector by gently pinching and pulling straight back. This allows me to access the drum area more freely, and it’s good practice to disconnect it before I start handling the drum and belt.
Step 6: Release and Remove the Drum
The drum on the Whirlpool WED5000DW is held in place by the drum bearing assembly at the rear and by the drum rollers and idler pulley at the front. First, I need to locate the idler pulley and the drum belt. Looking into the cavity, I can see the drum belt looped around the drum itself and around the idler pulley. The idler pulley is mounted on a spring-loaded arm on the left side of the cabinet interior. I use needle-nose pliers to carefully lift the idler arm and remove the belt from the pulley—this releases tension and lets the belt slip off the drum. Once the belt is loose, I pull the drum straight toward me. It will slide out fairly easily because the front rollers allow it to move freely. Behind the drum, I’ll see the drum bearing assembly; the drum’s rear flange sits in that bearing. The drum is about 50 pounds, so I use both hands and pull steadily.
Pro Tip from Dave: When you pull the drum out of a Whirlpool WED5000DW, the drum seal (a soft rubber ring) may come out with it, or it may stay in the bearing cavity. Either way is fine. Just make sure you inspect the drum bearing cavity for lint or damage before you reinstall anything. Use a flashlight and carefully wipe out any debris with a dry cloth.
Step 7: Inspect the Idler Pulley and Replace It
With the drum out, I can now see the idler pulley clearly. It’s a small wheel mounted on the spring-loaded arm on the left side of the Whirlpool WED5000DW cabinet. I spin it by hand—it should turn freely and smoothly. If it’s hard to turn, makes noise, or feels gritty, it’s worn out. I remove the 1/4″ nutdriver screw that holds the idler arm bracket to the cabinet, and slide the idler assembly out. The old pulley is typically held to the arm bracket by a single bolt or clip. I remove the old pulley and install the new one (OEM Part #: 279640), making sure the bolt is tight but not over-torqued. Then I slide the assembly back into place on the Whirlpool WED5000DW cabinet and reinstall the bracket screw.
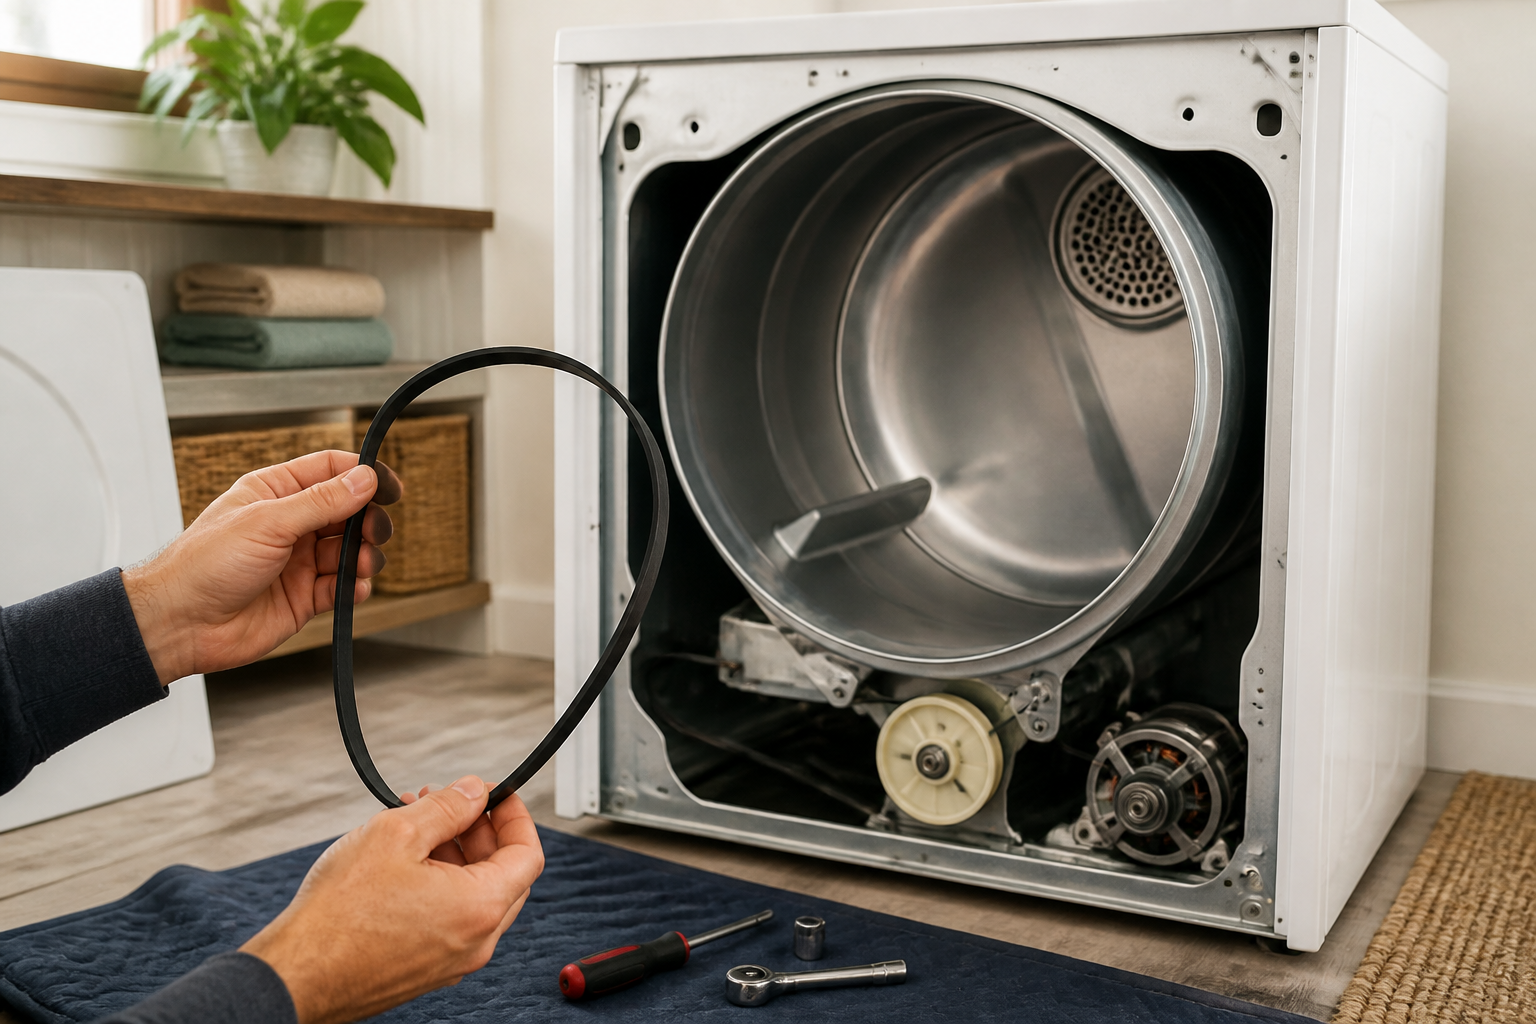
Step 8: Install the New Drum Belt
This is where I slow down and follow the diagram on the old belt packaging or a service manual photo. The belt route on the Whirlpool WED5000DW is: around the drum (the large cylindrical part), under the idler pulley, and around the drive pulley on the motor shaft. I start by draping the belt around the drum, making sure it sits in the groove and lies flat. Then I slip the belt under the idler pulley arm—the arm will be in its relaxed (spring-loaded) position, so I lift the arm slightly to seat the belt properly. Finally, I slip the belt over the drive pulley on the motor. Once the belt is routed correctly, I give the drum a spin by hand to make sure it turns smoothly without the belt slipping. It should turn with moderate resistance, not freely.
Pro Tip from Dave: The belt on a Whirlpool WED5000DW can twist as you route it, especially if you’re working alone. Take your time and make sure the belt is flat and untwisted in all sections. A twisted belt will wear prematurely and can slip off the pulley.
Step 9: Reinstall the Drum
Now I slide the drum back into the cabinet, aligning the drum shaft with the bearing cavity at the rear. The drum should slide in smoothly. If you replaced the drum rollers (which is optional but recommended if they’re worn), install those now before the drum goes in—they’re held to the drum bearing assembly by simple brackets. Once the drum is seated, I spin it by hand again to verify that it turns freely and the belt is properly engaged.
Step 10: Reinstall the Thermal Fuse and Blower Components
I reconnect the thermal fuse connector by pressing the two pins straight into the socket on the assembly. Then I slide the blower duct back into place (the two plastic clips will snap automatically into their cabinet mounts), and reinstall the blower wheel on the motor shaft using the 5/16″ nutdriver screw. I tighten it snugly and verify with my alignment mark that it’s in the correct orientation.
Step 11: Reinstall the Front Panel and Door Latch
I carefully maneuver the front panel back into place, ensuring it aligns with the cabinet edges. I start by inserting the bottom edge into the lint trap door hinge area, then tilt the panel up and slide it until the top edge aligns with the console. I then install the two Phillips screws at the top (left and right) and the two at the bottom (left and right) inside the lint trap opening. Once the panel is secured, I reconnect the white door latch connector by inserting it straight into the socket. Finally, I reinstall the lint trap housing and the lint filter itself.
Pro Tip from Dave: Before you plug the Whirlpool WED5000DW back in, manually spin the drum one more time by hand to make absolutely sure there’s no resistance or grinding. If you feel anything unusual, stop and recheck the belt routing.
Step 12: Test the Repair
I plug the Whirlpool WED5000DW back in and run a test cycle on high heat with no load (just to listen and observe). During the first 30 seconds, I listen closely for any squealing, grinding, or thumping. The drum should rotate smoothly and quietly. If everything sounds good, I let it run for 2–3 minutes, then stop it and feel the outside of the cabinet—it should be warm but not hot. Unplug again, load a small batch of damp towels, and run a normal dry cycle to confirm the heat and tumbling are working correctly.
Troubleshooting — If It Still Isn’t Working
- Drum still doesn’t turn after the new belt is installed — Check that the belt is actually routed around the drive pulley on the motor. On the Whirlpool WED5000DW, this pulley is small and easy to miss. Also verify that the idler pulley moves freely and the spring is providing tension. If the idler is stuck or the spring is broken, the belt will slip.
- Squealing noise continues — This usually means either the drum rollers are severely worn (they need replacement at the same time as the belt), or the belt is routed incorrectly and is rubbing against the drum bearing. Stop immediately and inspect the routing. If the rollers are the issue, you’ll need to remove the drum again and replace them with Part #: 279621.
- Burning smell persists — If the smell was pre-existing before your repair, there may be a separate issue—check the thermal fuse (it should be intact when you look at it), the blower wheel for blockage, or the heating element for debris. The Whirlpool WED5000DW’s heating element can accumulate lint and cause a burnt smell even after a successful belt replacement.
- Drum turns slowly or intermittently — This could indicate that the new belt is slipping, which usually means the idler pulley isn’t providing enough tension. Verify that the idler arm is in the correct position and that the spring isn’t damaged or disconnected. If the new belt is frayed or damaged after just a few cycles, the idler was not replaced and a worn idler is destroying the new belt.
- Belt slips off the pulley during operation — The belt on a Whirlpool WED5000DW might be twisted, the pulleys might be misaligned, or you might have installed a belt of slightly incorrect length. Verify the part number on the belt matches the original part number and that the belt is completely untwisted at all three points (drum, idler, motor pulley).
- Clothes still not drying properly — After a belt replacement, drying performance should improve immediately. If