Maytag MEDC465HW Heating Element Replacement — My Complete Repair Guide
When your Maytag MEDC465HW stops heating, your clothes come out cold and damp no matter how long the cycle runs — and that’s almost always the heating element going bad. I’ve fixed this on at least a dozen Maytag MEDC465HW units over the past few years, and I’ll walk you through exactly what I do, step by step, so you can save yourself a $250–$350 service call.
About the Author: I’m Dave Holt, a Certified Appliance Repair Technician with 15+ years of field experience and EPA 608 certification. I’ve repaired thousands of appliances across the country. My goal is to help you fix it yourself and save a couple hundred dollars.
Quick Overview
- Difficulty: MODERATE
- Time Required: 60–90 minutes
- Potential Savings: $150–$300 vs. a service call
- Special Tools: Multimeter (to test before replacing), 1/4-inch nut driver, Torx bits
Symptoms That Tell Me It’s This Problem
- Clothes stay wet and cold after a full cycle: The dryer runs, the drum turns, but no heat. That’s classic heating element failure on the Maytag MEDC465HW.
- Occasional heat, then nothing: Sometimes the element works, sometimes it doesn’t. When I see this on a Maytag MEDC465HW, it’s usually a thermal fuse that’s blown (which I’ll cover in troubleshooting), or an element that’s cracking internally.
- Burning smell during the first minute of a cycle: The heating element may be shorting to ground. Stop using the dryer immediately if you notice this.
- No error code on the display: The Maytag MEDC465HW won’t always throw a fault code for a bad heating element — it just quits heating. That’s why this diagnosis matters.
- Airflow and drum sound normal: You hear the drum spinning and the motor running fine, but no warmth coming from the exhaust vent.
- Lint trap and vent are clean: You’ve already ruled out airflow blockage, so the element is the next logical culprit.
⚠️ Safety Warning — Read Before You Touch Anything
The very first thing I do — every single time — is unplug the Maytag MEDC465HW from the wall outlet. Even with the power off, there is residual electrical charge in the capacitors inside the control panel. Do not skip this step. Wait a full 5 minutes after unplugging before opening the cabinet. Also, if your dryer vents to the outside, disconnect the vent duct before you tilt the cabinet — you’ll have more room to work, and you won’t accidentally crush the duct.
Parts You’ll Need
- Heating Element Assembly — OEM Part #: 40111201 (Maytag MEDC465HW) — This is the exact OEM part. It includes the element housing and coil. Do not buy a generic element; it won’t fit the Maytag MEDC465HW heating chamber correctly.
- Thermal Fuse — OEM Part #: 3387134 — While you’re in there, I replace this too. It’s cheap ($15–$25) and it often blows before the element does. Prevents future no-heat calls.
- High-Temperature Adhesive Silicone or Thermal Sealant — Optional, but I use a small amount to seal the element housing gasket on reassembly. Prevents air leaks that reduce drying efficiency.
Tools Required
- Multimeter set to continuity or Rx1 ohms (to test the old element before you remove it)
- 1/4-inch nut driver (or 1/4-inch socket with ratchet)
- Torx T20 bit (for the thermal fuse holder, if you replace it)
- Needle-nose pliers (for removing push-on wire connectors)
- Flashlight or headlamp (the heating chamber is in the back-lower of the cabinet)
- Adjustable wrench or 1/2-inch open-end wrench (for duct clamps if you remove the vent)
- Work gloves and safety glasses (metal edges inside the cabinet are sharp)
Step-by-Step: How I Replace the Heating Element on a Maytag MEDC465HW
Step 1: Unplug the Dryer and Wait 5 Minutes
I know I mentioned this in the safety section, but it’s critical. Unplug the Maytag MEDC465HW from the wall outlet — don’t just turn it off. The control board capacitors hold charge and can deliver a nasty shock if you touch the wrong terminal. Wait at least 5 minutes. This gives the capacitors time to fully discharge. I usually grab a coffee while I wait.
Step 2: Remove the Front Panel and Top Cover
The Maytag MEDC465HW has a removable front panel held on by two Phillips head screws at the top — one on each side. Unscrew these. Now, gently pull the front panel toward you and lift it away. Behind it, you’ll see the lint trap housing. Set the front panel aside. Next, remove the top cover. On the MEDC465HW, there are two Torx T15 screws on the top rear, near the control panel. Remove these and lift the top cover straight up and back — it hinges, so don’t force it.
Pro Tip from Dave: Take a photo of the wire connectors before you disconnect anything. The Maytag MEDC465HW has color-coded wires, but a picture saves you from plugging something in backward and damaging the board.
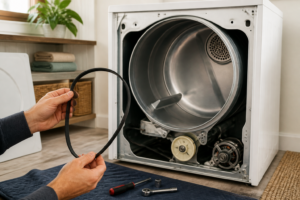
Step 3: Locate the Heating Element and Test It
The heating element on the Maytag MEDC465HW is mounted in the lower-rear section of the cabinet, behind the drum. You’ll see it when you look straight back, underneath the blower wheel. It sits in a metal chamber with a coil visible. Before you remove it, test it with your multimeter on the Rx1 ohms setting. Clip one probe to each terminal on the element. A good element reads between 10 and 30 ohms. If it reads infinity (or the meter doesn’t move), the element is open and needs replacing. If it reads 0 or very low, the element is shorted to ground — replace it immediately and do not run the dryer.
Pro Tip from Dave: Jot down the ohm reading on a piece of tape and stick it on the old element box. If you ever need to reference what a good reading looks like for the Maytag MEDC465HW, you’ll have it. Saves confusion down the road.
Step 4: Disconnect the Heater Box Wiring Harness
On the Maytag MEDC465HW, the heating element assembly has a two-pin push-on connector that joins to a wire harness coming from the control board. The connector is usually blue or black plastic. Pinch the sides gently with needle-nose pliers and pull straight back. Don’t yank on the wires themselves — always pull on the connector body. You should also disconnect the thermal fuse connector if you’re replacing that too (it’s a single white or tan connector right next to the main heater connector).
Step 5: Remove the Mounting Bolts for the Heater Box
The heating element housing on the Maytag MEDC465HW is held to the cabinet with two bolts — both 1/4-inch hex head. One is on the left side of the heater box, one on the right. You’ll use your 1/4-inch nut driver to remove these. They’re tight, so don’t be shy. Once both bolts are out, the heater box can slide out toward the rear of the cabinet. It won’t come far — the blower wheel and ductwork are in the way — but you’ll get enough clearance to lift it out of its mounting seat.
Pro Tip from Dave: If the heater box is stuck, spray a little WD-40 around the edges and wait 2–3 minutes. Don’t force it — you can crack the plastic housing. On the Maytag MEDC465HW, this housing is not cheap to replace on its own.
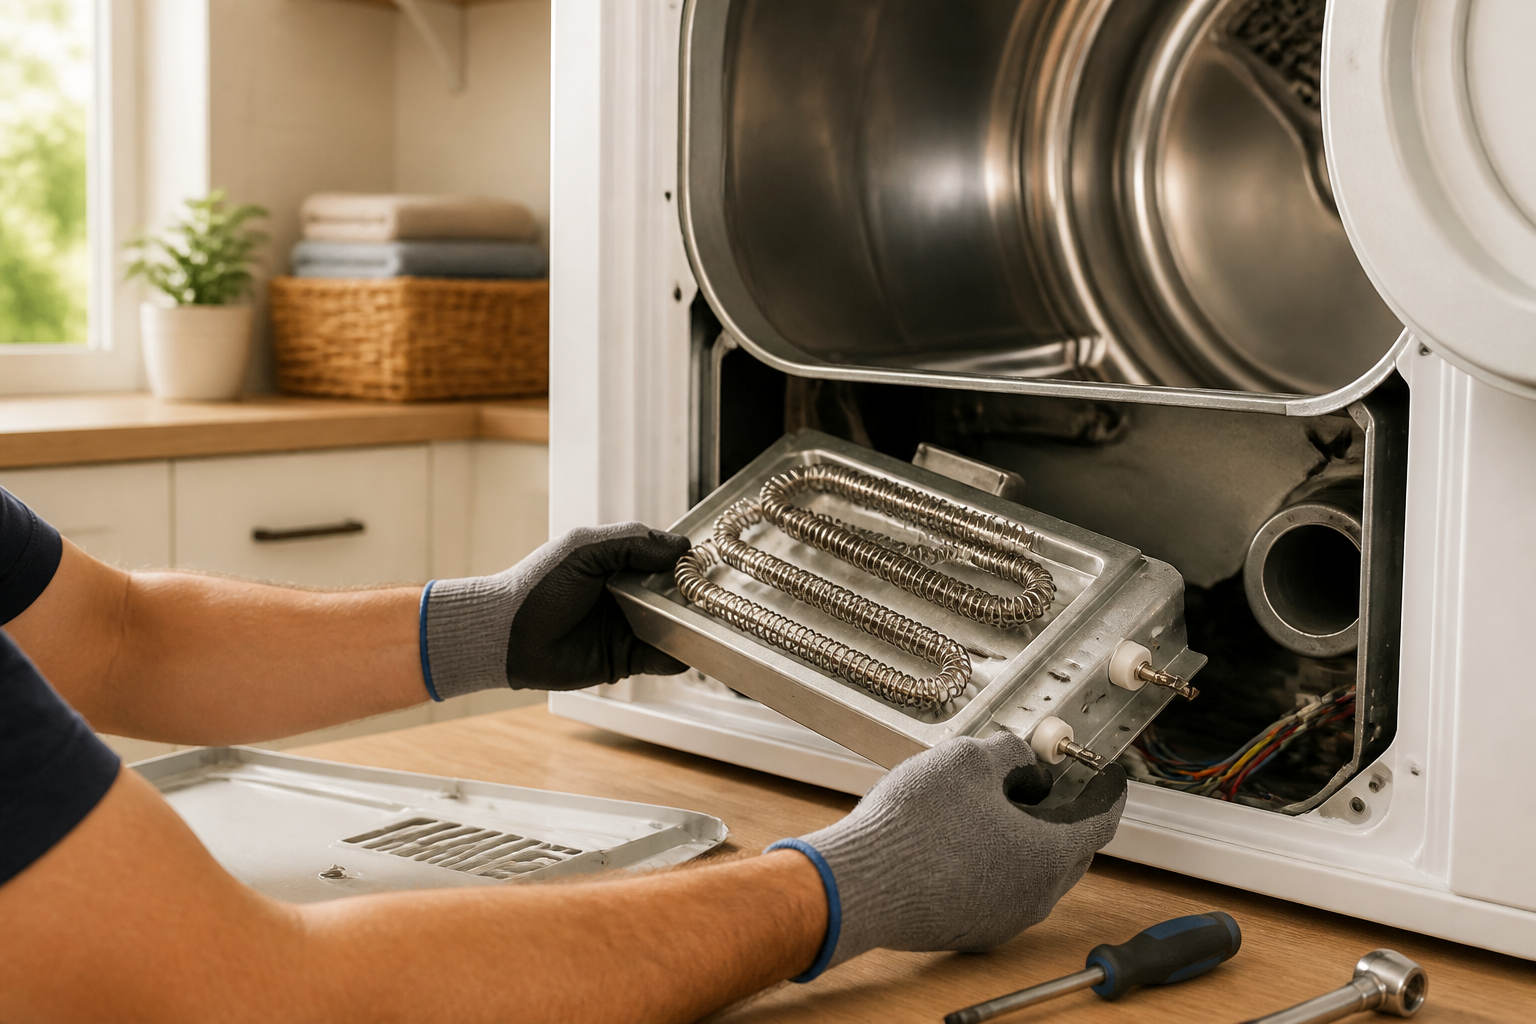
Step 6: Remove the Old Heating Element from the Housing
Once the heater box is out, you’ll see the heating coil element sitting in the center, surrounded by a metal or ceramic frame. The element is held in place by two small tabs or clips on each end of the coil — these snap into slots in the housing frame. On the Maytag MEDC465HW, the clips are usually plastic with a slight lip. Gently press inward on both sides of the coil, and it should slide out. If it’s corroded or stuck, a little WD-40 helps. The old element will come free. Be careful not to touch the coil directly with bare hands — the oils on your skin can weaken the new element’s lifespan.
Step 7: Prepare the Housing and Install the New Heating Element
Before you insert the new element, clean the interior of the heater box housing with a dry cloth to remove any lint or dust. On the Maytag MEDC465HW, the heating chamber gets grimy over time, and debris can reduce heat transfer. Wipe the mounting slots where the element clips sit. Now, take the new heating element (OEM Part #40111201 for the Maytag MEDC465HW) and align it with the slots. Insert it slowly and press down gently until both clip ends snap into place. You should hear or feel a small click. The element should sit flat and centered in the housing — no tilting or loose movement.
Pro Tip from Dave: If you’re installing thermal sealant around the element gasket, use just a thin bead — you don’t want sealant blocking the heating pathway or dripping onto the coil. On the Maytag MEDC465HW, less is more. Let it cure for 10 minutes before reinstalling the housing.
Step 8: Reinstall the Heater Box and Secure It
Slide the heater box back into the cabinet, aligning the two mounting bolt holes with the threaded inserts on either side. Once it’s seated, thread the 1/4-inch bolts back in and tighten them. On the Maytag MEDC465HW, these bolts should be snug but not over-tightened — they’re into aluminum or plastic threaded inserts, and you can strip them if you go too hard. Hand-tight plus a quarter turn is usually right.
Step 9: Reconnect the Wiring Harness and Thermal Fuse (if replacing)
Now, reconnect the two-pin heater connector by aligning the pins and pushing the connector body straight in until you hear a click. Check that it’s seated properly — the connector should not slide back and forth. If you’re replacing the thermal fuse (which I highly recommend on the Maytag MEDC465HW), push the new fuse connector onto its pins the same way. Both connectors should be tight and flush against their housings.
Step 10: Reassemble the Cabinet
Replace the top cover by setting it back in place and tightening the two Torx T15 screws on the rear. Replace the front panel by sliding it up and into the top bracket, then tightening the two Phillips head screws at the top corners. Make sure the lint trap housing and all clips are seated properly. On the Maytag MEDC465HW, if the front panel isn’t flush, something is misaligned — don’t force it.
Step 11: Reconnect the Vent Duct (if you removed it)
If you disconnected the vent duct earlier, reconnect it now. Make sure the clamp is tight on both the Maytag MEDC465HW outlet and the duct, so no warm air escapes into the wall cavity. A loose vent connection reduces drying efficiency and can be a fire hazard.
Step 12: Plug In and Test
Plug the Maytag MEDC465HW back into the wall outlet. Run a test cycle on the air-dry setting first (no heat), just to make sure the drum spins and the door closes properly. If that works, run a low-heat cycle with a damp towel inside. Wait about 5 minutes and feel the exhaust vent — you should feel warm air coming out. If the vent is hot and the towel is warm after a full cycle, you’re done. If there’s still no heat, move to the troubleshooting section.
Pro Tip from Dave: Run the dryer for at least three cycles before you consider the job complete. Sometimes a new element takes a cycle or two to “break in,” and you want to make sure there are no intermittent issues hiding. If it heats on cycle one and fails on cycle two, the thermal fuse may be the real culprit — see the troubleshooting section.
Troubleshooting — If It Still Isn’t Working
- New element installed but still no heat after three cycles: The thermal fuse is likely blown. Test it with your multimeter on continuity — a good fuse reads 0 ohms, a blown one reads infinity. Replace it with OEM Part #3387134. Also check the high-limit thermostat (if it’s accessible) by testing continuity across its terminals when the element is cool.
- Burning smell on the first run with the new element: This is usually residual factory dust on the new element burning off. Run a second cycle with the dryer empty (or with just a towel) to clear it out. If the smell persists or gets worse, stop immediately — you may have a wiring issue creating heat where it shouldn’t.
- Element gets hot but dryer still doesn’t dry clothes: The element is working, but airflow is blocked. Check the lint filter, exhaust duct, and the blower wheel for lint accumulation. On the Maytag MEDC465HW, lint can pack around the blower housing and reduce airflow dramatically.
- One cycle works, next cycle no heat: The thermal fuse is cycling on and off, which means it’s cutting power to the element when it senses an overheat. This could mean airflow is still restricted (see above), or the thermostat is faulty. On the Maytag MEDC465HW, verify that the blower is spinning freely.
- Uneven heat (one side of the drum gets hot, other side doesn’t): The new element may not be seated properly in the clips. Pop the front panel off again and check that the element coil is centered and clicked in fully on both ends. If it’s tilted, it can heat unevenly.
- Control board shows an error code after the new element install: Check all wire connectors again. Make sure nothing is pinched or seated backward. The Maytag MEDC465HW control board is sensitive to loose connections on the heater circuit.
When to Call a Professional Instead
- The thermal fuse keeps blowing even after the element is replaced: This suggests a deeper airflow or thermostat issue that requires diagnostic tools beyond a multimeter. A tech can test the thermostat and blower motor under load, which you can’t safely do at home.
- You tested the new element after install and it reads high ohms or infinity: The element itself may be defective (rare, but happens). Contact the supplier for a replacement. Also, check that both wire connectors are fully seated — a loose connection can register as a bad element on a multimeter.
- The control board is unresponsive or shows codes even after the heating circuit is repaired: The board itself may be damaged. Unless you’re comfortable replacing circuit boards, this is a professional call. Board diagnostics require a specialized multimeter and knowledge of the Maytag MEDC465HW wiring schematic.
- You see water inside the cabinet or the drum during disassembly: The Maytag MEDC465HW should never have water inside. This suggests a vent line backup or a seal failure inside the blower wheel housing. Water and electricity don’t mix — stop work and call a tech.
Final Thoughts
The Maytag MEDC465HW is a solid mid-range electric dryer, and