
Ice Maker Frozen Fill Tube Repair – Whirlpool WRF555SDFZ French Door Refrigerator
A frozen fill tube in your Whirlpool WRF555SDFZ ice maker is a common issue that prevents water from properly flowing into the ice maker mold, resulting in small, hollow, or no ice cubes. This problem typically occurs when warm, humid air enters the freezer compartment and condenses in the fill tube, where it subsequently freezes and blocks water flow. The issue can also be caused by a faulty damper control, poor door seals, or incorrect freezer temperature settings. This repair is rated as MODERATE difficulty, requiring disassembly of the ice maker unit and careful handling of water lines and electrical connections. Most homeowners with basic mechanical skills can complete this repair in 2-3 hours.
Symptoms
- Ice cubes are smaller than normal or hollow in the center
- Ice maker produces no ice despite running through harvest cycles
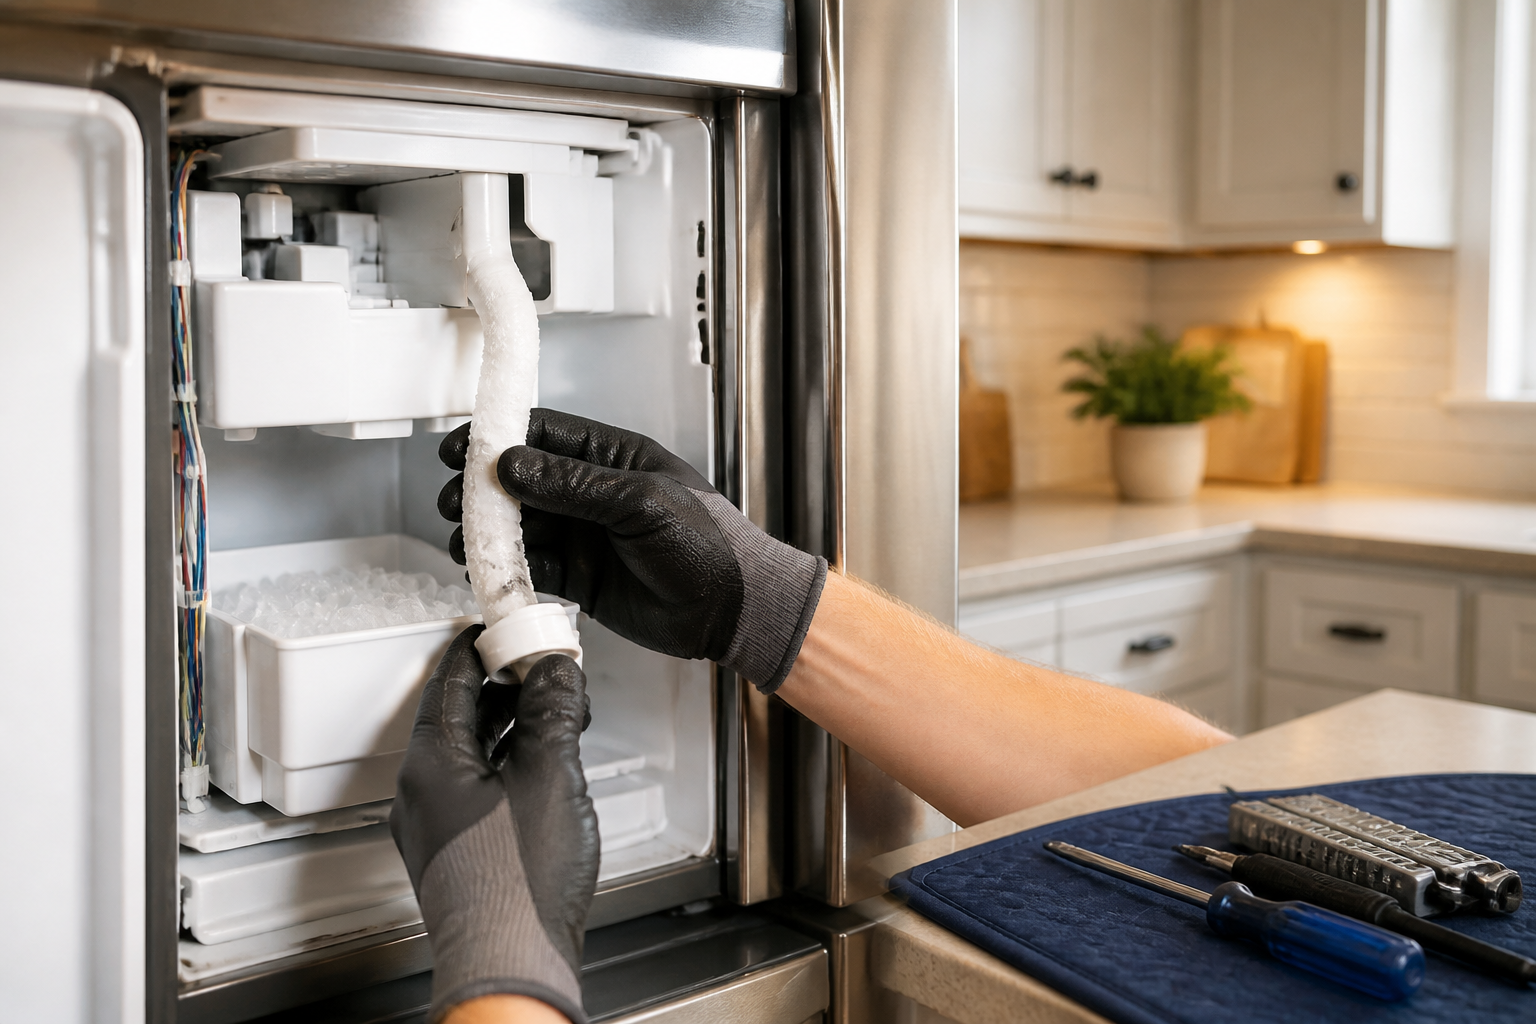
- Visible ice buildup around the fill cup area above the ice maker mold
- Water dripping or pooling beneath the ice maker in the freezer
- Ice maker makes normal operational sounds but fails to fill with water
- Intermittent ice production that stops and starts randomly
⚠️ Safety Warning
Before beginning any repair work on your Whirlpool WRF555SDFZ, disconnect the refrigerator from electrical power by unplugging the unit or turning off the circuit breaker. Turn off the water supply to the refrigerator at the shut-off valve, typically located behind or beneath the unit. Be prepared for water spillage when disconnecting water lines – have towels ready. This refrigerator weighs approximately 275 pounds, so never attempt to move it alone. Use caution when working with sharp edges on metal components and wear safety glasses when using power tools. Allow the freezer to warm to above 32°F before beginning work to prevent injury from touching frozen metal components.
Parts Needed
- Ice maker fill tube assembly – Whirlpool part number W10277448
- Fill cup assembly – Whirlpool part number W10873791
- Water line connector (if damaged) – part number W10505928
- Ice maker wire harness (if replacement needed) – part number W10882923
- Tube insulation foam – 1/2 inch diameter, 6 inches length
- Food-grade silicone sealant
Tools Required
- Phillips head screwdriver
- Flathead screwdriver
- Needle-nose pliers
- Hair dryer or heat gun
- Digital multimeter
- Adjustable wrench
- Small flashlight or headlamp
Step-by-Step Instructions
Step 1: Access the Ice Maker
🔨 Pro Tip from Dave
On the WRF555SDFZ, after you’ve thawed the fill tube, use a hair dryer on low to warm the fill cup and surrounding plastic for about 60 seconds before reassembly — this area stays colder than the rest of the freezer and a slightly chilled tube will refreeze within days if you skip this step. Also, don’t over-tighten the fill tube coupling when reinstalling; I’ve cracked at least three of these plastic fittings on service calls where someone over-torqued it trying to stop what they thought was a leak.
Remove all ice from the ice maker bin and pull the bin completely out of the Whirlpool WRF555SDFZ freezer compartment. Locate the ice maker unit mounted on the left wall of the freezer. Remove the ice maker cover by lifting the wire bail arm to the up position and pulling the front cover forward and down. You’ll see the ice mold, fill cup, and the clear plastic fill tube extending down from above.
Step 2: Disconnect Power and Water
Locate the ice maker wire harness connector on the left side of the freezer wall, approximately 8 inches above the ice maker unit. The connector has a blue plastic housing with 4 wires (typically red, black, white, and yellow). Press the locking tab and disconnect the harness. Next, trace the water line from the fill tube to where it connects to the main water supply line in the upper left corner of the freezer compartment behind the air duct.
Step 3: Remove the Ice Maker Unit
Remove the three Phillips head screws securing the ice maker to the freezer wall. These screws are located at the top-left, top-right, and bottom-center of the mounting bracket. Carefully pull the ice maker unit forward approximately 3 inches to access the fill tube connection at the rear. Support the weight of the unit as you work – it weighs approximately 8 pounds.
Step 4: Examine the Fill Tube
Using your flashlight, inspect the clear plastic fill tube that runs from the water inlet valve above down to the fill cup. Look for ice buildup, cracks, or disconnections. The tube should have a slight downward slope and measure approximately 1/4 inch in inner diameter. Take note of how the tube is routed and secured with plastic clips to the freezer wall.
Step 5: Thaw the Frozen Tube
Use a hair dryer on low heat setting to carefully thaw any ice in the fill tube. Hold the dryer 6-8 inches away from the tube and move it continuously to avoid melting the plastic. This process typically takes 5-10 minutes. You may hear water dripping as the ice melts. Place towels beneath the work area to catch melting water.
Step 6: Disconnect and Remove the Fill Tube
At the top connection point, squeeze the plastic retaining ring and pull the fill tube straight down to disconnect it from the water inlet valve. At the bottom, the tube connects to the fill cup with a press-fit connection – pull firmly to separate. Remove the old tube completely, noting the routing path through the clips attached to the freezer wall.
Step 7: Install the New Fill Tube
Route the new fill tube through the same clips and pathway as the original. Ensure the tube has a gradual downward slope without any kinks or loops that could trap water. Connect the top end to the water inlet valve by pushing firmly until you hear the retaining ring click into place. Connect the bottom end to the fill cup with firm pressure until fully seated.
Step 8: Add Insulation
Wrap the fill tube with the insulation foam, particularly in the upper 12 inches where it’s most exposed to air circulation. Secure the insulation with small zip ties or electrical tape every 4 inches. This prevents condensation from forming on the tube exterior and subsequently freezing.
Step 9: Test Water Flow
Before reassembling everything, reconnect the water supply and electrical connections temporarily. Press the test button on the ice maker (small button on the side of the unit) and observe water flow through the new tube. You should see a steady stream for approximately 6-8 seconds filling the ice mold to about 1/8 inch depth.
Step 10: Reinstall the Ice Maker
Position the ice maker unit back against the freezer wall, ensuring all wiring and tubing is properly routed and not pinched. Secure with the three original Phillips head screws, tightening them snug but not overtightened. Reconnect the 4-wire electrical harness until the blue connector clicks securely into place.
Step 11: Final Testing and Calibration
Replace the ice maker cover and lower the wire bail arm to the down position. Set your Whirlpool WRF555SDFZ freezer temperature to 0°F and allow 24 hours for the first batch of ice. Monitor the first few cycles to ensure proper fill levels and cube formation.
Troubleshooting
- If ice continues to form in the fill tube, check freezer door seals for proper sealing and verify freezer temperature is maintaining 0°F consistently
- If water doesn’t flow during testing, verify water supply is turned on and check for kinked lines or clogged inlet valve filter
- If ice maker doesn’t cycle, use multimeter to test for 120V AC at the electrical harness connector between red and white wires
- If water overflows the ice mold, the fill tube may be positioned incorrectly or the water inlet valve may not be shutting off properly
- If cubes are still hollow or small, check that the fill cup is properly aligned and not cracked or damaged
- If the freezer temperature fluctuates above 5°F, inspect the air damper control and freezer fan motor operation
When to Call a Professional
- If the water inlet valve requires replacement or shows signs of electrical failure during multimeter testing
- If refrigerant lines need to be moved or modified to access components, as this requires EPA certification
- If the main control board shows fault codes or the ice maker doesn’t respond to electrical testing
- If you’re uncomfortable working with water lines under pressure or 120V electrical connections in wet conditions
When to Call a Professional
Most of the repairs in this guide are within reach for a careful DIYer with basic tools. In my experience, if you’ve cleared the frozen fill tube twice within a single season and it keeps coming back, that’s the point to call a technician — because at that stage you’re almost certainly dealing with a failing water inlet valve that’s allowing a slow drip to refreeze in the tube overnight, and misdiagnosing that as a simple blockage will have you doing this repair on a loop. When in doubt, a diagnostic service call typically costs $80–$120 and can save you from a misdiagnosis that costs more in parts.
Recommended Parts & Tools
Whirlpool W10408179 Ice Maker Fill Tube Assembly
This is the genuine Whirlpool replacement fill tube assembly that delivers water to your ice maker and commonly freezes in the WRF555SDFZ model. This OEM part is designed specifically for Whirlpool French door refrigerators and ensures proper fit and function. Check current pricing on Amazon.
Wagner Spraytech HT1000 Heat Gun Kit
This variable temperature heat gun is essential for safely thawing the frozen fill tube in your Whirlpool WRF555SDFZ without damaging surrounding plastic components. The adjustable heat settings allow for controlled warming to melt ice blockages in the water line. Check current pricing on Amazon.


