Complete Installation Guide for the Whirlpool W10873791 Ice Maker Assembly
If your ice maker has stopped working, or you’re looking to boost your fridge’s ice production, this guide will walk you through every step of installing the W10873791 ice maker assembly. It’s a direct replacement for various Whirlpool, KitchenAid, and Maytag refrigerator models, which makes it a go-to for homeowners who want to restore their ice-making capability without calling in a technician.
Refrigerator Models Compatible with the W10873791 Ice Maker
Before you grab the W10873791, let’s make sure your refrigerator model is a match. This ice maker assembly fits a variety of Whirlpool-branded appliances across different product lines.
- Whirlpool Models: WRF535SWHZ, WRF535SMHZ, WRF560SMYH, WRF560SEYW, WRF989SDAH, WRF989SDAW, WRX735SDHZ, WRX735SDWZ, WRX988SDHZ, WRX988SDWZ, and many other French-door and side-by-side configurations manufactured between 2010-2023
- KitchenAid Models: KFXS25RYMS, KFXS25RYWH, KFXS27RYMS, KFXS27RYWH (stainless steel and white versions)
- Maytag Models: MFX2570AEM, MFX2570AEW, MFX2576AES, MFX2576AEW, and several other Maytag French-door refrigerators
Check the model number on the interior wall or back of your fridge to ensure compatibility before diving into installation. The W10873791 won’t work in models it’s not designed for.
What’s Included in the W10873791 Kit vs. What You’ll Need Separately
The W10873791 Package Includes:
- The ice maker assembly head unit with the ejector arm and motor
- The fill tube (water intake line) connector
- The wire harness connector and plug assembly
- Mounting bracket or mounting screws (typically three Phillips-head screws)
- Installation instruction sheet (though often incomplete)
What You Must Have or Purchase Separately:
- Water supply line: If your refrigerator doesn’t already have a water line running to the ice maker location, you’ll need to install one. This means a ¼-inch copper or plastic water line that connects from the refrigerator’s water inlet valve (usually at the back) to the ice maker in the freezer. Many homeowners will need to purchase and route this line separately.
- Water inlet valve: Located at the back of the refrigerator, this valve controls water flow to the ice maker. If you’re replacing an old ice maker, this should already be installed and functional.
- Mounting hardware: Most W10873791 units include screws, but if yours doesn’t, you’ll need three Phillips-head stainless steel screws (typically ¼-inch diameter, ½-inch length)
- Wire connectors (optional): The W10873791 uses a proprietary plug, but occasionally you may need additional connectors or wire nuts if rewiring is necessary
Tools and Materials Required for W10873791 Installation
- Phillips-head screwdriver (medium size)
- Flathead screwdriver (for prying and leverage)
- Socket wrench set or adjustable wrench (for water line connections)
- Multimeter (optional but helpful for testing electrical connections)
- Flashlight or headlamp (for visibility inside the freezer)
- Towels or absorbent cloths (for any water spillage)
- Bucket (to catch water from disconnected lines)
- Wire strippers (if splicing wires)
- Teflon tape (for water line connections)
Pre-Installation Verification Checklist
Before you start opening up your refrigerator and removing old components, let’s run through some essential checks:
Water Line Connection Verification
The W10873791 needs a functioning water supply line to make ice. Find the water inlet valve at the back of your refrigerator (usually near the bottom right corner, behind the refrigerator). You should spot a ¼-inch water line connected to it. Confirm that this line is connected and that water flows when you manually open the inlet valve by pushing the solenoid plunger. If there’s no water line, you’ll need to install one before the W10873791 can operate. Connecting to your home’s water supply line—typically under the kitchen sink—is essential for ice maker functionality.
Freezer Temperature Verification
The W10873791 ice maker works best when the freezer is at a temperature of 0°F (-18°C) or colder. Check your freezer’s thermostat setting. If it’s above 0°F, the W10873791 won’t make ice, and you’ll be troubleshooting an issue that doesn’t exist. Set your freezer to 0°F and give it 24 hours to stabilize before you install.
Power Supply Check
Make sure the refrigerator is plugged in and receiving power. The W10873791 requires a 120-volt electrical connection. If your refrigerator isn’t powered on, the ice maker assembly won’t function no matter how well you install it.
Step-by-Step Installation of the W10873791 Ice Maker Assembly
Step 1: Disconnect Power and Prepare the Freezer
- Unplug the refrigerator from the electrical outlet or turn off the circuit breaker supplying power to it. This is a must for safety when working with electrical components.
- Open the freezer door and let it warm slightly for easier access. Remove all ice cubes and any items blocking the ice maker location (typically in the upper right corner of the freezer).
- Give it about 15-30 minutes for condensation and ice on internal surfaces to melt a bit, which will make the component removal easier.
Step 2: Remove the Old Ice Maker (If Applicable)
If your refrigerator currently has an ice maker installed, it needs to come out before you can put in the W10873791.
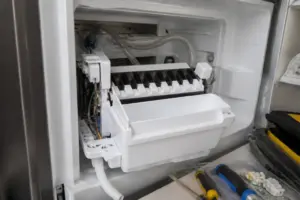
- Locate the three Phillips-head mounting screws securing the old ice maker assembly to the freezer wall. These are usually on the back face of the ice maker, facing the freezer interior. Remove all three screws using your Phillips-head screwdriver and set them aside.
- Carefully pull the old ice maker assembly toward you, freeing it from the mounting bracket. Don’t yank on it—remember, the water line and electrical harness are still connected.
- Find the water fill tube connector on the old ice maker. This is a small plastic tube, typically with a push-fit connector. Gently grasp the connector and pull straight back to disconnect it from the ice maker. Place a small towel under this connection point to catch any residual water.
- Look for the electrical wire harness connector. This is usually a proprietary connector with a single plug. Depress the release tab on the connector and pull the wire harness straight out. This connector should only come out in one direction.
- Remove the old ice maker assembly completely and set it aside for proper disposal or recycling.
Step 3: Prepare the Mounting Bracket
- Examine the mounting bracket or mounting surface on the freezer wall where the old ice maker was attached. This should be a flat surface with three screw holes clearly visible.
- Clean any debris, ice buildup, or corrosion from the mounting surface using a dry cloth or soft brush.
- Verify that all three screw holes are clear and unobstructed. If ice has built up around them, carefully melt it away or clear it with a plastic scraper.
- Position the new W10873791 ice maker assembly so that the mounting bracket aligns perfectly with the three mounting holes. Don’t install the screws just yet.
Step 4: Connect the Water Fill Tube to the W10873791
Before you mount the W10873791, it’s best to connect the water supply line now to avoid awkward positioning later.
- Locate the water fill tube inlet on the back of the W10873791 ice maker assembly. This is a small port, typically ¼-inch diameter, with a connector push-fit or threaded fitting.
- Take the water line that you disconnected from the old ice maker (or the new water line if you’re installing on a previously non-iced refrigerator). Make sure it’s clean and free of debris.
- If it’s a push-fit connector, insert the water line straight into the port with firm, steady pressure until you feel it click or seat fully. Pull gently on the line to confirm it’s secure.
- If it uses a threaded fitting, wrap the male threads with 2-3 layers of Teflon tape, then hand-tighten the connector. Use a wrench for an additional ¼-turn clockwise to secure it, but don’t over-tighten, as this can damage the plastic fitting.
- Place a bucket or towel under the water line connection and briefly turn on the water supply at the back of the refrigerator to ensure there are no leaks at the W10873791 connection point. Turn off the water supply immediately after testing.
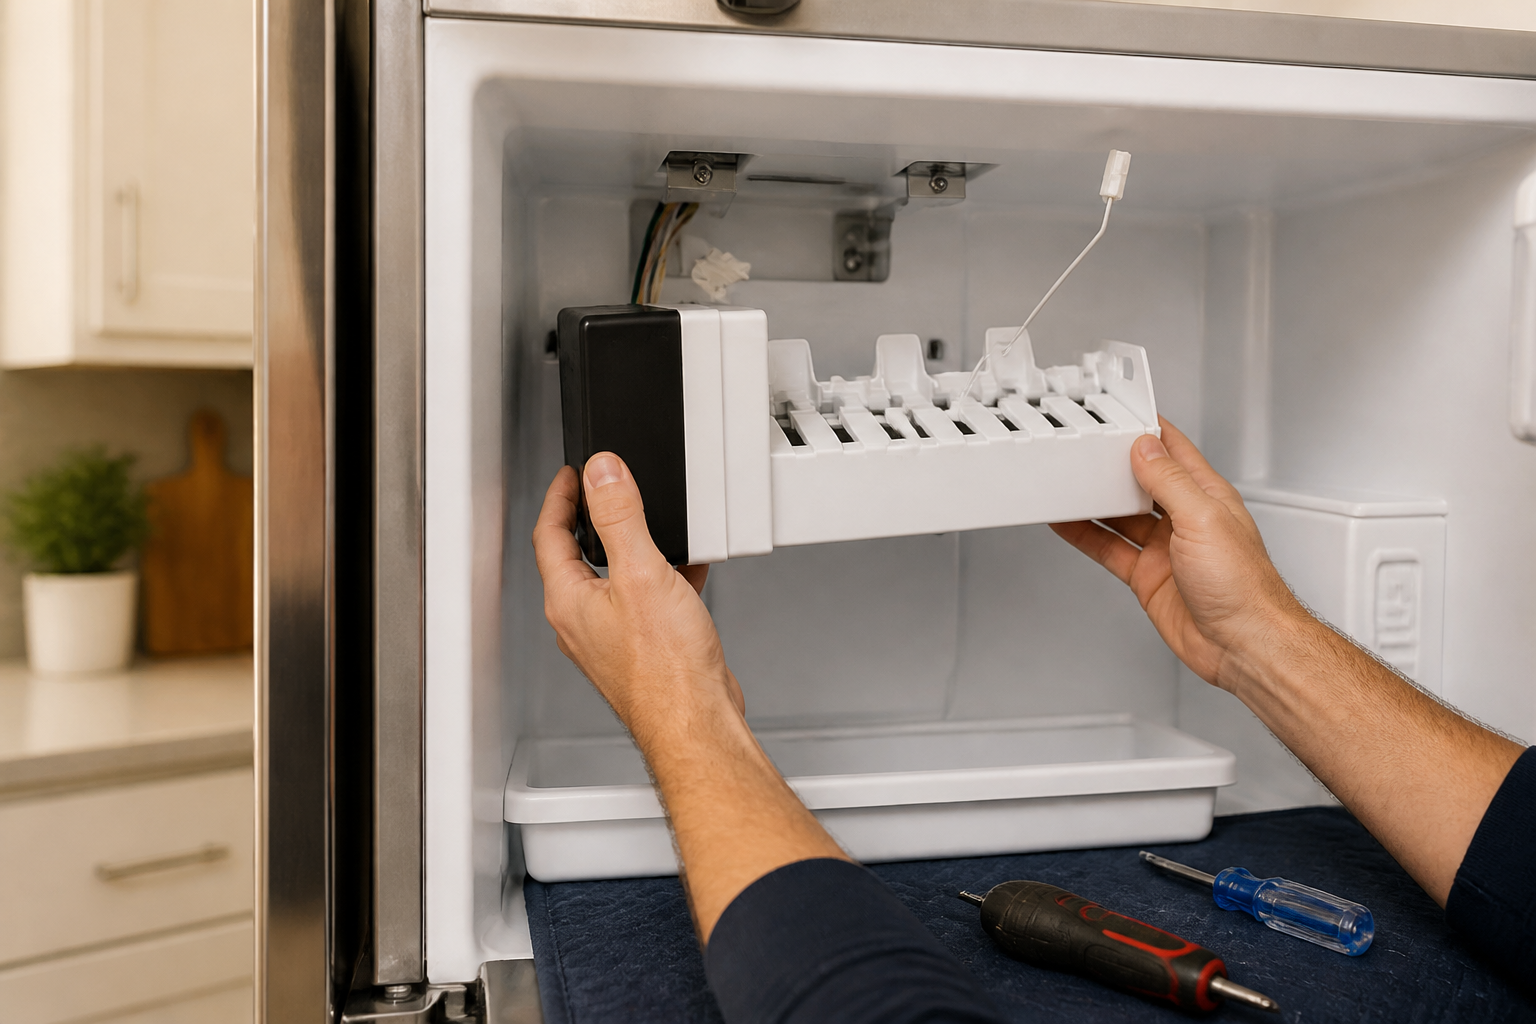
Step 5: Mount the W10873791 Assembly to the Freezer Wall
- Position the W10873791 ice maker assembly against the mounting surface with the water fill tube and electrical harness facing toward the back/side of the unit for easier access.
- Align the mounting bracket on the W10873791 with the three screw holes on the freezer wall. The assembly should sit flat and flush against the mounting surface.
- Insert the first Phillips-head mounting screw into the top-left hole and turn clockwise until snug. Don’t fully tighten yet.
- Insert the second mounting screw into the middle hole and turn clockwise until snug.
- Insert the third mounting screw into the bottom-right hole (or following your specific model’s configuration) and turn clockwise until snug.
- Go back and tighten all three screws fully, working in a triangular pattern (top-left, middle, bottom-right, then back to top-left) to ensure even pressure distribution. The W10873791 should be firmly mounted with no movement or flex.
- Check that the mounting is secure by gently attempting to wiggle the ice maker assembly. It should not move.
Step 6: Connect the Electrical Wire Harness
- Find the electrical wire harness connector that runs from the freezer wall or the back of the refrigerator. This connector leads to the refrigerator’s control board and provides the 120-volt signal for the W10873791.
- Take a look at the proprietary connector plug on the W10873791. Notice that it is keyed to fit only in one orientation (typically, one side is wider or has a guide pin). This prevents incorrect installation.
- Align the connector from the refrigerator’s wiring harness with the receptacle on the W10873791. The plug should insert straight without forcing or twisting.
- Push the connector firmly into the receptacle until you hear or feel a distinct click. The connector is now fully seated.
- Tug gently on the harness to ensure that the connection is secure and won’t pull free during operation.
- If the connector won’t engage, don’t force it. Check both the plug and receptacle for debris, bent pins, or incorrect orientation. Clean any debris with a dry cloth and try connecting again.
Step 7: Position the Ejector Arm in the DOWN Position
This is a critical step that many DIYers overlook, resulting in a non-functional ice maker after installation.
- Look at the front of the W10873791 assembly. You should see a metal or plastic arm extending downward or to the side. This is the ejector arm or feeler arm.
- The W10873791 will not produce ice if this arm is in the UP position. The arm must be physically lowered so that it extends fully downward.
- Manually grasp the ejector arm and push it to the DOWN position. You may hear a small click as it locks into place.
- Verify the arm position by attempting to lift it. If it resists and returns to the down position, it’s correctly positioned. If it remains in the up position, the ice maker will not cycle and produce ice.
Initial Setup and First Ice Production Cycle
Plugging In and Powering the Refrigerator
- Plug the refrigerator back into the electrical outlet or restore power via the circuit breaker.
- The refrigerator should power on immediately, and you may hear the compressor and other components begin normal operation.
- Don’t expect ice in the first few minutes. The W10873791 requires time to cool down, fill with water, and cycle through the ice-making process.
Flushing the Water System
Water sitting in the newly installed lines may contain sediment, minerals, or debris. It’s crucial to flush this water before relying on ice from the W10873791.
- Locate the water dispenser on your refrigerator’s door (if equipped) or plan to access the ice maker directly.
- Dispense water for 2-3 minutes continuously by pressing the water button on the door dispenser. This flushes sediment from the water line.
- If your refrigerator doesn’t have a water dispenser, you’ll still need to flush the water line. Open the freezer and check the ice maker. You might see water dripping or hear water flowing through the fill tube during the first ice-making cycle.
- Continue flushing or allow the ice maker to run for 24 hours. The water system is now primed and ready for ice production.
Waiting for the First Ice Batch
The W10873791 operates on a fixed cycle of approximately 17-24 hours for the first batch of ice.
- After installation and water line priming, the ice maker will automatically begin its first cycle. You might not hear any activity immediately, as the system is filling and cooling water in the ice cube mold.
- Wait a minimum of 24 hours before checking for ice production. This allows the W10873791 to complete at least one full freeze and ejection cycle.
- After 24 hours, open the freezer and check the ice bin (if equipped) or look at the mold area on the W10873791. You should see ice cubes.
- Remove and discard the first 2-3 batches of ice produced by the W10873791, even if they look clear and clean. These initial batches may contain sediment, minerals, or contaminants from the new water line.
- After the third or fourth batch, the ice should be clear and suitable for consumption.
Manual Testing of the W10873791 Ice Maker
Once installation is complete, you can test the W10873791 manually to confirm proper function without waiting for an automatic cycle.
Locating and Using the Manual Fill Button
- The W10873791 typically has a small manual fill or reset button on the back or bottom of the assembly. This button forces an immediate water fill cycle regardless of the normal cycle timing.
- Press this button once with a firm, quick motion. You should hear water flowing through the fill tube into the W10873791 mold within 2-3 seconds.
- Listen for the solenoid valve clicking open (a distinct electrical sound). This confirms that the water inlet valve is responding correctly to the W10873791’s signal.
- The water should fill the mold and then automatically shut off within 10-15 seconds. If water continues flowing or doesn’t stop, turn off the refrigerator immediately and check for leaks or a stuck water valve.
- Wait 17-24 hours, and the W10873791 should eject ice cubes. If no ice is ejected after this time, proceed to the troubleshooting section.
Troubleshooting: Your W10873791 Isn’t Making Ice
No Ice After 24 Hours: Diagnostic Steps
- Check the freezer temperature: Verify that the freezer is at 0°F (-18°C) or colder. If the temperature is above 0°F, the W10873791 won’t freeze water into ice. Adjust the thermostat to maximum cold, and wait an additional 24 hours.
- Verify water supply: Unplug the refrigerator and access the water inlet valve at the back. Look for a ¼-inch water line connected to it. Follow this line backward to confirm it originates from your home’s water supply or water filter. If no line exists, install one immediately.
- Test water valve solenoid: Plug the refrigerator back in. Using a multimeter on the AC voltage setting, place probes on the water inlet valve solenoid terminals. When you press the manual fill button on the W10873791, you should read approximately 110-120 volts AC. If you read
Recommended Parts & Tools
Whirlpool W10873791 Genuine OEM SxS Refrigerator Ice Maker
This is the genuine OEM replacement ice maker assembly that matches your refrigerator model specifications. Having an authentic part ensures proper fit, function, and warranty coverage for your installation.
Klein Tools Screwdriver Set
You’ll need various screwdrivers to remove the old ice maker and secure the new one in place, as the W10873791 typically requires both Phillips and flat-head screws. A quality multi-bit set gives you all the sizes needed without switching tools between steps.
Affresh Refrigerator Cleaner
Before installing your new ice maker, cleaning the ice maker housing and water line connections removes mineral deposits and debris that could affect performance. This specialized cleaner is safe for food contact surfaces and helps ensure your new W10873791 operates at peak efficiency from day one.
The W10873791 Assembly That Actually Fixes Your Whirlpool’s No-Ice Problem
If your Whirlpool fridge has stopped making ice or is producing only a few cubes, the ice maker assembly is almost always the culprit—and the W10873791 is the direct replacement that solves it. This is the part you’ll order first, not after troubleshooting a dozen other components.
What works
- Connector ports align perfectly with factory harnesses—no adapter hunting or jerry-rigging wires to get power flowing to the new assembly.
- Mounting brackets match the original exactly, so you don’t waste time drilling new holes or forcing the assembly into a space it wasn’t designed for.
- Ice production resumes within 24 hours of installation in most cases—this is a genuine fix, not a band-aid that buys you time before a real repair.
What doesn’t
- If your water line is frozen or your fill valve is stuck, this assembly won’t help—you’ll install it only to realize the water isn’t reaching the mold.
- Doesn’t come with the fill cup or water supply tubing, so you’ll need to transplant those from your old unit or source them separately if they’re damaged.
I’ve seen people swap this assembly only to discover their water inlet valve was the real problem all along—a $15 part they should have diagnosed first—so check your water supply line for ice blockages before you order. When you’re confident the assembly is the issue, the Whirlpool W10873791 Genuine OEM SxS Refrigerator Ice Maker will get your ice production back on track.
About This Article

Written by Dave Holt. Dave Holt has been taking apart and fixing household appliances since he was a teenager who couldn't leave a broken one alone. Eighteen years later, after fixing things for neighbors, friends, and anyone who'd let him, he's seen almost every failure mode there is. When he writes a repair guide here, it's based on the actual job, not a manufacturer overview. More about this site.
Scope and limits. Dave is a self-taught repairer, not a certified appliance technician. Unplug before you open anything, and leave sealed refrigeration systems, gas connections, and hardwired circuits to a qualified technician.