Samsung RF28F5001SR Ice Maker Leaking Water: Complete Troubleshooting Guide
A leaking ice maker in your Samsung RF28F5001SR French door refrigerator is a common problem that requires systematic diagnosis before attempting repairs. Water appearing in or around the ice maker compartment can originate from several different sources, each with distinct solutions. This comprehensive guide will help you identify the exact cause of the leak and provide step-by-step instructions to fix it.
Safety Warning
⚠️ Electrical Safety: Before beginning any work on your RF28F5001SR, unplug the refrigerator from the electrical outlet. The ice maker assembly contains electrical components including the water inlet valve solenoid and the heating element. Never attempt to test these components while the appliance is powered. Allow at least 15 minutes after unplugging for electrical charge to dissipate before handling internal components.
⚠️ Water Damage: When the ice maker is leaking, water may have already damaged surrounding components. Be cautious of any standing water and ensure the area is dried thoroughly to prevent electrical hazards.
Step 1: Confirm the Leak Source
The location and nature of the water leak will significantly narrow down the possible causes. Different symptoms point to different problems in the RF28F5001SR ice maker assembly.
Water Under the Ice Bin
If you’re finding water pooled beneath the ice bin in the RF28F5001SR, but the ice itself is dry, the problem is typically water being dispensed during the ice maker’s fill cycle but not freezing properly, or water leaking from the fill cup. This water drains down through the ice bucket opening. Common causes include an overfilled ice maker tray due to a faulty water inlet valve, or ice blockages in the fill tube preventing proper water flow.
Wet or Mushy Ice
When ice cubes in your RF28F5001SR are wet, mushy, or partially melted, this indicates water is present during the freezing cycle. This can result from the ice maker mold heater activating at the wrong time, condensation from the heating element, or water continuing to enter the mold after the fill cycle should have ended. The ice maker mold heater on the RF28F5001SR is designed to create a thin layer of heat to help release the ice cubes, but if it’s cycling too frequently or for too long, it will melt the ice.
Water on the Freezer Floor
Water pooling on the bottom of the freezer compartment in your RF28F5001SR could indicate several problems. First, check if the water is directly beneath the ice maker or spread across the entire floor. If it’s widespread, the issue may be the defrost drain system, not the ice maker. If it’s localized under the ice maker, the water inlet valve or fill tube is likely the culprit. Do not immediately assume the ice maker is faulty—the defrost drain system is commonly mistaken for an ice maker leak.
Understanding the RF28F5001SR Ice Maker Assembly
The Samsung RF28F5001SR ice maker assembly consists of several critical components that work together to produce ice:
- Water inlet valve: Controls water flow into the ice maker mold. Part number DA62-00038A for RF28F5001SR models.
- Fill cup and fill tube: Directs water from the inlet valve to the ice maker mold.
- Ice maker mold: Freezes water into individual cubes. Contains an electric heating element for release.
- Ice room door seal: Prevents cold air loss and water escape when dispensing ice.
- Motor and auger: Advances frozen ice cubes to the dispenser.
Diagnosing the Water Inlet Valve
The Most Common Cause: Faulty Water Inlet Valve
The water inlet valve (part number DA62-00038A on the RF28F5001SR) is the primary suspect in ice maker leaks. This solenoid-operated valve opens and closes to control water flow into the ice maker mold. A stuck or worn valve will either fail to close completely, causing continuous water dribble into the mold, or fail to open properly, causing incomplete fills that repeat cyclically.
Testing for a Dripping Valve
To test if the water inlet valve on your RF28F5001SR is leaking:
- Unplug the refrigerator and locate the water inlet valve at the back of the unit, typically on the lower right side of the freezer compartment area.
- Inspect the valve outlet connection where water lines attach. Look for active dripping or wet residue.
- If you see water dripping from the outlet when the unit is unplugged and the solenoid is de-energized, the valve seat is damaged and the valve must be replaced.
- If water drips only when the refrigerator is plugged in and the ice maker cycles, the solenoid coil may be stuck open, requiring valve replacement.
- Use a multimeter set to the 2 kΩ (ohms) scale to test the solenoid coil resistance. Disconnect the wire harness from the valve solenoid and touch the multimeter probes to the solenoid terminals. A reading between 500-1000 ohms indicates a good coil. A reading of 0 ohms or infinity indicates a failed solenoid requiring valve replacement.
Overfilling and the RF28F5001SR Fill Cycle
A malfunctioning water inlet valve (DA62-00038A) will keep the fill cycle running longer than the standard 5-7 seconds, causing the ice maker mold to overfill. The excess water spills out of the mold into the ice bin area, where it either drains to the bottom or partially refreezes, creating wet or misshapen ice. This is one of the most frequently reported issues on the RF28F5001SR.
Inspecting the Fill Cup and Fill Tube
Ice Blockage in the Fill Tube
The fill tube on your RF28F5001SR delivers water from the inlet valve to the ice maker mold. If water freezes inside this tube due to subfreezing temperatures or if ice cubes jamming the mold backup into the tube, water will be redirected and overflow into the ice bin.
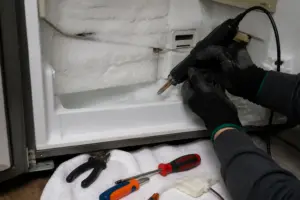
How to Clear Ice Blockages
- Unplug the RF28F5001SR and remove the ice bucket by lifting it straight out of the freezer.
- Look up into the ice maker cavity to locate the fill cup—a small plastic cup directly below the fill tube opening.
- If ice has accumulated in or around the fill cup, use a plastic scraper or old credit card to gently break it apart. Do not use metal tools that could damage the plastic components.
- Pour warm (not boiling) water down the fill tube opening to melt any ice blockages inside the tube itself. Collect the water with towels or a pan.
- Inspect the fill cup for cracks. A cracked fill cup will cause water to spray into the ice bin rather than flow into the mold. If cracked, the fill cup assembly must be replaced.
- Reinsert the ice bucket and allow the RF28F5001SR to complete 2-3 ice making cycles before determining if the issue is resolved.
Ice Room Door Seal Inspection
How the Ice Room Door Seal Works
The ice room (ice compartment) on the RF28F5001SR has a separate door with a rubber gasket seal that closes when you’re not actively dispensing ice. If this seal is torn, compressed, or misaligned, warm air enters the cold ice room and moisture condenses on the cold ice, creating water that pools at the bottom. Additionally, if the seal doesn’t close properly, water can leak out the front of the ice door when ice is being dispensed.
Checking the Ice Door Seal
- Open the ice room door on your RF28F5001SR by pushing on the ice bucket until the door pops open.
- Inspect the rubber gasket running around the perimeter of the door opening. Look for visible cracks, tears, or areas where the gasket is compressed and not springy.
- Close the door and watch the gasket seal completely. If there are gaps visible around the edges, the door is not sealing properly.
- Check that the ice room door closes smoothly without sticking. If the door binds or closes slowly, the hinge may be bent or the door frame may be damaged.
- If the gasket is damaged, the ice door seal gasket (part number DA61-00289A) can be replaced. If the door itself is cracked or the frame is bent, the ice room door assembly may need replacement.
Examining the Ice Tray for Cracks
Hairline Cracks in the Ice Maker Mold
The ice maker mold in your RF28F5001SR is made of plastic that, over time, can develop hairline cracks due to repeated freezing and heating cycles. These cracks allow water to seep out during the fill cycle, causing water to pool beneath the ice bin rather than freeze into cubes.
How to Inspect the Mold
- Unplug the RF28F5001SR and remove the ice bucket.
- Look directly into the ice maker cavity. The mold is the plastic tray with individual ice cube compartments.
- Carefully run your finger along the inside surfaces of the mold, feeling for any rough areas or cracks. Pay particular attention to the corners and seams where cracks are most likely to develop.
- Shine a flashlight into the mold to get a better view of potential cracks. Hairline cracks may be difficult to see without good lighting.
- If you find cracks, the ice maker assembly must be replaced. The mold is not sold separately; part number DA97-01953A is the complete ice maker assembly for RF28F5001SR models.
- Note the location of the crack. If water is leaking from a specific crack location, you can temporarily seal it with clear waterproof silicone caulk as a temporary fix while you order the replacement part.
Understanding the Ice Maker Mold Heater Cycle
How the Heating Element Works
The ice maker mold in the RF28F5001SR includes an electric heating element that briefly warms the bottom of the mold to help release the frozen ice cubes. This heating cycle is crucial for ice ejection. However, if the heater stays on too long or cycles too frequently, it will melt the ice, causing wet, mushy cubes and water to accumulate in the bin.
Condensation from the Heater
During the heating cycle, condensation naturally forms on the cold surfaces of the ice maker cavity in your RF28F5001SR. This moisture is normal and should drain away. However, if the defrost drain or ice maker drain is blocked, this condensation will accumulate as liquid water. The mold heater itself doesn’t leak water—rather, it creates the conditions for condensation that may not properly drain if the drainage system is compromised.
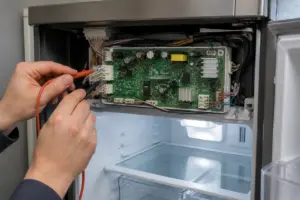
Testing the Heater Element
- Unplug the RF28F5001SR and locate the heating element at the bottom of the ice maker mold. It appears as a thin wire or resistive element.
- Disconnect the wire harness from the heater terminals.
- Set your multimeter to the 200 Ω (ohms) scale.
- Touch the multimeter probes to the heater terminals. A reading between 30-100 ohms indicates a functioning heater. A reading of 0 ohms or infinity means the heater has failed and should be replaced as part of the ice maker assembly (part number DA97-01953A for RF28F5001SR).
- If the heater tests good electrically but ice is still wet, the issue is likely the control module cycling the heater too frequently. Contact Samsung service for diagnostics.
The Defrost Drain System (Not Ice Maker Related)
Why This Is Commonly Mistaken for an Ice Maker Leak
Many homeowners report that their RF28F5001SR is leaking from the ice maker when, in fact, the leak is coming from the refrigerator’s defrost system. The defrost drain collects condensation from the evaporator coils and routes it to a drain pan at the bottom of the unit. If this drain becomes blocked by ice or debris, water will pool on the freezer floor, directly beneath the evaporator coils—which happens to be near the ice maker area.
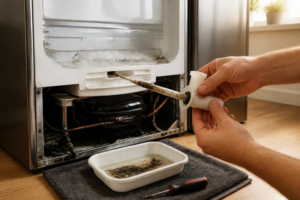
How to Identify a Defrost Drain Problem
- Check if water is spreading across the entire bottom of the freezer or localized only under the ice maker. Defrost drain leaks typically cause widespread pooling.
- Unplug the RF28F5001SR and locate the defrost drain line at the back wall of the freezer compartment, typically near the bottom. It’s a small plastic tube.
- Insert a straightened wire or pipe cleaner through the drain opening to clear any blockages.
- Pour a small amount of warm water down the drain to verify it flows freely. Water should drain without backing up.
- If water backs up, the drain line may be blocked further downstream. You may need to access the drain line from the back of the refrigerator for complete cleaning.
Step-by-Step Water Inlet Valve Replacement for RF28F5001SR
If you’ve determined that the water inlet valve (part number DA62-00038A) is the cause of the leak, follow these detailed steps to replace it.
Tools and Materials You’ll Need
- Replacement water inlet valve (DA62-00038A) for RF28F5001SR
- Adjustable wrench or 7/8″ wrench
- Flathead screwdriver
- Towels and a pan to catch water
- Wire strippers (optional)
- New water supply line (optional, if old line is damaged)
Detailed Replacement Instructions
- Unplug the refrigerator: Disconnect the RF28F5001SR from the electrical outlet. This is critical for your safety. Allow 15 minutes for any residual charge to dissipate.
- Turn off the water supply: Locate the water shut-off valve for your home’s water line to the refrigerator. Turn it clockwise until fully closed. If you cannot locate the shut-off valve, contact a plumber before proceeding.
- Remove the access panel: On the RF28F5001SR, the water inlet valve is located at the back of the freezer compartment, typically behind a plastic access panel. Open the freezer door and locate this panel on the lower right side. Remove any screws holding it in place using a flathead screwdriver. Gently pull the panel away from the unit.
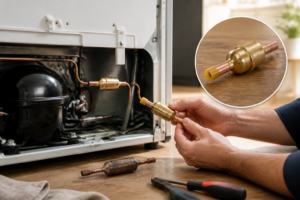
- Locate the water inlet valve: The valve is a rectangular component approximately 3 inches long by 2 inches wide. It has three connection points: an inlet water line, an outlet line (typically running upward to the ice maker), and an electrical harness. The part number DA62-00038A will be printed on the valve body.
- Disconnect the electrical harness: Carefully pull the wire harness straight out from the solenoid coil. Do not twist or bend the connector, as this can damage the terminals.
- Disconnect the water supply line: Using an adjustable wrench, grip the large hexagonal nut on the inlet side of the valve. While holding the valve body steady with your other hand, turn the nut counterclockwise to loosen the connection. Once loose enough to turn by hand, carefully unscrew the nut and remove the water line. A small amount of water may still be in the line—be prepared with towels.
- Disconnect the outlet water line: Using the same wrench method, disconnect the outlet line that runs to the ice maker. This connection is typically a compression fitting. Note the orientation of this fitting for reinstallation.
- Remove the mounting bracket: The valve is typically held in place by a metal bracket with one or two screws. Remove these screws with your flathead screwdriver and carefully slide the old valve out of the bracket.
- Install the new valve: Remove the new DA62-00038A valve from its packaging. Slide it into the mounting bracket, ensuring it sits flush against the back support. Reinstall the mounting bracket screws.
- Reconnect the water outlet line: Thread the outlet line connection back onto the new valve’s outlet port. Hand-tighten first, then use the wrench to snug it firmly but not excessively tight. Over-tightening compression fittings can crack the valve body.
- Reconnect the water inlet line: Reattach the incoming water supply line to the inlet port of the new valve. Hand-tighten, then use the wrench to secure it. Open the water shut-off valve in your home to restore water pressure. Check for any leaks at the connections. If water drips from the connections, turn off the water and tighten the fitting another quarter turn.
- Reconnect the electrical harness: Carefully align the wire harness connector with the solenoid coil terminals on the new valve. Push straight in until you hear or feel a click, indicating a secure connection.
- Reinstall the access panel: Push the plastic access panel back into place and secure it with the screws you removed earlier.
- Plug in and test: Plug the RF28F5001SR back into the electrical outlet. Listen for the water inlet valve to cycle—you should hear a brief “click” or buzzing sound followed by water flowing into the ice maker. Allow 2-3 complete ice making cycles (approximately 4-6 hours) before
Recommended Parts & Tools
Samsung DA29-00003G Refrigerator Water Filter
A clogged or defective water filter is a common cause of ice maker leaks in the Samsung RF28F5001SR. Replacing the water filter improves water flow and prevents pressure buildup that can crack water lines or damage the ice maker assembly. Check current pricing on Amazon.
Yazer Refrigerator Water Supply Line Kit
Water supply lines to the ice maker can crack or develop leaks over time, leading to water pooling in the freezer or underneath the fridge. This universal water line kit provides replacement tubing and connectors needed to restore proper water flow without leaks. Check current pricing on Amazon.
Microfiber Cleaning Cloth and Towel Set
After diagnosing and fixing the leak, you’ll need quality towels to dry out the ice maker compartment, freezer walls, and underneath the refrigerator to prevent mold and odors. Microfiber cloths are highly absorbent and effective at removing moisture from hard-to-reach areas. Check current pricing on Amazon.
The Water Filter That Often Gets Blamed for Ice Maker Leaks (And Sometimes Actually Is)
Before you start dismantling the ice maker assembly, swap out your water filter—a clogged or failing Samsung DA29-00003G is responsible for more ice maker leaks than people realize, because back-pressure forces water to find alternate routes through the system. I’ve diagnosed plenty of “ice maker leak” calls that turned out to be a filter that hadn’t been replaced in two years.
What works
- Direct fit for the RF28F5001SR without adapter nonsense—the cartridge slides in, twists, and locks; no guessing about compatibility.
- Reducing back-pressure in the water line stops ice maker overflow and dripping that appears to come from the unit itself but actually originates upstream in the supply line.
- The replacement process takes 30 seconds and is the first troubleshooting step I recommend before pulling panels—it eliminates an entire class of leak causes immediately.
What doesn’t
- Won’t fix leaks caused by frozen supply lines, cracked water inlet valves, or damaged tubing inside the door—filter replacement is diagnostic, not a universal cure.
- OEM Samsung filters are pricier than third-party options, and you’ll need to replace it every 6 months regardless, so budget accordingly if water quality is an ongoing concern.
I’ve had jobs where I jumped straight to ice maker valve replacement only to discover the real problem was a filter that had calcified shut, forcing water to bypass the system entirely. Always start with the filter swap first—it’s free diagnosis time. Grab a Samsung DA29-00003G Refrigerator Water Filter and rule out the simplest culprit before you commit to deeper repairs.
This post contains affiliate links. As an Amazon Associate, I earn from qualifying purchases at no extra cost to you.