How Hard Water vs. Soft Water Affects Ice Makers: A Complete Technical Guide
The quality of water supplied to your ice maker directly impacts its performance, longevity, and the quality of ice it produces. Whether you have hard water or softened water, each presents distinct challenges that require different management strategies. This comprehensive guide explains the science behind water hardness effects on ice makers and provides practical solutions to maximize your appliance’s lifespan and ice quality.
Understanding Water Hardness and Ice Maker Impact
Water hardness is measured in parts per million (ppm) of dissolved minerals, primarily calcium and magnesium. The USDA classifies water hardness as follows:
- Soft water: 0-60 ppm
- Slightly hard: 61-120 ppm
- Moderately hard: 121-180 ppm
- Hard: 181-250 ppm
- Very hard: 251+ ppm
These minerals behave differently depending on whether water is naturally soft, naturally hard, or artificially softened. Understanding these differences is crucial for proper ice maker maintenance.
Hard Water and Ice Makers: Mineral Scale Buildup
How Hard Water Damages Ice Maker Components
Hard water contains dissolved calcium (Ca²⁺) and magnesium (Mg²⁺) ions. When these minerals enter your ice maker’s water distribution system, they don’t simply pass through. As water is heated, circulated, or frozen through the ice maker’s evaporator coils, these minerals precipitate out of solution and form scale deposits.
The most critical components affected by hard water scale include:
- Evaporator coils: These are aluminum or steel tubes where water freezes. Scale buildup on the coil’s interior restricts water flow and creates an insulating layer that prevents efficient heat transfer and freezing.
- Water inlet valve: Located at the back of most refrigerators (typically behind the lower back panel), this solenoid valve has a small orifice (usually 0.6-0.8mm in diameter). Mineral deposits can partially or completely block this opening.
- Fill tube: The plastic or metal tube that delivers water from the inlet valve to the ice maker bucket accumulates scale that restricts flow.
- Water distribution arm: This component spreads water evenly across the evaporator. Scale prevents proper movement and reduces water distribution.
- Thermostat sensing bulb: Mineral deposits insulate this temperature sensor, causing it to misread conditions and trigger harvest cycles prematurely.
Scale Composition and Formation
In hard water conditions, the primary scale compounds are calcium carbonate (CaCO₃) and magnesium carbonate (MgCO₃). These white, chalky deposits are visible to the naked eye. Formation occurs particularly in areas where water is heated or subjected to pressure changes—exactly where ice maker components operate.
The rate of scale formation depends on water temperature and hardness level. In areas with water hardness exceeding 180 ppm, scale buildup can become visible within 6-12 months of normal ice maker operation.
Soft Water and Ice Makers: Sodium and Other Concerns
Water Softener Chemistry and Ice Maker Issues
Water softeners use ion exchange resin to remove calcium and magnesium by replacing them with sodium (Na⁺) ions. While this prevents scale formation, it introduces a different problem: sodium can accumulate in ice maker components and produce salty-tasting ice.
A typical water softener discharge contains 200-400 ppm of sodium, depending on hardness levels and regeneration frequency. For context, the EPA recommends limiting sodium intake, and ice made from softened water can have a noticeable salty taste, especially in concentrated form.
Sodium Buildup Patterns
Unlike mineral scale which is insoluble, sodium remains dissolved in water. However, when water is frozen into ice, the water molecules form crystals while dissolved minerals are concentrated in the remaining liquid. This process, called freeze concentration, can push sodium ions to accumulate in:
- The inlet valve screen (the small mesh filter inside the water inlet valve)
- Ice bucket residue that dissolves when ice melts
- The evaporator coil surface where mineral concentration occurs during the freeze cycle
While softened water doesn’t damage ice maker hardware the way hard water does, the taste issue and potential texture problems make it suboptimal for ice production.
Which is Worse: Hard Water or Softened Water?
Comparative Damage Assessment
Hard water causes physical damage that reduces component lifespan and appliance functionality. Scale buildup is cumulative, progressive, and eventually requires professional descaling or component replacement. An ice maker operating on hard water without intervention will typically decline in performance over 2-3 years.
Softened water doesn’t damage the ice maker mechanically but creates quality issues and potential taste problems. However, depending on the softener system, it may introduce other minerals or chemicals (iron, manganese, or residual softener resin particles) that cause different complications.
From a pure damage perspective, hard water is worse because it shortens appliance lifespan. However, softened water requires management because it affects the end product (ice quality) even if the machine itself isn’t damaged.
The ideal scenario is moderately hard water (120-180 ppm) treated with a quality filter, which provides enough minerals for proper ice formation without excessive scale risk.
Signs of Hard Water Damage in Your Ice Maker
Slow Ice Production
One of the earliest indicators of hard water damage is reduced ice production rate. A properly functioning ice maker produces one batch of ice (typically 7-10 cubes) every 90 minutes to 2 hours. If you notice the cycle extending to 3+ hours per batch, scale accumulation is likely restricting water flow through the inlet valve or fill tube.
To verify this is the cause, observe the water sound when the ice maker cycles. Hard water damage produces a faint trickle rather than a distinct flow sound at the fill tube outlet.
White Mineral Deposits Visible
The most obvious hard water indicator is white, chalky deposits visible in the ice bucket, on the evaporator coil, or around the fill tube area. These deposits range from fine powder to rough, chunky accumulations depending on scale severity and ice maker age.
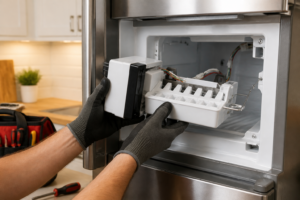
To inspect the evaporator coil, you’ll need to remove the ice maker unit. For most refrigerators:
- Locate the ice maker (typically in the freezer compartment, upper right area)
- Remove the ice bucket by lifting it straight up
- Locate the screws holding the ice maker module to the wall (typically 2-3 screws)
- Disconnect the water inlet tube (may require a small flathead screwdriver to loosen the connection nut)
- Pull the ice maker forward to access the evaporator coil
If you see white deposits on the coil or inside the fill tube, hard water scaling is present.
Reduced Ice Maker Arm Movement
The harvest arm (the metal rod that pushes ice out when the cycle completes) should move freely throughout its range of motion. If movement is sluggish, hesitant, or incomplete, scale may have accumulated on the pivot points or the motor drive mechanism.
To test this manually, first unplug the refrigerator or shut off the ice maker. Push the harvest arm downward—it should return to its original position smoothly. Stiff or gritty movement indicates mineral deposits on mechanical components.
Incomplete or Misshapen Ice Cubes
Hard water scale on the evaporator coil creates uneven freezing. Some areas freeze faster than others, resulting in misshapen cubes with irregular surfaces, hollow sections, or incomplete formation. The ice cubes may look “fractured” or have visible white deposits embedded within them.
Ice Maker Cycles Frequently But Produces No Ice
When scale is severe enough to completely block the inlet valve or fill tube, the ice maker enters a diagnostic loop. The thermostat detects the coil isn’t freezing (because no water is reaching it), signals the valve to open, the valve stays blocked, and the cycle repeats without producing ice. You’ll hear the motor attempt to cycle but no ice forms.
Signs of Softened Water Issues in Ice Makers
Salty or Bitter-Tasting Ice
The most noticeable symptom of softened water use is sodium-affected ice. The taste is distinctly salty, particularly when ice melts in beverages. Some people describe it as slightly bitter or “off.” This occurs because sodium from the softener is freeze-concentrated into the ice structure.
Taste testing is straightforward: make ice using the current water supply, allow one batch to melt in a glass of distilled water, and taste it. Salty taste confirms softener output is reaching the ice maker.
Sodium Residue on Inlet Valve Screen
Water inlet valve screens are typically 100-200 mesh and designed to catch large particles. When softened water passes through repeatedly, sodium-based compounds can accumulate as a film or crust on the screen mesh.
To inspect the inlet valve screen:
- Shut off the water supply to the refrigerator at the main shut-off valve (usually under the sink or at the point where the supply line enters the wall)
- Locate the inlet valve (bottom rear of refrigerator, accessible by removing the lower back panel)
- Unscrew the inlet connection using a 1/2-inch or 9/16-inch wrench
- The screen is a small cylindrical mesh insert inside the connection port
- Remove it with needle-nose pliers and inspect for white or tan-colored buildup
A clean screen should be bright silver mesh. Softener residue appears as a dull, whitish film or scaling.
Cloudy or Hazy Ice Appearance
While hard water typically produces cloudy ice due to trapped air bubbles around mineral deposits, softened water can produce hazy ice with a different appearance—sometimes appearing slightly milky or with a subtle film. This is caused by freeze-concentrated minerals and sodium that create light-scattering in the ice crystal structure.
Why Ice Clarity Matters: Hard vs. Soft Water Effects
Clear Ice Science
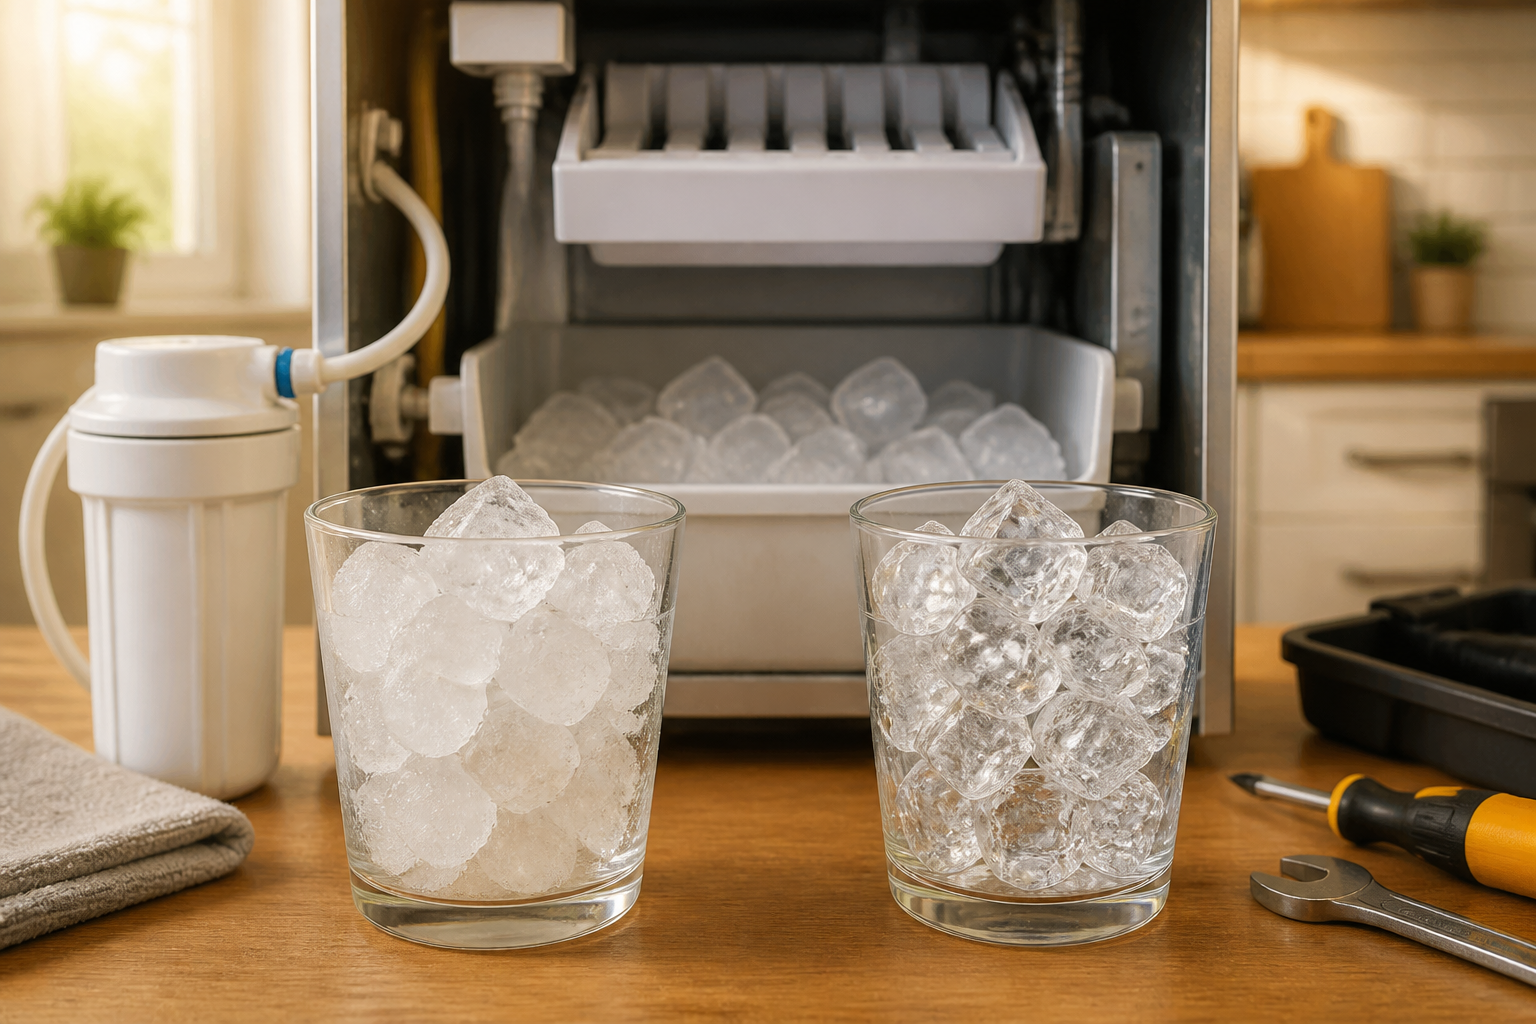
Crystal-clear ice is produced only when water freezes slowly and uniformly with minimal dissolved minerals or air. The clarity scale works as follows:
- Crystal clear: No visible cloudiness, perfect mineral/sodium balance, slow freezing rate
- Slightly cloudy: Minor mineral content or air trapped during rapid freezing
- Milky white: High mineral or sodium content, rapid freezing, or both
- Visible deposits: Scale particles or mineral clumps frozen into ice structure
Hard water produces cloudiness because calcium and magnesium ions disrupt uniform crystal formation and trap air bubbles. Softened water, if high in sodium, produces haziness from sodium concentration during the freeze process.
The clearest ice comes from moderately hard water (80-120 ppm) or softened water that has been post-treated with a remineralization filter (which adds small amounts of minerals back to improve taste and ice clarity).
Solutions: Managing Hard Water Ice Makers
Establishing a Descaling Schedule
For households with hard water, regular descaling is essential maintenance. Descaling frequency depends on water hardness:
- Moderately hard (120-180 ppm): Descale every 12-18 months
- Hard (180-250 ppm): Descale every 6-12 months
- Very hard (250+ ppm): Descale every 3-6 months
Professional descaling involves flushing the ice maker components with a food-safe descaling solution (typically citric acid or acetic acid based). This requires partial disassembly of the ice maker and is best performed by a qualified technician, costing $150-350 per service.
DIY descaling is possible for some models but voids warranties on many refrigerators. If you choose to descale yourself, use only commercial food-grade descaling solutions designed for appliances—never use vinegar or other acidic household cleaners, which can damage seals and components.
Installing an Inline Water Filter
An inline filter installed before the ice maker (and sometimes before the water dispenser) is the most effective hard water management solution. These filters use activated carbon, sediment media, or specialized resin to reduce mineral content.
Filter specifications for ice makers:
- Connection size: 1/4-inch compression fitting (most common)
- Flow rate: Minimum 0.5 gallons per minute (GPM) for proper ice maker operation
- Pressure rating: 50-100 PSI
- Sediment filtration: 5-20 microns
- Mineral reduction: 50-80% (varies by filter media)
- Replacement interval: Every 6-12 months, depending on water quality and usage
Installation location:
The filter should be installed at the point where the refrigerator water supply line enters the appliance, typically under the kitchen sink or at the wall penetration. The filter housing attaches to the wall or inside a cabinet, with inlet and outlet lines connected via compression fittings.
Installation steps:
- Shut off the main water supply valve
- Attach the filter housing bracket to the wall using provided hardware
- Install compression fittings on the inlet and outlet ports
- Connect the inlet line (from the water source) to the filter’s “in” port
- Connect the outlet line (to the refrigerator) to the filter’s “out” port
- Turn the water supply back on and check for leaks
- Run water through the system for 5 minutes to flush the filter media
- Test ice quality after 12-24 hours of operation
Dedicated Ice Maker Water Line (Bypassing Softener)
For households with water softeners, the optimal solution is installing a separate water supply line that bypasses the softener entirely and supplies only the ice maker.
System design:
- Install a saddle valve or tee connection on the main water line (before it enters the softener)
- Run 1/4-inch copper or plastic tubing from this connection to the ice maker inlet valve
- Install an inline filter on this line to reduce any remaining minerals
- The refrigerator’s water dispenser (if equipped) continues to use softened water
This approach provides the ice maker with minimally treated water (reducing sodium) while the rest of the household benefits from softened water. The cost is approximately $150-300 for materials and professional installation.
Important consideration: Mixing soft and hard water can affect overall system balance. Consult your water softener technician before implementing this solution.
Water Pressure Requirements: Regardless of Hardness
Optimal Operating Pressure
Both hard and soft water must reach the ice maker at proper pressure for normal operation. The standard requirement is 20-100 PSI, with optimal performance at 50-80 PSI.
Low water pressure (below 20 PSI) causes:
- Slow or incomplete ice bucket filling
- Extended cycle times
- Partial ice cube formation
- Frequent error codes on smart refrigerators
High water pressure (above 100 PSI) causes:
- Inlet valve seal damage
- Water leakage from connection points
- Fill tube cracks or splits
- Accelerated wear on the solenoid valve
Testing water pressure:
To measure your refrigerator’s water supply pressure, purchase a water pressure gauge (available at hardware stores for $15-40). The gauge has a 1/2-inch NPT connection that screws onto the water supply shut-off valve or a tee fitting.
- Shut off the refrigerator’s water supply valve
- Disconnect the water line from the valve
- Screw the pressure gauge onto the water supply valve output
- Turn the valve back on
- Read the PSI on the gauge
If pressure is below 20 PSI, contact your water utility or check for leaks in your main line. Pressure above 100 PSI requires installing a pressure reducing valve (PRV) on the refrigerator supply line.
Comprehensive Water Quality Testing
Before implementing solutions, test your water to understand baseline conditions:
- Home test kit: $15-30, measures hardness in ppm (instant results)
- Professional lab test: $50-150, measures hardness, sodium, pH, minerals, and contaminants (recommended for decision-making)
Contact your local water utility—many provide free water quality reports showing hardness
Recommended Parts & Tools
Descaling Solution for Ice Makers and Coffee Machines
Hard water buildup is one of the primary issues affecting ice maker performance, and this food-grade descaling solution effectively removes mineral deposits from internal water lines and components. Using a proper descaler is essential for ice makers in hard water areas to restore water flow and prevent cloudiness in ice production. Check current pricing on Amazon.
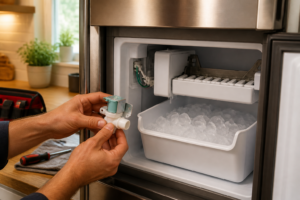
Ice Maker Fill Cup and Funnel Kit
This specialized fill cup allows you to manually test water fill levels and flush out mineral deposits during maintenance and troubleshooting of your ice maker’s water supply system. It’s an invaluable tool for diagnosing whether hard water minerals are blocking water intake valves or fill tubes. Check current pricing on Amazon.
Water Filter Replacement Cartridge for Refrigerators
Installing a high-quality water filter cartridge reduces mineral content before water reaches your ice maker, significantly extending the appliance’s lifespan and improving ice quality in hard water areas. This preventative upgrade minimizes future descaling needs and ensures clearer, better-tasting ice. Check current pricing on Amazon.
The Descaling Solution That Actually Clears Hard Water Buildup in Ice Makers
If you’re dealing with hard water, mineral deposits will accumulate inside your ice maker’s water lines and fill valve faster than you’d expect—and a good descaling solution is your first line of defense before the buildup becomes a clog. This is the tool I reach for when an ice maker starts producing cloudy cubes or slows down its cycle, because it actually dissolves the calcium and magnesium without damaging the plastic components.
What works
- Dissolves hard water scale effectively without requiring disassembly of the entire ice maker—you can run it through the water line and let chemistry do the work.
- Safe on rubber seals and plastic tubing, which matters because aggressive acids can crack internal components and create bigger problems than the mineral buildup you’re trying to fix.
- Works on both built-in and standalone ice makers, and the same solution doubles as a coffemaker descaler, so you’re not buying single-use chemicals.
What doesn’t
- Won’t fix a completely blocked fill valve—if water stopped flowing weeks ago, the mineral plug may be too dense, and you’ll need to replace the valve instead of just cleaning it.
- Requires running multiple cycles and flushing time, so this isn’t a quick fix if you need ice in the next hour; plan for at least 2–3 hours of soaking and rinse cycles.
The mistake I see most often is waiting until the ice maker stops working entirely before descaling—by then, hard water deposits have already restricted water flow so much that a single descaling run won’t clear it all. If you catch the slow-production or cloudy-ice stage early, this solution saves you a valve replacement. Grab a Descaling Solution for Ice Makers and Coffee Machines and run it through your system every 6 months in hard water areas.
This post contains affiliate links. As an Amazon Associate, I earn from qualifying purchases at no extra cost to you.