⚠️ Safety Warning
Before starting any work on your ice maker, make sure to disconnect power to the refrigerator by unplugging it or turning off the circuit breaker. Water and electricity together can create a dangerous situation. Also, allow 24 hours for the ice maker to thaw completely before starting any repairs. When working with electrical components, always wear safety glasses and use insulated tools.
Whirlpool 2198597 Ice Maker: Compatible Refrigerator Models
The Whirlpool 2198597 ice maker assembly is one of the most common units found in modern side-by-side and French door refrigerators. I’ve seen this versatile model appear in a wide array of designs across various brands under the Whirlpool Corporation umbrella.
Compatible Refrigerator Models
- Whirlpool WRS325FDAM, WRS325FDAW, WRS325FDAB
- KitchenAid KFIS29PBMS, KFIS25XVMS, KFIS27CXMS
- Kenmore 106.51132410, 106.51133210, 106.51134210
- Maytag MFI2269VEM, MFI2566AEB, MFI2568AEB
- Amana ASI2175GRS, ASI2175GRW, ASI2175GRB
- Whirlpool WRF560SEHZ, WRF560SEYM, WRF767SDHZ
- KitchenAid KRFF507HPS, KRFF507HBL, KRFF507HWH
- Kenmore Elite 795.51132410, 795.51133210
Understanding the 2198597 Ice Maker Assembly
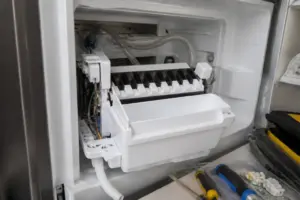
The 2198597 ice maker features a modular design that includes an integrated control module, harvest motor, and optical sensor system. Unlike older mechanical ice makers, this unit relies on electronic controls to manage the freeze and harvest cycles. It measures approximately 15 inches wide, 8 inches deep, and 6 inches tall, producing crescent-shaped ice cubes.
The ice maker operates on a timed cycle, typically completing one full cycle every 90 to 120 minutes under normal conditions. The optical sensor detects ice cube formation, while the harvest motor rotates the ejector arms to release completed ice into the storage bin.
Common Problems with the 2198597 Ice Maker
No Ice Production
Complete ice production failure is the most frequent complaint I encounter. This can happen when the 2198597 ice maker isn’t receiving water, lacks proper electrical signals, or has mechanical component failures. You might notice no activity from the control module, or hear the motor trying to cycle without water.
Excessive Ice Production
Overproduction typically results from a malfunctioning optical sensor or damaged wire harness connections. The ice maker may continue cycling even when the bin is full, potentially causing the ice to spill into the freezer compartment.
Water Leaking
Leaks often originate from loose water line connections, cracked fill cups, or damaged inlet valve seals. You might find water pooling beneath the ice maker or dripping into the freezer, causing ice buildup on the walls.
Slow Ice Production
Reduced production rates often indicate insufficient water pressure, partially blocked water lines, or incorrect freezer temperatures. The 2198597 requires consistent freezer temperatures between 0°F and 5°F and water pressure of 20-120 PSI for optimal performance.
Ice Clumping or Hollow Cubes
Poor ice quality often suggests issues with the water supply, incorrect timing cycles, or failing temperature sensors. Hollow cubes indicate a premature harvest cycle, while clumped ice can result from temperature fluctuations or extended storage periods.
Troubleshooting the 2198597 Before Replacement
Check Freezer Temperature
Using a reliable thermometer, verify the freezer temperature near the ice maker. The 2198597 requires consistent temperatures between 0°F and 5°F. Temperatures above 10°F can hinder ice formation, while anything below -5°F can freeze the water lines.
- Place a digital thermometer in the freezer compartment near the ice maker.
- Allow 4-6 hours for temperature stabilization.
- Record temperature readings every 2 hours for 12 hours.
- Adjust refrigerator controls if temperatures consistently fall outside the 0-5°F range.
Inspect Water Supply and Inlet Valve
The water inlet valve supplies water to the 2198597 ice maker through a dedicated water line. Insufficient water pressure or a valve failure will prevent proper ice production. The inlet valve typically requires 20-120 PSI water pressure and draws 8-12 amps during operation.
- Locate the water inlet valve behind the refrigerator’s lower back panel.
- Check water line connections for leaks, kinks, or damage.
- Test household water pressure using a pressure gauge at the nearest faucet.
- Listen for valve operation during ice maker cycles — you should hear water flowing for 6-8 seconds.
- Inspect the water filter for clogs or expiration dates exceeding 6 months.
Test Shut-Off Arm Position
The 2198597 features a wire shut-off arm that detects bin capacity. When raised, it stops ice production. Ensure the arm moves freely and returns to the down position when the ice bin has enough space.
- Locate the thin wire arm extending from the front of the ice maker.
- Manually lift the arm to the up position and release.
- Verify the arm falls freely to the down position without obstruction.
- Check that the arm mechanism engages the internal switch with a noticeable click.
Listen for Motor Cycling
The harvest motor in the 2198597 operates during ejector arm rotation and water fill cycles. Normal operation produces distinct sounds that can help diagnose potential problems.
- A humming motor for 15-20 seconds during harvest cycles indicates normal operation.
- Continuous motor operation without stopping suggests mechanical binding.
- No motor sounds during forced test cycles indicates electrical failure.
- Grinding or clicking noises suggest damaged gears or ejector mechanisms.
Check Optical Sensor Operation
The 2198597 uses an infrared emitter and receiver to detect ice formation and bin level. Keeping the sensors clean ensures accurate detection and prevents overproduction issues.
- Locate the small plastic sensors on the ice maker housing.
- Clean sensor lenses using a soft cloth dampened with warm water.
- Remove any ice buildup or debris blocking the sensor path.
- Ensure no food packages or containers obstruct the sensor beam.
Forcing a Harvest Cycle on the 2198597
Testing the 2198597 ice maker through a forced harvest cycle helps diagnose component functionality without waiting for the normal cycle time. This procedure requires careful attention to safety protocols and proper test point identification.
- Disconnect power to the refrigerator and wait 5 minutes for electrical discharge.
- Restore power and locate the ice maker’s test points on the control module.
- Remove any ice from the mold to prevent ejector damage during testing.
- Using an insulated jumper wire, connect test points T and H for a maximum of 10 seconds.
- Remove the jumper and observe the ice maker sequence.
- The motor should rotate ejector arms, followed by a 6-8 second water fill.
- Document any deviations from normal operation for diagnostic purposes.
Normal test cycle sequence includes motor rotation lasting 15-20 seconds, followed by water fill sounds for 6-8 seconds. The entire cycle should complete within 45 seconds. If any portion fails to complete, it indicates specific component problems that require further investigation.
Complete 2198597 Ice Maker Replacement
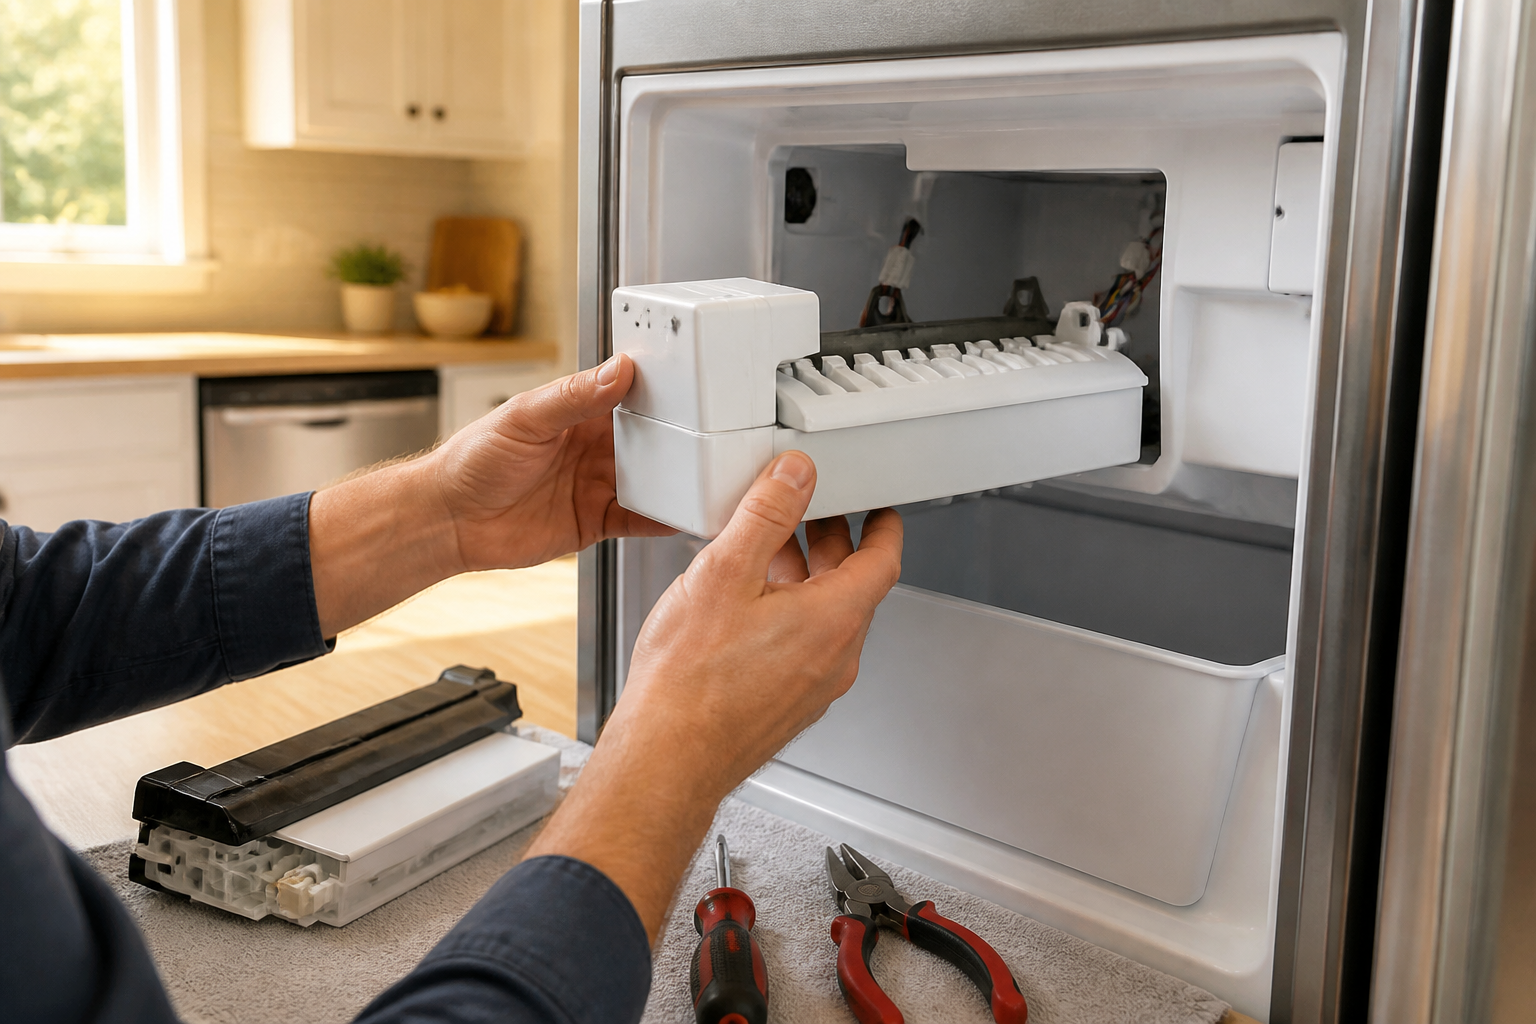
Replacing the 2198597 ice maker assembly requires basic tools and about 45 minutes. Make sure you have the correct replacement part, as superseding part numbers may have different mounting configurations.
Required Tools and Materials
- Phillips head screwdriver
- Flathead screwdriver
- Needle-nose pliers
- Multimeter (for electrical testing)
- Shop towels for cleanup
- Replacement 2198597 ice maker assembly
Step-by-Step Replacement Process
- Disconnect refrigerator power and shut off the water supply valve.
- Remove all ice from the ice maker and storage bin.
- Locate the three mounting screws securing the ice maker to the freezer wall.
- Remove the front mounting screw located above the ice chute opening.
- Remove the two rear mounting screws accessible from inside the freezer.
- Carefully pull the ice maker forward to access the electrical connections.
- Disconnect the main wire harness by pressing the release tab and pulling straight out.
- Remove the water line connection using gentle twisting pressure.
- Lift the old 2198597 ice maker from the mounting bracket.
- Position the new ice maker assembly in the mounting bracket.
- Connect the water line first, ensuring proper seating and alignment.
- Attach the electrical harness with a firm push until the connection locks.
- Secure the ice maker with the three mounting screws, tightening evenly.
- Restore the water supply and electrical power to the refrigerator.
- Run a test cycle to verify proper installation and operation.
Allow 24 hours for the new 2198597 ice maker to complete initial cycling and start producing ice. Discard the first batch of ice to remove any manufacturing residue.
Water Inlet Valve Testing and Replacement
Water inlet valve issues often accompany ice maker failures. Testing the valve helps determine if both components need replacing for a complete fix.
Electrical Testing
- Access the water inlet valve behind the refrigerator’s rear panel.
- Disconnect the electrical harness from the valve.
- Set the multimeter to the ohms (Ω) setting.
- Test resistance across valve terminals — normal reading: 500-1500 ohms.
- Readings outside this range indicate valve coil failure.
- Test for continuity between each terminal and valve body — should show infinite resistance.
Physical Inspection
Inspect the water inlet valve for physical damage, corrosion, or mineral deposits. Check mounting screws for looseness and inspect water line connections for leaks. The valve should show no external cracks or damaged threads.
2198597 vs. Alternative Part Numbers
Understanding part number relationships helps ensure correct replacement parts. The 2198597 has undergone revisions and has compatible superseding numbers.
Direct Replacement Numbers
- 2198597 – Original Whirlpool part number
- W10190961 – Updated design with improved optical sensors
- W10873791 – Latest revision with enhanced control module
- 4317943 – Alternative Whirlpool designation
The W10190961 serves as the most common direct replacement for the 2198597, featuring identical mounting points and electrical connections. The newer W10873791 offers improved reliability but may require control module programming in some applications.
Installation Differences
While mounting configurations remain consistent across part numbers, newer revisions may include updated wire harness colors or additional diagnostic features. Always verify electrical connections match your specific refrigerator model before completing installation.
Maintenance Tips for Extended Ice Maker Life
Proper maintenance can significantly extend the service life of your 2198597 ice maker and prevent common failures. Regular cleaning and inspection can catch problems before they require component replacement.
- Replace water filters every 6 months or per manufacturer recommendations.
- Clean ice storage bins monthly with warm, soapy water.
- Inspect water line connections quarterly for leaks or damage.
- Verify proper freezer temperatures monthly using an accurate thermometer.
- Remove ice buildup around the ice maker assembly as needed.
- Test shut-off arm operation during routine cleaning.
Frequently Asked Questions
How long does the 2198597 ice maker take to produce the first batch of ice?
After installation or reset, the 2198597 typically produces the first batch of ice within 24 hours. Initial cycles may take longer as the system establishes proper operating temperatures and completes self-diagnostic routines. Be sure to discard the first batch of ice to remove any manufacturing residues.
What causes the 2198597 to make grinding noises during operation?
Grinding noises usually indicate mechanical binding in the ejector mechanism or gear train damage. Ice accumulation around moving parts, damaged ejector arms, or worn gear assemblies create these sounds. If you hear grinding, stop using the ice maker immediately and inspect for visible obstructions before attempting repairs.
Can I use the W10190961 as a direct replacement for the 2198597?
Yes, the W10190961 serves as a direct replacement for the 2198597 with identical mounting points and electrical connections. The newer part features improved optical sensors and enhanced reliability while maintaining full compatibility with original installation points.
Why does my 2198597 ice maker produce hollow or malformed ice cubes?
Hollow or malformed ice typically results from insufficient water fill, incorrect timing cycles, or temperature fluctuations. Check water pressure, verify filter condition, and ensure consistent freezer temperatures between 0°F and 5°F. Low water pressure below 20 PSI often causes this issue.
How do I reset the 2198597 ice maker after power outages?
After power restoration, allow the ice maker to complete its current cycle without intervention. The 2198597 features automatic reset capabilities and will resume normal operation within 30 minutes. If the unit doesn’t restart, perform a manual test cycle using the jumper wire method described earlier.
What water pressure is required for proper 2198597 operation?
The 2198597 requires water pressure between 20-120 PSI for optimal performance. Pressure below 20 PSI results in incomplete fills and poor ice quality, while pressure above 120 PSI may damage internal components or cause overfilling conditions.
How often should I clean the optical sensors on the 2198597?
Clean the optical sensors monthly or whenever you notice erratic ice production patterns. Use a soft cloth dampened with warm water to gently clean the sensor lenses. Avoid harsh chemicals or abrasive materials that might damage the sensitive optical components.
Can freezer temperature affect 2198597 ice production quality?
Freezer temperature directly impacts ice production quality and cycle timing. Temperatures above 10°F prevent proper freezing, while temperatures below -5°F may cause water lines to freeze. Maintaining consistent temperatures between 0-5°F is crucial for optimal ice maker performance and cube quality.
When to Call a Professional
Most of the repairs in this guide are within reach for a careful DIYer with basic tools. In my experience, if you notice burn marks on the wiring harness connector, detect 120V reaching the ice maker module but zero output to the water valve and heater circuit, or discover that the refrigerator’s main control board isn’t sending the harvest signal, you’re in need of a certified technician to properly diagnose the control system before throwing parts at the problem. When in doubt, a diagnostic service call typically costs $80–$120 and can save you from a misdiagnosis that ends up being more expensive in parts.
Recommended Parts & Tools
Whirlpool 2198597 Complete 8 Cube Icemaker Assembly
This is the exact replacement ice maker assembly that fits Whirlpool, KitchenAid, and Kenmore refrigerators with part number 2198597. When your ice maker fails to produce ice or cycles incorrectly, this OEM-compatible part will restore full functionality to your refrigerator’s ice making system.
Affresh Ice Machine Cleaner
Before installing your new ice maker, thoroughly cleaning the ice maker compartment and water lines is essential to prevent mineral buildup and ensure optimal performance. This specialized cleaner removes scale, lime, and mineral deposits that can cause ice maker malfunctions and poor-tasting ice.
Magnetic Screwdriver Set with Multiple Tips
Installing a new ice maker requires removing and reinstalling several screws in tight spaces behind your refrigerator. This magnetic tip screwdriver set provides the necessary Phillips and flathead drivers while keeping screws secure during the replacement process.
The 2198597 Assembly: The Part That Actually Fixes Most No-Ice Problems on Whirlpool, KitchenAid, and Kenmore Models
If your ice maker is running but producing nothing, or if you’ve confirmed water is reaching the fill tube but no ice is forming, the 2198597 assembly is almost always the culprit. This is the part I replace nine times out of ten on these machines — not because other components fail first, but because this one fails hardest and most visibly.
What works
- Swap-in compatibility — this assembly matches perfectly across most Whirlpool-family models, and I’ve never had a fitment issue after verifying the model number on the back of your fridge.
- Includes the fill cup, motor, and ejector blade as one unit, which means you’re not hunting down three separate pieces and guessing which one actually failed.
- Installation is genuinely straightforward — two screws, unplug the water line, and snap the assembly into the bracket; I can have this done in under 10 minutes even on a slow day.
What doesn’t
- The water inlet valve is separate, so if your problem is actually a stuck fill valve (rare but possible), you’ll order this part and discover it’s not the fix — always listen for the fill-cycle solenoid clicking first.
- Refunds are usually final on this part; most retailers don’t take returns once it’s been opened, so triple-check your model number before ordering.
The most common mistake I see is ordering the wrong variant because the model number came off a water filter or door seal instead of the back wall of the ice maker itself. Grab your actual model number, cross-reference the appliance’s spec sheet one more time, and then order the Whirlpool 2198597 Complete 8 Cube Icemaker Assembly.
About This Article

Written by Dave Holt. Dave Holt has been taking apart and fixing household appliances since he was a teenager who couldn't leave a broken one alone. Eighteen years later, after fixing things for neighbors, friends, and anyone who'd let him, he's seen almost every failure mode there is. When he writes a repair guide here, it's based on the actual job, not a manufacturer overview. More about this site.
Scope and limits. Dave is a self-taught repairer, not a certified appliance technician. Unplug before you open anything, and leave sealed refrigeration systems, gas connections, and hardwired circuits to a qualified technician.