Frigidaire FFHT1821TS Drainage Problems: Complete Troubleshooting and Repair Guide
Today I want to share what I’ve learned about the Frigidaire FFHT1821TS — a reliable top-mount refrigerator that can nonetheless run into drainage trouble. If you’ve noticed water pooling inside your fridge, ice forming in the freezer, or puddles on your kitchen floor, this guide is here to help you troubleshoot and fix those drainage problems.
Understanding Drainage Problems on the FFHT1821TS
Common Signs of Drainage Issues
In my experience, drainage problems on the Frigidaire FFHT1821TS show up in several ways that make it clear something’s gone awry:
- Water pooling at the bottom of the fresh food section: You might notice standing water accumulating in the lowest areas or corners of the refrigerator. This water often has a stale odor and can lead to food spoilage.
- Water leaking onto your kitchen floor: If a puddle forms beneath the fridge, usually near the front or back legs, it indicates that defrost water isn’t being properly routed to the evaporation pan.
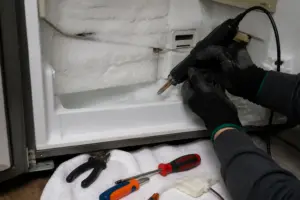
- Excessive frost and ice buildup in the freezer: You’ll see thick ice accumulating on the walls, shelves, and food items in the freezer. This secondary symptom signals that defrost water isn’t draining properly, leading to humidity refreezing.
- Water dripping from the freezer compartment into the fresh food section: Look for active dripping or wet spots on the bottom shelf of the refrigerator right below the freezer.
- Frost on the back wall of the fresh food section: If you notice frost on the interior back panel, particularly in the lower section, it’s a sign of defrost system failure.
How the Defrost Drain System Works on the FFHT1821TS
To effectively troubleshoot, it’s crucial to understand how the drainage system of your Frigidaire FFHT1821TS works:
The defrost cycle: Several times a day, the FFHT1821TS automatically enters a defrost cycle, warming the evaporator coil located on the back wall of the freezer section. This melting action clears away frost that has built up on the coil.
Water collection and drainage: The melted water flows down into a small drain hole typically situated on the freezer floor near the back wall—about 4-6 inches from the rear panel and centered left-to-right on the FFHT1821TS.
Drain tube pathway: Water from the freezer drain hole moves into a vinyl drain tube that runs down the back of the refrigerator. This tube connects to a second drain tube that leads to the evaporation pan beneath the refrigerator.
Evaporation pan function: The evaporation pan collects defrost water, and heat from the compressor warms the pan, allowing the water to evaporate instead of accumulating. A properly functioning FFHT1821TS will have a mostly dry pan, or just a small amount of residual water.
Diagnosing the Specific Problem
Clogged Defrost Drain Hole: The Most Common Issue
In my experience, the defrost drain hole on the FFHT1821TS is the most common failure point. Measuring about 3/8 inch in diameter, it can become blocked with ice, food particles, or mineral deposits. When this happens, water can’t drain from the freezer floor, causing a backup into the fresh food section.
How to identify a clogged drain hole: Check the freezer floor for a small drain opening where water exits during the defrost cycle. Place your hand near the hole to feel for air movement when the compressor is running, or visually look for a small circular opening near the rear wall.
What causes clogging: Ice forms around the drain hole, occasionally blocking it entirely. Accumulation of food particles, frost crystals, and mineral deposits from water can also contribute to the blockage.
Step-by-Step: Clearing a Clogged Defrost Drain Hole
- Unplug the FFHT1821TS from the electrical outlet. Wait 5 minutes to allow any residual charge to dissipate.
- Remove all food items from the freezer section to access the freezer floor. Keep perishable items cool in a cooler with ice.
- Remove the freezer shelves and baskets by gently lifting and sliding them out. Remember their positions for reinstallation.
- Prepare a hot water and baking soda solution: Mix 2 tablespoons of baking soda with 2 cups of hot (not boiling) water. This acts as a gentle abrasive and deodorizer.
- Locate the drain hole on the freezer floor, typically 4-6 inches from the rear panel. Look for a small round hole, often surrounded by frost.
- Use a turkey baster to flush the drain: Fill the baster with the hot baking soda solution. Insert the tip into the drain hole and squeeze firmly. Repeat 5-6 times, allowing liquid to flow into the drain between applications. Gurgling sounds indicate water is flowing through the drain tube.
- Follow with a hot water rinse: Use the turkey baster to flush the drain hole 3-4 times with plain hot water to clear any remaining baking soda residue.
- Clear the exterior drain tube: If possible, access the drain tube from beneath the refrigerator. Refer to the section below for detailed instructions on “Clearing the Exterior Drain Tube.”
- Reinstall all components: Replace the freezer baskets and shelves in their original positions. Plug the FFHT1821TS back in and let it run for 2 hours before restocking with food.
- Monitor the freezer floor for the next 24 hours to ensure it remains dry or contains only minimal moisture.
What if the drain remains clogged? If hot water and baking soda don’t clear the blockage, the ice plug may be too solid. Try this advanced technique: With the FFHT1821TS unplugged and empty, pour a small container of warm (80-90°F) water into the drain hole and wait 15 minutes. This will allow the ice to soften slightly. Then, repeat the turkey baster flushing method.
Clearing the Exterior Drain Tube on the FFHT1821TS
The vinyl drain tube connecting the interior freezer drain to the exterior evaporation pan can also become clogged. Here’s how to clear it:
- Unplug the FFHT1821TS and ensure it’s been unpowered for at least 5 minutes.
- Pull the refrigerator away from the wall carefully, using furniture sliders to prevent floor damage. Leave enough space to access the back panel—typically 12-18 inches.
- Locate the drain tube: Identify the vinyl drain tube at the back of the FFHT1821TS, usually white or clear, running from the top rear area down to the evaporation pan. The diameter is typically 3/8 inch.
- Trace the tube to where it enters the evaporation pan: Follow the tube downward until it connects to the drain pan assembly beneath the refrigerator.
- Disconnect the drain tube: Gently pull the tube away from its connection points. It typically inserts into a rubber grommet fitting. Hand-pull with a gentle twisting motion—avoid using pliers, as they can crack the tube.
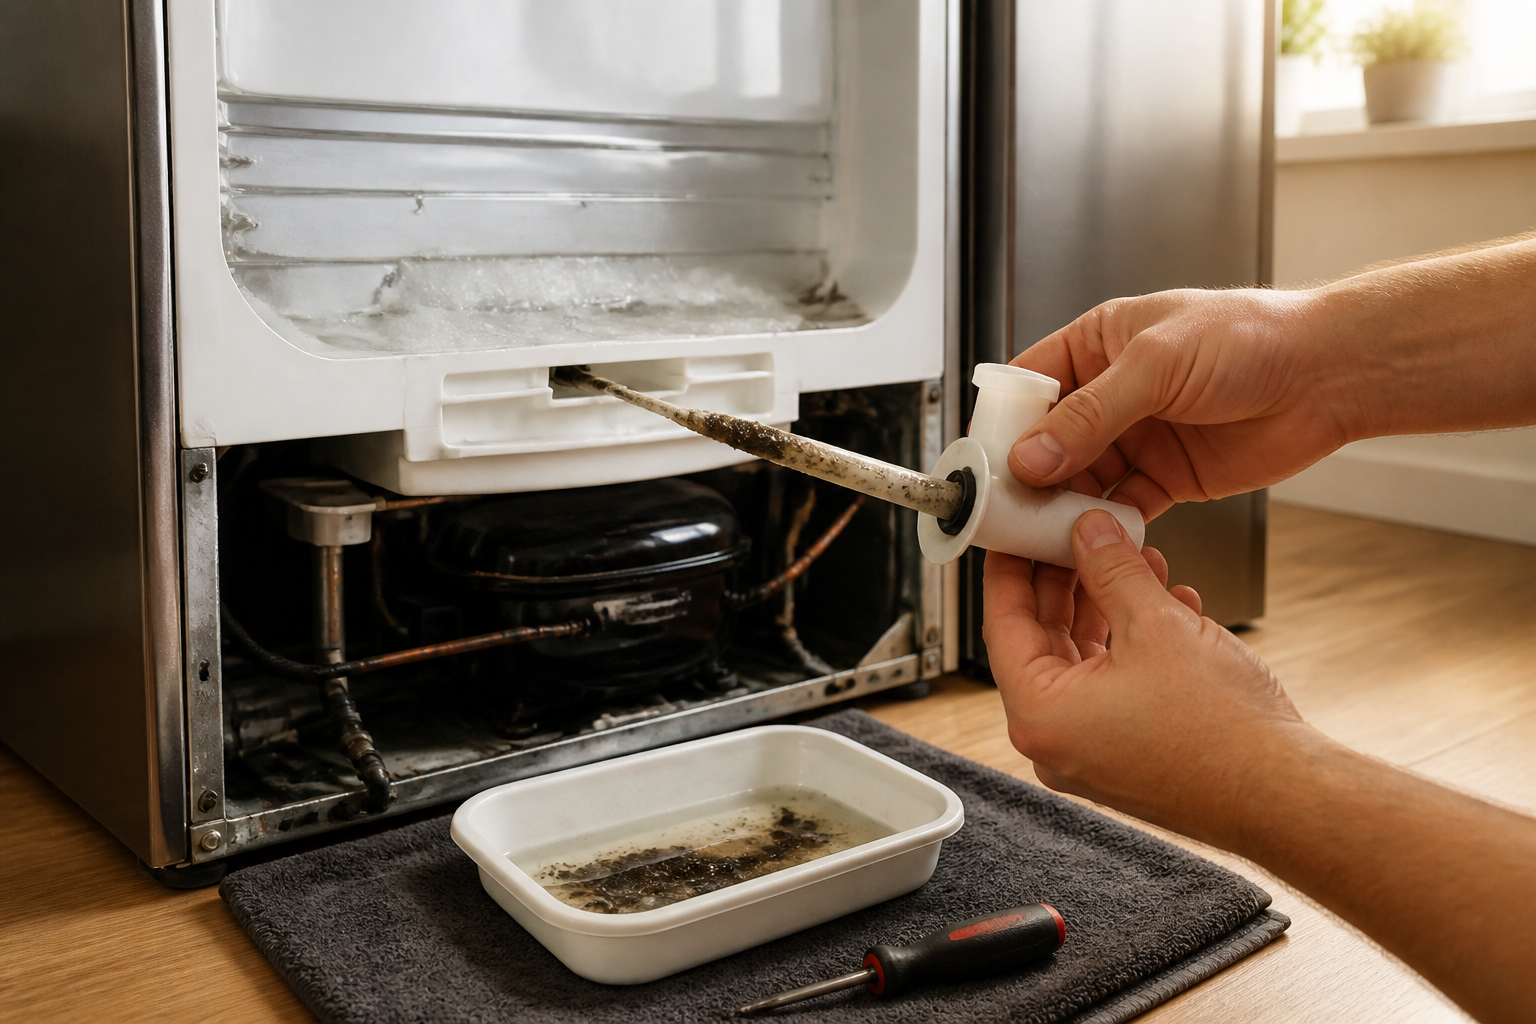
- Flush the drain tube: Using a turkey baster filled with hot water, flush the tube from the upper end, allowing water to flow out the bottom end into a bucket. Repeat 8-10 times, watching for sediment, mineral deposits, or ice fragments to be expelled.
- Use a plumbing snake if necessary: If water doesn’t flow freely, the blockage may be solid. A 1/4-inch plumbing snake can be carefully fed through the tube to break up ice plugs or mineral buildup. Feed the snake slowly and don’t force it.
- Reconnect the drain tube: Once cleared, reinsert the tube into its rubber grommet connection, ensuring it sits firmly to prevent slipping during operation.
- Inspect the connection for leaks: With the refrigerator still unplugged, manually pour a small amount of water into the interior freezer drain hole. Observe if water flows through the tube into the pan without leaking from connection points. If leaks occur, the rubber grommet may need replacement.
- Push the refrigerator back into place and plug in the FFHT1821TS.
Checking the Drain Heater on Your FFHT1821TS
Some models of the Frigidaire FFHT1821TS come with a small heating element in the drain tube meant to prevent ice from forming. If your model has this feature, a failed heater can lead to water freezing in the drain tube during colder periods.
Identifying if your FFHT1821TS has a drain heater: Look at the drain tube where it exits the refrigerator cabinet at the back. If you see a small cylindrical component (approximately 2 inches long and 1/2 inch in diameter) with electrical wire connections, your model has a drain heater. Consult your FFHT1821TS manual or contact Frigidaire customer service for confirmation.
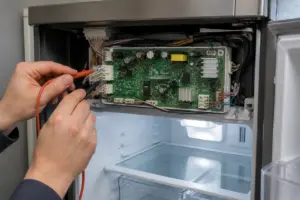
Testing the drain heater: To test, use a multimeter set to the ohms (resistance) setting. Unplug the FFHT1821TS, then disconnect the electrical connectors on the heater element. Touch the multimeter probes to the heater terminals. A working heater should read a resistance between 20-100 ohms. A reading of infinity (or no continuity) indicates the heater is burned out and needs replacement.
If the heater is faulty: The heater element is a replaceable part, and the part number for most FFHT1821TS models is available through Frigidaire parts suppliers. Replacement involves disconnecting electrical connectors and unbolting the heater from the drain tube assembly. Installation is simply reversing the process—securely connect the electrical terminals and ensure the heater element is positioned directly on the drain tube for even heat distribution.
Inspecting and Cleaning the Evaporation Pan
The evaporation pan located beneath your Frigidaire FFHT1821TS can also develop problems that hinder proper drainage.
Accessing the Evaporation Pan
- Unplug the FFHT1821TS from the electrical outlet.
- Pull the refrigerator away from the wall using furniture sliders, creating 18-24 inches of clearance.
- Remove the access panel: The front bottom of the FFHT1821TS usually has a removable kick plate or access panel secured by clips or screws. Remove it carefully to expose the compressor compartment and evaporation pan area.
- Locate the drain pan: The evaporation pan is typically a rectangular plastic container beneath the compressor, about 18 inches long and 10 inches wide, with a depth of 3-4 inches.
- Visually inspect the pan for various conditions.
What to Look For in the Evaporation Pan
- Cracks or breaks in the plastic: Even minor cracks can let water escape instead of evaporating, leading to leaks beneath the FFHT1821TS.
- Separation of pan seams: The pan may dislodge or its seal may break, allowing water to seep from connection points.
- Excessive water accumulation: A healthy evaporation pan should have little to no water. If water pools more than 1/2 inch deep, the pan isn’t draining properly, or the drain tube inlet is clogged.
- Algae or mold growth: Black or green slime on the interior surfaces indicates biological growth from stagnant water, suggesting poor evaporation and potential drain obstruction.
- Sediment or mineral buildup: White or tan crusty deposits indicate hard water mineral accumulation in the pan.
Cleaning the Evaporation Pan on Your FFHT1821TS
- With the FFHT1821TS unplugged, carefully slide the evaporation pan out from underneath the refrigerator. It should pull straight out from the side or front, depending on your model’s design.
- Empty any standing water into a sink or bucket.
- Prepare a cleaning solution: Mix 1 part white vinegar with 3 parts water in a bucket. Vinegar effectively dissolves mineral deposits and kills mold and algae.
- Soak the pan: Place the evaporation pan in a bathtub or large sink filled with the vinegar solution for 30 minutes to soften mineral and biological buildup.
- Scrub thoroughly: Use a soft brush or non-abrasive scrub pad to clean the interior surfaces of the pan, focusing on corners and the drain inlet opening. Remove all visible deposits and slime.
- Rinse completely: Rinse the pan multiple times under hot running water until all vinegar odor is gone and the water runs clear.
- Dry the pan: Allow the pan to air dry completely before reinstalling it or dry it with a clean cloth.
- Inspect the drain inlet: While the pan is removed, check the drain tube connection point on the underside. Ensure the tube inlet is clear and unobstructed. If needed, flush this inlet with hot water using a turkey baster.
- Reinstall the pan: Slide the clean evaporation pan back under the FFHT1821TS until it fits snugly. Ensure it’s level—a tilted pan won’t drain effectively.
Cracked Evaporation Pan: Replacement Instructions
If you find cracks in the evaporation pan, it will need to be replaced since a leaking pan can’t be effectively repaired.
- Order a replacement evaporation pan from a Frigidaire parts supplier using your FFHT1821TS model number. The part number should be available in your refrigerator’s manual.
- With the FFHT1821TS unplugged, remove the old pan by sliding it out from beneath the refrigerator.
- Disconnect the drain tube from the pan’s inlet by gently pulling or unscrewing the connection, depending on your model’s design.
- Position the new pan in the same location beneath the refrigerator, ensuring it sits level.
- Reconnect the drain tube to the inlet on the new pan, pushing firmly until the connection is secure.
- Verify proper positioning: The pan should be fully seated and level, preventing water from escaping from the sides or back.
- Plug in the FFHT1821TS and monitor the pan for 24 hours of operation to confirm proper drainage.
Testing After Repair: 24-Hour Monitoring Protocol
After completing any drainage repair on your Frigidaire FFHT1821TS, it’s crucial to test the repair to confirm it’s successful and to prevent future water damage.
Immediate Post-Repair Inspection
- Plug in the FFHT1821TS and allow the compressor to run for 10 minutes to initiate a defrost cycle.
- Check the freezer floor for water accumulation. While a small amount of moisture is normal, standing water indicates the issue persists.
- Look underneath the refrigerator for any water leaks on the kitchen floor.
- Listen for unusual sounds such as splashing or gurgling water, which might signal that the drain tube is misdirecting water.
24-Hour Extended Monitoring
- Allow the FFHT1821TS to operate normally for a full 24 hours, letting the door open and close naturally during this time.
- Check the freezer floor every 6 hours for water accumulation. Use a cloth to wipe the floor and assess moisture levels.
- Inspect beneath the refrigerator twice during this period (at 12 hours and 24 hours) for any leaks on the floor.
- Visually inspect the evaporation pan, if accessible, to ensure water is collecting properly. It may contain water, but it should be minimal—typically less than 1/4 inch deep.
- Check food items in the freezer for any frost or ice buildup. A properly functioning FFHT1821TS maintains minimal frost on food.
- If conditions are normal after 24 hours, you can be confident that the repair was successful. Now it’s time to restock the fridge!
Recommended Parts & Tools
Refrigerator Defrost Drain Line Cleaning Kit
This specialized cleaning kit includes flexible tubing and brush attachments designed to clear ice and debris from the defrost drain line on your Frigidaire refrigerator. Clogged drains are the primary cause of drainage issues, and this tool makes it easy to dislodge blockages without damaging the line.
Plastic Drain Pan Replacement for Frigidaire Refrigerators
The drain pan under your refrigerator collects condensation from the defrost cycle, and cracks or deterioration can cause leaks and water pooling. This OEM-compatible replacement pan ensures proper water collection and drainage into your home’s plumbing system.
HVAC Flush and Cleaning Liquid for Refrigerant Lines
This safe, non-corrosive flushing solution helps clear mineral deposits and sediment buildup from defrost drain lines that regular water cannot remove. Including this product in your maintenance routine can help prevent future clogs and drainage issues.
The Drain Line Cleaning Kit That Actually Clears Frozen FFHT1821TS Blockages
If you’ve confirmed that water isn’t draining from the defrost system, a clogged drain line is almost always the culprit—and trying to flush it with hot water alone rarely works when ice or mineral buildup is involved. This kit gives you the right tools to push through blockages without damaging the plastic tubing that Frigidaire uses on this model.
What works
- The flexible tubing and brush attachments fit the tight, angled drain passages in the FFHT1821TS without forcing or kinking the line—I’ve snapped drain tubing before by using rigid tools.
- Includes a hand pump that provides steady, controlled pressure; you can actually feel when the blockage breaks free instead of blasting through with compressed air and accidentally cracking the drain pan.
- The mild flushing solution removes mineral deposits and ice that simple hot water leaves behind, so the drain stays clear longer after the initial fix.
What doesn’t
- If your drain line is completely separated from the drain pan fitting, this kit won’t help reattach it—you’ll need to locate and reseat the tubing first, which sometimes requires removing the kick plate and lower back panel.
- The solution bottles are small; if you have multiple clogs or a heavily fouled system, one kit might not be enough for a thorough flush on the first pass.
I’ve learned the hard way that diagnosing a water pooling issue as a failed drain pan can lead to unnecessary replacements when the real problem is just a blockage a few inches into the line. Save yourself that hassle and grab the Refrigerator Defrost Drain Line Cleaning Kit first if water is backing up inside your fridge.
About This Article

Written by Dave Holt. Dave Holt has been taking apart and fixing household appliances since he was a teenager who couldn't leave a broken one alone. Eighteen years later, after fixing things for neighbors, friends, and anyone who'd let him, he's seen almost every failure mode there is. When he writes a repair guide here, it's based on the actual job, not a manufacturer overview. More about this site.
Scope and limits. Dave is a self-taught repairer, not a certified appliance technician. Unplug before you open anything, and leave sealed refrigeration systems, gas connections, and hardwired circuits to a qualified technician.