
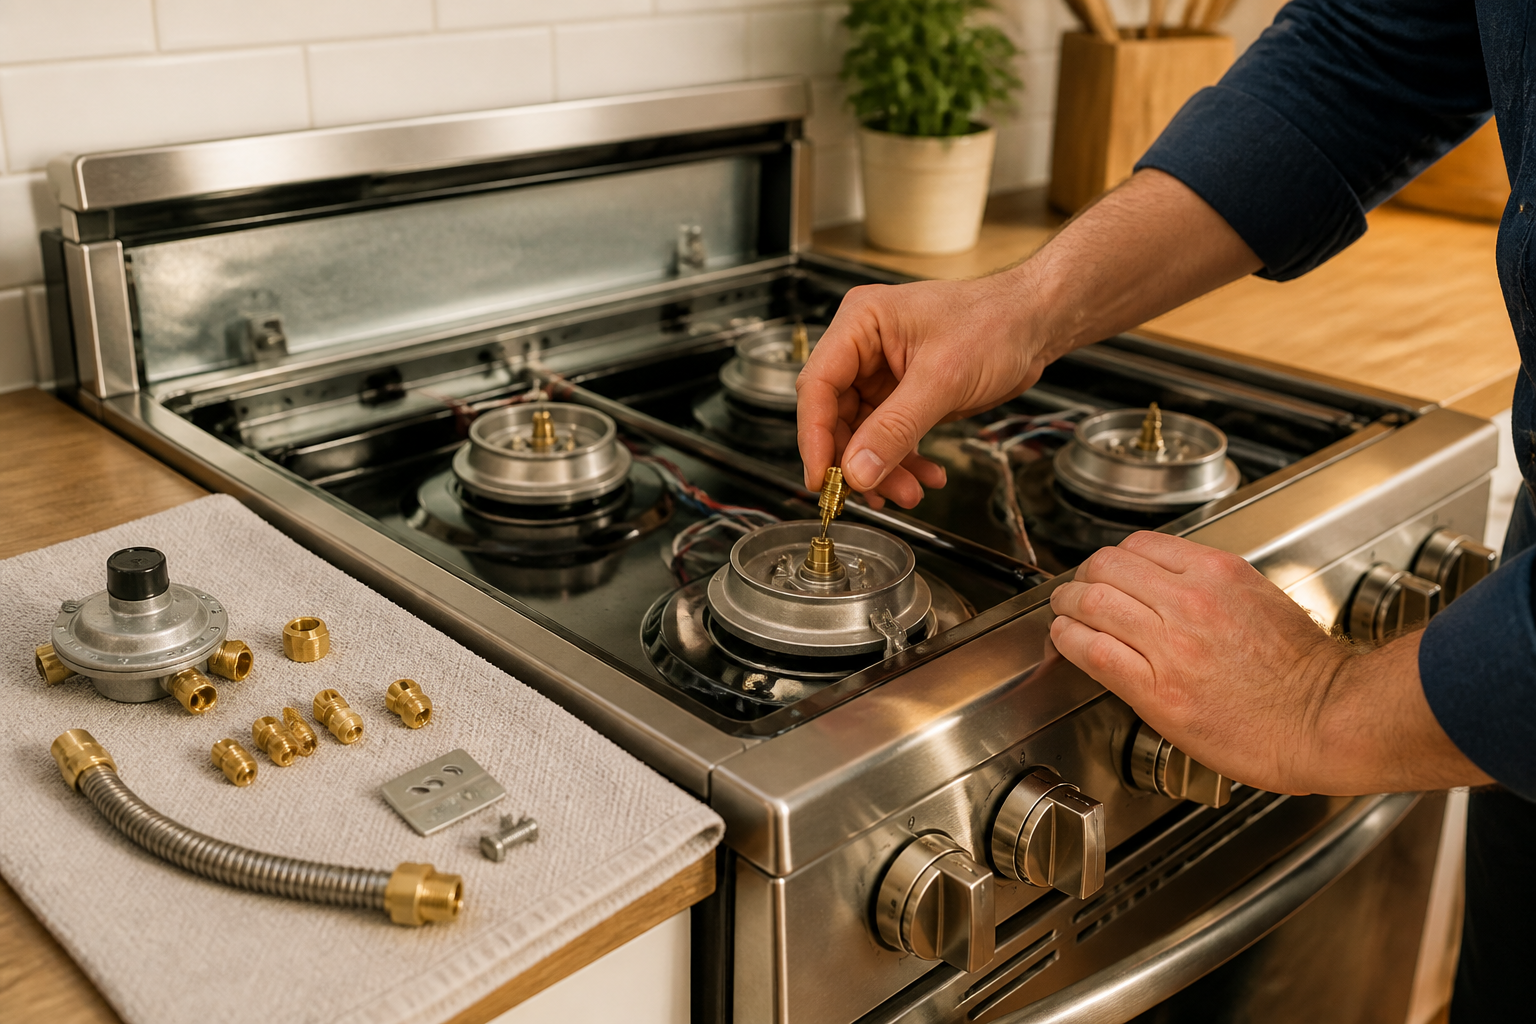
Complete LP Conversion Kit Installation Guide for Samsung NX60A6511SS Gas Range
Today I’m going to guide you through converting your Samsung NX60A6511SS gas range from natural gas to propane (LP) operation. If you’ve moved to an area where only LP service is available, or your home runs solely on LP gas, this guide will help you tackle the conversion with confidence. Gas work deserves care, so read the safety section before you start.
Converting your NX60A6511SS involves a few crucial steps: you’ll be switching out the natural gas orifices for smaller LP ones on all burners, adjusting the pressure regulator, and fine-tuning the flame heights. While this might sound daunting, I assure you that with the right tools and a methodical approach, it’s a manageable DIY project for anyone with a bit of mechanical aptitude.
Understanding LP Conversion: What Changes and Why
Natural gas and propane (LP) are both gaseous fuels, but they have different pressure requirements and burn characteristics. Your Samsung NX60A6511SS is set up for natural gas with an inlet pressure of about 4 inches of water column (IWC). Propane, however, requires an inlet pressure of around 10 inches of water column. The orifices, which are tiny brass components controlling the fuel flow to each burner, differ in size because propane delivers more energy per unit volume than natural gas.
LP orifices are smaller in diameter than natural gas orifices, typically measuring around 0.068 inches for LP compared to 0.083 inches for natural gas on similar burner sizes. This size difference is critical; using the wrong orifice can lead to insufficient flames or dangerously high flames that could damage cookware or pose safety risks.
The pressure regulator on your NX60A6511SS also requires adjustment or reversal to accommodate LP’s higher inlet pressure. Most Samsung ranges feature reversible regulators that can be flipped to switch between natural gas and LP modes.
Required LP Conversion Kit and Part Numbers
For the Samsung NX60A6511SS, the correct LP conversion kit is usually part number RA-LG120H or an equivalent Samsung LP conversion kit. Before diving into your project, make sure to verify the exact part number for your model by:
- Checking your range’s user manual (available on Samsung’s website)
- Contacting Samsung customer service at 1-800-SAMSUNG with your model number (NX60A6511SS)
- Looking at the manufacturer’s label inside the oven cavity or on the back of the range
Your LP conversion kit for the NX60A6511SS will include:
- Four LP orifices for the surface burners
- One LP orifice for the oven burner
- One LP orifice for the broiler burner
- Regulator adjustment components or a replacement regulator
- LP operation label/decal
- Installation instructions specific to this model
It’s essential to avoid using generic LP orifices from other manufacturers. The specific geometry and sizing of Samsung’s orifices are designed to ensure the proper flame characteristics for your NX60A6511SS.
⚠️ Critical Safety Information
Before starting any work on your Samsung NX60A6511SS:
- Shut off the gas supply at the meter or tank valve and wait 5 minutes. This helps to ensure that all gas pressure is relieved from the lines.
- Work in a well-ventilated area. Make sure to open windows and doors; do not attempt this in a closed kitchen.
- Do not use an open flame or perform this work near pilot lights or ignition sources. Even a brief exposure to gas can accumulate in the room.
- Have a working gas leak detector on hand. This is not optional—it’s essential safety equipment for this project.
- Do not convert your range back and forth between natural gas and LP. Once converted to LP on your NX60A6511SS, have a professional technician handle any future conversions.
- If you smell gas during or after the conversion, immediately stop work, leave the house, and call your gas utility or 911. Avoid using electrical switches or creating sparks.
- Never assume a connection is tight. Each connection point must be tested with soapy water before operating the range.
Tools and Materials You’ll Need
- LP conversion kit for the NX60A6511SS (part RA-LG120H or equivalent)
- Adjustable wrench set (6-inch, 8-inch, and 10-inch wrenches)
- Screwdriver set (both Phillips and flathead)
- Socket wrench set with 1/4-inch and 5/16-inch sockets
- Gas leak detector (electronic or liquid soap solution)
- Dish soap and a spray bottle with water
- Paper towels or absorbent cloth
- Work gloves (cotton or leather)
- Flashlight or headlamp for visibility
- Your NX60A6511SS user manual
Step-by-Step LP Conversion Process
Step 1: Prepare Your Work Area and Disconnect the Range
Start by turning off the main gas supply valve or LP tank valve. Wait at least 5 minutes for any residual gas pressure to dissipate. Open all windows and doors in your kitchen to ensure proper ventilation throughout the conversion process.
Pull your Samsung NX60A6511SS away from the wall about 18 inches, giving yourself enough space to access the back connections. You don’t need to disconnect the gas line yet—you can do that later in the process. However, if you feel comfortable, disconnecting it now might give you more room to work.
Step 2: Remove the Surface Burner Caps and Grates
Your NX60A6511SS has four surface burners across the cooktop. Start with the front-left burner. Lift the burner cap straight up and remove it; it’s not permanently attached, just sitting on top of the burner base.
Next, remove the burner grate that sits above the burner base. The grates on the NX60A6511SS are held in place by their weight and positioning; simply lift them straight up and set them aside in a safe spot. Do this for all four surface burner locations (two in the front, two in the back).
Step 3: Remove the Burner Heads and Locate Natural Gas Orifices
With the caps and grates removed, you’ll see the burner base assembly on your NX60A6511SS. The burner head, which has flame ports around its edge, is removable. Lift straight up on the burner head; it should slide off the burner base easily. Set it aside carefully.
Underneath where the burner head was installed, you’ll find the burner base mounted to the cooktop. The orifice assembly, which you can access from below the range or by tilting the cooktop, is typically located underneath the cooktop surface. For the NX60A6511SS, you usually tilt the cooktop up towards the back.
Tilting the cooktop: Find the hinge points at the back of the cooktop. Slowly and carefully tilt the cooktop up towards the back wall. It should move smoothly—don’t force it. Most NX60A6511SS models will tilt up about 45 degrees, giving you great access to the orifices below. Support the cooktop to prevent it from falling back down.
Looking at the underside of each burner location, you should see a small brass fitting—this is the natural gas orifice. It has a tiny hole in the center (the actual orifice opening) and threads that screw into the gas manifold.
Step 4: Remove and Replace Surface Burner Orifices
Using your adjustable wrench or a dedicated orifice wrench (if one came with your LP conversion kit), grasp the natural gas orifice on the front-left burner of your NX60A6511SS. Hold the wrench steady and turn it counterclockwise about 2-3 turns to unscrew it.
Once it’s unscrewed, remove the natural gas orifice completely. This small brass component is around 1/2 inch long. Inspect the hole at its tip; it should have a relatively large opening, typical of natural gas orifices.
Now, take the corresponding LP orifice from your conversion kit. Hold it up to a light and look through it; the opening will be noticeably smaller than that of the natural gas version. Confirm you have the correct size by comparing it to the natural gas orifice you just removed.
Thread the LP orifice into the same hole where the natural gas orifice was installed, starting with hand-tightening to avoid cross-threading. Once it’s hand-tight, use your wrench to snug it—don’t over-tighten. Use only moderate pressure, as orifices are made of soft brass and can be damaged by excessive force.
Repeat this process for all four surface burners on your NX60A6511SS, working systematically: front-left, front-right, rear-left, rear-right. Double-check that you’ve replaced all four before moving on to the oven burner.
Step 5: Replace the Oven Burner Orifice
With your cooktop still tilted up, locate the oven burner orifice toward the back and center of the range, typically slightly to one side (usually the right side on most Samsung models). The oven burner orifice looks similar to the surface burner orifices but may be positioned differently.
Using the same technique as before, unscrew the natural gas oven orifice from your NX60A6511SS by turning counterclockwise. Remove it completely and set it aside with the surface burner orifices.
Install the LP oven orifice from your conversion kit, starting with hand-threading and then snugging it with your wrench. Again, don’t over-tighten.
Step 6: Replace the Broiler Burner Orifice
On the NX60A6511SS, the broiler is located in the drawer below the main oven. Access the broiler burner by fully opening the broiler drawer and removing any racks inside. The broiler burner orifice will be accessible from above the broiler compartment, similar to the oven burner orifice location.
Using the same counterclockwise rotation technique, unscrew the natural gas broiler orifice from your NX60A6511SS. It might require a bit more force than the surface burner orifices. Remove it completely.
Now, install the LP broiler orifice from your conversion kit, starting with hand-threading and then snugging it with your wrench.
Step 7: Lower the Cooktop and Reassemble Burners
Carefully lower the cooktop on your NX60A6511SS back to its normal position. Support it as you lower it to prevent it from dropping suddenly. Once it’s fully lowered, check to ensure it’s seated properly and lies flat.
Reinstall the burner heads on each surface burner location of your NX60A6511SS, pushing them straight down until they’re fully seated. Reinstall the burner caps, ensuring they sit firmly in place. Replace the grates, seating them properly in their positions.
Your surface burners and cooktop should now look exactly as they did before, but with LP orifices underneath.
Step 8: Adjust or Replace the Pressure Regulator
This step is crucial for the proper LP operation of your NX60A6511SS. The pressure regulator is usually found inside the range cabinet, near where the gas line enters the unit from the back.
On many Samsung NX60A6511SS models, the regulator is reversible—it can be flipped to switch between natural gas and LP operation. Your LP conversion kit should come with instructions specific to your regulator type. However, here’s the general procedure:
- Locate the regulator on your NX60A6511SS (typically a cylindrical brass component with inlet and outlet ports).
- Using your adjustable wrench, unscrew the regulator from the manifold inlet. You may notice some residual gas escaping, which is normal. Allow it to dissipate.
- Examine your regulator. If it has a removable cap or internal diaphragm, refer to your specific conversion kit instructions. Many Samsung regulators simply need to be reversed (flipped 180 degrees) and reinstalled.
- If your kit includes a replacement regulator, remove the old one completely and install the new LP-specific regulator in its place.
- Once the regulator is adjusted or replaced, hand-thread it back into the manifold inlet on your NX60A6511SS, then snug it with your wrench. Avoid over-tightening.
If you’re uncertain about your specific regulator type, refer to the documentation that came with your LP conversion kit or contact Samsung support for clarification on the NX60A6511SS regulator setup.
Step 9: Reconnect the Gas Line and Test for Leaks
If you disconnected the gas line earlier, now is the time to reconnect it. The gas line typically uses a 1/2-inch or 3/8-inch compression fitting at the back of your NX60A6511SS. Hand-thread the fitting to start, then use two wrenches (one to hold the fitting on the range and one to tighten the compression nut) to snug the connection. Don’t over-tighten.
Prepare your leak detection solution by mixing one part dish soap with two parts water in a spray bottle. You’ll use this to check every connection point on your NX60A6511SS for gas leaks.
Before turning on the gas supply, make sure all your work is complete and all connections are at least hand-tight. Slowly turn the main gas supply back on and listen carefully for any hissing sounds.
Spray the soapy water solution on every connection point:
- The main gas line connection at the back of the NX60A6511SS
- The regulator inlet and outlet connections
- The manifold connections where you installed the new orifices
- Any other visible gas line connections inside the range cabinet
Keep an eye out for bubbles forming in the soapy water. Bubbles indicate a leak. If you see any, immediately turn off the gas supply and tighten that connection slightly. Retest with fresh soapy water. Do not operate your NX60A6511SS if any leaks are present.
Step 10: Test Ignition and Adjust Flame Heights
Once you’ve confirmed there are no leaks, you can test the ignition on your NX60A6511SS. Turn on one surface burner and observe the flame. LP flames will look different from natural gas flames—they’ll be more compact, burn hotter, and may appear slightly more blue.
On the burner control knob, you should notice small adjustment screws (usually hidden behind or beneath the knob on your NX60A6511SS). These control the minimum flame height when the burner is at its lowest setting. You may need to adjust these screws for fine-tuning the flame.
The minimum flame should be steady and blue, with just a hint of yellow at the tip. If the flame is too high at the minimum setting, use a small flathead screwdriver to turn the adjustment screw counterclockwise (usually) about 1/4 turn. Test the burner again and repeat as necessary.
Test all four surface burners, the oven burner, and the broiler burner on your NX60A6511SS, adjusting flame heights as needed. Each burner may require different adjustments.
Step 11: Install the LP Operation Label
Your LP conversion kit comes with a label or decal indicating that the range now operates on LP gas. This label is crucial for safety and future reference. Install it in the location specified in your kit instructions—typically on the back of the range or inside the oven cavity door.
The label alerts future technicians, movers, or owners that this NX60A6511SS has been converted to LP operation. Don’t ever remove or obscure this label.
Step 12: Final Inspection and Documentation
After running your range for about 10 minutes, turn off all burners and carefully smell around the range. You should not detect any gas odor. If you do, turn off the gas immediately and investigate the source using your leak detection solution.
Once you’re satisfied with your conversion, write down the date of conversion and initial the LP operation label on your NX60A6511SS. Keep your conversion kit box and any documentation for future reference.
Flame Characteristic Differences: What to Expect After LP Conversion
After converting your NX60A6511SS to LP operation, you can expect the following differences compared to natural gas:
- Flames will be more compact and burn hotter, reaching higher temperatures at the same burner setting.
- Cooking times may decrease slightly—so adjust recipes and cooking times accordingly.
- The flame color will be predominantly blue with minimal yellow (yellow tips indicate complete combustion, not incomplete burning).
- Minimum flame settings may seem higher than you’re used to; this is normal for LP operation.
- The range may be slightly louder during ignition; this is normal.
Troubleshooting Common LP Conversion Issues on the NX60A6511SS
Flame won’t ignite on one or more burners: This issue is often due to debris in the orifice opening or incomplete connection of burner components. Remove the burner head, check the orifice opening with a flashlight, and ensure it isn’t blocked. Also, make sure the burner head is fully seated.
Flame is excessively high even at minimum setting: Your orifice may be too large (wrong part installed) or the adjustment screw may need further counterclockwise rotation. If you used a non-Samsung orifice kit, double-check that each part matches the specification for your model before proceeding.
Recommended Parts & Tools
Dryer Vent Conversion Kit LP Adapter
This LP conversion adapter is essential for properly converting your Samsung gas range from natural gas to propane operation. The kit includes all necessary fittings and regulators required for safe and correct installation on the NX60A6511SS model.
WORKPRO 2-Piece Adjustable Wrench Set
You’ll need a quality adjustable wrench to disconnect and reconnect the gas line fittings during the LP conversion process. This tool ensures you can safely tighten connections to the proper specifications without damaging the brass fittings.
Gas Leak Detection Spray (16 oz)
After completing your LP conversion installation, this non-toxic leak detection spray is critical for verifying that all connections are secure and there are no gas leaks. Simply apply it to all connection points—bubbles will immediately indicate any leaks that need to be addressed.
Gas Leak Detection Spray — Your Safety Check Before Firing Up the Converted Range
After you’ve completed the LP conversion on your NX60A6511SS, testing for gas leaks isn’t optional—it’s the step that keeps your kitchen safe. This is where a reliable leak detection spray becomes essential, catching any connection you might have missed or any valve that didn’t seal properly on the first try.
What works
- Catches pinhole leaks and loose fittings you’d never spot visually—especially around the orifice plugs and regulator connections where cross-threading can happen.
- Fast bubble formation means you get immediate feedback instead of wondering if your conversion held pressure, which saves the anxiety of testing your work blind.
- Works on all gas connections (brass fittings, aluminum, stainless steel valve bodies) without damage or leaving residue that requires cleanup afterward.
What doesn’t
- Won’t detect leaks smaller than what produces visible bubbles—extremely minor weeps at thread connections might not show, though those are rare with hand-tight brass fittings.
- Requires the gas supply to be pressurized to work, so you need LP actually flowing before you can test (unlike a pressure gauge that tests static connections).
The first time I converted one of these ranges, I skipped the leak test because I’d torqued everything carefully—then smelled gas the next morning at a fitting I’d thought was tight. That 30 seconds of spray application would’ve saved me a nervous hour tracking down why my kitchen smelled like rotten eggs. Grab a Gas Leak Detection Spray (16 oz) and test every connection before you consider the job done.
About This Article

Written by Dave Holt. Dave Holt has been taking apart and fixing household appliances since he was a teenager who couldn't leave a broken one alone. Eighteen years later, after fixing things for neighbors, friends, and anyone who'd let him, he's seen almost every failure mode there is. When he writes a repair guide here, it's based on the actual job, not a manufacturer overview. More about this site.
Scope and limits. Dave is a self-taught repairer, not a certified appliance technician. Unplug before you open anything, and leave sealed refrigeration systems, gas connections, and hardwired circuits to a qualified technician.



