Jenn-Air Wall Oven Sabbath Mode and F3 Error Code Troubleshooting Guide
Jenn-Air wall ovens are premium appliances, but they’re not immune to technical issues. Two of the most common problems homeowners encounter are Sabbath mode getting stuck and the F3 error code appearing on the display. This guide walks you through understanding both issues, diagnosing root causes, and performing the repairs yourself with confidence and safety.
⚠️ Safety Warning
Wall ovens operate at high temperatures and contain electrical components that can deliver dangerous shocks. Before beginning any repair:
- Disconnect the appliance from electrical power. Switch off the circuit breaker serving the oven, then test the outlet with a non-contact voltage detector to confirm power is off.
- Allow the oven to cool completely if it has been operating. Interior temperatures exceed 500°F and can cause severe burns.
- Never work on the appliance while plugged in or while power is supplied.
- When testing electrical components with a multimeter, ensure the appliance is powered off and unplugged.
- If you’re uncomfortable working with electrical components, contact a licensed appliance repair technician.
What Is Sabbath Mode on Jenn-Air Wall Ovens?
Sabbath mode is a specialized operating mode designed for Jewish Sabbath observance and other religious practices that restrict certain activities on specific days. When Sabbath mode is active on a Jenn-Air wall oven, the following features engage:
- Constant Temperature Maintenance: The oven maintains a set temperature (typically 170–200°F for keeping food warm) without cycling heating elements on and off in the usual manner.
- Delayed Start and Stop Response: Commands to adjust temperature or start/stop the oven take effect after a 30-second delay, preventing instantaneous activation that some religious practices discourage.
- Disabled Audible Alerts: Beeps, chimes, and alert tones are silenced. The display may still show information, but no sound output occurs.
- Display Behavior: Some models show reduced display activity or no display changes when buttons are pressed, though the oven continues operating.
- No Internal Light: The interior oven light does not turn on when the door opens, and the light control is disabled.
Sabbath mode is not a malfunction; it’s an intentional feature. However, when users cannot exit Sabbath mode or when other errors occur simultaneously, troubleshooting becomes necessary.
How to Enter and Exit Sabbath Mode on Jenn-Air Wall Ovens
The method to toggle Sabbath mode varies slightly by model. Below are instructions for the most common Jenn-Air wall oven models.
Jenn-Air JJW2427 (27″ Single Wall Oven)
- Press the Menu button on the control panel.
- Use the arrow buttons to scroll to Sabbath.
- Press Select to enter the Sabbath menu.
- Choose On to activate Sabbath mode or Off to deactivate.
- Press Start to confirm the change.
Jenn-Air JJW3430 (30″ Double Wall Oven)
- Press Menu on either oven’s control panel (upper or lower).
- Scroll with arrow buttons to Settings or More Options.
- Select Sabbath Mode.
- Press On or Off as desired.
- Press Start to confirm.
Jenn-Air JJW3527 (27″ Single Wall Oven, Newer Models)
- Touch the Settings icon (gear symbol) on the touchscreen display.
- Tap Sabbath Mode from the settings menu.
- Toggle the switch to On or Off.
- Press Confirm or Done.
Consult your model’s user manual if the above steps do not work, as newer touchscreen-equipped models may have slightly different navigation. Your manual should specify the exact sequence for your serial number range.
Sabbath Mode Stuck: Oven Won’t Exit Sabbath Mode
If you follow the steps above but Sabbath mode remains active—the display shows “Sabbath” or no display changes occur when you press buttons—a power cycle is the first and often successful remedy.
Power Cycle Procedure
- Locate the circuit breaker serving the wall oven. Most wall ovens are on a dedicated 40–50 amp circuit breaker.
- Switch the breaker to the OFF position. If you’re unsure which breaker controls the oven, look for one labeled “Oven,” “Range,” or “Kitchen,” or test by turning breakers off one at a time until the oven’s control panel goes dark.
- Wait a minimum of 5 minutes. This allows residual electrical charge in the oven’s control board to dissipate completely.
- Switch the breaker back to ON.
- Test the oven. Press a button on the control panel. If the display lights up and responds normally, attempt to exit Sabbath mode using the steps outlined above.
A power cycle resets the control board’s software state. In many cases, this resolves Sabbath mode becoming stuck.
If Power Cycle Does Not Work
If the oven remains in Sabbath mode after a 5-minute power cycle, the issue may involve a control board malfunction or a stuck button contact on the keypad. At this stage, consult your oven’s user manual to determine if a factory reset procedure exists for your specific model. Some Jenn-Air ovens allow a hard reset by holding specific button combinations (often Menu + Start simultaneously for 10 seconds). If neither the power cycle nor the manual’s reset procedure works, the control board likely requires replacement, which is beyond scope for most DIY repairs and should be handled by a certified technician.
F3 Error Code on Jenn-Air Wall Ovens
The F3 error code on Jenn-Air wall ovens indicates a temperature sensor out of range condition. The oven’s control board uses a resistance temperature detector (RTD) probe located inside the oven cavity to monitor internal temperature. When the sensor’s electrical resistance falls outside the expected range—either too high or too low—the control board triggers the F3 fault code and halts oven operation as a safety measure.
Common Causes of F3 Error
- Defective RTD Sensor: The most common cause. The sensor’s internal element degrades, breaks, or short-circuits.
- Loose or Corroded Wire Connector: The two-wire connector linking the sensor to the control board may be loose, partially disconnected, or corroded, preventing proper signal transmission.
- Damaged Wiring Harness: The thin wires running from the sensor connector to the control board may be pinched, burned, or broken.
- Control Board Malfunction: Less commonly, the control board’s temperature sensor input circuit fails, causing it to misinterpret sensor data.
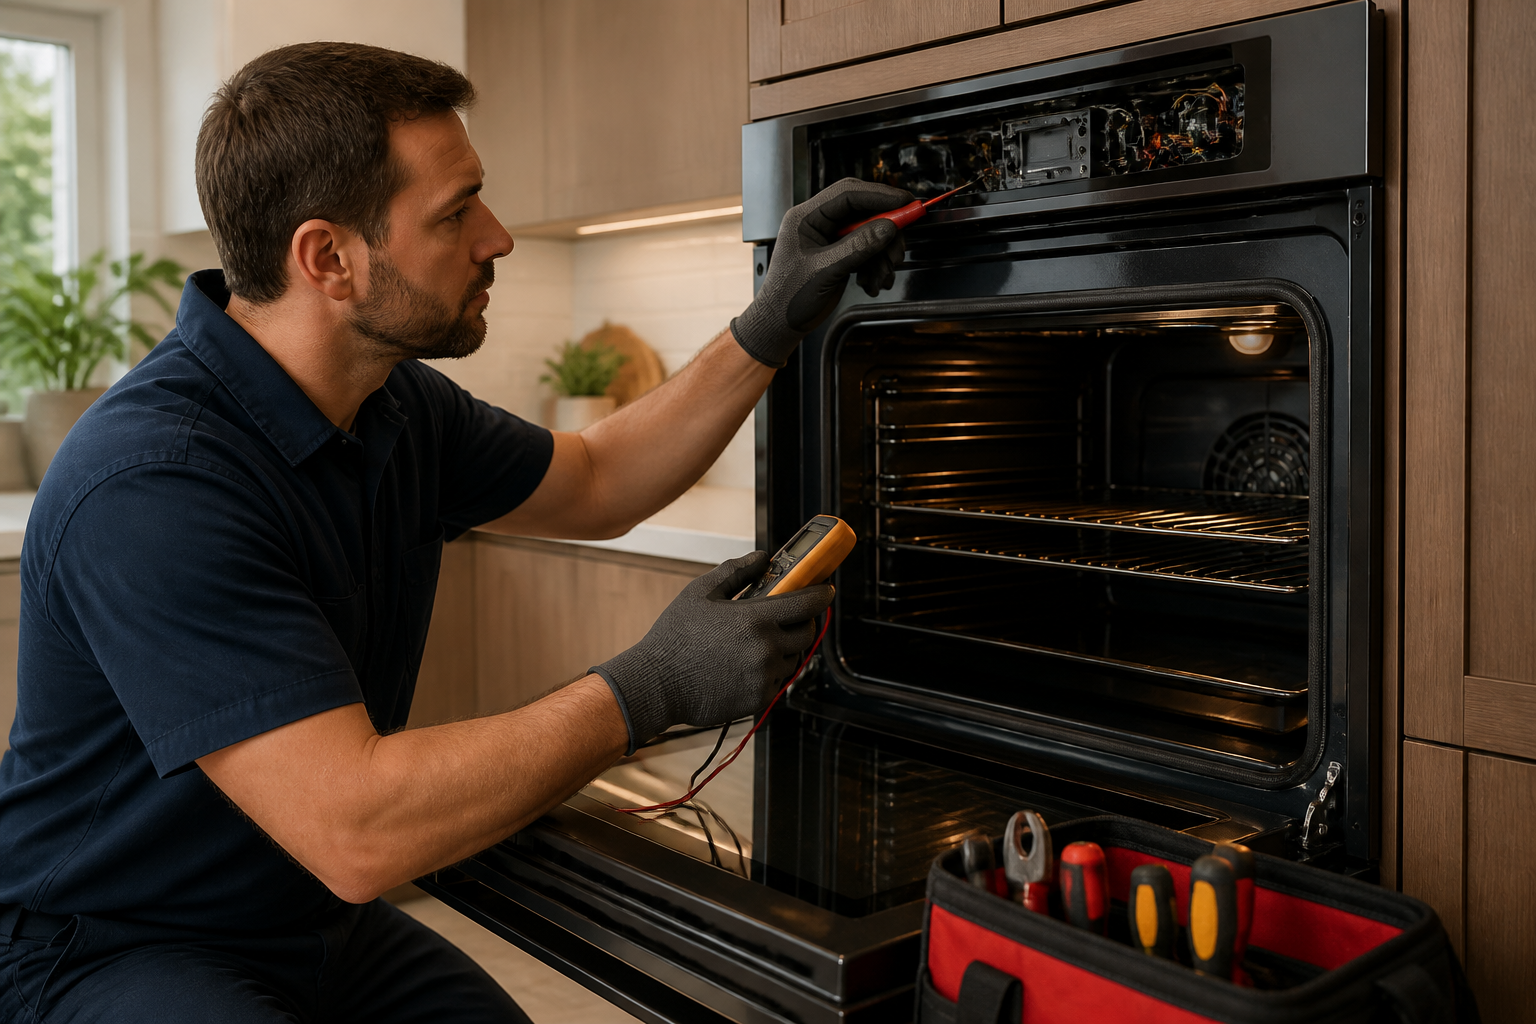
How to Test the Jenn-Air Oven Temperature Sensor
Before replacing the sensor, test it with a multimeter to confirm it’s truly defective. This ensures you don’t replace a functioning sensor if the fault lies elsewhere.
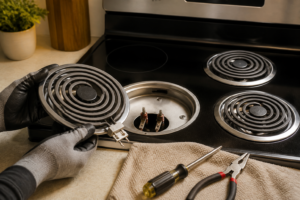
Locating the RTD Sensor
On most Jenn-Air wall ovens, the RTD probe is mounted inside the oven cavity on the right side wall, approximately 4–6 inches up from the oven floor. It appears as a small metal tube (about 1/2 inch in diameter and 3–4 inches long) with a two-wire connector at its base exiting the oven cavity through a small opening. The sensor is held in place by a single setscrew or clip.
Testing Procedure
- Power off and unplug the oven. Confirm no power is present with a non-contact voltage detector.
- Allow the oven to cool to room temperature. Sensor readings are temperature-dependent; you need a baseline at ambient conditions.
- Locate the RTD sensor connector. You may need to remove the oven’s control panel trim or access panel to reach it. Consult your model’s service manual for the exact access point.
- Gently disconnect the two-wire connector from the sensor. Note the wire colors (typically white and red, though colors vary by model).
- Set your multimeter to the Ohms (Ω) setting, typically Ohm × 1 or × 10 scale depending on your meter.
- Touch one multimeter probe to each of the sensor’s connector pins. The order (red to pin 1 or pin 2) doesn’t matter for an ohms reading; resistance is bidirectional.
- Read the ohms value on the display. At room temperature (approximately 70°F), a functioning Jenn-Air RTD sensor should read between 1080 and 1090 ohms. Readings of 0 ohms (shorted sensor) or infinity/no reading (open/broken sensor) indicate a faulty sensor.
- If the ohms reading is within 1080–1090 ohms, the sensor is likely functioning correctly. Reconnect the connector and proceed to check for loose connections or wiring damage. If the reading is outside this range, proceed to sensor replacement.
Important: Jenn-Air uses a platinum RTD sensor with a specific resistance curve. While a reading of ±20 ohms variation may be acceptable, readings significantly higher (e.g., 1200+ ohms) or lower (e.g., 800 ohms) suggest sensor degradation and replacement is warranted.
Checking the Connector and Wiring
If the sensor tests within normal resistance range, inspect the connector and wiring:
- Visual Inspection: Look for corrosion (green or white oxidation), burning, or pinched wires.
- Connector Seating: Reconnect the sensor, then gently wiggle the connector to ensure it’s fully seated. If the connector feels loose or can be easily pulled free, it may be worn and require replacement.
- Wire Continuity: With the sensor still disconnected and the multimeter set to continuity mode (often marked with a sound symbol), touch one multimeter probe to each of the two wires at the connector. You should hear a beep, indicating continuity. No beep suggests a broken wire.
If the connector is corroded or damaged, attempt to clean it with a dry brush or cotton swab. If the connector is mechanically loose, it may need to be re-crimped or the sensor assembly replaced.
Jenn-Air Oven Temperature Sensor Replacement Procedure
If testing confirms the sensor is defective (resistance outside 1080–1090 ohms or infinity reading), replacement is necessary. The RTD probe assembly is a relatively affordable part (typically $40–$80) and replacement requires no soldering or special tools.
Parts and Tools Needed
- Replacement RTD Sensor Assembly (specific to your model; see the Frequently Asked Questions section for part number guidance)
- Multimeter (for pre-replacement testing)
- Small Phillips or flathead screwdriver (for removing the setscrew or clip holding the sensor)
- Needle-nose pliers (optional, for carefully removing the connector)
Step-by-Step Replacement
- Power off and unplug the oven. Confirm with a non-contact voltage detector that power is absent.
- Allow the oven to cool completely. Do not attempt this repair while the oven is warm.
- Locate and access the RTD sensor. On most models, you can reach the sensor from inside the oven cavity. Depending on your model, you may need to remove a trim panel or access cover. Some ovens have sensors accessible from the front after removing interior racks.
- Note the sensor’s position and orientation. The sensor tube should be pointing into the oven cavity, and the connector should be at the rear or side. Taking a photo with your smartphone is helpful for reference during reassembly.
- Locate the mounting setscrew or clip. The sensor is typically held in place by a single small setscrew (M4 or similar) or a wire clip. Use the appropriate screwdriver to loosen and remove the setscrew, or carefully open the clip to free the sensor.
- Gently pull the sensor out of its mounting hole. The tube should slide out smoothly. Do not force it; if it’s stuck, check that the setscrew or clip is fully removed.
- Disconnect the two-wire connector from the old sensor. The connector usually pulls straight off with a gentle, steady pull. If it’s very tight, use needle-nose pliers to stabilize the connector body while pulling the wires free.
- Connect the two-wire connector to the new RTD sensor. Ensure the wires are fully inserted into the connector pins and that the connector is fully seated. Pull gently on the wires to verify they do not slide out.
- Insert the new sensor into the mounting hole, orienting it the same way as the old sensor (tube inward, connector outward or to the side).
- Secure the sensor with the setscrew or clip. Tighten the setscrew snugly—do not over-tighten, as this can crack the sensor ceramic body. If using a clip, ensure it firmly holds the sensor in place.
- Visually inspect the installation. The sensor should be fully seated, the connector should be secure, and no wires should be pinched between the sensor and oven walls.
- Restore power by switching the circuit breaker back on. Wait a few seconds for the oven’s control board to boot up.
- Test the oven. Preheat it to 350°F and observe whether the temperature rises normally and the F3 error code no longer appears. If the F3 error persists after sensor replacement, proceed to the control board diagnosis section below.
Post-Replacement Testing
After installing the new sensor and restoring power, run a full preheat cycle. Set the oven to 350°F and allow it to heat for at least 10 minutes. The oven should reach 350°F without displaying the F3 error. Check the displayed temperature on the control panel; it should match a standalone oven thermometer placed inside the cavity (within ±25°F is normal for non-calibrated displays).
If the oven reaches temperature without error, the repair is complete. If the F3 error reappears immediately or during preheating, the control board may be at fault (see below).
Understanding Jenn-Air Oven Error Codes: F3 vs. F2 vs. F9
Jenn-Air wall ovens use a standardized error code system to help users and technicians identify faults. Understanding the distinction between common codes can narrow down troubleshooting:
- F3 Error – Temperature Sensor Out of Range: The RTD probe’s resistance is outside the normal operating window (typically below 500 ohms or above 2000 ohms, or an open circuit). This is the most common error and usually indicates a faulty sensor or loose connection.
- F2 Error – Shorted Temperature Sensor: The RTD sensor is shorted, reading a resistance of nearly 0 ohms or showing as a short circuit. This typically requires sensor replacement but may occasionally be caused by a connector pin short-circuited against metal.
- F9 Error – Control Board Fault or Communication Error: The control board is not properly communicating with one of its daughter boards (e.g., the display board or heating element relay board). This usually requires control board replacement.
If you see F2 instead of F3, the sensor is shorted rather than open or out of range, but the remedy is the same: replace the sensor. If F9 appears after sensor replacement, the control board is likely faulty and requires professional replacement.
Control Board Diagnosis and Replacement (Backup After Sensor Replacement)
If you have successfully replaced the RTD sensor, confirmed the new sensor reads within 1080–1090 ohms, and the F3 error persists, the control board’s sensor input circuit may be faulty. This is a rare scenario but possible.
When to Suspect Control Board Failure
- A new RTD sensor reads correctly with a multimeter, but the oven still displays F3.
- The F3 code appears intermittently (not continuously), suggesting a flaky circuit rather than a dead sensor.
- The oven displays F9 or other control board error codes in addition to or instead
Recommended Parts & Tools
Jenn-Air Wall Oven Temperature Sensor (RTD Probe)
The F3 error code on Jenn-Air wall ovens typically indicates a temperature sensor failure, which prevents the oven from heating properly and triggers Sabbath Mode issues. This OEM-compatible temperature sensor replacement is essential for restoring accurate temperature readings and clearing the fault code. Check current pricing on Amazon.
IFIXIT Pro Tech Toolkit – 112 Piece Set
Accessing the temperature sensor and control board components on a Jenn-Air wall oven requires precision screwdrivers, pliers, and panel removal tools. This comprehensive toolkit includes all the specialized tools needed to safely disassemble the oven cavity and replace internal parts without damage. Check current pricing on Amazon.
Thermal Grease Compound for Oven Sensors
When reinstalling the temperature sensor probe, thermal grease ensures proper heat transfer contact between the sensor tip and the oven cavity for accurate readings. This food-safe grease is specifically formulated for high-temperature appliance use and helps prevent future F3 error codes caused by sensor contact issues. Check current pricing on Amazon.
The Temperature Sensor That’s Usually Behind the F3 Error on Jenn-Air Wall Ovens
The F3 error code on a Jenn-Air wall oven almost always points to a faulty RTD (resistance temperature detector) probe, which measures oven temperature and reports back to the control board. If you’re seeing F3 repeatedly or the oven won’t hold temperature, this sensor is your first replacement candidate.
What works
- Drops right into the existing sensor pocket with no adapter required—the connector and probe diameter are OEM-matched for Jenn-Air models.
- Clears the F3 error immediately on most units once installed and the control board resets, avoiding the cost of a service call or control board replacement.
- Restores accurate temperature regulation, so the oven stops overshooting or undershooting your set temperature—a dead giveaway that the old probe was reading incorrectly.
What doesn’t
- Won’t fix F3 errors caused by a broken control board or wiring harness—if the sensor is visibly intact and seated properly, the board itself may be the culprit.
- Requires removing the interior oven cover and sometimes partial disassembly of the side wall to access the probe pocket, which can feel tight on some Jenn-Air models depending on your comfort level with confined spaces.
I’ve ordered the wrong sensor type first—confusing RTD probes with thermocouples—and wasted a week before confirming Jenn-Air wall ovens use RTD sensors exclusively. Double-check your model number against the compatibility list before ordering, but once you have the right part, Jenn-Air Wall Oven Temperature Sensor (RTD Probe) is the fix that actually sticks.
This post contains affiliate links. As an Amazon Associate, I earn from qualifying purchases at no extra cost to you.