Complete Guide to Repairing the Maytag MFI2570FEZ Ice Maker Solenoid
Today I’m digging into a common issue with the Maytag MFI2570FEZ refrigerator: the ice maker solenoid. When this component fails, your ice maker stops producing ice even though the mechanical cycles carry on as normal — which is exactly what makes it confusing to diagnose. In this guide I’ll walk you through identifying a bad solenoid, testing it, and replacing the entire water inlet valve assembly on your MFI2570FEZ.
Understanding the Ice Maker Solenoid on the MFI2570FEZ
What the Solenoid Does
The ice maker solenoid is an electromagnetic coil embedded inside the water inlet valve. Each time the ice maker goes through its cycle, the solenoid receives an electrical signal from the control module. This signal energizes the coil, generating a magnetic field that pulls open an internal plunger. This action unseats a valve ball, allowing pressurized water from your home’s supply line to flow into the ice maker mold. If the solenoid isn’t functioning properly, water never enters the mold, and you end up with no ice.
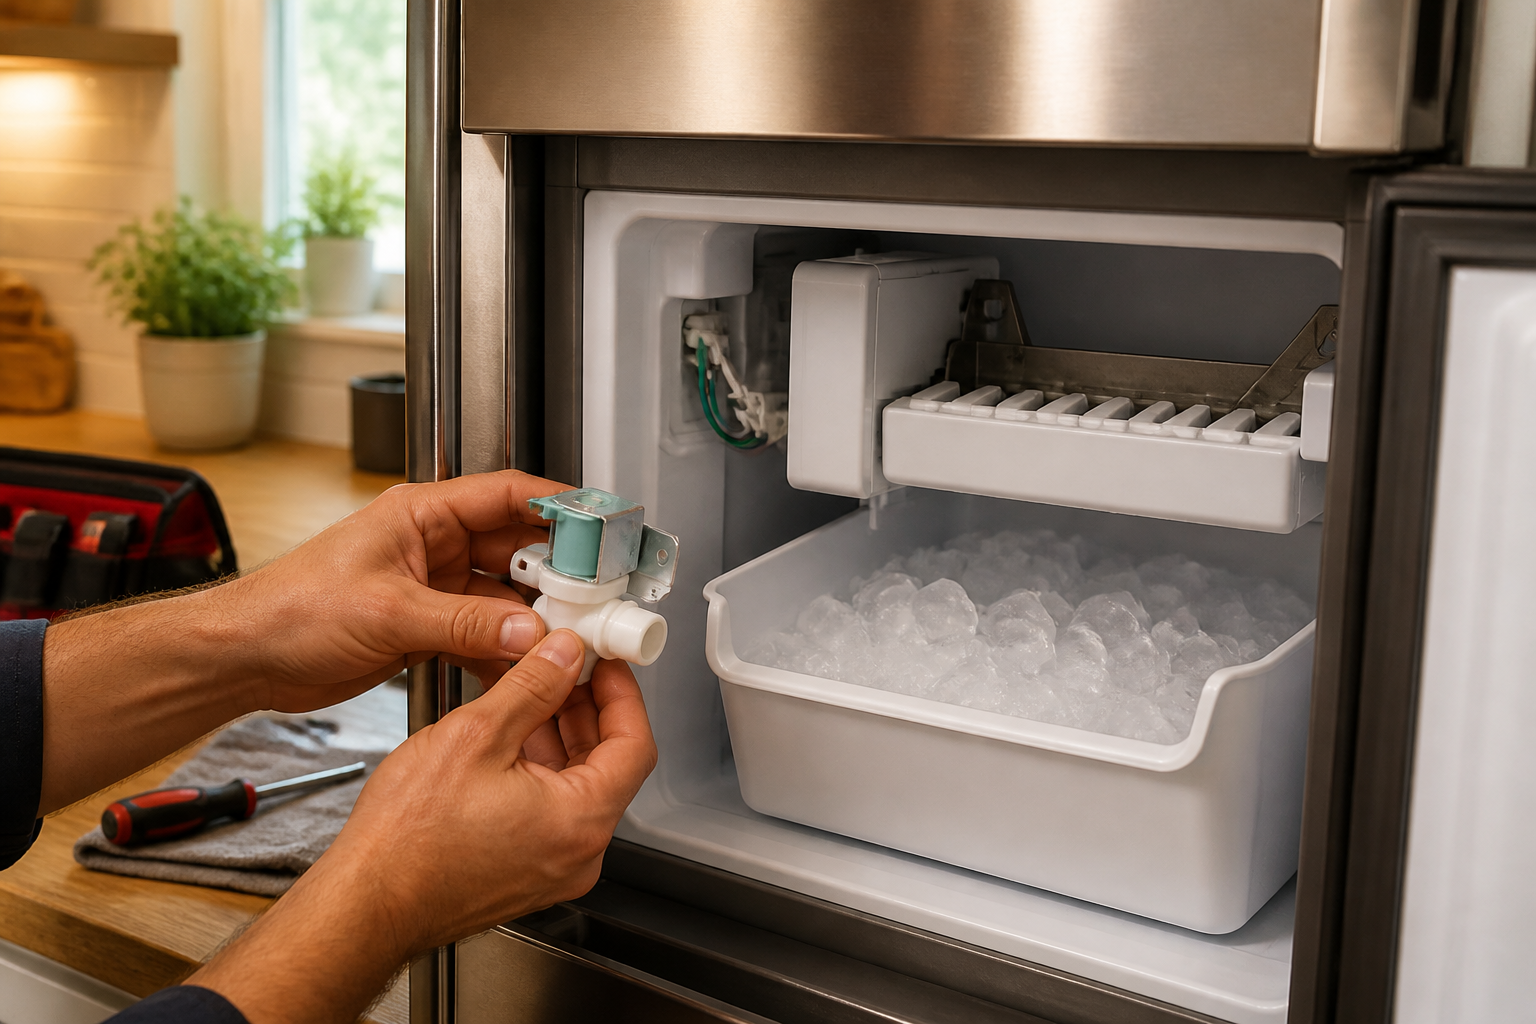
On the MFI2570FEZ, you can’t replace the solenoid independently from the water inlet valve assembly. You’ll need to swap out the whole valve unit, which includes the solenoid coil, valve body, and inlet connection ports. This valve operates as a normally-closed design, meaning it requires electrical power to open—this feature prevents continuous water flow if the power goes out.
How the Solenoid Integrates with Your MFI2570FEZ System
The MFI2570FEZ ice maker system operates through a precise sequence: the ice maker motor rotates a cam that activates a fill valve switch. This switch sends 120 volts AC to the solenoid coil via a two-wire harness. The solenoid gets energized for about 6-8 seconds, allowing water to fill the ice tray. Once the fill time is up, the control module de-energizes the solenoid, the valve closes, and the freezing cycle kicks in. This cycle repeats every 6-8 hours until ice cubes are ejected, and then it all starts over again.
Symptoms of a Failed Solenoid in the MFI2570FEZ
Primary Failure Indicators
- The ice maker cycles through its mechanical rotation, but the ice tray remains completely empty.
- You hear a clicking or buzzing sound from the water inlet valve during the fill cycle, but no water enters the ice maker.
- Water leaks from the valve connection point or along the inlet water line.
- The ice maker starts working intermittently and then stops producing ice altogether.
- No water flow when you manually test the fill valve.
The most obvious sign of a failed solenoid on the MFI2570FEZ is that clicking sound coupled with no water flow. You’ll hear the solenoid trying to energize, but the valve doesn’t open because the internal plunger is stuck or the coil has lost its electromagnetic strength.
Distinguishing Solenoid Failure from Other Issues
Before concluding that the solenoid is the issue, make sure water is actually reaching the water inlet valve. Low water pressure, kinked inlet lines, or frozen supply lines can stop water flow, even if the solenoid is still functional. The MFI2570FEZ ice maker needs a minimum of 20 PSI of water pressure to operate. If your home’s water pressure is below this, the valve won’t open properly, even if the solenoid is energized.
Also, check that the ice maker is enabled in your refrigerator’s settings and that the freezer temperature is set to 0°F or below. If the freezer is warmer than 15°F, the ice maker control module might disable the fill cycle for safety reasons.
Locating the Water Inlet Valve on the MFI2570FEZ
Access and Physical Location
The water inlet valve assembly on the MFI2570FEZ is tucked away at the rear bottom panel of the refrigerator, usually 6-10 inches from the floor and positioned toward the center-rear of the unit. To reach it, you’ll need to pull the refrigerator away from the wall and remove the rear base cover panel, typically secured by 3-4 Phillips head screws along the bottom edge.
Once you’ve removed the rear panel, search for a metal box-shaped component about 2 inches wide by 3 inches tall. This is your water inlet valve. You’ll see two water hose connections: a larger inlet hose that comes from the water supply line and a smaller outlet hose that leads to the ice maker or water dispenser. A two-wire electrical connector plugs into the top or side of the valve body.
Safety Considerations Before Access
Before you dive into the water inlet valve area on the MFI2570FEZ, make sure the refrigerator is unplugged from the electrical outlet and that the water supply shut-off valve is closed. This valve is usually located under your kitchen sink or in the basement/crawlspace where the water line enters your home. Closing this valve will help prevent water from spraying everywhere when you disconnect the inlet hose.
⚠️ Safety Warning
The MFI2570FEZ operates on 120 volts AC to power the solenoid coil. If you do any electrical testing with the refrigerator plugged in, you risk electrical shock. Always unplug the refrigerator before disconnecting the solenoid wires. Water and electricity don’t mix, and every test in this guide should be performed with the refrigerator unplugged and the water supply shut off. Do not try to apply voltage to the solenoid coil by hand, and avoid improvising test leads—doing so at the bottom rear of the refrigerator, surrounded by water lines, could result in serious injury.
Testing the Solenoid Coil with a Multimeter
Resistance Testing (Basic Diagnostic)
This test helps determine if the solenoid coil is intact or if it has an open circuit (broken). For this, you’ll need a digital multimeter set to the resistance (ohms) function. Typically, a solenoid coil in the MFI2570FEZ water inlet valve measures between 200 and 500 ohms at room temperature, with some reading as high as 600 ohms, depending on the specific winding configuration.
- Unplug the MFI2570FEZ from the electrical outlet completely.
- Remove the rear base cover panel to expose the water inlet valve.
- Locate the two-wire electrical connector plugged into the solenoid. Gently disconnect this connector by pressing the release tab or clip.
- Set your multimeter to the resistance (Ω) setting, usually using the 200 ohm or 2000 ohm scale.
- Touch one multimeter probe to each of the two connector pins on the solenoid coil terminals.
- Read the resistance value on your multimeter display.
Interpreting Your Results: If your reading falls between 200-500 ohms, the solenoid coil is likely functional, and the issue might be due to an internal sticking valve or an electrical supply problem. If you get a reading of 0 ohms or very close to it, the coil wire is shorted. If your reading shows “OL” (open line) or infinity, the coil wire is completely broken or disconnected internally, confirming that the solenoid is defective.
A reading outside the normal range indicates a failed solenoid that needs replacement. The coil is sealed inside the valve body and can’t be accessed or rewound. So, you’ll need to replace the entire water inlet valve assembly.
Recording Your Baseline Reading
Before you disconnect the valve, jot down the solenoid resistance value. This gives you a baseline for future troubleshooting if needed. Keep this info handy along with your refrigerator’s documentation or in a service log.
When the Resistance Test Isn’t Conclusive
Rely on the De-Energized Tests You Have Already Done
You might come across advice suggesting you apply 120 volts directly to the solenoid coil with a makeshift jumper to hear it click. Don’t go there. Creating a mains-voltage test lead from an extension cord and trying to touch it to a component while also feeling for vibration isn’t safe. The checks we’ve covered in this guide should be your go-to for the MFI2570FEZ: the coil resistance test, inspecting water pressure and inlet lines, and confirming the ice maker is switched on with the freezer holding at 0°F or below.
The One Thing Resistance Testing Cannot Rule Out
The resistance test has a single blind spot worth noting. A coil can measure within the normal range of 200-500 ohms and still produce a weak magnetic field that fails to pull the plunger open. Mineral scale or corrosion might also keep that plunger stuck in the closed position, even when the coil itself reads fine. In both scenarios, your multimeter will tell you the solenoid is healthy, but no water will reach the ice mold.
The practical solution to that blind spot isn’t to apply mains voltage to the coil; it’s to swap in a known-good part. If your coil reads within the range, the supply pressure exceeds 20 PSI, and the inlet line is clear and unfrozen, but the ice maker still doesn’t fill, go ahead and install a new water inlet valve. Remember that with the MFI2570FEZ, the solenoid is sealed inside the valve body and isn’t serviceable on its own. Therefore, whether it’s a weak coil, a stuck plunger, or an open coil, the fix is to replace the valve assembly. If you want to verify the diagnosis before buying the part, a certified appliance technician can bench-test the valve under safe conditions.
Water Inlet Valve Part Numbers for the MFI2570FEZ
Identifying the Correct Replacement Valve
Before you purchase a replacement valve for your MFI2570FEZ, confirm the exact part number. The primary OEM (Original Equipment Manufacturer) water inlet valve for this model is part number W10498976. This is a two-outlet valve designed to supply water to both the ice maker and the water dispenser on your model. However, Maytag has released several updated versions of this valve, so it’s crucial to verify against your model number before ordering.
Alternative part numbers that may be compatible with the MFI2570FEZ include W10411576 and W10782619, depending on the manufacturing year of your refrigerator. Always check the part number on Maytag’s official parts website or consult a certified Maytag dealer to ensure compatibility before purchasing.
Where to Purchase the Valve
Genuine OEM valves for the MFI2570FEZ can be found at Maytag authorized parts distributors, major appliance parts retailers, and online suppliers who specialize in refrigerator components. When ordering, be sure to provide your full model number (MFI2570FEZ) and the serial number from the refrigerator’s rating plate. This guarantees you receive the correct valve with the appropriate hose connection sizes and solenoid specifications.
Step-by-Step Water Inlet Valve Replacement for the MFI2570FEZ
Tools and Materials You’ll Need
- Adjustable wrench (for hose clamp removal)
- Needle-nose pliers (for wire connector release)
- New water inlet valve (W10498976 or compatible for MFI2570FEZ)
- Small bowl or bucket to catch water spillage
- Two clean rags
- Flashlight
- Replacement hose clamps (optional, in case existing clamps are damaged)
Detailed Replacement Procedure
- Prepare Your MFI2570FEZ: Unplug the refrigerator from the electrical outlet. Locate the water supply shut-off valve in your home (usually found under the kitchen sink or in the basement) and turn it clockwise to close it. Turn on your kitchen faucet to depressurize the water line.
- Access the Valve: Pull the MFI2570FEZ away from the wall to create enough space for working behind it. Use a flashlight to locate the rear base cover panel. Remove the 3-4 Phillips head screws securing the panel and set it aside.
- Position Your Bucket: Place a small bucket or bowl directly under the water inlet valve to catch any water left in the supply line or valve body. Keep a rag handy to wipe up any spills.
- Disconnect the Water Inlet Hose: Find the large inlet hose connected to the water inlet valve. This hose carries pressurized water from your home’s supply line. Using an adjustable wrench, loosen the hose clamp by turning the screw counterclockwise about 2-3 full turns. Don’t fully remove the clamp just yet. Gently wiggle the hose to break the seal, then slide it off the valve inlet port. Water may drip, so be ready with your bucket. Move the hose clamp further down the hose and set it aside.
- Disconnect the Ice Maker Supply Hose: Locate the smaller outlet hose that exits the water inlet valve toward the ice maker. Loosen this hose clamp in the same way, wiggle the hose gently, and disconnect it from the valve outlet port. Again, have your bucket ready for any water spillage. Set this hose clamp aside as well.
- Disconnect the Electrical Connector: Find the two-wire electrical connector plugged into the solenoid on the water inlet valve. Press the release tab or clip on the connector (this is typically a small plastic tab on the side) and gently pull the connector straight out. Avoid twisting or pulling at an angle to prevent damaging the connector pins.
- Remove the Old Valve: The water inlet valve on the MFI2570FEZ is often secured by one or two mounting brackets or clips. Identify these mounting points and remove any screws or clips holding the valve in place. In most cases, the valve will lift out once the hose clamps and electrical connectors are disconnected. If the valve is stuck, don’t force it—check for any additional screws you may have missed.
- Install the New Valve: Position the new water inlet valve (W10498976 or compatible) in the same spot where the old valve was mounted. If using mounting brackets, align the valve correctly and reinstall any screws or clips. Ensure the valve is oriented the same way as the original—check that the inlet and outlet ports are facing the correct directions.
- Reconnect the Electrical Connector: Plug the two-wire electrical connector into the new solenoid coil. Push firmly until you hear a distinct click, which indicates the connector is fully seated. Gently tug on the connector to make sure it’s secure.
- Reconnect the Ice Maker Supply Hose: Position the smaller outlet hose onto the valve’s outlet port. Slide the hose clamp up and tighten it by turning the screw clockwise until snug. It should be secure, but avoid over-tightening as that can crack the hose.
- Reconnect the Water Inlet Hose: Position the large inlet hose onto the valve’s inlet port. Slide the hose clamp up and tighten it in the same manner. Ensure this connection is secure since it carries pressurized water.
- Restore Water Supply: Go back to your home’s water shut-off valve and turn it counterclockwise to open it. Turn on your kitchen faucet to check for water flow. You should see water running from the faucet within a few seconds.
- Inspect for Leaks: Return to your MFI2570FEZ and check the water inlet valve area for any leaks. Look carefully at both hose connection points and the valve body itself. If you notice any dripping, turn off the water supply, disconnect the leaking hose, and re-tighten the hose clamp. Restore the water supply and check again.
- Reassemble the Refrigerator: Close and secure any panels you removed. Push the MFI2570FEZ back into its normal position against the wall, ensuring it’s level and stable.
- Plug In and Test: Plug the MFI2570FEZ back into the electrical outlet. The ice maker might take 10-15 minutes to enter a fill cycle. Listen for the solenoid to click during this cycle, and watch for water flowing into the ice maker mold.
After Replacement: Flushing and Testing the MFI2570FEZ Ice Maker System
Why Flushing Is Important
After replacing the water inlet valve on your MFI2570FEZ, it’s a good practice to flush the water line to clear out any air bubbles and debris that may have entered during disconnection. Air in the line can hinder proper water flow to the ice maker, leading to incomplete fills or no fill at all. Flushing ensures clean water reaches the ice maker.
Flushing Procedure
- Access the rear of the MFI2570FEZ and locate the small outlet hose connected to the new water inlet valve (the hose leading to the ice maker).
Recommended Parts & Tools
Ice Maker Solenoid Valve for Maytag Refrigerators
This is the primary replacement part you’ll need for this repair—the solenoid that controls water flow to the ice maker. A faulty solenoid is the most common cause of “no ice” problems in Maytag MFI2570FEZ models.
Craftsman 11-Piece Screwdriver Set
You’ll need various screwdrivers to remove panels and access the ice maker assembly on your Maytag refrigerator. This comprehensive set includes both Phillips and flathead options in multiple sizes to handle any fasteners you’ll encounter.
Ecos Hypoallergenic All-Purpose Cleaner
After replacing the solenoid, use this safe cleaner to wipe down internal components and remove any mineral deposits or debris that may have accumulated in the water lines. A clean ice maker system ensures optimal performance after your repair.
The Solenoid That Actually Controls Water Flow to Your MFI2570FEZ Ice Maker
If your ice maker cycles but produces nothing, the solenoid valve is the first part to replace—it’s the gatekeeper that tells water whether to flow into the ice maker or stay shut. I’ve pulled plenty of these Maytag units apart, and nine times out of ten when you hear the familiar mechanical whir but get zero ice, this solenoid has failed electrically.
What works
- Direct fit for the MFI2570FEZ without any adapter brackets or modification—connectors line up exactly as they should.
- Comes with the internal plunger assembly intact, so you’re not swapping parts midway through the job if the original plunger is stuck or corroded.
- Reasonable price point compared to ordering from Maytag directly, which for this model runs nearly double once you factor in shipping.
What doesn’t
- Installation requires shutting off water to the fridge and draining the lines—if you’re not comfortable doing that, this job gets more involved than expected.
- The solenoid itself is a symptom fix, not a diagnostic; if your water inlet valve is actually blocked or your fill tube is kinked, replacing this won’t solve your problem.
I’ve had homeowners order this solenoid first only to discover their real issue was a frozen water line in the door—so test the solenoid with a multimeter before you commit to the replacement, because swapping the wrong part wastes time. When you’re confident the solenoid is the culprit, grab the Ice Maker Solenoid Valve for Maytag Refrigerators and you’ll have your ice maker back in business within an hour.
About This Article

Written by Dave Holt. Dave Holt has been taking apart and fixing household appliances since he was a teenager who couldn't leave a broken one alone. Eighteen years later, after fixing things for neighbors, friends, and anyone who'd let him, he's seen almost every failure mode there is. When he writes a repair guide here, it's based on the actual job, not a manufacturer overview. More about this site.
Scope and limits. Dave is a self-taught repairer, not a certified appliance technician. Unplug before you open anything, and leave sealed refrigeration systems, gas connections, and hardwired circuits to a qualified technician.