Asko Dishwasher F11 Error Code: Complete Troubleshooting and Repair Guide
The F11 error code on Asko dishwashers indicates a critical overflow protection fault. This error means water has accumulated in the base pan of your dishwasher, triggering the float switch safety mechanism. Understanding what triggered this overflow and how to fix it will save you hundreds of dollars in service calls. This guide covers every model in the Asko lineup, including the D5000, D5100, D5400, D5900, and similar series.
What Does F11 Mean on Asko Dishwashers?
The F11 error code indicates an overflow protection fault or water outlet fault. Your Asko dishwasher is equipped with an Aquastop system—a safety feature that detects water accumulation in the base pan and immediately halts operation. When the base pan water level rises above normal, a float switch is triggered, and the machine displays F11 and stops running.
This error can occur for two primary reasons:
- Water is leaking into the base pan from internal components (door seal, spray arm, hoses, or water softener)
- The drain pump is running, but water is not draining properly from the sump (blocked filter, kinked drain hose, or pump failure)
The F11 code is a protective mechanism—it prevents potential water damage to your kitchen floor by stopping the cycle before more water accumulates. Do not ignore this error or attempt to bypass it.
Immediate Steps to Take
Before troubleshooting, you must safely remove the standing water in the base pan:
- Turn off the dishwasher using the power button or by switching off the circuit breaker if necessary
- Do not run another cycle—this will only accumulate more water
- Pull the dishwasher forward carefully to access the front and bottom areas. You may need to disconnect the drain hose at the sink connection point
- Tilt the dishwasher backward (approximately 15-20 degrees) to allow water to drain from the base pan toward the front. Have towels ready to catch water
- Use a wet/dry shop vacuum to extract remaining water from the base pan if tilting doesn’t remove all standing water
- Leave the door open for several hours to allow the interior to dry completely
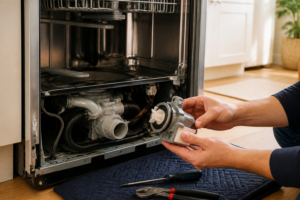
Accessing the Base Pan and Float Switch
To inspect the float switch and confirm water in the base pan, you need to access the dishwasher’s base:
- Remove the front kick panel—this is the decorative plastic or metal trim at the very bottom of the dishwasher front. It typically clips in place or is held by 2-3 screws along the top edge
- Locate the white or gray float switch mounted on the inside of the base pan, typically on the left or center side. It resembles a small mushroom-shaped plastic piece that moves up and down
- Inspect the base pan for standing water, debris, or visible damage to hoses and connections
- Check all visible hose connections at the inlet (hot water supply), drain outlet, and any softener bypass lines
Testing the Base Pan Float Switch
The float switch is a simple mechanical device that triggers when water level rises. You can test it manually to confirm it’s functioning:
- Ensure the dishwasher is powered off and unplugged from the electrical outlet
- Locate the float switch in the base pan (see “Accessing the Base Pan” section above)
- Gently depress the float switch upward with your finger—it should move freely without sticking or grinding
- If the float moves smoothly, remove your finger and let it return to its resting position. This confirms the mechanical switch is not frozen or damaged
- If the float is stuck or doesn’t move, it may have mineral deposits or debris preventing proper operation. Clean around the float with a soft brush and distilled water
- Plug the dishwasher back in and run a power cycle (described in the reset section below) to see if the F11 error clears
If the float switch appears damaged, cracked, or severely corroded, it will need replacement. Contact Asko support for your specific model’s float switch assembly part number.
Common Causes of F11 Error—Water in Base Pan
Door Seal (Gasket) Leaks
The rubber door gasket creates a watertight seal when the door closes. Over time, the gasket hardens, shrinks, or develops tears, allowing water to escape during the wash cycle.
How to inspect:
- Open the dishwasher door and look at the rubber seal running around the perimeter
- Check for visible cracks, tears, hardening, or areas where the gasket is pulled away from the door frame
- Run your finger along the gasket—it should feel pliable and soft, not brittle
- Close the door gently and look for light coming through any gaps
- If you find damage, the gasket must be replaced (typically $80-150 in parts)
Cracked Spray Arm
The upper and lower spray arms rotate during the wash cycle to distribute water across dishes. A crack in either arm allows water to spray into the base pan instead of onto dishes.
How to inspect:
- Remove the lower spray arm by unscrewing or unclipping it from its mounting pin at the base of the tub
- Hold it up to light and visually inspect the plastic for cracks or splits, especially near where it attaches to the center hub
- For the upper spray arm, you may need to remove the upper basket—it’s typically held by clips on both sides
- Look for water spots or mineral deposits on the outside of the arm near cracks, which indicate water escaping during operation
- If cracked, the spray arm must be replaced (typically $50-120)
Loose or Damaged Hose Clamps
The inlet hose (supplies water) and drain hose are secured with metal or plastic clamps. If these loosen, water leaks at the connection point into the base pan.
How to inspect:
- Pull the dishwasher forward to access hoses at the rear
- Locate the inlet hose (typically 3/4″ diameter, connected to the hot water supply valve under the sink)
- Check the clamp securing the hose to the water inlet valve on the dishwasher. Tighten it by hand first, then use a flathead screwdriver to turn the screw clockwise 1/4 turn
- Locate the drain hose (larger diameter, runs to the sink drain or garbage disposal)
- Check the clamp at the dishwasher connection point and tighten if loose
- Inspect both hoses for cracks or splits, especially near the ends where they connect. If damaged, replace the entire hose assembly
Kinked or Blocked Drain Hose
A kinked drain hose prevents water from exiting the machine during the drain cycle. The pump continues running, eventually triggering the float switch as water backs up into the base pan.
How to inspect:
- Pull the dishwasher forward and visually trace the entire length of the drain hose from the dishwasher to the sink drain
- Look for sharp bends or flattened sections where the hose is kinked
- Straighten any kinks gently—do not bend the hose at angles less than 45 degrees
- If the hose is cracked and kinked, it must be replaced
- Check where the drain hose enters the sink drain—remove any debris or buildup that might block water flow
- If your Asko connects to a garbage disposal, ensure the disposal’s drain cap is removed (this cap must be knocked out when installing a new disposal)
Filter and Sump Blockage
Food particles, glass fragments, or mineral buildup can block the drain filter at the bottom of the tub, preventing water from reaching the drain pump.
How to inspect and clean:
- Remove the lower basket from inside the dishwasher
- At the base of the tub, you’ll see a cylindrical or circular drain filter assembly. It typically has a handle or knurled edge that unscrews counterclockwise
- Unscrew and remove the filter carefully
- Rinse it thoroughly under running water, using an old toothbrush to remove buildup
- Inspect the sump area (the recessed area where the filter sits) for debris. Use tweezers to remove any fragments
- Reinstall the filter by screwing it clockwise until snug. Do not overtighten, as this can crack the plastic
Water Softener and F11 Error on Asko Dishwashers
Many Asko dishwasher models, particularly the D5400 and D5900 series, include a built-in water softening system. This system removes minerals from the water before it enters the spray arms, which is essential in hard water areas. However, the water softener can cause F11 errors if not maintained properly.
How the Asko Water Softener Works
The softener uses salt (regenerant) to remove calcium and magnesium ions from incoming water. The salt is stored in a reservoir inside the dishwasher. When the softening resin becomes saturated with minerals, the system triggers a regeneration cycle where water flushes through the salt and resin to restore its effectiveness.
Water Softener Causes of F11
- Salt reservoir empty or very low—the softener cannot function, causing mineral buildup that can affect water drainage or trigger sensor faults
- Salt overflowing—if salt crystals or salt water overflow from the softener, they enter the base pan and trigger the float switch
- Softener bypass line clogged or disconnected—some Asko models have a bypass that diverts water if the softener fails; a blockage can cause back-pressure that forces water into the base pan
Refilling the Salt Reservoir
If your Asko has a built-in water softener, check the salt level regularly:
- Locate the salt reservoir—it’s typically accessed by opening the lower left corner of the interior tub or by removing a small cover on the inside
- Look inside to check the salt level. If you see exposed resin beads (small plastic pellets) or if the salt compartment appears nearly empty, refilling is needed
- Purchase Asko-approved water softener salt (usually available as pellets, not powder or tablet form). Your local hardware store carries compatible salt, or consult your Asko manual for approved brands
- Pour salt into the reservoir until it’s approximately 3/4 full. Do not overfill, as this can cause salt to overflow into the dishwasher tub
- Run a regeneration cycle if your model has a dedicated softener regeneration button, or run a normal wash cycle to activate the softener
- Check for water in the base pan after the cycle completes. If the F11 error was caused by low salt, it should not reappear
Inspecting the Softener Overflow
If you’ve refilled the salt and water is still accumulating in the base pan, the softener may be overflowing:
- Open the salt reservoir and look at the water level inside. It should be about 1/3 full of water
- If water is overflowing from the reservoir into the tub, the softener float (which controls water entry) may be stuck or faulty
- Manually press down on the softener float (a small plastic piece inside the reservoir) to ensure it moves freely
- If the float is stuck or broken, the softener assembly will need to be replaced—contact Asko service for the specific part number for your model
Testing the Drain Pump
If you’ve ruled out water leaks and the base pan has standing water, the drain pump may be running but not expelling water. This indicates either a pump failure or a blockage preventing water flow.
Drain Pump Function Test
- Power off the dishwasher and ensure it’s unplugged
- Plug it back in and select the drain cycle only (if available on your model) or the shortest cycle available
- Listen closely for the drain pump motor running. You should hear a humming or buzzing sound, typically lasting 30-60 seconds during the drain phase
- If you hear the pump running but water remains in the base pan after the cycle, the pump is operational but water is being blocked from exiting
- If you hear no pump sound at all, the pump motor may have failed or the pump connector has come loose
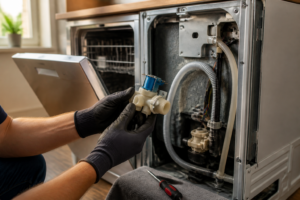
Locating and Inspecting the Drain Pump
The drain pump is located beneath the tub, accessible from the base panel:
- Remove the kick panel at the front bottom of the dishwasher
- Locate the drain pump—it’s a cylindrical component, typically 4-6 inches long, mounted on the lower left or center side of the base. It has two hose connections: one from the sump inlet and one to the drain hose outlet
- Check both hose connections for looseness. Tighten by hand, then use a flathead screwdriver to turn any hose clamps 1/4 turn clockwise
- Verify that water can flow freely through the outlet hose toward the sink drain (see “Kinked or Blocked Drain Hose” section above)
- If the pump connector has come loose, it will be a plastic or rubber connector at the base of the pump motor. Firmly press it back into place
When the Drain Pump Needs Replacement
If the pump runs but no water exits, or if the pump makes a grinding noise and doesn’t run smoothly, the pump motor has likely failed internally. This requires pump replacement, typically a $150-300 part plus labor if you’re not comfortable doing the work yourself. Consult your Asko manual for the specific pump part number for your model.
Resetting the F11 Error After Fixing the Problem
Once you’ve identified and corrected the underlying cause of the F11 error, you must reset the error code. The float switch may need to be “reset” by the control board to clear the fault memory.
Power Cycle Reset Procedure
- Ensure the base pan is completely dry with no standing water present
- Close the dishwasher door securely
- Switch off the power using the circuit breaker that supplies the dishwasher (do not simply turn off using the control panel button)
- Wait 5 minutes with the power switched off. This allows the control board’s memory to clear
- Turn the power back on using the circuit breaker
- Select a short test cycle (rinse cycle if available, or the shortest wash cycle)
- Observe the cycle from start to finish. If the F11 error does not reappear, the problem has been resolved
- If the F11 reappears immediately after the reset, water is still present in the base pan or the float switch is still triggered. Return to the troubleshooting steps above
Alternative Reset: Using the Control Panel
Some Asko models allow reset through the control panel:
- Press and hold the “Start/Cancel” button for 3-5 seconds while the F11 error is displayed
- The display should flash or change, indicating the reset sequence has been initiated
- Wait 30 seconds for the control board to complete its diagnostics
- If the error clears, proceed with a test cycle as described above
Note: Not all Asko models support control panel reset. Consult your owner’s manual for your specific model’s reset procedure.
Asko Dishwasher Models Affected by F11 Error
The F11 error code applies to virtually all Asko dishwasher models, including but not limited to:
Recommended Parts & Tools
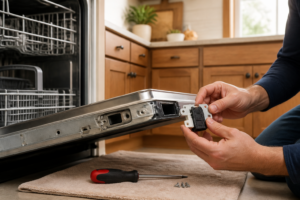
Dishwasher Float Switch Assembly
The float switch is the primary component that triggers the F11 overflow error code when it malfunctions. Replacing this part is often the most direct solution to resolve overflow protection issues in Asko dishwashers. Check current pricing on Amazon.
Dishwasher Drain Pump Assembly
A clogged or failing drain pump can prevent proper water drainage, causing the float switch to trigger an overflow error. This replacement pump ensures water drains efficiently and prevents false F11 error codes. Check current pricing on Amazon.
Appliance Repair Tool Kit with Screwdrivers and Socket Set
You’ll need various screwdrivers and socket tools to access the float switch and drain pump components inside your Asko dishwasher. This comprehensive kit includes all the essential hand tools needed for safe disassembly and reassembly during repairs. Check current pricing on Amazon.
The Float Switch That Actually Stops the F11 Error on Asko Dishwashers
When water pools in the base pan and triggers that F11 code, nine times out of ten it’s a stuck or failed float switch that’s not doing its job. This is the first part I order because it’s the most common culprit and the easiest win if overflow protection isn’t working right.
What works
- Swap-in replacement clips directly into the existing bracket in most Asko models — no rewiring or adapter fussing required.
- The float arm moves freely on this assembly, so it actually rises with water level instead of getting stuck halfway and throwing a false alarm.
- Installing it kills the F11 code immediately if the float was genuinely stuck; you know within one test cycle whether you’ve found your problem.
What doesn’t
- If the real issue is a clogged drain line or pump malfunction, swapping the float won’t help — you’ll still get water pooling, just a different symptom pattern.
- Older Asko models (pre-2010) use slightly different connector terminals, so verify your model year before ordering to avoid a return trip.
I’ve had customers order this first and discover later that their actual problem was a blocked drain pump intake — the float assembly itself was fine, just responding to real water. Always check drain flow before assuming the float switch failed, but when it is the culprit, Dishwasher Float Switch Assembly solves it cleanly.
This post contains affiliate links. As an Amazon Associate, I earn from qualifying purchases at no extra cost to you.