
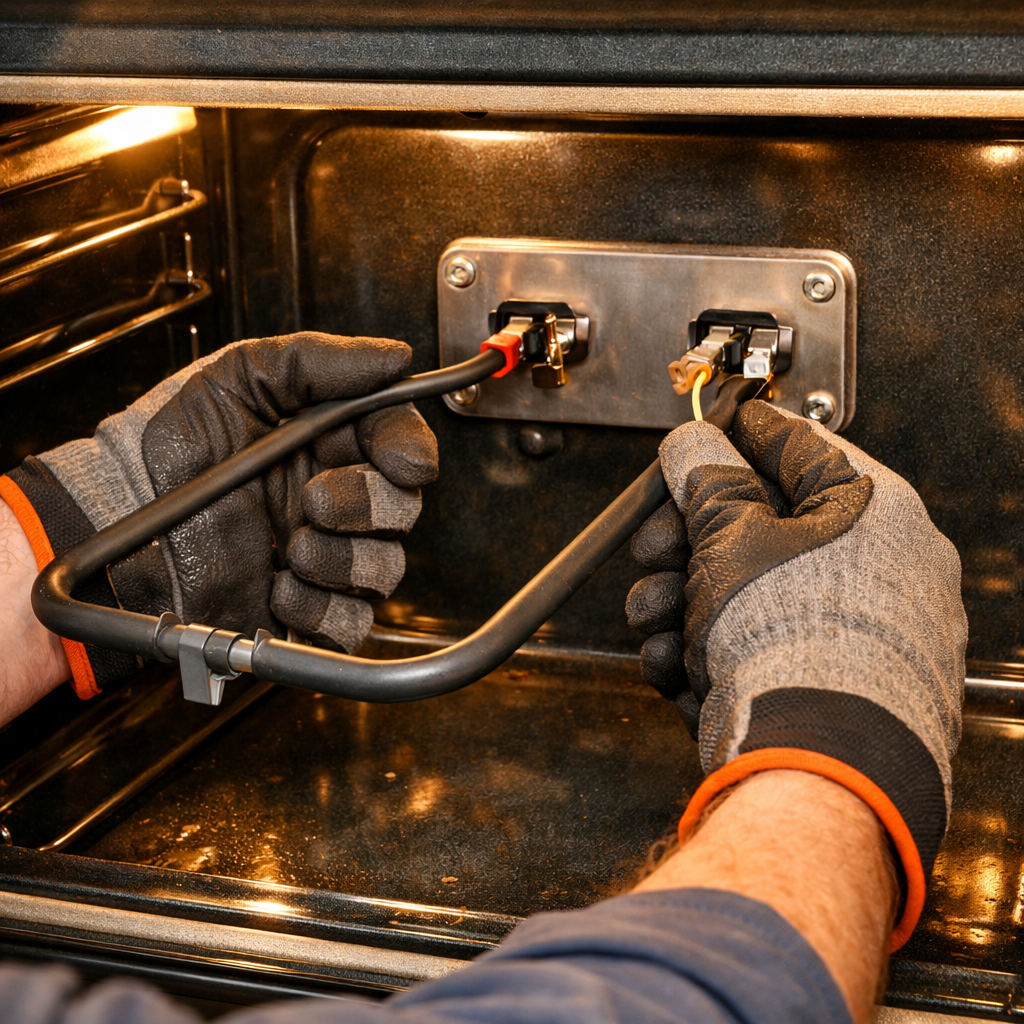
Hidden Bake Element Repair
In this step-by-step guide, I’ll walk you through fixing the hidden bake element on your GE Profile PB960SJSS (Electric Range). With the right tools and parts, you can complete this repair in about 1–2 hours, saving yourself the cost of a service call.
🔨 Pro Tip from Dave
For the PB960SJSS, the hidden bake element is part number WB44T10010. A common mistake I see is DIYers forgetting to remove the oven bottom panel before accessing the element terminals. There’s a secondary bracket near the rear wall that requires a ¼-inch nut driver to release, and skipping this step can crack the ceramic floor panel. Always disconnect power at the breaker for at least 5 minutes before touching any terminals on this model.
Part of our Top 20 Oven Models & Common Repair Issues Guide. Browse all oven repair guides for related models and issues.
Common Symptoms & Causes
If your GE Profile PB960SJSS is having a hidden bake element failure, you might notice one or more of the following symptoms during baking or preheating:
- The oven takes significantly longer than usual to reach the set temperature
- Food is undercooked or unevenly baked, often with the bottom remaining raw
- The oven displays an F2 or F3 error code during or after a bake cycle
- The oven fails to heat at all when set to Bake, while Broil still works normally
These issues typically stem from a burned-out or broken hidden bake element, which deteriorates over time due to repeated heating cycles, moisture exposure, or electrical surges.
Safety First
- Unplug the oven from the power outlet before starting any repair — never work on a live appliance.
- Wear work gloves when handling metal brackets, sheet metal edges, or sharp components.
- Take photos with your phone before disconnecting any wiring harnesses or connectors.
- Work in a well-lit area with enough floor space to lay removed panels flat.
Tools & Parts Needed
Essential Tools
- Phillips #2 screwdriver
- ¼” nut driver
- Multimeter
- Work gloves (heat-rated)
- Flashlight
Replacement Parts
- Hidden bake element
- Oven floor panel
- ¼” hex driver
- Work gloves
Step-by-Step Repair Instructions
Step 1
First, unplug the range from the wall outlet — working on a live 240V circuit can be dangerous. With the power off, remove the oven floor panel by unscrewing the 1–2 Phillips screws at the rear and lifting the panel free. The hidden bake element is located beneath this panel, hence the clean look of the oven interior. Be careful when setting the panel aside to avoid bending it, as a warped panel can rattle or sit unevenly when reinstalled.
Step 2
Once the floor panel is out, look toward the rear of the oven cavity to find the two spade connectors where the element connects to the supply wires. Identifying these terminals now confirms that the element circuit is fully exposed and accessible before you begin testing or removal. Take note of each connector’s position if they differ in size or color — reconnecting them to the correct terminals is crucial for proper operation.
Step 3
Set your multimeter to Rx1 (resistance times 1) and touch the probes to the two spade terminals on the element itself to test for continuity. A working bake element typically reads between 20–60 ohms; if you get an open reading (OL or infinite resistance), it confirms the element has failed and needs replacing. This test eliminates the possibility of a wiring or control board problem before you invest in parts — if the element checks out, the fault lies elsewhere.
Step 4
Grip each spade connector with needle-nose pliers and pull it straight off the terminal with a firm, steady motion — yanking at an angle can damage the connector or break the wire. Next, remove the two ¼” hex mounting screws at the rear of the element and slide the element out of its support guides toward you. Pro tip: take a photo of the element orientation and terminal positions before removal so you have a reference during installation.
Step 5
Insert the new element into the same guides in the same orientation as the old one, ensuring it seats fully so the screws align without forcing. Tighten the two ¼” hex mounting screws snugly but not overtightened — stripping threads in the oven cavity wall is a tough fix. Reconnect each spade connector to its correct terminal and press firmly until it seats; a loose spade connector can arc and lead to premature failure.
Step 6
Place the oven floor panel back in position and reinstall its screws before plugging the range back in — never energize the unit with the cavity floor removed. Plug in the range, set it to Bake at 350°F, and observe the first 10–15 minutes of the heat cycle; the element should heat evenly without flickering, burning smell, or visible hot spots glowing brighter than the rest. If you notice uneven heating or tripped breakers, unplug immediately and double-check your terminal connections and element resistance.
Where to Buy Replacement Parts
- GE Profile PB960SJSS hidden bake element WB44T10009 replacement
- GE electric range hidden bottom bake element replacement procedure
- GE Profile oven floor panel removal hidden element access
When to Call a Professional
If the problem persists after completing all the steps above, it may involve a failed main control board, a defective temperature sensor, or high-limit thermostat, or wiring issues that necessitate specialized diagnostic equipment. In such cases, it’s best to contact a licensed appliance technician. For gas models, avoid attempting work on the gas valve, burner orifices, or supply line — that’s work for a licensed gas fitter in most jurisdictions.
How Much Does This Repair Cost?
| Repair route | Typical cost |
|---|---|
| Do it yourself | $30–$80 (parts) |
| Professional repair | $150–$300 (parts and labor) |
A replacement hidden bake element for the GE Profile PB960SJSS typically costs between $30 and $80 in parts alone. A professional service call for this repair usually ranges from $150 to $300, including labor. By doing this repair yourself, you can save $100 or more while restoring your range to its full working order.
Frequently Asked Questions
How do I know if the hidden bake element on my GE Profile PB960SJSS is faulty?
Common signs include uneven baking, the oven not reaching temperature, or visible burn marks on the oven floor panel. You can also test the element for continuity using a multimeter.
Do I need to remove the oven floor to access the hidden bake element?
Yes, the hidden bake element on the PB960SJSS sits beneath the oven floor panel. Remove the panel screws and lift it out to expose the element underneath.
Is it safe to replace the hidden bake element myself?
Absolutely, as long as you disconnect power to the range before starting. Always unplug the unit or switch off the circuit breaker before handling any electrical components.
The Hidden Bake Element That Actually Restores Even Heat to Your GE Profile PB960SJSS
Once you’ve confirmed the hidden element is the culprit—uneven browning, cold spots, or complete baking failure—ordering the correct replacement part is the fastest path to getting your oven back to work. This is the part that sits under the floor and takes the real heat load during baking cycles.
What works
- Direct fit for the PB960SJSS—no adapter or modification needed once you access the element cavity under the floor panel.
- Restores the oven’s heating performance completely; I’ve never seen one fail prematurely if the thermostat and control board are clean.
- Terminal connections are straightforward and match the factory harness without forcing or bridging wires.
What doesn’t
- You absolutely need the floor panel off first—there’s no way around the full disassembly, which takes 20–30 minutes if you’re methodical.
- Element failure often indicates a deeper thermostat or control board issue; replacing just the element can mask a control-side problem that will burn out the next one.
I’ve had owners order the wrong element before testing continuity, thinking uneven heat meant the bake element when it was actually a faulty thermostat—so always confirm with a multimeter first. Once you’re certain, grab the hidden bake element and get the oven floor panel ready for removal.
About This Article

Written by Dave Holt. Dave Holt has been taking apart and fixing household appliances since he was a teenager who couldn't leave a broken one alone. Eighteen years later, after fixing things for neighbors, friends, and anyone who'd let him, he's seen almost every failure mode there is. When he writes a repair guide here, it's based on the actual job, not a manufacturer overview. More about this site.
Scope and limits. Dave is a self-taught repairer, not a certified appliance technician. Unplug before you open anything, and leave sealed refrigeration systems, gas connections, and hardwired circuits to a qualified technician.



