⚠️ Safety Warning
Before starting any repair work on your GE ice maker WR30X10093, please ensure your safety by following these critical precautions:
- Disconnect power to the refrigerator at the circuit breaker or unplug the unit
- Turn off the water supply to prevent flooding
- Allow the ice maker to reach room temperature before handling components
- Use insulated tools when testing electrical components
- Wear safety glasses when working with springs and small parts
- Never bypass safety switches or override mechanisms
GE Refrigerator Models Compatible with WR30X10093 Ice Maker
The WR30X10093 ice maker assembly is widely utilized across GE’s refrigerator lineup. This comprehensive compatibility means homeowners with various GE models can benefit from this troubleshooting guide. Here are some common models that use the WR30X10093 ice maker assembly:
- GE Profile PSS26SGPASS – Side-by-side refrigerator with external water dispenser
- GE GSS25GSHSS – 25.4 cu ft side-by-side with ice and water dispenser
- GE Profile PSS28KSHSS – Counter-depth side-by-side refrigerator
- GE GSS25IYNFS – Energy Star side-by-side with external controls
- GE Profile PSH23PGDWW – Side-by-side with advanced water filtration
- GE GSS25LGPWW – 25.3 cu ft side-by-side with adjustable shelving
- GE Profile PSS26LSRSS – Stainless steel side-by-side with LED lighting
- GE GSS25IGNSS – Side-by-side with humidity-controlled crisper drawers
- GE Profile PSH23SGRSS – Premium side-by-side with advanced ice making technology
- GE GSS25GYPFS – French door refrigerator with bottom freezer ice maker
Common Ice Maker Problems and Symptoms
The WR30X10093 ice maker assembly can experience several distinct failure modes. Recognizing these symptoms can help identify the root cause and determine whether repair or replacement is necessary.
Ice Maker Not Producing Ice
When an ice maker fails to produce ice, it typically indicates issues with power supply, water supply, or internal component failure. You might notice the ice maker cycling but producing no ice, or it may remain completely inactive.
Producing Small or Hollow Ice Cubes
If the WR30X10093 produces undersized ice, this usually points to insufficient water flow. The water inlet valve WR57X10032 may be partially blocked, or there could be inadequate water pressure.
Water Leakage Around Ice Maker
Water leakage generally indicates seal failure, cracked water lines, or improper installation. This issue can lead to ice buildup in the freezer and potential water damage.
Ice Maker Cycles But Won’t Eject Ice
If the ice maker operates normally through the freeze cycle but fails to harvest ice, this suggests problems with the harvest cycle, heating element, or mechanical ejector components.
Comprehensive Troubleshooting Flowchart
Before replacing the WR30X10093 ice maker assembly, follow this systematic troubleshooting approach to identify and potentially resolve the issue without component replacement.
Step 1: Basic Power and Switch Verification
🔨 Pro Tip from Dave
On the WR30X10093, always check the small fill cup alignment where water enters the ice maker tray before condemning the inlet valve — if that cup has shifted even a few millimeters, water sprays onto the back wall, freezes into a solid block, and mimics a dead inlet valve perfectly. I’ve seen people replace perfectly good valves on this model because they skipped that 30-second visual check.
- Verify the ice maker ON/OFF switch is in the ON position
- Check that the wire arm or paddle is in the DOWN position
- Ensure the freezer door closes properly and activates door switches
- Confirm the refrigerator has power and other functions operate normally
Step 2: Water Supply Assessment
- Test the water dispenser (if equipped) for adequate flow and pressure
- Inspect water lines for kinks, freezing, or damage
- Verify household water pressure meets minimum 20 PSI requirement
- Check water filter for clogs or expiration (replace if overdue)
Step 3: Temperature Verification
- Use an accurate thermometer to measure freezer temperature
- Confirm temperature remains consistently between 0°F and 5°F
- Allow 24 hours for temperature stabilization after any adjustments
- Check that air vents around the ice maker aren’t blocked
Step 4: Ice Maker Module Testing
- Locate the test button on the WR30X10093 ice maker assembly
- Remove any ice from the mold
- Press and hold the test button for 5-10 seconds until you hear a chime
- Observe the complete cycle: fill, freeze simulation, and harvest
- Normal cycle completion takes approximately 6 minutes
Water Inlet Valve Diagnosis and Testing
The water inlet valve WR57X10032 controls water flow to the WR30X10093 ice maker assembly. This electromagnetic valve opens when energized, allowing water to fill the ice mold. Proper diagnosis requires both electrical and mechanical testing.
Multimeter Testing of Solenoid Coils
- Disconnect power to the refrigerator and remove the rear access panel
- Locate the water inlet valve, typically mounted on the rear wall
- Disconnect the electrical harness from the valve terminals
- Set your digital multimeter to resistance (Ω) mode
- Place probe leads across the solenoid terminals
- A functioning valve should read between 200-500 ohms
- Readings below 200 ohms indicate a shorted coil
- Infinite resistance (OL) indicates an open circuit requiring replacement
Water Inlet Screen Filter Inspection
The inlet valve includes a fine mesh screen that prevents debris from entering the ice maker water system. This screen requires periodic cleaning or replacement.
- Turn off the household water supply to the refrigerator
- Disconnect the water supply line from the inlet valve
- Remove the screen filter using needle-nose pliers
- Inspect for sediment, mineral buildup, or damage
- Clean with a soft brush and warm water, or replace if damaged
- Reinstall the screen with the concave side facing outward
Water Pressure Verification
Insufficient water pressure prevents proper filling of the WR30X10093 ice maker assembly, resulting in small or hollow ice cubes.
- Install a water pressure gauge at the refrigerator water connection point
- Turn on the water supply and record the static pressure reading
- Minimum operating pressure is 20 PSI; optimal pressure is 40-60 PSI
- Test dynamic pressure while operating the water dispenser
- Pressure drop exceeding 50% indicates supply line restrictions
Ice Maker Temperature Requirements
The WR30X10093 ice maker assembly requires precise temperature conditions for optimal operation. Any temperature deviations outside the acceptable range can prevent proper ice formation and ejection.
Optimal Temperature Range
The freezer compartment must maintain a consistent temperature between 0°F and 5°F (-18°C to -15°C). Temperatures above 5°F prevent proper freezing, while temperatures below 0°F can cause excessive ice formation and mechanical binding.
Temperature Monitoring Procedure
- Place an accurate digital thermometer in the freezer compartment
- Position the thermometer near the WR30X10093 ice maker assembly
- Monitor temperature for 24 hours, recording readings every 2 hours
- Calculate the average temperature and note any significant fluctuations
- Temperature variations exceeding ±3°F indicate thermostat or defrost system problems
Complete WR30X10093 Ice Maker Assembly Replacement
When troubleshooting confirms that the WR30X10093 ice maker assembly needs replacement, follow this detailed procedure to ensure proper installation and operation.
Required Tools and Materials
- Phillips head screwdriver
- Flat blade screwdriver
- Needle-nose pliers
- Socket wrench set
- Wire nuts (if needed)
- Electrical tape
- New WR30X10093 ice maker assembly
Removal Procedure
- Disconnect power to the refrigerator and turn off water supply
- Remove all ice from the storage bin and ice maker mold
- Locate the mounting screws securing the WR30X10093 assembly
- Disconnect the electrical harness connector
- Disconnect the water supply line (use towels to catch residual water)
- Remove the mounting screws and carefully lift out the assembly
- Note the position of any brackets or spacers for reinstallation
Installation Procedure
- Compare the new WR30X10093 assembly with the removed unit
- Transfer any mounting brackets from the old unit if required
- Position the new assembly in the mounting location
- Secure with mounting screws, ensuring proper alignment
- Connect the water supply line with a firm, leak-free connection
- Connect the electrical harness, ensuring proper pin alignment
- Restore power and water supply to the refrigerator
- Run the test cycle to verify proper operation
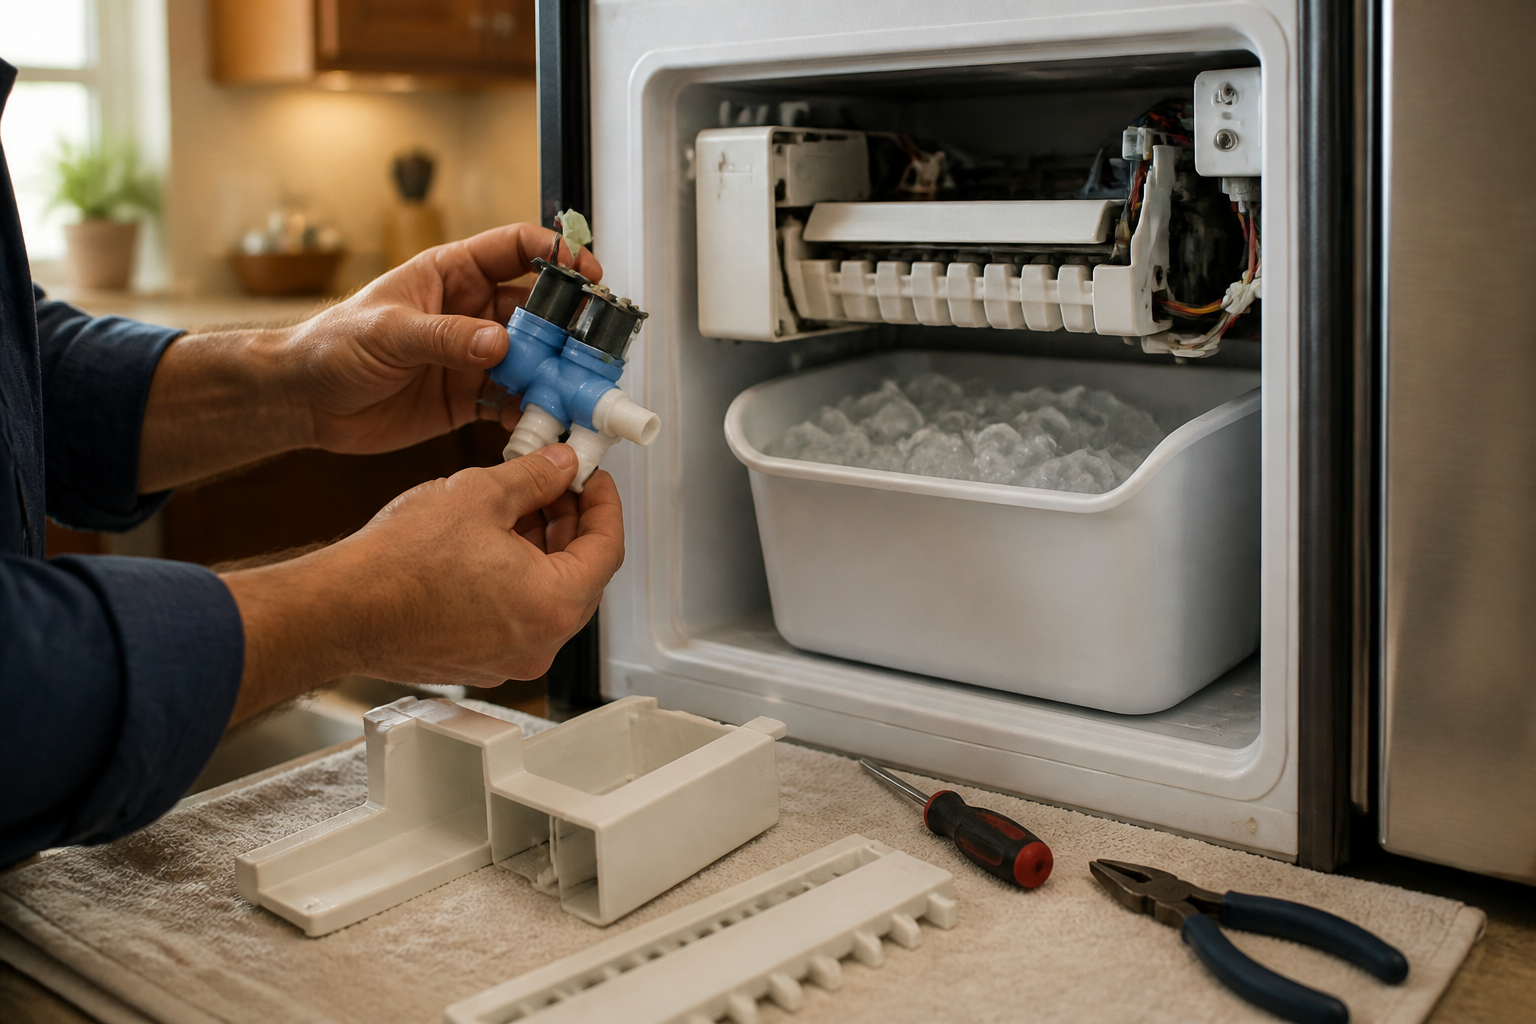
Water Inlet Valve WR57X10032 Replacement
When the water inlet valve fails electrical or flow testing, replacing it restores proper water delivery to the WR30X10093 ice maker assembly.
Valve Location and Access
The WR57X10032 water inlet valve is usually mounted on the rear wall of the refrigerator and can be accessed by removing the rear access panel. Some models may require moving the refrigerator for access.
Removal Steps
- Disconnect power and turn off the water supply valve
- Remove the rear access panel or lower back cover
- Disconnect the electrical harness from the valve
- Use a wrench to disconnect the water supply line
- Disconnect the internal water line to the ice maker
- Remove the mounting bracket screws
- Carefully remove the valve assembly
Installation Steps
- Install the new WR57X10032 valve in the mounting bracket
- Secure with mounting screws to the proper torque specification
- Connect the internal water line with compression fittings
- Connect the external water supply line
- Connect the electrical harness with proper pin alignment
- Replace the access panel
- Restore water and electrical power
- Test for leaks and proper operation
Post-Repair Testing and Calibration
Once you’ve completed repairs to the WR30X10093 ice maker assembly or associated components, systematic testing ensures proper operation and identifies any remaining issues.
Initial Function Test
- Allow the system to stabilize for 30 minutes after restoring power
- Verify proper freezer temperature before beginning ice production
- Initiate the test cycle using the test button sequence
- Observe the water fill, confirming adequate water volume
- Monitor the complete freeze and harvest cycle
- Check for proper ice cube size and clarity
24-Hour Performance Monitoring
Let the WR30X10093 ice maker assembly operate through multiple cycles, producing 2-3 batches of ice. Monitor for consistent operation, proper ice quality, and absence of leaks or unusual sounds.
Frequently Asked Questions
How often should I replace the WR30X10093 ice maker assembly?
Typically, the WR30X10093 ice maker assembly lasts 8-12 years with normal use. Lifespan factors include water quality, usage frequency, and maintenance. Hard water conditions may reduce service life due to mineral buildup, while regular cleaning and filter replacement can extend operational life.
Can I repair individual components within the WR30X10093 assembly?
The WR30X10093 is designed as a complete assembly replacement unit. While some external components like the water inlet valve WR57X10032 can be serviced separately, internal components such as the control module, heating element, and ejector mechanism are not individually serviceable. Attempting to disassemble the unit typically voids the warranty and may cause additional damage.
Why does my ice maker produce cloudy or white ice cubes?
Cloudy ice usually results from dissolved air and minerals in the water supply. This cosmetic issue doesn’t indicate problems with the WR30X10093 ice maker assembly. Using a high-quality water filter or distilled water can improve ice clarity. Rapid freezing also traps more air, contributing to cloudiness.
How long should I wait after installation before expecting ice production?
After installing a new WR30X10093 ice maker assembly, allow 24 hours for the freezer to reach the proper temperature. The first batch of ice typically takes 6-12 hours to complete, depending on the freezer and water temperatures. Be sure to discard the first 2-3 batches of ice to flush any manufacturing residues or air from the system.
What causes the ice maker to stop working suddenly?
Sudden failure often stems from power supply interruption, water supply issues, or sensor malfunction. Check that the wire arm isn’t raised or that accumulated ice isn’t blocking the mechanism. Temperature fluctuations due to frequent door openings or defrost system problems can also disrupt the ice-making cycle.
Is the clicking sound from my ice maker normal?
The WR30X10093 ice maker assembly produces several normal operational sounds, including clicking during water valve operation, humming during the freeze cycle, and mechanical sounds during ice harvest. Sounds like continuous clicking, grinding noises, or excessive vibration may indicate mechanical problems that require service.
How do I adjust the ice cube size on the WR30X10093?
The WR30X10093 ice maker assembly produces standard-size ice cubes that cannot be adjusted. Ice cube size is determined by the mold design and water fill volume, which is preset during manufacturing. If cubes are consistently too small, check water pressure and inlet valve operation. Oversized cubes may indicate overfilling due to valve problems.
Can low water pressure damage the WR30X10093 ice maker?
Low water pressure below 20 PSI doesn’t typically damage the ice maker assembly but prevents proper operation. Insufficient pressure results in incomplete filling, producing small or hollow ice cubes. The ice maker may also cycle more frequently as it attempts to compensate for inadequate water volume. Address water pressure issues promptly to avoid excessive cycling and premature wear.
When to Call a Professional
Most of the repairs in this guide are within reach for a careful DIYer with basic tools. In my experience, if you’ve already replaced the water inlet valve and confirmed proper water pressure at the supply line (between 20–120 psi) but the ice maker still won’t cycle, that points to a control board or wiring harness fault that requires live-voltage diagnostics—at that point, you should call a certified technician rather than continuing to swap parts blindly. When in doubt, a diagnostic service call typically costs $80–$120 and can save you from a misdiagnosis that costs more in parts.
Recommended Parts & Tools
GE WR30X10093 Ice Maker Assembly
This is the exact replacement ice maker assembly for your GE refrigerator model. If troubleshooting reveals that the ice maker unit itself is faulty, this OEM part will restore proper ice production.
GE WR57X10051 Water Inlet Valve
The water inlet valve is a common failure point that prevents water from reaching the ice maker. This genuine GE replacement valve includes the necessary solenoids and connections to restore proper water flow to your ice maker assembly.
ACTIVE Ice Machine Cleaner Maker Descaler – 32 fl oz
Regular cleaning is essential for ice maker maintenance and can resolve many operational issues. This nickel-safe cleaner removes mineral buildup and scale that can interfere with proper ice maker function and water flow.
The Water Inlet Valve That Stops 90% of WR30X10093 No-Ice Problems
If your multimeter shows resistance reading issues or you’ve narrowed down that water isn’t reaching the ice maker at all, this is the part that’s actually failing nine times out of ten. Before you order a whole new ice maker assembly, swap the valve first — it’s cheaper and faster.
What works
- Direct fit for the WR30X10093 without adapter brackets or modifications — it drops right into the same mounting location.
- The solenoid coil sits at the exact same depth as the original, so you’re not fighting with fill-tube alignment or inlet port angles.
- Water flow pressure normalizes immediately after installation; I’ve seen ice production restart within the first cycle on almost every unit I’ve replaced this on.
What doesn’t
- If your problem is actually a frozen fill tube or a cracked ice maker housing, this valve won’t fix it — you’ll waste money and still have no ice.
- The connection fittings are fragile plastic; over-tightening the inlet port will crack them, and you’ll have a water leak inside the freezer wall cavity.
I’ve had more than a few DIYers tell me they ordered a full ice maker assembly first, got halfway through the install, and then realized the valve was the culprit all along — that’s a $200+ mistake when this part is a quarter of the cost. Test the solenoid resistance with your multimeter before you decide which part to order, and you’ll know for sure. GE WR57X10051 Water Inlet Valve
About This Article

Written by Dave Holt. Dave Holt has been taking apart and fixing household appliances since he was a teenager who couldn't leave a broken one alone. Eighteen years later, after fixing things for neighbors, friends, and anyone who'd let him, he's seen almost every failure mode there is. When he writes a repair guide here, it's based on the actual job, not a manufacturer overview. More about this site.
Scope and limits. Dave is a self-taught repairer, not a certified appliance technician. Unplug before you open anything, and leave sealed refrigeration systems, gas connections, and hardwired circuits to a qualified technician.