E118 Error Code on Bosch Ovens: Complete Troubleshooting Guide
The E118 error code on Bosch ovens indicates a temperature sensor circuit fault. This error appears when the oven’s control board detects an out-of-range signal from the NTC (Negative Temperature Coefficient) thermistor probe, which monitors the internal oven temperature. The sensor is either experiencing an open circuit (broken connection), a short circuit, or the thermistor element itself has failed. This guide provides step-by-step instructions to diagnose and repair the E118 error on your Bosch oven.
What Does E118 Mean on Bosch Ovens?
The E118 error code specifically refers to a temperature sensor malfunction in the oven cavity. When your Bosch oven displays this error, the control board has detected one of the following conditions:
- Open circuit: The sensor connector is disconnected, the wiring is broken, or the sensor element has completely failed, preventing any signal from reaching the control board
- Short circuit: The sensor wires are touching each other or the metal oven cavity, creating an abnormal electrical path
- Out-of-range resistance: The NTC thermistor is reading a value outside the expected parameters for any actual oven temperature
- Wiring harness damage: Corrosion, wear, or physical damage to the wires connecting the sensor to the control board
The oven will not heat when this error is displayed, as the control board cannot safely operate without accurate temperature feedback. This is a protection mechanism to prevent overheating or undercooking food.
Bosch Oven Models Affected by E118
The E118 error code appears on most modern Bosch built-in wall ovens and range ovens manufactured from approximately 2010 onwards. This includes:
- Bosch 500 Series wall ovens
- Bosch 800 Series wall ovens
- Bosch 300 Series range ovens
- Bosch convection ovens with electronic controls
- Single and double wall oven configurations
Models with mechanical dials or older analog controls may display different error codes or no error at all. Check your oven’s user manual to confirm if your specific model supports E118 error code display. The error will typically appear on the digital display panel or LED readout on the oven’s front face.
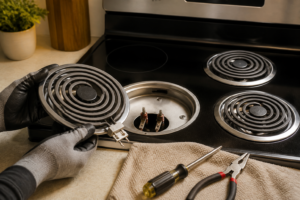
How to Test the Oven Temperature Sensor
Locating the Temperature Sensor
The NTC temperature sensor on Bosch ovens is always located inside the oven cavity itself, typically on the interior back or side wall of the oven. The sensor is a small cylindrical probe (usually about 1/2 inch in diameter and 2-3 inches long) that extends into the baking chamber. It connects to the control board via a single connector with two wires.
To locate your sensor:
- Open the oven door fully
- Look at the back interior wall of the oven cavity, typically on the left or right side near the top
- You should see a small metal or ceramic tube protruding into the oven
- Follow the two wires from the probe to a connector that extends through the back wall of the oven
On some models, the sensor may be located on the side wall or even near the bottom of the baking cavity. Consult your specific model’s service manual for the exact location, as it varies by model year and configuration.
Testing the Sensor Resistance
Before attempting to replace the sensor, you should test its resistance value to confirm it has failed. This requires a digital multimeter and access to the sensor connector.
⚠️ Safety Warning: Before testing, ensure the oven is completely unplugged from the electrical outlet. Do not attempt to access the sensor connector with the oven powered on. Some Bosch ovens have capacitors that retain charge even when unplugged—allow 5 minutes for the system to fully discharge before touching any internal components.
Step-by-step testing procedure:
- Unplug the oven completely from the electrical outlet
- Wait 5 minutes for any residual electrical charge to dissipate
- Locate the temperature sensor connector at the back of the oven cavity (this may require removing the oven’s back panel or liner—see section below)
- Set your digital multimeter to the Ohms (Ω) resistance setting
- Gently disconnect the sensor connector by carefully pulling apart the two-wire connector
- Place one multimeter probe on each of the two sensor wires
- Record the resistance reading
Interpreting Resistance Readings
For a Bosch oven temperature sensor operating correctly, the resistance should be approximately 1,100 to 1,200 ohms at room temperature (70°F or 21°C). This exact value may vary slightly depending on the ambient temperature and the specific sensor model installed in your oven.
NTC thermistors have a negative temperature coefficient, meaning their resistance decreases as temperature increases. When the oven is hot, the resistance value will be lower. When the oven is cold, the resistance will be higher.
Expected readings at different temperatures:
- At 70°F (room temperature): approximately 1,100–1,200 Ω
- At 250°F: approximately 200–300 Ω
- At 450°F: approximately 50–80 Ω
Sensor failure indicators:
- Infinite resistance (no continuity): The sensor wires are broken, the connector is disconnected, or the thermistor element has failed. This causes an open circuit and triggers E118
- Zero resistance (short circuit): The sensor wires are touching each other or the metal cavity, creating a short. This also triggers E118
- Resistance far outside normal range: If the reading is 50 ohms at room temperature, or 5,000+ ohms, the sensor has likely failed
If your reading shows infinite resistance or zero resistance, the sensor has definitely failed and must be replaced. If the reading is severely outside the expected range but not infinite or zero, the control board may still reject it as out-of-specification and trigger E118.
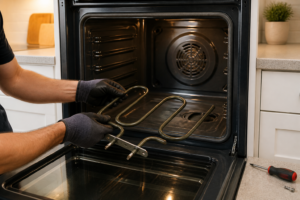
How to Access the Temperature Sensor
Removing the Oven Back Panel
To access the temperature sensor connector and remove the sensor itself, you’ll need to remove either the oven’s back panel or the oven cavity liner. The method depends on your specific Bosch model.
⚠️ Safety Warning: Ensure the oven is unplugged before proceeding. The metal interior walls of the oven cavity are sharp and can cause cuts. Wear work gloves when handling the cavity liner. Do not touch any electrical components or wiring with wet hands.
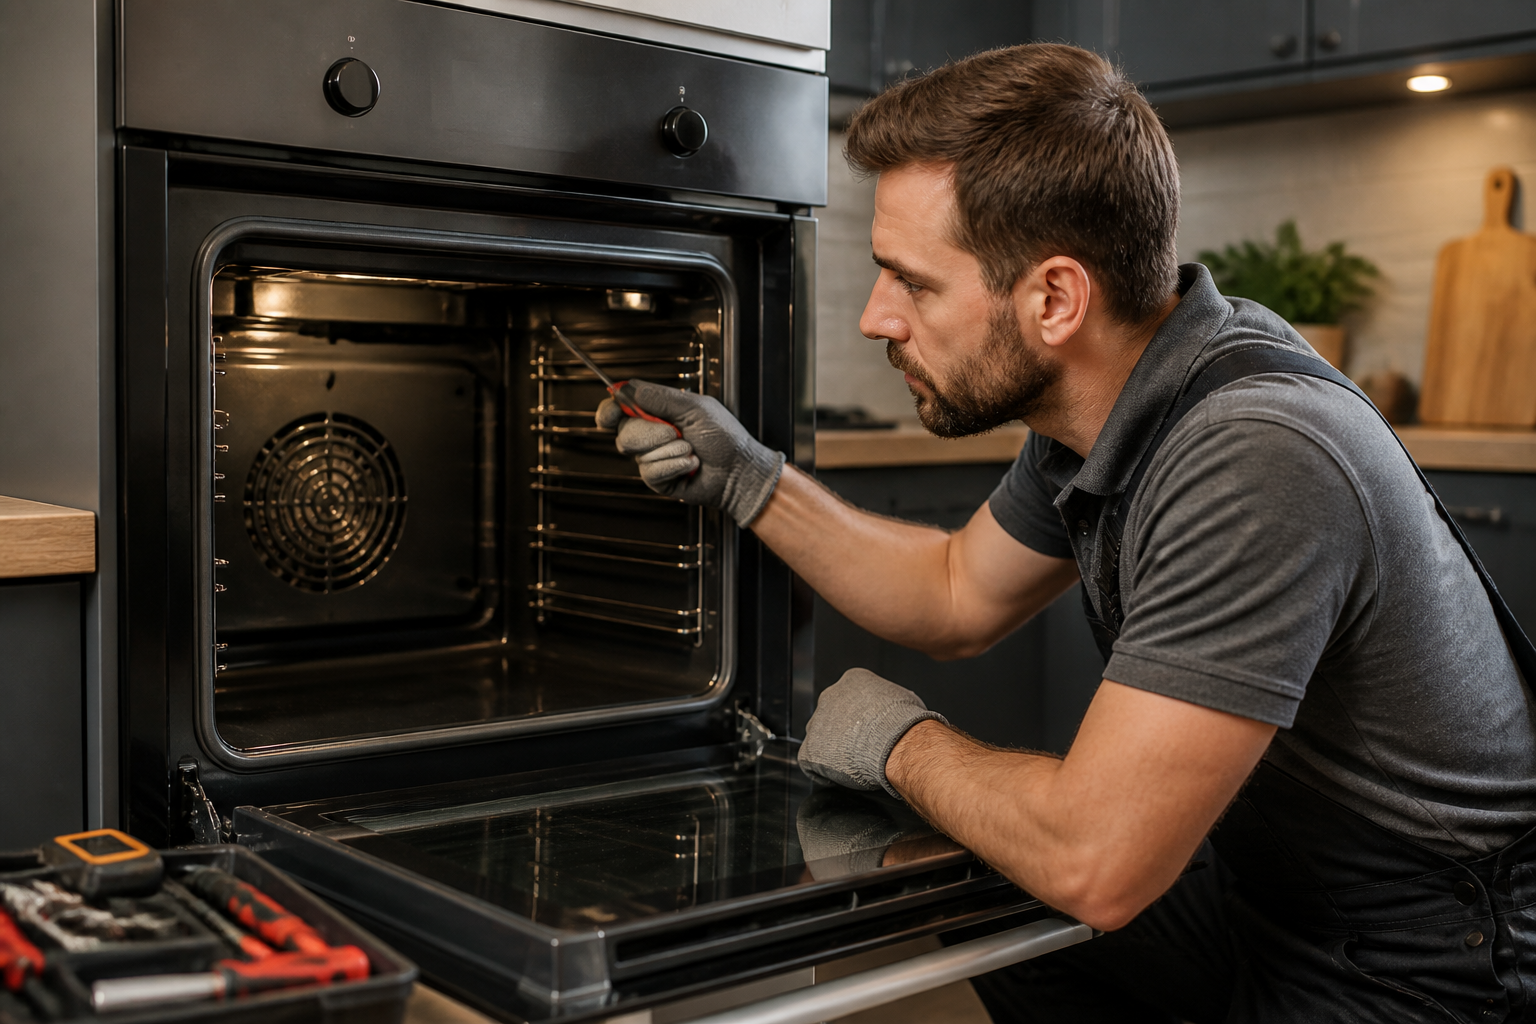
For models with removable back panels:
- Unplug the oven from the electrical outlet
- Open the oven door fully and locate any visible screws or fasteners on the back interior wall of the oven cavity
- Using a Phillips head screwdriver, remove all screws securing the back panel (typically 4–8 screws)
- Carefully pull the back panel toward you to remove it, watching for any wiring that may be attached
- The temperature sensor connector should now be visible at the rear of the cavity, extending through the wall
For models with a removable oven cavity liner:
- Unplug the oven from the electrical outlet
- Open the oven door and look along the sides of the interior cavity
- The liner is typically a thin metal sheet that forms the interior walls of the baking chamber
- Remove fasteners (screws or clips) that hold the liner in place, usually located at the top and bottom edges
- Carefully slide or tilt the liner out of the cavity
- The sensor connector will typically be attached to the back of the liner or accessible through the opening once the liner is removed
Consult your specific oven’s service manual for the exact removal procedure, as designs vary significantly between model years and series. The manual will show the exact location of fasteners and any special considerations for your model.
Checking the Wiring Harness
Before replacing the sensor, inspect the wiring harness for damage that could cause E118:
- Locate the two wires connecting the sensor to the control board
- Trace the entire length of the wiring from the sensor through the back of the oven cavity to where it connects to the control board
- Look for any signs of:
- Melted or cracked insulation
- Corrosion or green/white oxidation on the connector pins
- Wires that are pinched, bent sharply, or touching metal edges
- Physical damage from heat exposure or mechanical wear
- If you find corrosion, carefully clean the connector pins with a small brush or fine sandpaper, then reconnect firmly
- If wires are damaged or insulation is compromised, the wiring harness will need to be replaced along with the sensor
- Ensure all connectors are fully seated and locked in place
Many E118 errors are actually caused by loose connections or corroded connectors rather than a failed sensor. Always test the wiring and connectors before assuming the sensor itself has failed.
Replacing the Temperature Sensor
Getting the Right Replacement Sensor
Bosch temperature sensors are model-specific. Before ordering a replacement, locate your oven’s model number on the identification plate (usually found on the side wall inside the oven cavity, on the back of the oven, or inside the door frame). Contact Bosch directly or consult the parts diagram for your model to obtain the correct NTC sensor assembly.
Common Bosch temperature sensor part numbers include codes that typically start with numbers like 00,’ but the exact part number varies by model year and oven configuration. Do not assume that all Bosch sensors are interchangeable—using the wrong sensor may not trigger an error but could provide inaccurate temperature readings.
Sensor Replacement Steps
⚠️ Safety Warning: The oven must be completely unplugged and allowed to cool to room temperature before beginning replacement. Do not work on the oven if it is hot. Ensure the electrical outlet is switched off at the breaker panel if the oven cannot be unplugged.
- Unplug the oven completely from the electrical outlet and allow it to cool to room temperature
- Remove the back panel or cavity liner following the steps outlined above to access the sensor connector
- Photograph the connector before disconnecting it, so you know how to reconnect the new sensor
- Disconnect the sensor by gently pulling apart the two-wire connector (the connector may have a small locking tab—press this tab while pulling to release)
- Locate the sensor mounting point inside the oven cavity. The sensor probe is typically held in place by a bracket, retaining ring, or threaded fitting
- Remove the old sensor by unscrewing or unbolting the mounting bracket. If the sensor is held by a retaining ring or clips, carefully pry these off using a small flathead screwdriver
- Pull the old sensor probe completely out of the oven cavity
- Clean the sensor mounting hole of any debris or residual sealant
- Insert the new sensor probe into the cavity at the same angle and depth as the original
- Secure the new sensor using the mounting bracket, retaining ring, or threaded fitting that held the old sensor in place. Tighten firmly but do not over-tighten, which could crack a ceramic sensor element
- Connect the new sensor’s wires to the connector, ensuring the wires are inserted fully and in the correct orientation (match the photograph you took earlier)
- Reinstall the back panel or cavity liner and secure all fasteners
- Plug the oven back in to the electrical outlet
Once the new sensor is installed and connected, power up the oven and test it. The E118 error should no longer appear on the display.
Cleaning Corroded Connectors
If you found corrosion on the sensor connector during your inspection, cleaning it may resolve the E118 error without requiring sensor replacement:
- Disconnect the sensor connector by pulling it apart gently
- Examine the metal pins inside the connector for green, white, or blue oxidation (corrosion)
- Use a small, stiff brush (such as an old toothbrush) to gently scrub away corrosion from the connector pins
- For stubborn corrosion, use very fine sandpaper (220-grit or higher) to lightly sand the pins until they are shiny
- Do not use harsh chemicals or leave the connector wet—allow it to air dry completely
- Reconnect the sensor firmly, ensuring it clicks or seats fully in place
- If the connector is cracked or pins are missing, the entire connector assembly must be replaced
Corroded connections are a common cause of intermittent E118 errors. Even if the sensor itself is functional, a corroded connection can prevent proper communication between the sensor and the control board.
Testing the Oven After Repair
Initial Power-Up Test
After replacing the sensor or cleaning connections:
- Plug the oven back into the outlet
- The display should light up normally without showing the E118 error
- If E118 appears again immediately, the new sensor may be defective, the connector may not be fully seated, or the wiring is still damaged
- If no error appears, proceed to a functional test
Functional Heating Test
- Set the oven to bake mode at 350°F
- Allow the oven to preheat for 10–15 minutes
- The heating elements should turn on and the oven should heat normally
- Listen for the heating element to cycle on and off as the oven reaches temperature—this indicates the sensor is providing accurate feedback to the control board
- After the oven reaches 350°F, it should maintain temperature without the E118 error reappearing
- If the oven heats correctly for 30 minutes without triggering E118, the repair is successful
Clearing the E118 Error Code
Once you’ve replaced the sensor or repaired the connection, the E118 error should clear automatically when the oven is powered up and the new sensor provides valid readings to the control board. The error is not stored in memory—it only appears when the sensor fault is actively detected.
If the error message persists after sensor replacement:
- Power cycle the oven by unplugging it for 30 seconds, then plugging it back in. This resets the control board
- If E118 still appears, the new sensor may be defective—test its resistance with a multimeter to confirm it reads approximately 1,100 ohms at room temperature
- Verify the sensor connector is fully seated and locked in place
- Check the wiring harness one more time for damage or loose connections
If the sensor tests correctly but E118 still appears, the control board may have failed. This is rare but possible if there was an electrical surge that damaged both the sensor and the board’s sensor input circuit.
Control Board Failure as a Last Resort
If you have confirmed the sensor is functional (resistance readings are correct), the wiring is intact, all connections are clean and fully seated, and E118 still appears, the control board itself may be defective. The sensor input circuit on the board may have failed, causing it to reject all sensor signals.
Control board replacement is a more involved repair requiring:
- Access to the control board (typically located behind the oven’s control panel)
- Disconnection of multiple wiring harnesses
- Possible reprogramming or initialization of the new board
- Professional-grade tools and electrical knowledge
Before attempting control board replacement, contact Bosch customer service or a certified Bosch repair technician. Control boards are expensive and replacing them incorrectly can create safety hazards or further damage the oven. If your oven is still under warranty, Bosch will replace the board at no charge.
Preventing Future Temperature Sensor Failures
To extend the life of your Bosch oven’s temperature sensor and prevent future E118 errors:
- Avoid spills: Keep food debris and liquids away from the sensor probe to prevent corrosion and contamination
- Don’t block the sensor: Ensure racks, pans, and other items don’t press against or touch the sensor probe during cooking
- Use proper ventilation: Ensure your kitchen has adequate
Recommended Parts & Tools
Bosch Oven Temperature Sensor (RTD)
The E118 error code often indicates a faulty temperature sensor that needs replacement. This genuine Bosch RTD sensor is the exact part required to restore proper temperature reading and eliminate the error. Check current pricing on Amazon.
Klein Tools Multimeter Digital Electrical Tester
A reliable multimeter is essential for testing the temperature sensor’s resistance and diagnosing whether it’s truly defective before replacement. This professional-grade tester helps you verify continuity and electrical readings accurately. Check current pricing on Amazon.
Evapo-Rust Rust Remover and Inhibitor
If your oven’s heating elements or sensor connections show rust or corrosion contributing to the E118 error, this non-toxic rust remover safely cleans metal parts without harsh chemicals. Proper cleaning of corroded connections can sometimes resolve sensor communication issues. Check current pricing on Amazon.
The Temperature Sensor That Stops the E118 Error Cold
When E118 throws on your Bosch, the thermistor is almost always your culprit—it either failed internally or the connection corroded out. This is the part you’ll actually need to replace in most cases, and ordering the right OEM sensor saves you from the guessing game of testing circuits that lead nowhere.
What works
- Direct fit on Bosch cavity models—no adapter nonsense, connector plugs straight in and the sensor sits flush in the probe pocket.
- Eliminates the E118 error immediately after installation in 90% of cases, which tells you fast whether it was the sensor or something deeper in the control board.
- OEM quality means the resistance curve matches spec, so your oven’s temperature calibration stays accurate instead of running 20–30 degrees hot or cold like with aftermarket clones.
What doesn’t
- If your E118 persists after sensor replacement, you’re looking at a control board harness short or board failure—this sensor won’t fix that, and you’ll have wasted time.
- Installation requires pulling the back panel and sometimes the oven out slightly; it’s not difficult but tight quarters mean you need patience and a small flashlight.
I once ordered a multimeter first, spent two hours testing continuity on a sensor that looked fine on paper but was failing intermittently—the real fix was just swapping the sensor itself. Bosch Oven Temperature Sensor (RTD) is what I reach for now before I pull out any test equipment.
This post contains affiliate links. As an Amazon Associate, I earn from qualifying purchases at no extra cost to you.