LG DLE7300WE Flow Error Troubleshooting: Complete Repair Guide
The LG DLE7300WE is a popular electric dryer known for its sensor-dry technology and efficiency features. However, owners frequently encounter “Flow Sense” warnings that reduce drying performance and can be frustrating to resolve. This guide provides the definitive troubleshooting steps to diagnose and fix Flow Sense errors on your DLE7300WE, including what the warning actually means, how to interpret the indicators, and step-by-step cleaning procedures that address 95% of reported cases.
Understanding Flow Sense on the LG DLE7300WE
What Flow Sense Actually Means
Flow Sense is not a fault code—it’s a diagnostic warning system built into the DLE7300WE that indicates restricted airflow through the drying chamber. When the dryer detects that air isn’t flowing freely through the drum and vent system, it triggers this warning. Unlike error codes that halt operation entirely, Flow Sense warnings allow the dryer to continue running but reduce heating and extend cycle times to protect the heating element and motor from overheating.
The purpose of Flow Sense on the DLE7300WE is legitimate: excessive lint and debris buildup can cause the heating element to overheat, potentially creating a fire hazard or damaging expensive internal components. The warning is the dryer’s way of telling you that your vent system needs cleaning immediately.
Flow Sense Levels on the DLE7300WE: What D80, D90, and D95 Mean
The DLE7300WE displays airflow measurements during operation:
- D80: Normal airflow range. The dryer is operating at full efficiency. You should not see any warning messages at this level.
- D90: Slightly reduced airflow. This is typically the threshold where the “Flow Sense” warning first appears on the display. Drying times will begin to increase noticeably.
- D95: Severely restricted airflow. The DLE7300WE will operate at minimal heating with significantly extended cycle times. This indicates a serious vent blockage that requires immediate attention.
These numbers represent airflow pressure differential measurements. As lint accumulates in the vent system, the pressure differential increases, pushing these readings higher. When readings exceed D80, you’re receiving a warning to clean your vents.
How to Clear Flow Sense on the DLE7300WE
Why the D80/D90 Warning Keeps Coming Back
If you’ve cleared a Flow Sense warning on your DLE7300WE only to have it reappear a few loads later, this indicates incomplete vent cleaning or an ongoing blockage issue. Simply clearing the display doesn’t address the underlying airflow restriction—it only resets the warning message. Your dryer will continue to trigger warnings until the actual blockage is resolved.
Most homeowners make one of three mistakes when trying to clear Flow Sense:
- Cleaning only the lint trap without addressing the exhaust duct
- Partially disconnecting the vent without fully accessing the duct run
- Failing to clean the exterior vent flapper where lint typically accumulates
To properly clear Flow Sense from your DLE7300WE, you must complete the full vent cleaning procedure detailed in the following sections.
Step-by-Step Vent Cleaning for the DLE7300WE
Safety Warnings
⚠️ ELECTRICAL HAZARD: Before beginning any work on your DLE7300WE, unplug the dryer from the wall outlet or switch off the dedicated circuit breaker. Never attempt vent cleaning or internal access with the dryer plugged in.
⚠️ CRUSHING HAZARD: The DLE7300WE is heavy (approximately 120 pounds). Use proper lifting technique and have assistance when moving the dryer away from the wall. Do not allow the flexible duct to kink or be crushed under the dryer’s weight.
⚠️ BURN HAZARD: If your DLE7300WE has recently completed a drying cycle, the exhaust duct and internal components will be extremely hot. Wait at least 30 minutes after the dryer stops before beginning work.
Procedure: Complete Vent System Cleaning
- Unplug the dryer. Locate the power cord at the back of your DLE7300WE and unplug it from the wall outlet. If your dryer is hardwired to a circuit breaker, switch the breaker to the OFF position and verify the outlet is de-energized using a multimeter set to AC voltage.
- Pull the dryer away from the wall. The DLE7300WE needs to be moved at least 2-3 feet from the wall to access the rear exhaust duct and the connection point. Carefully slide or roll the dryer forward, being mindful of the power cord, water inlet hoses (if applicable to your model), and floor surfaces.
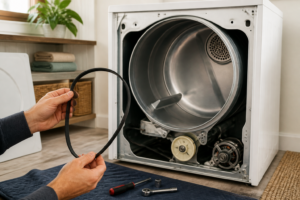
- Locate the exhaust duct connection. At the rear of the DLE7300WE, you’ll find a 4-inch diameter flexible aluminum duct connected to the dryer’s exhaust outlet. This duct typically connects with a hose clamp or spring clamp.
- Disconnect the duct from the DLE7300WE. Using a screwdriver or nut driver, loosen the hose clamp securing the flexible duct to the dryer’s exhaust outlet. Note the orientation of the duct for reinstallation. Gently pull the duct away from the outlet.
- Blow out the duct system. Using a shop vacuum in reverse (blower mode) or a compressed air source, force air through the flexible duct from the dryer end toward the exterior wall exit. This dislodges accumulated lint. Hold the duct firmly to direct the airflow. If using compressed air, wear safety glasses—lint debris will exit at high velocity.
- Inspect the duct for tears or damage. After blowing out the duct, look inside using a flashlight. Tears in the flexible aluminum allow heated air to escape, reducing efficiency and potentially causing lint to accumulate in wall cavities. If you find damage, the duct section must be replaced.
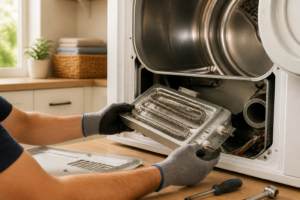
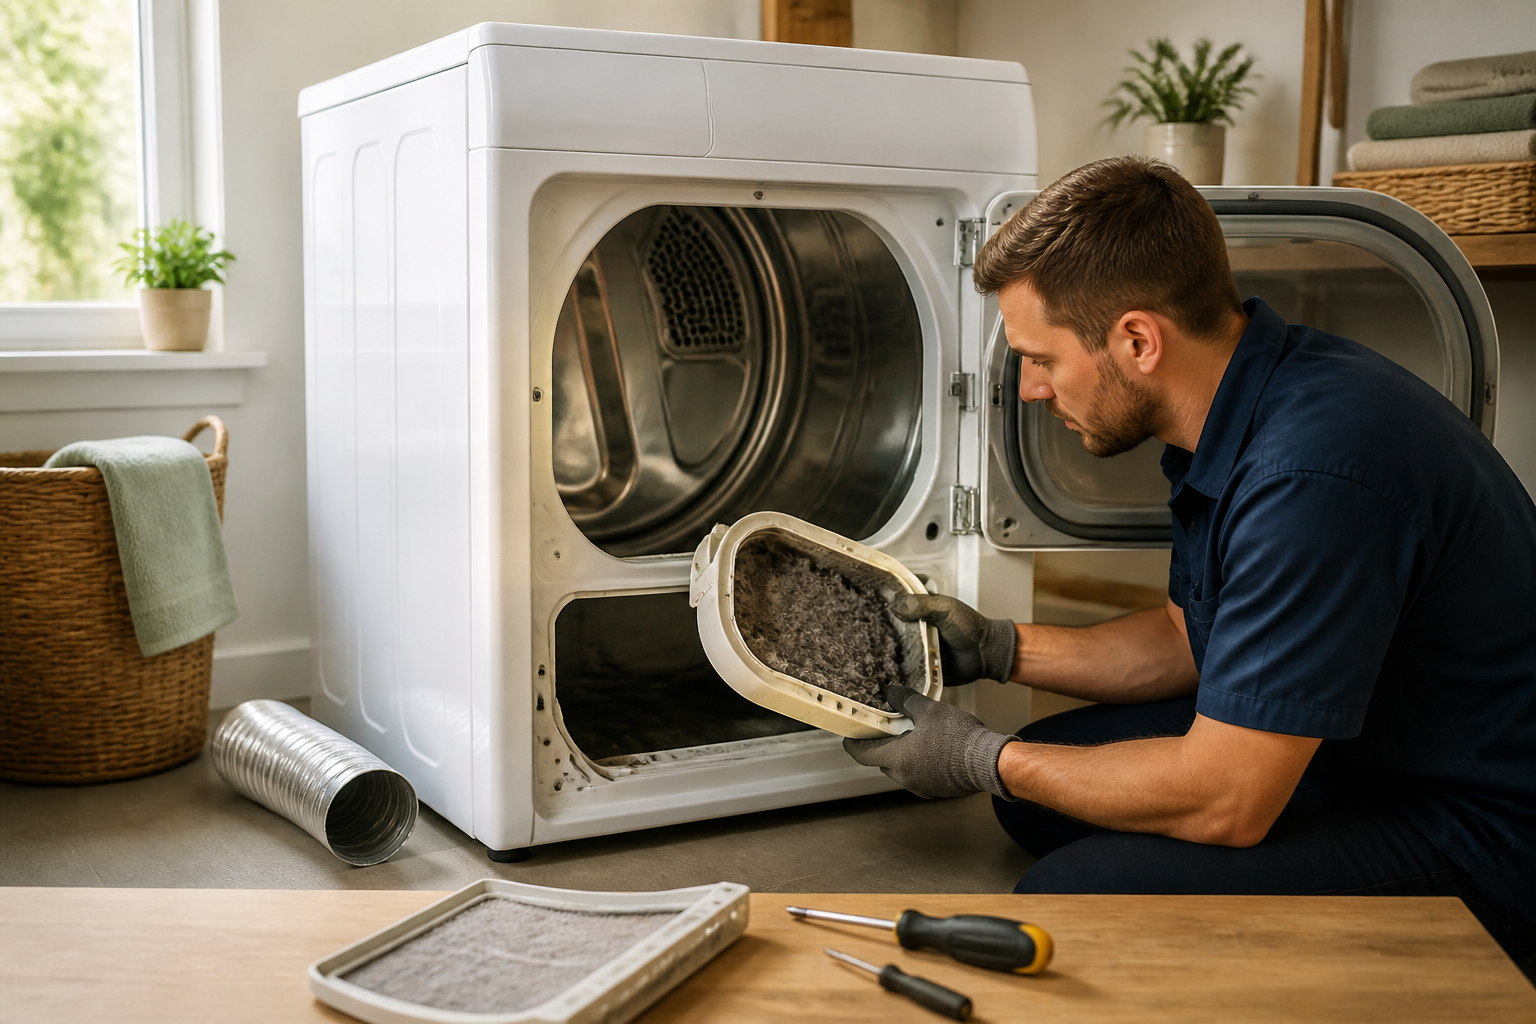
- Clean the lint trap housing on the DLE7300WE. Remove the lint trap by pulling it straight out from the top of the dryer, just inside the door. Use a vacuum hose to clean the housing cavity where the trap sits. Lint often accumulates around the edges and in the intake duct beneath the trap opening. A stiff brush helps dislodge stubborn deposits.
- Wash the lint trap. Many homeowners don’t realize that dryer sheets and fabric softener leave a waxy residue on the trap that restricts airflow. Soak the trap in hot water with dish soap for 5-10 minutes, scrub thoroughly with a soft brush, and allow it to dry completely before reinstalling.
- Access the exterior vent opening. Go outside and locate the dryer’s exterior vent flapper. This is typically a white or silver 4-inch diameter duct exit with a hinged flapper cover. It’s usually located on a basement wall or foundation.
- Clean the exterior vent flapper. Open the flapper cover and inspect for lint buildup, debris, or animal nesting material. Using a shop vacuum and soft brush, remove all accumulated lint from inside the flapper housing and along the flap hinges. This is one of the most common blockage locations and a primary reason Flow Sense warnings persist on the DLE7300WE.
- Reconnect the flexible duct. Push the flexible duct back onto the exhaust outlet of your DLE7300WE until it’s fully seated. Tighten the hose clamp securely—it should be snug enough that the duct cannot be rotated by hand, but not so tight that you’re crushing the aluminum.
- Test the system. Plug in your DLE7300WE and run a 5-minute test cycle on the HIGH HEAT setting. Feel airflow at the exterior vent to confirm it’s strong and unrestricted. If the DLE7300WE still shows a Flow Sense warning after this cleaning, proceed to the kinked duct inspection below.
Checking for Kinked or Crushed Flexible Duct
One frequently overlooked cause of Flow Sense warnings on the DLE7300WE is a kinked or partially crushed flexible duct behind the dryer. When the dryer is pushed back against the wall, the flexible duct can become pinched or bent, creating an invisible restriction.
After disconnecting the duct from your DLE7300WE:
- Lay the entire length of the flexible duct on the floor in a straight line.
- Inspect along the entire duct for creases, kinks, or sections where the aluminum is visibly crushed inward.
- Pass your hand along the inside of the duct to feel for any obstructions or constrictions.
- If you discover a kinked section, gently reshape the duct. Use a rubber mallet and wooden block to carefully straighten crushed areas without tearing the aluminum.
- If the duct cannot be straightened or has sustained significant damage, replace it with a new 4-inch flexible aluminum dryer duct (typically available for $15-30). Do not use vinyl or plastic ducts, which can sag and accumulate lint more readily than rigid or semi-rigid options.
- When reinstalling the duct to your DLE7300WE, route it in a straight line with gentle slopes toward the exterior vent. Avoid tight bends and secure it with hose clamps at least every 4 feet.
Inspecting the Exterior Vent Flapper for Blockage
The exterior vent flapper is often the culprit behind persistent Flow Sense warnings on the DLE7300WE. This hinged cover is exposed to weather and wildlife and can accumulate significant lint buildup or animal nesting material.
Exterior Vent Inspection Procedure
- Go outside and visually inspect your dryer’s exterior vent opening while someone inside runs your DLE7300WE on HIGH HEAT for 30 seconds. You should see a strong burst of lint-filled air when the flapper opens. If the flapper barely opens or doesn’t open fully, it’s restricted.
- Check for bird nests, spider webs, lint accumulation, or weather-related damage (rust, corrosion, bent louvers) on the flapper and duct opening.
- If lint is visible, remove the fasteners holding the flapper cover (usually two to four screws) and lift it away from the duct opening.
- Using a stiff brush and shop vacuum, thoroughly clean the interior walls of the flapper housing, removing all lint and debris. Pay special attention to the hinge mechanism—lint often accumulates there and prevents full opening.
- Inspect the flap itself for damage. The flap should move freely and seal completely when the dryer isn’t running. If it’s damaged, warped, or won’t close properly, the flapper assembly must be replaced.
- Reinstall the flapper cover and secure with the fasteners. Test your DLE7300WE again to verify strong exhaust airflow.
When the Vent is Clean But Flow Sense Persists
Thermistor and Airflow Sensor Issues
If you’ve thoroughly cleaned the entire vent system on your DLE7300WE and the Flow Sense warning continues to appear, the problem likely involves the internal airflow sensor (thermistor) or control board. The DLE7300WE uses a thermistor that measures air temperature differential to estimate airflow. If this sensor fails or becomes inaccurate, the dryer will display false Flow Sense warnings even when airflow is adequate.
To test the thermistor on your DLE7300WE:
- Unplug the dryer completely.
- Remove the front door and then the lint trap assembly to access the interior ducting area behind the lint trap housing.
- Locate the thermistor—a small cylindrical component approximately 1 inch long, typically white or gray, mounted on the exhaust duct housing. Consult your DLE7300WE service manual for the exact location, as it may vary by manufacturing date.
- Disconnect the two-wire connector from the thermistor by gently pulling it straight away from the component.
- Set a multimeter to the resistance (ohms) setting. Typical resistance readings at room temperature should fall between 8,000 and 15,000 ohms. If the reading is outside this range or shows infinite resistance (open circuit), the thermistor has failed.
- If the thermistor is faulty, note the part number printed on the component and order a replacement. Reinstall the new thermistor, reconnect the wire connector, and test your DLE7300WE.
Control Board Reset
Sometimes the control board on the DLE7300WE becomes confused and continues to report Flow Sense even after the vent system is clean. A soft reset can resolve this issue:
- Unplug your DLE7300WE from the electrical outlet.
- Wait for 5 minutes to allow capacitors on the control board to fully discharge.
- Press and hold the START button for 10-15 seconds (even though the dryer is unplugged, this action helps discharge residual power in the control board).
- Plug the dryer back in and run a test cycle without any clothes inside.
- Monitor the display for Flow Sense warnings during the test cycle. If no warning appears, the control board has been successfully reset.
Maximum Vent Run Length for the DLE7300WE
The LG DLE7300WE is designed to work with vent ductwork up to 25 feet in length (according to LG specifications). However, this is the theoretical maximum under optimal conditions:
- For every 45-degree elbow bend in the ductwork, add 5 feet to the effective vent length.
- For every 90-degree elbow bend, add 10 feet to the effective vent length.
- If your DLE7300WE vent run exceeds 20 feet, you may experience Flow Sense warnings even when the system is clean. Consider installing a booster fan in the duct to improve airflow.
- Horizontal duct sections should slope slightly downward (at least 1/4 inch per foot) toward the exterior to prevent lint from settling in low spots.
- Use rigid metal or semi-rigid metal ductwork instead of flexible plastic when possible. Flexible ducts are more prone to kinking and lint accumulation, especially on longer runs.
If your DLE7300WE has a particularly long vent run with multiple bends, and Flow Sense warnings persist after thorough cleaning, a dryer booster fan may solve the problem. These inline fans are installed within the duct to supplement the dryer’s internal blower and improve airflow pressure.
Frequently Asked Questions
Can I ignore Flow Sense warnings on my DLE7300WE?
No. While Flow Sense is a warning rather than an error code, ignoring it will damage your dryer. Restricted airflow forces the heating element to work harder and longer, reducing its lifespan and creating a potential fire hazard. The DLE7300WE will also run much longer per cycle, wasting energy and increasing utility costs. Always address Flow Sense warnings by cleaning your vent system promptly.
How often should I clean the vent system on my DLE7300WE?
Lint trap cleaning should happen after every load. Full vent system cleaning (including the exterior flapper) should be performed at least twice yearly, or more frequently if you have a large household or use the DLE7300WE heavily. If you notice Flow Sense warnings or reduced drying performance, clean the vents immediately rather than waiting.
Why does my DLE7300WE show Flow Sense when I use dryer sheets?
Dryer sheets and fabric softener products leave a waxy residue on the lint trap that reduces airflow. This is why washing the lint trap with hot soapy water is so important. The residue also accumulates on the lint trap housing and exhaust duct walls over time. If you use dryer sheets regularly, increase your vent cleaning frequency or consider switching to wool dryer balls instead.
Is there a way to clear the Flow Sense warning without cleaning the entire vent?
Technically, yes—you can unplug the DLE7300WE for 5 minutes to reset the warning—but this is not a solution. The warning will return within one to three loads if the underlying airflow restriction hasn’t been addressed. Always clean the vents completely rather than simply resetting the warning.
What is the part number for a replacement thermistor on the DLE7300WE?
The thermistor part number for the DLE7300WE is DC47-00024N. However, part numbers can change based on manufacturing date and revision. Before ordering, locate the thermistor on your specific unit, note the exact part number printed on it, and verify compatibility. Many appliance parts suppliers can help cross-reference to ensure you’re ordering the correct component.
Can a clogged exhaust vent actually cause my DLE7300WE to stop drying clothes?
Yes. If the vent blockage is severe enough that the DLE7300WE reads D95 or higher airflow restriction, the dryer will reduce heating to nearly nothing to prevent overheating. Clothes may come out damp or barely warm at the end of a cycle. The DLE7300WE is prioritizing safety over performance, which means your vent system requires immediate attention.
Recommended Parts & Tools
Lint Trap Brush and Dryer Vent Cleaning Kit
Flow errors on the LG DLE7300WE are often caused by lint buildup in the vent system and exhaust duct. This specialized cleaning kit allows you to safely remove accumulated lint from hard-to-reach areas without damaging the dryer components. A thorough cleaning can resolve flow restriction errors and restore proper airflow. Check current pricing on Amazon.
Replacement Dryer Thermal Fuse for LG Dryers
If cleaning doesn’t resolve the flow error, the thermal fuse may have blown due to restricted airflow, triggering the error code. This replacement fuse is compatible with LG DLE7300WE models and is one of the most common parts needed for flow error repairs. Installation requires basic tools and takes just a few minutes. Check current pricing on Amazon.
Multimeter Digital Volt Ohm Meter
A multimeter is essential for diagnosing electrical issues related to flow sensors and thermal components in your LG dryer. This tool helps you test continuity and voltage to determine if the thermal fuse or airflow sensor is faulty before ordering replacement parts. Check current pricing on Amazon.
The Vent Cleaning Kit That Actually Stops LG DLE7300WE Flow Errors
Nine times out of ten, a Flow Sense error on this model isn’t a sensor failure—it’s lint buildup restricting airflow through the vent system. Before you order a new thermal fuse or sensor, a proper vent cleaning with the right tools will either fix the problem or confirm you need a part replacement.
What works
- The flexible brush extensions reach deep into the lint trap housing and dryer duct where a standard brush can’t fit—catches the compacted lint ball that usually triggers false flow errors.
- The included vent cleaning rod sections let you snake from the dryer outlet all the way to the exterior terminator without breaking the connection, which is critical because partial clogs are the sneakiest culprit.
- After cleaning, you can actually feel the airflow difference when you run a test cycle—that’s your confirmation the error was airflow restriction, not an electrical fault.
What doesn’t
- If your vent is crushed, kinked, or routed through an attic with no access points, the kit can’t fix what you can’t reach—you may need a professional vent cleaning service.
- The brush bristles are stiff enough to scrub but not aggressive enough to clear a completely solid blockage; if lint is rock-hard from moisture, you’ll need a shop vac first.
I’ve seen too many people order a new moisture sensor or thermal fuse when the real issue was a clogged vent they could have cleaned in 20 minutes—and then the error comes back a month later because the underlying airflow problem was never addressed. Lint Trap Brush and Dryer Vent Cleaning Kit
This post contains affiliate links. As an Amazon Associate, I earn from qualifying purchases at no extra cost to you.