
LG LRFXS2503S Craft Ice Maker Repair Guide
The LG LRFXS2503S French door refrigerator features an innovative craft ice maker that produces slow-melting sphere ice. When this system fails, it’s typically due to issues with the water supply, ice maker motor assembly, or electronic control board. Common causes include clogged water lines, faulty solenoid valves, defective craft ice maker assembly, or control board communication errors. This repair is rated as MODERATE difficulty, requiring some disassembly of interior components and basic electrical troubleshooting skills. The repair typically takes 2-3 hours and requires accessing components behind the refrigerator’s left wall panel.
Symptoms
- Craft ice maker LED shows error code “1E” or flashing red light on the LG LRFXS2503S display panel
- Ice maker motor runs continuously but produces no ice spheres after 24-48 hours
- Water fills the craft ice molds but ice spheres are malformed, hollow, or fail to release properly
- No water enters the craft ice maker assembly despite normal water dispenser function
- Ice maker produces grinding or clicking noises during the harvest cycle without ejecting ice
- Craft ice function shows “OFF” status on SmartThinQ app despite being enabled in refrigerator settings
⚠️ Safety Warning
Before beginning any repair work on your LG LRFXS2503S, disconnect power at the circuit breaker for at least 5 minutes to allow capacitors to discharge. This refrigerator operates on 115V AC and contains multiple electrical components that can cause shock or injury. Turn off the water supply valve behind the refrigerator and place towels on the floor to catch water spillage during disassembly. The craft ice maker assembly weighs approximately 8 pounds and contains sharp metal edges. Wear safety glasses when working with water lines under pressure. Never attempt repairs while the unit is plugged in, as the ice maker motor and solenoid valves are controlled by live circuits.
Parts Needed
- LG Craft Ice Maker Assembly – Part #AEQ36756912 (complete motor and mold assembly)
- Water Inlet Valve Assembly – Part #5220JA2009A (dual solenoid valve for ice makers)
- Ice Maker Control Board – Part #EBR41956428 (craft ice maker PCB)
- Water Supply Line Kit – 1/4″ OD polyethylene tubing, 6 feet length with compression fittings
- Door seal gasket for craft ice compartment – Part #ADX32617710
- Temperature sensor probe – Part #6323EL2002A (thermistor for ice maker compartment)
Tools Required
- Phillips head screwdriver set (#1 and #2)
- Flathead screwdriver (1/4″ wide blade)
- Digital multimeter with DC voltage and continuity testing capability
- Adjustable wrench set (7/16″ and 1/2″)
- Needle-nose pliers with wire stripping capability
- Flashlight or headlamp for interior visibility
- Container for catching water drainage (minimum 2-quart capacity)
Step-by-Step Instructions
Step 1: Access the Craft Ice Maker Compartment
🔨 Pro Tip from Dave
One thing that trips up even experienced DIYers on this model: the craft ice maker has its own dedicated water inlet solenoid — separate from the regular ice maker solenoid — and I’ve seen countless techs (and homeowners) replace the wrong valve because they didn’t confirm which solenoid port feeds the craft ice maker specifically before ordering parts. Always trace the fill tube from the craft ice maker back to the valve and test that exact solenoid coil for continuity before assuming the whole valve assembly needs replacement.
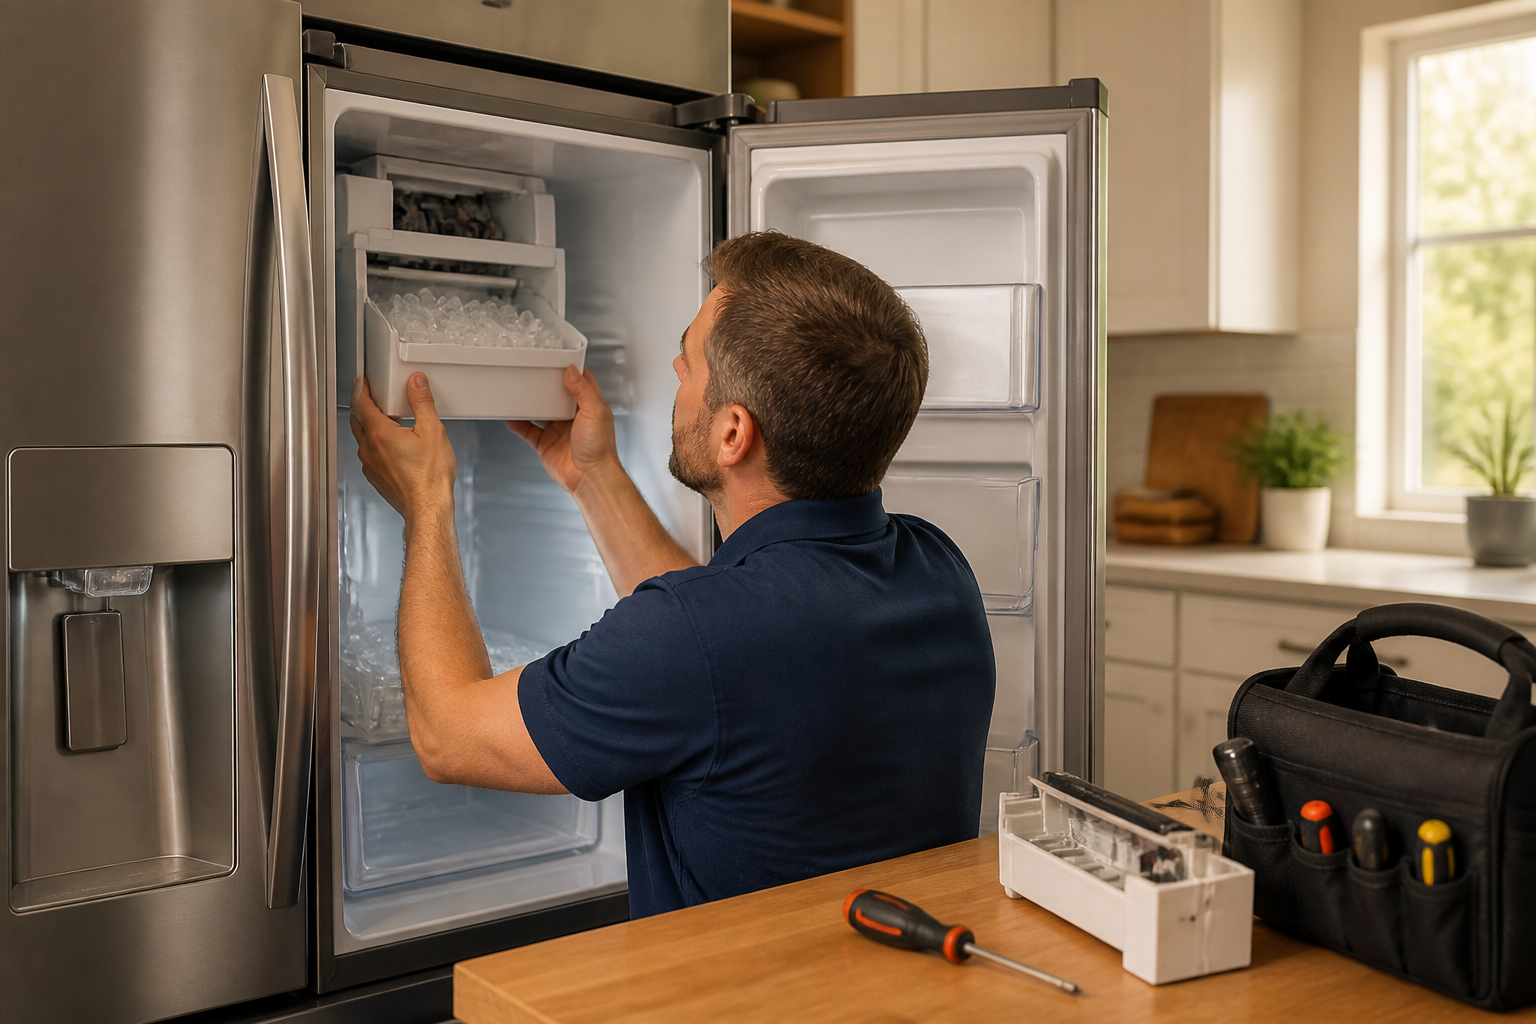
Remove all food items from the LG LRFXS2503S left door and locate the craft ice maker compartment in the upper left section. Pull out the craft ice storage bin by lifting the front edge and sliding it toward you. Remove the two Phillips screws securing the craft ice maker cover panel, located at the top-left and bottom-right corners of the compartment opening. The screws are #8 x 3/4″ length. Carefully lift the cover panel and disconnect the white 4-pin electrical connector by pressing the release tab and pulling straight out.
Step 2: Test Electrical Connections
Using your multimeter set to DC voltage, test the power supply to the craft ice maker. With the refrigerator plugged in temporarily, measure voltage across pins 1 and 2 of the disconnected harness connector. You should read approximately 12V DC. If no voltage is present, the issue is likely in the main control board or wiring harness. Also test continuity between the craft ice maker’s motor terminals using the ohm setting – you should read 150-300 ohms of resistance across the motor windings.
Step 3: Remove the Craft Ice Maker Assembly
Disconnect power and locate the three mounting screws securing the craft ice maker assembly to the refrigerator wall. These are 10-32 x 1″ screws positioned at the top-center, bottom-left, and bottom-right of the unit. Remove the water supply line by pressing the quick-connect fitting’s blue collar and pulling the 1/4″ tubing straight out. Carefully lift the craft ice maker assembly out of the compartment – it weighs approximately 8 pounds and has sharp edges on the mounting brackets.
Step 4: Inspect Water Supply System
Trace the water supply line from the craft ice maker connection point back to the dual water valve assembly, located behind the LG LRFXS2503S in the lower-right corner of the machine compartment. Check for kinks, clogs, or ice blockages in the tubing. Remove the water valve assembly by disconnecting the two 1/4″ water lines and unplugging the electrical harness. Test valve operation by applying 12V DC across the solenoid terminals – you should hear a distinct clicking sound when energized.
Step 5: Test the Craft Ice Maker Motor
With the craft ice maker assembly removed, locate the stepper motor on the bottom of the unit. This motor controls the ice formation and harvest cycles. Using your multimeter, test continuity across all four motor windings. The motor should show 200-400 ohms resistance between each pair of terminals. Check the motor gear assembly by manually rotating the main drive gear – it should turn smoothly without binding. Any grinding or resistance indicates internal motor failure requiring replacement of the complete assembly.
Step 6: Examine Ice Mold Condition
Inspect the craft ice maker’s silicone molds for cracks, tears, or buildup of mineral deposits. The LG LRFXS2503S uses a dual-mold system that creates two ice spheres per cycle. Clean the molds with warm soapy water and ensure the harvest mechanism moves freely. Check that the ice release sensors (small black components near each mold) are clean and properly positioned. These optical sensors detect when ice formation is complete and trigger the harvest cycle.
Step 7: Replace Faulty Components
If testing revealed a defective craft ice maker assembly, install the replacement unit by reversing the removal process. Align the three mounting holes with the refrigerator wall brackets and secure with the original 10-32 screws. Reconnect the water supply line by pushing the 1/4″ tubing firmly into the quick-connect fitting until it clicks. Ensure the electrical harness connector is fully seated and the release tab engages properly.
Step 8: Test Water Valve Operation
Before final reassembly, test the water inlet valve system. With power restored to the LG LRFXS2503S, access the diagnostic mode by holding the craft ice button for 5 seconds until the display shows “ICE TEST.” This mode forces a test cycle that should fill the ice molds with water within 2 minutes. If no water flows, verify the household water supply valve is fully open and water pressure is between 20-120 PSI as specified for this model.
Step 9: Calibrate Ice Maker Settings
After successful water fill testing, exit diagnostic mode and access the refrigerator’s service menu by pressing and holding the freezer and refrigerator temperature buttons simultaneously for 5 seconds. Navigate to the craft ice calibration setting and follow the on-screen prompts to reset the ice maker’s cycle timing. This ensures proper coordination between water fill, freeze, and harvest cycles specific to the LG LRFXS2503S control algorithms.
Step 10: Reassemble and Final Testing
Reinstall the craft ice maker cover panel using the two original Phillips screws. Insert the ice storage bin by sliding it fully into the compartment until it locks in place. Restore power and water supply to the refrigerator. Select craft ice mode from the dispenser panel and wait 24-48 hours for the first ice spheres to be produced. The LG LRFXS2503S typically produces 3-4 ice spheres per day under normal operating conditions.
Troubleshooting
- If ice maker still shows error codes after component replacement, check the main control board connections and verify software version is current through LG SmartThinQ app updates
- Hollow or malformed ice spheres indicate insufficient water fill – adjust water valve timing in service menu or check for partially clogged water filter
- Ice maker runs continuously without producing ice suggests faulty harvest sensors or mechanical binding in the ejector mechanism
- No power to craft ice maker assembly may indicate blown fuse F3 (5A) on the main control board, located behind the display panel
- Water leakage around ice maker compartment typically results from cracked molds or loose water line connections requiring resealing
- Unusual noises during ice production cycles often indicate worn drive gears or motor bearings necessitating complete assembly replacement
When to Call a Professional
- Refrigerant leaks or compressor issues affecting overall cooling performance beyond just the ice maker function
- Main control board replacement requiring software programming and calibration specific to the LG LRFXS2503S model
- Water supply issues involving household plumbing modifications or pressure regulator installation
- Warranty concerns on newer units where DIY repairs may void manufacturer coverage
When to Call a Professional
Most of the repairs in this guide are within reach for a careful DIYer with basic tools. In my experience, if you’ve already confirmed good water pressure and flow to the valve, replaced the craft ice maker assembly, and the unit still isn’t producing sphere ice, that’s a strong indicator of a control board communication fault — and diagnosing that correctly requires a manufacturer service mode and the right test equipment, so that’s the point where calling a certified LG technician will save you from chasing an expensive misdiagnosis. When in doubt, a diagnostic service call typically costs $80–$120 and can save you from a misdiagnosis that costs more in parts.
Recommended Parts & Tools
LG Electronics AEQ36756916 Ice Maker Assembly
This genuine LG ice maker assembly is specifically designed for LG LRFXS2503S refrigerators and directly addresses craft ice production issues. When the craft ice feature stops working, replacing the entire ice maker assembly often resolves problems related to frozen mechanisms, faulty sensors, or damaged internal components. Check current pricing on Amazon.
LG Electronics 5221JA2012A Water Inlet Valve
The water inlet valve controls water flow to the ice maker and is a common culprit when craft ice production fails on LG LRFXS2503S models. A faulty valve can prevent proper water filling cycles, resulting in no ice production or malformed craft ice spheres. Check current pricing on Amazon.


