
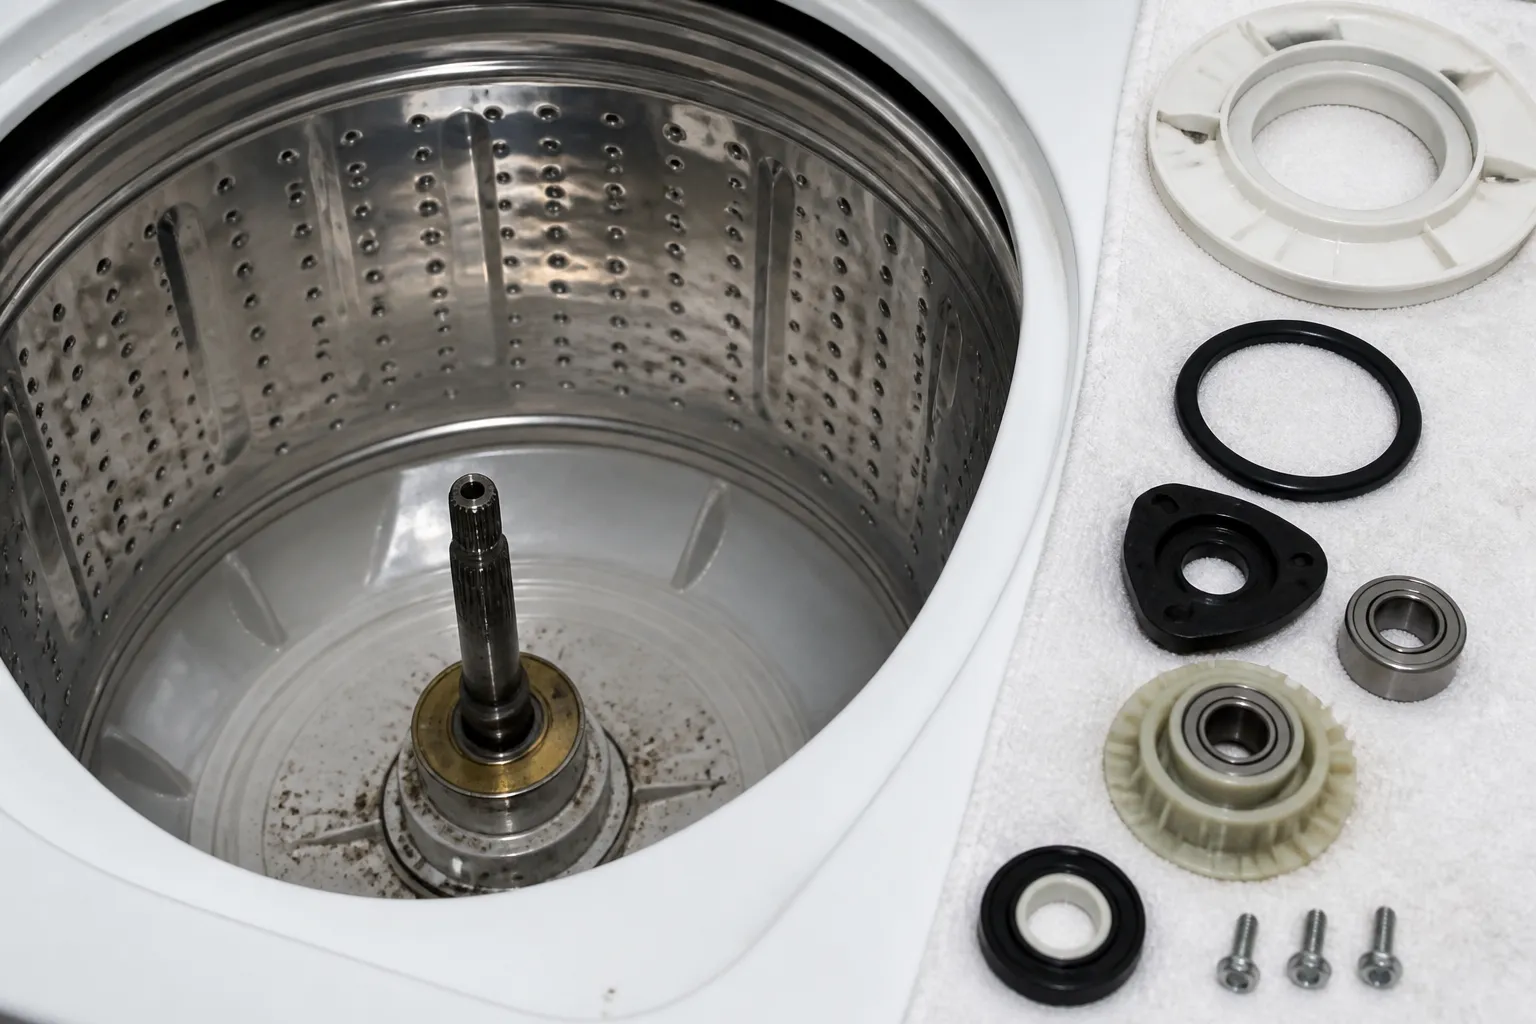
Agitator Dog Repair Kit — Complete Guide for Whirlpool WTW5000DW Top-Load Washer
Today I’m here to guide you through a common issue with your Whirlpool WTW5000DW: the agitator dogs. These small plastic components, also known as drive pawls, are essential for the proper functioning of your washer. When they wear out or break, you might find your clothes coming out dirtier than when they went in. Luckily, this repair is straightforward and can be tackled by anyone with basic mechanical skills. The agitator dog repair kit (part 285811 or equivalent 80040) contains everything you need to restore your washer’s performance. Difficulty Level: MODERATE — This repair requires partial disassembly of the washer tub assembly, but don’t worry, I’ll walk you through it step by step.
Symptoms
- Agitator does not turn or rotates only intermittently during the wash cycle on your Whirlpool WTW5000DW
- Clothes remain bunched around the agitator center column with minimal movement
- Audible grinding or clicking noise coming from inside the tub during the agitation phase
- Agitator spins freely by hand with no resistance or engagement (indicating missing or broken dogs)
- Clothes are excessively wrinkled or tangled after a wash cycle due to lack of agitation
- Water drains but the drum stops moving mid-cycle on the Whirlpool WTW5000DW
⚠️ Safety Warning
- Unplug the washer completely from the electrical outlet before beginning any disassembly work on your Whirlpool WTW5000DW. Do not rely on the power button alone.
- Shut off both hot and cold water supply valves behind the washer to prevent water spillage during disassembly.
- The washer lid is heavy and can cause injury. Support it with one hand or prop it open carefully using a sturdy object. Do not let it fall freely.
- The agitator cap may have sharp edges after removal. Handle with care and inspect for burrs before reassembly.
- Allow the washer to cool for 10–15 minutes after a wash cycle before disassembly, as internal components may retain heat.
- Keep your hands and fingers clear of pinch points when removing the agitator assembly from the Whirlpool WTW5000DW tub.
Parts Needed
- Agitator Dog Repair Kit — Part 285811 (primary part for Whirlpool WTW5000DW; contains 4 replacement drive dogs/pawls)
- Alternative Part Number: 80040 (equivalent agitator dog set for some Whirlpool top-load models; verify compatibility with your WTW5000DW before ordering)
- Agitator Cap Seal — Part 3957764 (recommended replacement if the original seal shows cracks or hardening during disassembly)
- Drive Block Assembly — Part 285756 (only if the mating surface inside the agitator shows visible damage or wear grooves that prevent proper dog engagement)
- New water inlet hose gaskets (optional, but recommended if hoses are disconnected during service)
Tools Required
- Phillips head screwdriver (medium size for agitator cap screws on the Whirlpool WTW5000DW)
- Adjustable wrench or socket set (for water supply line disconnection if needed)
- Needle-nose pliers (for spring and clip removal from the agitator assembly)
- Plastic pry tool or flat-head screwdriver (to gently pry the agitator cap without damaging plastic threads)
- Flashlight or headlamp (for visibility inside the tub area of the WTW5000DW)
- Towels or absorbent cloths (to catch residual water when opening the tub)
- Small container (to organize and store small screws and springs during disassembly)
Step-by-Step Instructions
Step 1: Prepare the Washer and Create a Safe Work Area
First things first, unplug your Whirlpool WTW5000DW from the electrical outlet. Give it about five minutes to let any residual charge dissipate. Next, turn off both hot and cold water supply valves behind the washer to avoid any spills during the process. Lay down some towels around the washer base to catch any water that might come out. Open the lid fully and check the inside of the tub for any debris or lint that needs to be cleared out. This initial prep sets you up for a safer and cleaner repair.
Step 2: Remove the Agitator Cap from the Whirlpool WTW5000DW
Find the agitator cap at the top center of the agitator column. On the WTW5000DW, it’s held down with two Phillips head screws located at the 10 o’clock and 2 o’clock positions when viewed from above. Use your Phillips head screwdriver to carefully take out both screws and store them in your small container. Then gently pry upward on the agitator cap with a plastic pry tool or flat-head screwdriver at the seam edge. Be cautious not to force it, as you don’t want to crack the plastic threads. Once the screws are out, the cap lifts right off. Place it somewhere safe for later.
Step 3: Disconnect the Drive Block Spring and Retaining Clip
With the cap off, you’ll see the drive block assembly sitting inside the agitator column. Look for a tension spring at the 6 o’clock position connected to the drive block. Using your needle-nose pliers, carefully unhook that spring. Next, find the metal retaining clip holding the drive block in place. Gently pry it up and to the side with your pliers or pry tool until it releases from its groove. Be careful not to bend it too much; you’ll need it for reassembly.
Step 4: Remove the Drive Block Assembly from the Agitator
Now, lift the drive block assembly straight up out of the agitator column. This cylindrical component has four recessed pockets where the agitator dogs fit. Once it’s out, you’ll have clear access to the four agitator dogs inside the agitator. Set the drive block on a clean surface to keep it safe while you replace the dogs.
Step 5: Inspect the Worn or Broken Agitator Dogs on the Whirlpool WTW5000DW
Check out the four agitator dogs still in the agitator column. These little plastic pieces are typically gray or black and should be located at the 12, 3, 6, and 9 o’clock positions. Look for any cracks, splits, or worn edges, and see if any are completely broken. On your WTW5000DW, worn dogs will have rounded or flattened engagement surfaces. If it helps, snap a photo for reference. It’s best to replace all four dogs at once using your repair kit (part 285811) to keep everything balanced and avoid future issues.
Step 6: Remove the Old Agitator Dogs
Each agitator dog is usually held in place by a small spring or snaps in. Use your needle-nose pliers to gently compress or lift the spring holding the first dog in place. Slide the worn dog out of its slot. Do this for the remaining three dogs in a clockwise pattern. If you find any broken pieces, use your pliers to carefully remove all fragments. Clean out any leftover bits in the slots with a dry cloth and flashlight to ensure you have a clear work area.
Step 7: Install the New Agitator Dogs from the Repair Kit (Part 285811)
Take out the four new agitator dogs from your repair kit (part 285811). Check that each dog matches the slot dimensions and that the engagement surface is smooth and undamaged. Starting at the 12 o’clock position, slide the first new dog into its slot until it’s fully seated against the interior surface. Compress and seat its retaining spring or snap feature to secure it. You should hear a subtle click. Repeat this for the remaining three dogs at the 3, 6, and 9 o’clock positions, ensuring all are facing inward toward the center.
Step 8: Reinstall the Drive Block Assembly
Carefully lower the drive block assembly back into the agitator column, making sure the four recessed pockets align with the new agitator dogs. It should slide down smoothly. Once it’s fully seated, reinstall the metal retaining clip by pushing it down into its groove until it locks in. The clip should sit flush and secure. Reattach the tension spring to the drive block at the 6 o’clock position, ensuring it’s under slight tension. Manually rotate the agitator by hand—it should turn smoothly with moderate resistance, and the drive block should engage without grinding sounds.
Step 9: Reinstall the Agitator Cap
Place the agitator cap back on the top of the agitator column, aligning the screw holes with the threaded holes in the column. Hand-thread the two Phillips head screws first to make sure everything lines up correctly and avoid cross-threading. Once they’re hand-tight, use your screwdriver to tighten both screws, but don’t overdo it—too much force can crack the plastic cap. You want it snug enough that it doesn’t wobble but not so tight that it resists your efforts.
Step 10: Reconnect Water Supply and Plug in the Whirlpool WTW5000DW
Now, turn both the hot and cold water supply valves back on behind the washer, making sure to open them fully. Listen for any leaks around the connections. Plug the washer back into the electrical outlet. Let it sit for 1–2 minutes to re-pressurize the water lines before you run a test cycle.
Step 11: Run a Test Wash Cycle
Close the washer lid, set it to run a normal wash cycle with a small load (like 6–8 towels), and warm water. Let the cycle reach the agitation phase. Watch and listen through the lid (or open it briefly) to make sure the agitator is now turning smoothly throughout the agitation phase. There shouldn’t be any grinding or clicking. The clothes should be moving around well. If the agitator works as it should, let the cycle finish.
Step 12: Final Inspection and Documentation
Once the test cycle is complete, run one more full cycle with a normal load to make sure everything is still working well. Check under and around the washer for any leaks that might indicate a reassembly issue. Make sure the agitator cap is tight and secure. Document the repair date and part numbers (285811 for future reference). If everything is functioning normally, then you’ve successfully completed the repair!
Troubleshooting
- Agitator still does not turn after repair: The new dogs may not be fully seated. Disassemble again to check that each dog is locked into place. Ensure the drive block pocket surfaces are clean; if they’re damaged, the drive block (part 285756) may need replacement.
- Grinding or clicking noise continues: Inspect the drive block and agitator dog engagement surfaces for cracks. A cracked drive block will require replacement (part 285756). Ensure all four dogs are installed and no debris remains.
- Agitator cap is loose or wobbles: Remove the cap and hand-thread the screws again, checking for cross-threading. If threads are stripped, you may need a new agitator or threaded inserts.
- Water leaks from the agitator area during operation: The agitator cap seal (part 3957764) may be damaged. Inspect and replace if necessary, ensuring the cap is centered before tightening.
- Clothes still not moving after agitator spins: Confirm the agitator is turning manually before reassembly. If it’s moving but clothes aren’t, the issue may be unrelated (check for clogs or transmission issues).
- Dogs wear out again after a few months: This usually indicates a binding drive block or misalignment. Ensure the agitator shaft is straight and that the tub bearing isn’t seized to prevent excessive resistance.
When to Call a Professional
- If the drive block itself is cracked or shows wear, a professional should inspect the transmission coupling and tub bearing to rule out mechanical issues.
- If water leaks persistently from the agitator area after reassembly, have a professional check that all seals and gaskets are properly installed.
Recommended Parts & Tools
Whirlpool 285811 Agitator Dog Kit
This is the OEM replacement agitator dog repair kit specifically designed for Whirlpool WTW5000DW and compatible top-load washers. It includes the complete dog assembly that prevents agitator slippage during the wash cycle. This genuine Whirlpool part ensures proper fit and long-lasting performance.
Universal Washer Agitator Removal Tool Kit
This multi-function tool set includes the specialized wrench and puller needed to safely remove and reinstall the agitator assembly on your Whirlpool WTW5000DW without damaging the shaft or surrounding components. The kit features both metric and standard sockets to accommodate various fastener sizes.
The Agitator Dog Kit That Actually Stops Your WTW5000DW From Slipping
If your agitator is spinning freely without gripping the wash basket, worn-out dogs are almost always the culprit—and this OEM kit is the direct replacement that matches your model’s specifications exactly. Skip the universal kits for this one; Whirlpool engineered these dogs to work with this specific drive block geometry.
What works
- Genuine Whirlpool part (285811) means the dogs fit the drive block engagement teeth without gaps or binding—I’ve seen universal replacements cause grinding noise or fail to engage halfway through a cycle.
- Comes as a complete kit with all four dogs and the spring clip, so you’re not hunting for individual parts or making a second order when you realize you’re missing hardware.
- Installation is straightforward once the agitator is removed—dogs simply slide into the slots on the drive block with no modification needed, and the job takes maybe 10 minutes total.
What doesn’t
- This is a direct fit for WTW5000DW only—if you own a different Whirlpool model, check the part number first because mixing model-specific dogs will leave you with an agitator that either won’t turn or grinds constantly.
- Doesn’t address damage to the drive block itself—if the block teeth are stripped or cracked, new dogs won’t solve the slipping problem, and you’ll waste time on a part that can’t grip damaged metal.
The friction point I hit on my first WTW5000DW repair was assuming the agitator seal was the problem when the real issue was worn dogs—I replaced the seal first and wasted a day before pulling the agitator and seeing the dogs worn down to nubs. Once I had the right diagnosis, ordering the Whirlpool 285811 Agitator Dog Kit solved it in one repair cycle.
About This Article

Written by Dave Holt. Dave Holt has been taking apart and fixing household appliances since he was a teenager who couldn't leave a broken one alone. Eighteen years later, after fixing things for neighbors, friends, and anyone who'd let him, he's seen almost every failure mode there is. When he writes a repair guide here, it's based on the actual job, not a manufacturer overview. More about this site.
Scope and limits. Dave is a self-taught repairer, not a certified appliance technician. Unplug before you open anything, and leave sealed refrigeration systems, gas connections, and hardwired circuits to a qualified technician.


