
Speed Queen Top-Load Washer Transmission Oil Leak Repair Guide
Speed Queen commercial-grade washers are built for durability, but like any machine with moving parts, the transmission can develop oil leaks over time. This comprehensive guide covers diagnosing transmission oil leaks, identifying which components are failing, and performing the necessary repairs. We’ll also address motor capacitor issues, which are frequently confused with transmission problems since both affect washer startup and operation.
⚠️ Safety Warning
Before beginning any repair work on your Speed Queen washer:
- Disconnect the washer from electrical power at the outlet or circuit breaker
- Allow the machine to cool for at least 30 minutes if it has been running
- The transmission fluid may be hot — use caution when handling
- Motor capacitors store electrical charge even when disconnected — you must discharge them before handling (see discharge procedure below)
- If you identify a natural gas connection or smell gas, do not attempt repairs — contact a qualified service technician
- Never work on internal components while the machine is plugged in
Identifying a Speed Queen Transmission Oil Leak
Visual Signs of Transmission Oil Leaks
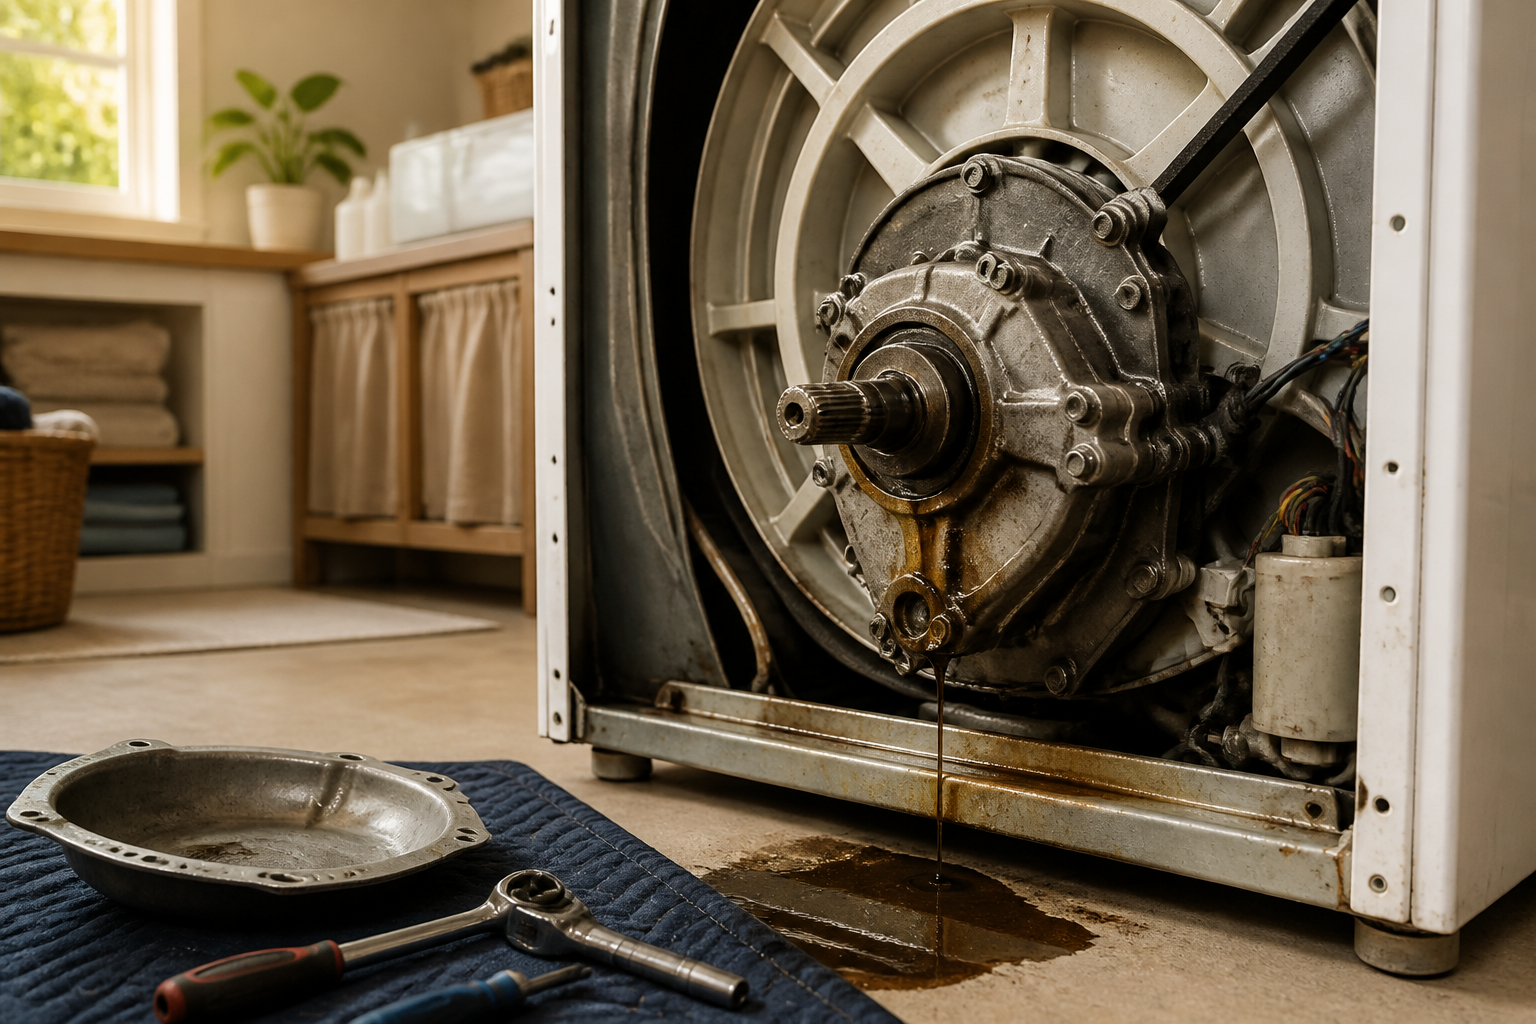
A Speed Queen transmission oil leak manifests in several distinct ways. The most obvious sign is dark brown or black oil beneath the machine. Speed Queen transmission fluid is typically a mineral oil with a reddish-brown color when new, darkening to nearly black as it ages and circulates through the transmission. Check the floor under the washer, particularly directly beneath the transmission housing, which is located at the bottom center of the machine.
You may notice oily residue on the cabinet exterior near the bottom front or sides. Some users report a distinct petroleum smell coming from the washer, particularly after a wash cycle when the transmission has been operating. This is often the first warning sign before visible pooling occurs.
Visible drips or small puddles that appear after the washer has been running for 10-15 minutes indicate an active leak. Mark the location of these drips with a piece of tape on the floor and note the time to help your technician identify the source.
Differentiating Transmission Oil from Other Fluids
Speed Queen washers use transmission oil that is distinct from coolant, detergent residue, or water. Real transmission oil will:
- Be noticeably slippery between your fingers
- Not mix readily with water (will bead up on wet surfaces)
- Have a strong petroleum smell
- Leave a dark stain on paper or fabric that persists over time
- Never come from the drain hose or water inlet areas
Common Transmission Oil Leak Locations in Speed Queen Washers
Output Shaft Seal Leaks
The output shaft seal is the most common source of transmission oil leaks in Speed Queen washers. This seal is located where the transmission output shaft exits the transmission housing to connect to the drive pulley. The seal is a mechanical component rated for continuous rotation and high pressure — under normal operating conditions, some minor weeping is acceptable, but active dripping indicates seal failure.
The output shaft seal in Speed Queen washers is typically a double-lip design with a spring tension component. When this seal wears or is damaged, transmission fluid begins to escape around the rotating shaft. You’ll notice oil on the exterior of the transmission case below the pulley area and on the drive belts.
This is the most accessible seal for DIY replacement on Speed Queen top-load models, located at the bottom-front of the transmission assembly.
Transmission Fill Plug Leaks
Speed Queen transmissions are sealed units with a fill plug located on the top or side of the transmission case. This plug is typically a hex-head bolt (usually 12mm or 14mm) with a rubber or cork gasket. Over time, this gasket deteriorates, allowing fluid to seep out slowly.
If you notice oil appearing at the bottom of the washer cabinet but cannot locate it coming from the shaft seal area, the fill plug gasket is likely the culprit. This is a simple repair requiring only a new gasket and a wrench.
Transmission Case Cracks
Less common but more serious, small cracks can develop in the transmission case casting due to impact, vibration stress over decades, or manufacturing defects. These cracks typically develop along the bottom seam or near mounting points. A cracked transmission case cannot be repaired and requires complete transmission replacement — this is beyond DIY scope and should be handled by a certified technician.
To identify a case crack, thoroughly clean the entire transmission exterior with a dry cloth, run the washer for one cycle, and immediately inspect. A case crack will show oil seeping from a specific line or point rather than from a gasket junction.
Is a Minor Speed Queen Transmission Oil Leak Normal?
Speed Queen commercial equipment is designed with tighter tolerances than residential machines, but minor transmission fluid weeping is within manufacturing specifications. Here’s how to determine if your leak is acceptable or requires repair:
Normal Weeping vs. Problem Leak
Normal Weeping (No Repair Required):
- A barely visible mist of oil around the output shaft seal after 8+ hours of operation
- Very minor accumulation (less than 1 tablespoon per week) on the cabinet floor
- Only visible after extended use cycles, not present after a single wash
- No oil present on the drive belts
- Transmission fluid level remains adequate when checked via dipstick (see owner’s manual for location)
Problem Leak (Repair Required Immediately):
- Visible drops forming and falling within 30 minutes of washer startup
- More than 1 tablespoon of oil accumulation per wash cycle
- Oil present on the drive belts (indicates significant leakage)
- Noticeable petroleum smell during operation
- Transmission fluid level dropping between uses (requires regular topping off)
- Oil visible from multiple leak points on the transmission case
The distinction matters because addressing a minor weep prematurely may lead to unnecessary transmission replacement when a simple seal recoating or gasket refresh would suffice. However, a problem leak requires immediate attention to prevent transmission damage from fluid loss and belt contamination.
Output Shaft Seal Replacement Procedure
Tools and Materials Required
- Socket set (including 10mm, 12mm, and 14mm sockets)
- Adjustable wrench
- Screwdrivers (Phillips and flathead)
- Small pry bar or flathead screwdriver for seal removal
- Seal driver tool (specific to your model — see part numbers below)
- Needle-nose pliers
- Clean shop towels
- Small container for fasteners
- New output shaft seal assembly (model-specific)
- Optional: seal installation kit with driver ring
Accessing the Transmission
The transmission in Speed Queen top-load washers is located beneath the washing tub. Access requires removing the front panel and drain hose assembly:
- Unplug the washer from the electrical outlet
- Close the water inlet shutoff valves on the wall behind the machine
- Locate the front access panel — typically held by four Phillips-head screws along the bottom edge
- Remove screws and carefully pull the panel away from the machine
- The transmission will be visible at the bottom center, directly below the tub
- Note the position of all hoses and electrical connections before proceeding
If your Speed Queen model has a side access panel instead of front access, locate the panel on the opposite side of the motor and follow the same removal sequence.
Removing the Drive Belt
Before accessing the output shaft seal, you must remove the drive belt to prevent accidental rotation:
- Locate the belt tensioner bracket (typically mounted on the motor frame)
- Using an adjustable wrench, loosen the tensioner bolt counterclockwise until slack appears
- Slide the belt off the pulley on the transmission output shaft
- If the belt is cracked, frayed, or shows signs of oil contamination, replace it with a new one — oil exposure degrades rubber rapidly
- Set the belt aside on a clean surface
Removing the Old Seal
The output shaft seal is a pressed component seated in a groove at the point where the shaft exits the transmission case:
- Position your small pry bar at the edge of the old seal (not touching the rotating shaft itself)
- Gently pry the seal outward — it may require several attempts if it’s corroded
- Do not use excessive force that could damage the shaft or case bore
- Once the seal is loose, carefully extract it by hand
- Inspect the shaft surface where the seal made contact — it should be smooth and free of scoring
- If the shaft is scored or pitted, the seal will not hold, and transmission replacement is necessary
- Wipe away all old oil and seal debris with a clean cloth
Installing the New Seal
Speed Queen output shaft seals are available as complete assemblies with the spring tension already installed. Installation is the reverse of removal:
- Inspect the new seal before installation — it should have a spring coil visible on the inner lip
- Apply a very light coat of clean transmission fluid to the shaft where the seal will contact
- Position the seal squarely over the shaft opening
- Using a seal driver tool (specific to your model), press the seal straight into the bore until it seats flush with the case
- Do not tap with a hammer — use steady, even pressure from the driver tool
- The seal should seat with a slight resistance — when properly installed, it will not move when you attempt to wiggle it by hand
Note on Seal Driver Tools: Speed Queen seals require specific driver tools to avoid damage. Common driver sizes for Speed Queen transmissions are 1.750 inches (44.45mm) and 2.000 inches (50.8mm) in diameter. Verify your model’s requirement in the service manual before purchasing or fabricating a driver.
Reinstalling the Belt and Testing
- Reinstall the drive belt over the transmission output pulley
- Adjust the tensioner until the belt is snug but not over-tight — proper tension is approximately 1/2 inch deflection when you press the belt midway between pulleys
- Secure all fasteners before reconnecting power
- Reconnect the washer to power and run a test cycle without water to verify belt tracking and listen for any unusual sounds
- After 5-10 test cycles, check for any leaking around the newly installed seal
- Minor weeping during initial operation is normal as the seal breaks in — monitor over the first week of use
Common Output Shaft Seal Part Numbers
Speed Queen transmissions use different seals depending on model year and transmission type. Research your specific machine using the model number plate (typically located on the back panel or inside the door area):
- Speed Queen 30-series (LWN, WWN models): Output shaft seal assembly M095070, secondary part number 090207
- Speed Queen 40-series commercial (LWN40, WWN40): Seal assembly M098765 with spring tension component
- Speed Queen 50-series (LWN50, WWN50): Heavy-duty seal M099450
- Older Speed Queen models (pre-2000): Consult service documentation as seal designs vary significantly
If you cannot locate your exact part number, contact Speed Queen customer service with your machine’s serial number — they provide detailed service documentation at no cost.
Speed Queen Motor Capacitor: Location, Function, and Failure Symptoms
What the Motor Capacitor Does
The motor capacitor in a Speed Queen washer is an electrical component that stores and releases energy to start the main drive motor. Unlike the transmission, which is mechanical, the capacitor is purely electrical. Speed Queen washers typically use a motor run capacitor rated between 7.5 and 15 microfarads (µF), depending on motor horsepower.
The capacitor serves two critical functions: First, it provides the initial electrical phase shift needed to start the motor from a standstill. Second, it maintains optimal electrical conditions while the motor runs, allowing it to operate at full speed and efficiency. When the capacitor fails, the motor cannot receive the electrical signal needed to start or maintain speed.
Locating the Motor Capacitor
The motor capacitor on Speed Queen top-load washers is mounted directly to the motor frame, typically on the rear or side of the motor housing. To locate it:
- Access the rear of the machine by pulling it away from the wall (ensure water and electrical connections remain intact)
- Look for a cylindrical component approximately 2-3 inches tall attached to the motor with metal clips or a mounting bracket
- The capacitor will have two wire terminals at the top and a label showing microfarad (µF) and voltage ratings (typically 370-440V)
- You may also see the capacitor mounted on the side of the motor frame, visible when the access panel is removed
The exact location varies by model year — consult your service manual for a diagram specific to your machine.
Motor Capacitor Failure Symptoms
Motor hums but won’t start: This is the classic capacitor failure symptom. When you initiate a wash cycle, the motor makes a low humming sound but the drum does not rotate. The hum indicates the motor is receiving electrical power but cannot generate the initial torque to start. This is almost always a failed capacitor.
Very slow start: The motor takes 5-10 seconds to begin rotating, then accelerates to normal speed. This indicates the capacitor is partially failed — it provides some starting assistance but not at full efficiency.
Motor runs but shuts off intermittently: If the motor starts but cuts out during the cycle, a failing capacitor (especially one with internal arcing or shorts) may be the cause. This is less common than complete failure but possible.
Burning smell from the motor area: A capacitor failure can produce a distinct burning or popcorn-like smell from the motor area. This indicates internal arcing within the capacitor and means it requires immediate replacement — do not operate the machine further.
Visible capacitor damage: Look for bulging on the top of the cylindrical capacitor case, or a split/crack in the casing. These are certain signs of failure and the capacitor must be replaced.
Motor Capacitor vs. Transmission Problems: How to Tell the Difference
Many homeowners confuse motor capacitor failure with transmission issues because both prevent the drum from rotating. Here’s how to distinguish them:
Capacitor Failure: Motor hums, drum doesn’t move, belt is loose or stationary. The problem is electrical — the motor isn’t generating torque. Check for burning smell near the motor.
Transmission Failure: Motor runs and makes normal operating noise, belt turns, but drum rotates very slowly or not at all. The problem is mechanical — the transmission isn’t transferring power correctly.
To test: Start a wash cycle and listen near the motor (not the transmission). If the motor hums without engaging, it’s the capacitor. If the motor runs normally but the drum doesn’t move, the issue is in the transmission or drive belt.
How to Safely Test and Replace the Motor Capacitor
Critical Safety: Capacitor Discharge Procedure
⚠️ Motor capacitors store electrical charge that can cause serious shock or burns even when the appliance is unplugged. You must discharge the capacitor before touching it:
- Unplug the washer from the electrical outlet
- Wait 5 minutes for residual charge to dissipate
- Using an insulated screwdriver (handle with plastic insulation), touch one terminal to the other terminal, allowing any remaining charge to ground safely
- Repeat this discharge procedure 2-3 times to ensure complete discharge
- You should not see or hear any spark — if you do, wait another 5 minutes and repeat
- After discharge, the capacitor is safe to handle
Never skip this step. Capacitor discharge accidents result in burns, muscle spasms, and involuntary movements that can cause additional injury. Treat the capacitor as live until you have personally discharged it.
Testing the Capacitor with a Multimeter
Before replacing the capacitor, you can confirm it’s actually failed using a multimeter with capacitance measurement capability (not all multimeters have this feature):
- After discharging the capacitor, set your multimeter to the capacitance measurement mode (symbol µF)
- Touch one probe to each terminal of the capacitor
- The multimeter will display a capacitance reading in microfarads
- Compare this reading to the rated capacitance on the capacitor label (e.g., 10µF)
- If the reading is zero
Recommended Parts & Tools
Automatic Transmission Fluid (ATF) – Dexron III
Speed Queen washers with transmission oil leaks require proper replacement fluid to restore hydraulic function after repair. This Dexron III ATF is the correct viscosity and specification for Speed Queen transmission systems and will ensure smooth operation of your washer after seal replacement. Check current pricing on Amazon.
Disposable Gasket Scraper Set
When accessing the transmission area to locate and repair the oil leak, you’ll need to remove old gasket material without damaging metal surfaces. This scraper set provides plastic and metal options to safely remove residue before installing replacement seals and gaskets. Check current pricing on Amazon.
Oil Absorbent Spill Kit
Transmission fluid spills during the repair process require prompt cleanup to prevent slip hazards and protect your flooring. This absorbent kit quickly contains and cleans transmission oil leaks, making the repair area safe to work in and easier to restore. Check current pricing on Amazon.
The Right Fluid Makes the Difference When Refilling After a Speed Queen Transmission Seal Repair
Once you’ve replaced the leaking seal or gasket, you’re going to need to refill the transmission with the correct fluid—and using the wrong spec is one of the easiest ways to undo all your work. Dexron III ATF is what Speed Queen calls for in their commercial-grade top-loaders, and it’s the only fluid I’ve trusted on these machines after I made the mistake of grabbing a generic “universal” ATF on my first transmission job.
What works
- Matches OEM viscosity and friction modifiers exactly—no slippage or erratic spin speeds after refill
- Widely available and costs less than ordering direct from Speed Queen’s parts supplier
- Stable in older Speed Queen transmissions that have seen years of heavy commercial use
What doesn’t
- If you grab a synthetic blend or full synthetic ATF by mistake, you may see foam in the transmission and slight torque loss during the spin cycle
- Won’t solve a leak on its own—you still have to find and seal the source, or you’ll be refilling every few months
I learned the hard way that ordering fluid is the step most DIYers skip until they’ve already torn into the transmission pan and discovered they don’t have any on hand. Automatic Transmission Fluid (ATF) – Dexron III is cheap insurance—grab it before you start the repair so you’re not scrambling halfway through.
This post contains affiliate links. As an Amazon Associate, I earn from qualifying purchases at no extra cost to you.


