LG LFXS26973S Freezer Frosting Up: Complete Diagnostic and Repair Guide
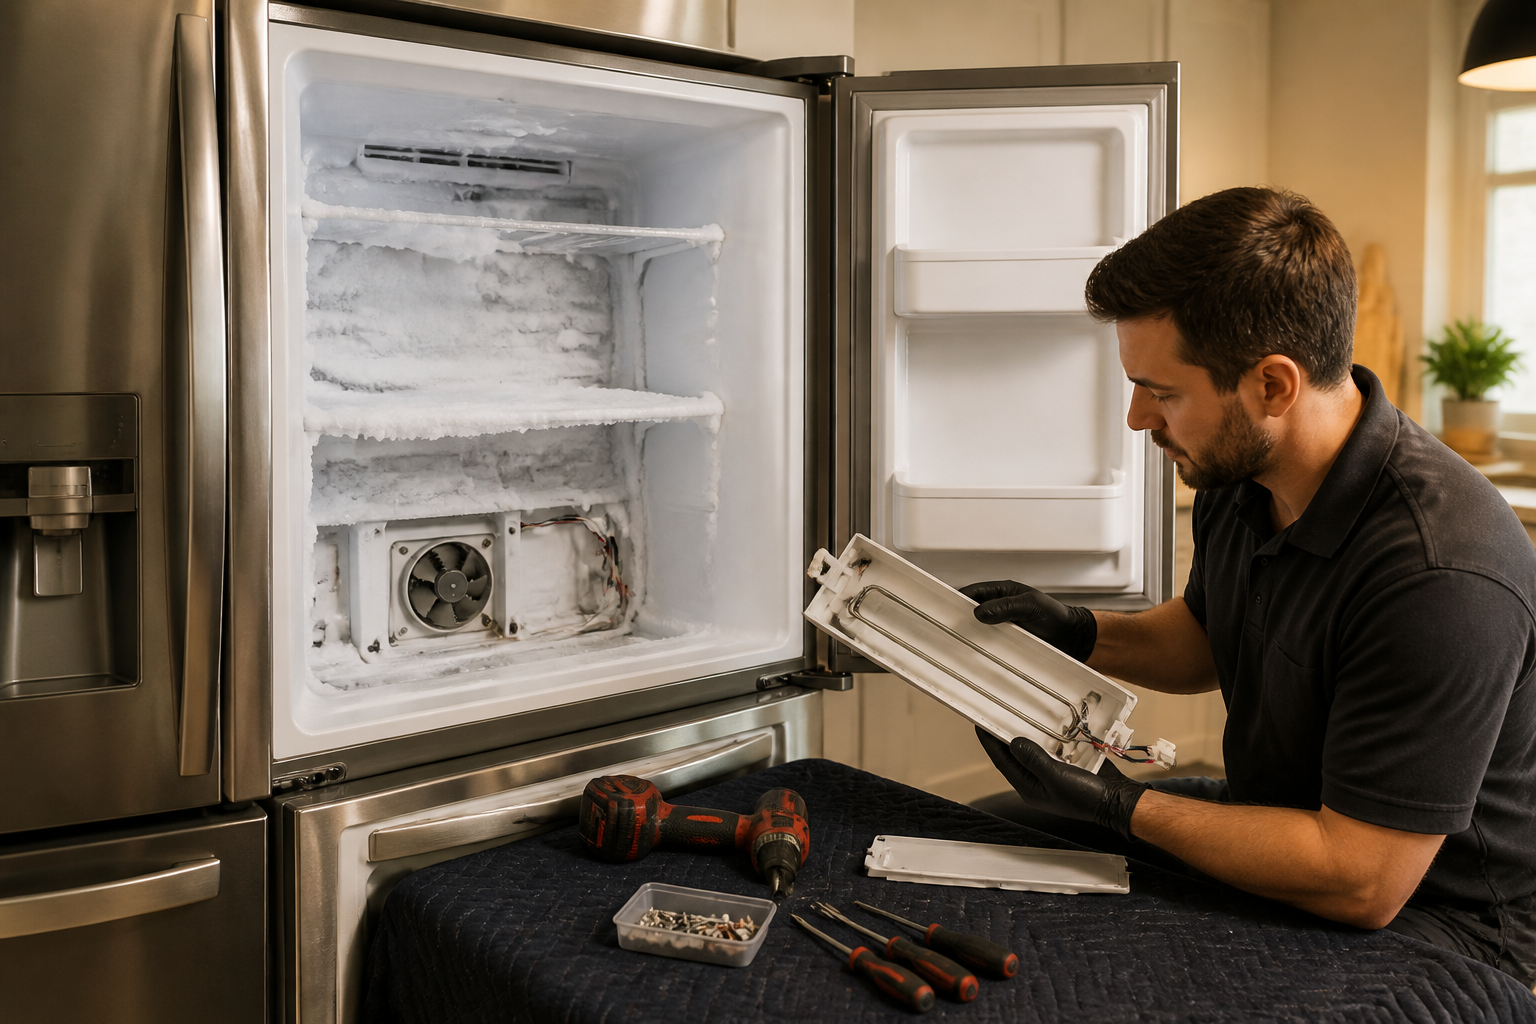
One of the most common problems I’ve run into is excessive frost buildup in the freezer compartment of the LG LFXS26973S French door refrigerator. If you’ve opened your freezer drawer to find ice covering the walls and back panel, you’re not alone. This guide will help you identify the likely culprits — the defrost heater, defrost thermostat, defrost timer/control board, or a faulty door gasket — and walk you through diagnosing and repairing the issue yourself, which can save you a significant amount compared to calling in a technician.
Understanding the Defrost System in the LG LFXS26973S
Your LG LFXS26973S employs an automatic defrost system that cycles on about every 8-12 hours. During this cycle, the defrost heater element works to melt ice accumulating on the evaporator coil. The melted water then drains through the defrost drain pan and out of the refrigerator. However, if any component of this system fails, you can expect frost to build up rapidly, often covering the entire back wall of the freezer in just 24-48 hours.
Common Causes of Frosting in the LFXS26973S Freezer
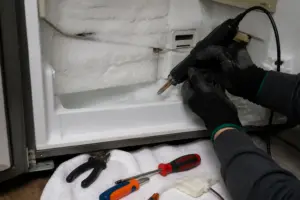
Defrost Heater Failure
The defrost heater is a heating element that warms the evaporator coil to melt accumulated ice. In the LG LFXS26973S, this heater is located behind the freezer back panel and wrapped around the evaporator coil. When it burns out—as frequently happens in this model—ice continues to build up because melting doesn’t occur. Burnouts can result from power surges, manufacturing defects, or simply wear over time. Most units experience this failure between 3-7 years of use.
Defrost Thermostat (Thermal Limiter) Failure
The defrost thermostat is a temperature-sensitive switch that indicates when the defrost heater should turn on and off. In the LFXS26973S, you’ll find it mounted directly on the evaporator coil. If this thermostat fails, it may not signal the heater to activate, or it could get stuck in the “on” position. When stuck off, ice accumulates; when stuck on, you might notice frost only on one side of the freezer or experience unusually cold temperatures.
Defrost Timer or Control Board Issue
The defrost timer or control board in the LFXS26973S manages the entire defrost cycle. Newer models utilize a solid-state control board instead of a mechanical timer. If this board malfunctions or gets stuck, it won’t initiate the defrost cycle, leading to continuous frost accumulation. Although control board failures are less frequent than heater issues, they can be more challenging to diagnose.
Door Gasket Leak
The French door design of the LFXS26973S means you have two door gaskets on the refrigerator section and one on the freezer drawer. If any of these gaskets are compromised, warm, humid air can enter the freezer, where it condenses and freezes on the coils and walls, creating excess frost. This cause is often overlooked, as homeowners typically focus solely on the defrost system.
Evaporator Fan Motor Failure
The evaporator fan circulates cold air throughout both the freezer and refrigerator compartments. If this fan stops working, the defrost heater may function correctly, but the melted water won’t evaporate properly, leading to frost buildup. Furthermore, without proper air circulation, cold spots develop, causing the system to work harder.
Step 1: Visual Inspection to Identify the Problem
Before ordering any parts for your LFXS26973S, I recommend performing a visual inspection to narrow down the cause of the frost issue.
- Open the freezer drawer fully and check where the frost is concentrated. If frost covers the entire back wall and sides, you’re likely looking at a defrost heater or thermostat failure. If frost is primarily on the drawer slides and lower areas, a door gasket problem is more probable.
- Inspect the freezer drawer rails and slides. If they’re heavily frosted but the back wall is relatively clear, it indicates that warm air is leaking in from the door seal rather than an issue with the defrost system.
- Feel the back panel of the freezer. In a functioning LFXS26973S, the back panel should be cold but not solidly frozen. If it feels like a solid block of ice, you’re dealing with a defrost system failure.
- Unplug the refrigerator and allow it to sit for 30 minutes. If frost melts significantly during this period, the defrost heater is likely working, albeit inefficiently, indicating a potential thermostat or timer issue. If the frost stays solid, the heater isn’t functioning at all.
Step 2: Remove the Freezer Back Panel on the LFXS26973S
To effectively diagnose the frosting issue, you’ll need to access the evaporator coil behind the back panel.
- Unplug the refrigerator from the electrical outlet.
- Remove the freezer drawer by pulling it straight out until it stops, then lifting the front edge and pulling again.
- The back panel is usually secured with 2-4 plastic clips or screws. On most LFXS26973S models, clips are located on the top corners. Push inward on these clips while pulling the panel toward you.
- Once the panel is loose, carefully pull it away from the refrigerator. Be cautious—there’s often a defrost drain tube attached to the back of this panel. Disconnect it gently.
- With the back panel removed, you’ll have a clear view of the evaporator coil and the defrost heater element.
Step 3: Testing the Defrost Heater on the LFXS26973S
<pThe defrost heater in the LFXS26973S is the most frequently failing component, and it’s a thin metallic heating element wrapped around the evaporator coil, typically located in the center-back area of the freezer cavity.Locating the Defrost Heater
With the back panel removed, look for a thin metal tube or wire element spiraling around the evaporator coil. The heater is approximately 3-4 feet long and about 1/4 inch in diameter. The heater terminals connect to wires leading to the control board, usually located on the back exterior of the refrigerator. The part number for most LFXS26973S models is 4391960 or 5300609262, but make sure to verify this before ordering.
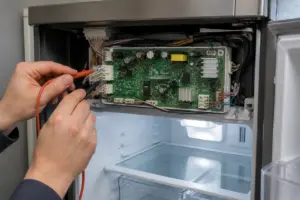
Testing with a Multimeter
To test the defrost heater on your LFXS26973S, you’ll need a digital multimeter. Here’s how:
- Ensure the refrigerator is unplugged and has been disconnected for at least 5 minutes.
- Locate the two heater terminals on the defrost heater element, typically held in push-on style connectors.
- Gently pull the connector wires away from the terminals to expose the metal spades.
- Set your multimeter to the ohms (resistance) setting, usually marked with an Ω symbol.
- Touch the multimeter probes to the two heater terminals.
- A properly functioning defrost heater in the LFXS26973S should read between 40-60 ohms of resistance. Some models may show a range of 30-100 ohms depending on the specific design.
- If the multimeter reads “OL” (open line) or shows infinite resistance, the heater element has burned out and needs replacement.
- If the reading is within the normal range but your freezer still accumulates frost, the heater may have internal corrosion, or the thermostat could be preventing it from activating. Move on to Step 4.
Replacing the Defrost Heater in the LFXS26973S
If your multimeter confirmed that the heater is burned out, replacement is necessary. The defrost heater assembly for the LFXS26973S typically costs between $80-150 depending on the exact part number.
- With the refrigerator unplugged, disconnect the wire connectors from the heater terminals by gently pulling them off.
- The heater element is usually secured by a metal bracket or clips. Locate these fasteners and release them. On the LFXS26973S, they’re typically small plastic or metal clips near the evaporator coil.
- Carefully unwrap the old heater element from around the coil and remove it.
- Position the new heater element in the same location, wrapping it around the evaporator coil just like the original. Ensure it spirals smoothly without sharp bends.
- Secure the heater with its clips or brackets.
- Reconnect the wire connectors to the heater terminals, ensuring they’re fully seated.
- Reinstall the back panel and freezer drawer, reconnect the defrost drain tube, and plug the refrigerator back in.
- Run a manual defrost cycle (see Step 5) to verify the heater is working properly.
Step 4: Testing the Defrost Thermostat on the LFXS26973S
If your heater resistance reading was normal but frost is still accumulating, the defrost thermostat (thermal limiter) is likely the issue. You’ll find this component mounted on the evaporator coil and it looks like a small cylindrical device with a temperature dial.
Locating the Defrost Thermostat
On the LFXS26973S, the defrost thermostat is typically clipped directly to the evaporator coil, usually on the lowest horizontal section. It’s a small component, around 1 inch long and 1/2 inch in diameter, with two wire terminals.
Testing Procedure
- Unplug the LFXS26973S and allow it to sit for at least 10 minutes to ensure all power is discharged.
- Locate the two wires connected to the thermostat terminals and gently pull them free.
- Set your multimeter to the ohms (resistance) setting.
- Touch the multimeter probes to the thermostat terminals.
- A functioning defrost thermostat will show approximately 0 ohms of resistance (a complete circuit) when the coil temperature is above approximately 32°F. If the coil is very cold (below 32°F), the thermostat should show infinite resistance (open circuit).
- If the thermostat shows infinite resistance at room temperature or above, it’s stuck in the open position and must be replaced.
- If it shows 0 ohms resistance even when the coil is cold, it’s stuck closed, causing the heater to run continuously or not cycle properly.
Replacing the Defrost Thermostat
The defrost thermostat for the LFXS26973S typically costs $35-60, with part numbers 2149107 or 6502JJ702 depending on your exact model variant.
- With the refrigerator unplugged, disconnect the wire terminals from the thermostat.
- Remove the clip or fastener holding the thermostat to the evaporator coil. On the LFXS26973S, this is usually a simple clip that slides or pops off.
- Position the new thermostat in the same location, ensuring it’s in direct contact with the coil. Poor contact will prevent accurate temperature sensing.
- Secure the thermostat with its clip.
- Reconnect the wire terminals, ensuring they’re fully seated.
- Plug the refrigerator back in and monitor the freezer temperature over 24 hours to verify a reduction in frost.
Step 5: Performing a Manual Defrost Cycle on the LFXS26973S
After replacing either the heater or thermostat, you can force a defrost cycle to confirm the repair before reassembling everything.
- Plug the LFXS26973S back in after your repairs.
- Locate the defrost timer or control board. On most LFXS26973S models, the control board is mounted on the back of the refrigerator, near the compressor area. Some models have an accessible defrost cycle button labeled “Test” or “Defrost.”
- If your LFXS26973S has a test button, press and hold it for 3-5 seconds. You should hear a relay click, indicating the defrost heater has been activated.
- If there’s no test button, you can manually advance the defrost timer by removing the control board and rotating the timer wheel. This requires more technical skill and may void warranties—only attempt this if you’re confident in your abilities.
- Once the defrost cycle starts, you should feel heat coming from the back panel area if the heater is functioning. The temperature inside the freezer may rise slightly as the heater melts ice.
- Allow the cycle to run for 15-20 minutes, then check if water drains from the defrost drain opening at the bottom of the back panel.
- If you see water draining and the coil defrosts, your repair was successful. If no water appears or the heater doesn’t produce heat, you may have a different problem—refer to the troubleshooting section below.
Step 6: Checking the Door Gasket on the LFXS26973S
The French door design of the LFXS26973S features two refrigerator door gaskets and one freezer drawer gasket. A compromised seal on any of these can allow warm, humid air into the freezer, where it condenses and freezes on cold surfaces. This issue is particularly problematic in humid climates and is often an overlooked cause of freezer frosting.
Inspecting the Door Gaskets
- Remove all items from the freezer drawer to get a clear view.
- Visually inspect the entire perimeter of the freezer drawer gasket where it contacts the refrigerator frame. For the LFXS26973S, check for cracks, tears, hardening, or deformation of the rubber seal.
- Pay special attention to the bottom corners and the area where the gasket folds at the hinge side, as these areas experience the most wear.
- Also inspect the lower edges of the two refrigerator door gaskets, as these sometimes compress or deform from the weight of the doors.
Dollar Bill Test for Air Leaks
A straightforward but effective test for gasket integrity on the LFXS26973S:
- Close the freezer drawer with a dollar bill (or a piece of paper) positioned at various points along the gasket—top center, bottom center, left edge, right edge.
- Try to pull the dollar bill out. It should require significant force to remove. If it slides out easily, that section of the gasket isn’t sealing properly.
- Repeat this test along the entire perimeter of the door gasket, paying special attention to the bottom edge and corners.
- Also test the bottom edges of the refrigerator doors in the same way, as these can contribute to freezer humidity problems in the LFXS26973S.
Gasket Replacement
If the gasket fails the dollar bill test, it will need replacement. The freezer drawer gasket for the LFXS26973S has the part number 3550JJ701 and costs approximately $60-90. Refrigerator door gaskets are part numbers 3550JJ700 (left door) and 3550JJ703 (right door), each costing $80-120.
- Unplug the refrigerator.
- For the freezer drawer gasket, completely remove the drawer by pulling it out until it stops, lifting the front edge, and pulling again.
- The gasket is held in place by a channel or groove running around the perimeter of the drawer. On the LFXS26973S, gently pry up the gasket from this channel starting at one corner.
- Once the old gasket is removed, clean the channel thoroughly with warm water and mild soap to remove any debris or hardened adhesive.
- Position the new gasket into the channel, starting at the top center and working your way around. Ensure the gasket sits evenly all around.
- Reinstall the freezer drawer, plug the refrigerator back in, and monitor for improvement in frost accumulation over several days.
Step 7: Checking the Evaporator Fan Motor on the LFXS26973S
The evaporator fan motor circulates cold air throughout your LFXS26973S. Even if your defrost heater and thermostat are functioning correctly, a non-working fan can lead to ice accumulation because melted water won’t circulate out of the freezer compartment properly.
Locating the Evaporator Fan
In the LFXS26973S, the evaporator fan is located behind the back panel you removed earlier, usually positioned above or to the side of the evaporator coil. It’s a small electric motor with a fan blade attached, mounted on a bracket designed to draw air across the coil and push it into the freezer compartment. With power disconnected, check the fan blade by spinning it by hand to ensure there are no obstructions, ice buildup, or a seized motor that won’t turn freely.
Recommended Parts & Tools
LG Refrigerator Defrost Thermostat Assembly
The defrost thermostat is crucial, as it triggers your freezer’s defrost cycle. If this part fails, warm air won’t cycle through the evaporator coils to melt accumulated frost, which leads to ice buildup. Replacing a faulty thermostat is often the most effective solution for frost accumulation issues.
Multimeter Digital Electrical Tester
You’ll need a multimeter to test the defrost thermostat’s continuity and verify whether it’s functioning properly before replacement. This tool helps you diagnose electrical components in your refrigerator without unnecessary part replacement.
HVAC Fin Comb and Coil Cleaning Tool
Use this specialized tool to gently clean the evaporator coils and condenser fins of any accumulated frost or debris during your repair. Clean coils ensure proper heat exchange and help prevent future frosting problems.
The Defrost Thermostat That Actually Stops the Frost Buildup in Your LG LFXS26973S
Before you pull the fridge apart chasing the defrost heater, test the thermostat first—it’s the component that tells the defrost cycle when to kick in, and a failed one is the most common reason this model ices over solid. If the thermostat won’t trigger the heating element, frost just keeps accumulating regardless of how new your heater is.
What works
- Drops straight into the mounting bracket behind the evaporator coil with no modification—exact LG fitment means no adapter hunting or forced connections.
- The brass sensing bulb actually makes contact with the coil surface, so you know the temperature reading is legit and the defrost cycle triggers when it should.
- Comes with the correct wiring terminals and clips, so you’re not improvising connections that could arc or fail in six months.
What doesn’t
- Requires you to unplug the fridge and pull the back panel—not a five-minute swap, and if your coil is caked with ice, you’ll need to manually defrost first or work around the buildup.
- If your evaporator fan is also dead or your drain line is clogged, swapping the thermostat alone won’t fix the frost problem; you’re treating the symptom, not necessarily the root cause in every case.
I’ve seen too many people order a new defrost heater only to realize the thermostat never was sending the signal to heat in the first place—you end up pulling the fridge apart twice, which is annoying. Start by testing the one you have with a multimeter if you can access it, but if it’s reading open circuit or won’t close on temperature drop, LG Refrigerator Defrost Thermostat Assembly is the fix that actually stops the icing cycle.
About This Article

Written by Dave Holt. Dave Holt has been taking apart and fixing household appliances since he was a teenager who couldn't leave a broken one alone. Eighteen years later, after fixing things for neighbors, friends, and anyone who'd let him, he's seen almost every failure mode there is. When he writes a repair guide here, it's based on the actual job, not a manufacturer overview. More about this site.
Scope and limits. Dave is a self-taught repairer, not a certified appliance technician. Unplug before you open anything, and leave sealed refrigeration systems, gas connections, and hardwired circuits to a qualified technician.