
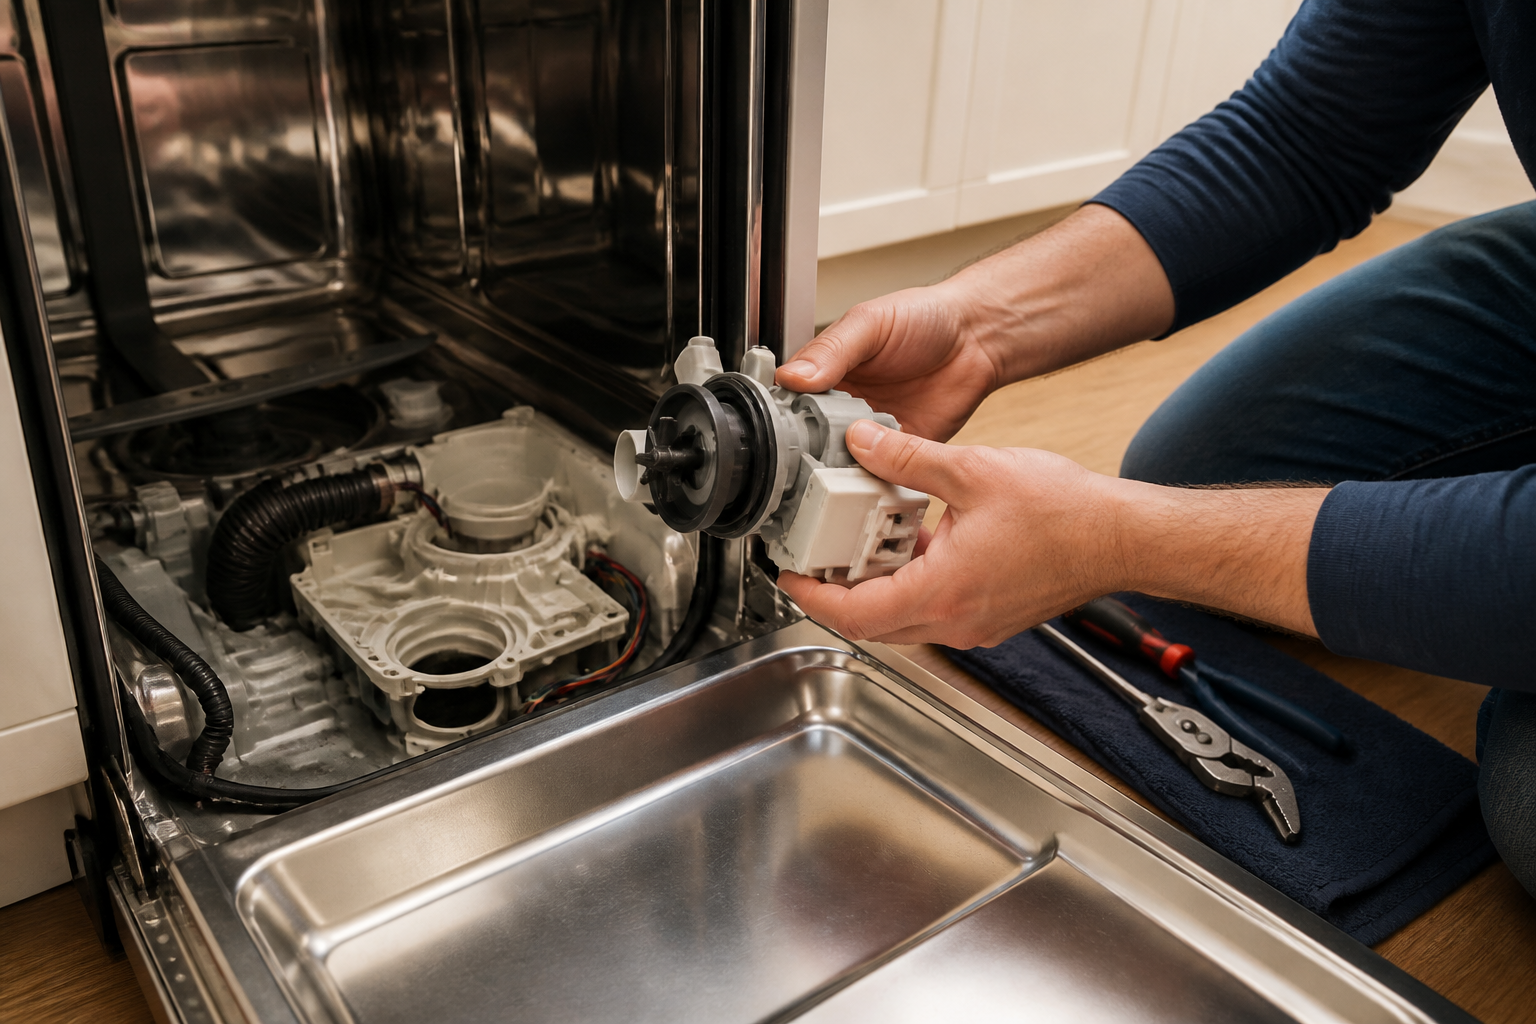
Drain Pump Replacement Guide for the Maytag MDB8959SKZ Dishwasher
The Maytag MDB8959SKZ is a solid built-in dishwasher, but like any mechanical appliance it runs into trouble eventually — especially with the drain pump. If you’re noticing standing water at the bottom after a wash cycle, or hearing grinding noises during the drain phase, there’s a good chance the drain pump has failed. This guide takes you through the entire replacement process, from diagnosing the problem to the details of installation.
Recognizing Drain Pump Failure on Your MDB8959SKZ
Before diving into disassembly, it’s crucial to confirm that the drain pump is the actual culprit. Here are some symptoms that indicate a failing drain pump in the Maytag MDB8959SKZ:
- Standing water in the tub: If water remains at the bottom after the cycle, it usually means the pump can’t expel it through the drain hose.
- Grinding or squealing noise: Loud grinding or squealing sounds during the drain cycle suggest potential damage to the internal impeller or bearings.
- Error codes: Look for error codes F9 or E1 on your MDB8959SKZ, which typically indicate a drain issue.
- Slow draining: If water drains slowly or not at all, that suggests the pump might be losing pressure.
- Water leaking from beneath the dishwasher: A cracked pump housing or faulty seal can lead to leaks during operation.
Pre-Repair Troubleshooting: Check the Filter and Sump First
Before you yank that drain pump out of your MDB8959SKZ, take a moment to check for clogs that could be mimicking a pump failure. A blocked filter or sump can cause standing water and throw error codes, even if the pump is still in good shape.
Cleaning the Filter Assembly on the MDB8959SKZ
- Open the dishwasher door and twist the lower spray arm counterclockwise to remove it.
- Locate the circular filter assembly at the bottom center of the tub. It’s a fine mesh filter surrounded by a coarser screen.
- Lift the filter assembly straight up and out of the sump area.
- Rinse it under running water, clearing away any food particles or debris. A soft brush can help clean the mesh without damaging it.
- Check the sump cavity for any trapped debris and remove anything you find.
- Reinstall the filter assembly by inserting it back into the sump and twisting clockwise until it seats.
- Replace the lower spray arm and run a short drain cycle to test.
If water still stands after this cleaning, it’s likely time to replace the drain pump. But if cleaning resolves the issue, you’ve just saved yourself a repair!
Tools and Materials Required
Before starting the drain pump replacement on your MDB8959SKZ, gather these tools:
- Phillips head screwdriver (both standard and magnetic tip recommended)
- Flathead screwdriver
- Adjustable wrench (10-12 inch)
- Needle-nose pliers
- Towels or shop rags (to catch any water spills)
- Multimeter (optional, for testing electrical connections)
- Flashlight or headlamp for visibility in tight spaces
- Helper (recommended for tipping the MDB8959SKZ safely)
- Drain pan or bucket for water spillage
- New drain pump assembly (part number for MDB8959SKZ specified below)
Drain Pump Part Number for the Maytag MDB8959SKZ
The correct replacement drain pump for the Maytag MDB8959SKZ is:
Part Number: 12002531 (Maytag OEM drain pump motor and housing assembly)
Alternative equivalent part number: WPW10237263
Always verify that your MDB8959SKZ model number matches this part compatibility before ordering. The drain pump assembly for the MDB8959SKZ includes the motor, impeller, and housing as one complete unit. Individual components aren’t serviceable, so you’ll need to replace the entire assembly.
Safety Warnings
⚠️ ELECTRICAL HAZARD: The Maytag MDB8959SKZ runs on 120V household current. Always disconnect power at the circuit breaker before beginning work. Don’t rely solely on the control panel switch—it doesn’t cut all electrical power to the unit.
⚠️ WATER HAZARD: There might be standing water in the MDB8959SKZ even after disconnection. Use towels and a drain pan to manage any spillage.
⚠️ CRUSHING HAZARD: The MDB8959SKZ weighs over 100 pounds. Never work beneath it without proper support. Use wooden blocks or have a helper to prevent serious injury if the unit shifts.
⚠️ BURN HAZARD: If you’ve recently run the MDB8959SKZ, internal components and water may be hot. Allow 30 minutes for cooling before starting your work.
Step-by-Step Drain Pump Replacement for the MDB8959SKZ
Step 1: Disconnect Power from Your MDB8959SKZ
- Locate your home’s electrical circuit breaker panel.
- Find the breaker labeled for the dishwasher or kitchen circuit (typically 20 amps for the MDB8959SKZ).
- Switch it to the OFF position.
- Return to the MDB8959SKZ and verify that power is disconnected by pressing the control panel buttons—nothing should respond.
- If your MDB8959SKZ is hardwired, locate the disconnect switch typically mounted on the wall above or beside the unit and switch it to OFF.
Step 2: Remove the Dishwasher from the Cabinet
- Open the MDB8959SKZ door fully and remove the bottom access panel (held by 2-3 screws) to reveal the mounting brackets.
- Locate the mounting brackets on the sides of the MDB8959SKZ where it connects to the cabinet frame. Remove the screws securing these brackets (typically 2 per side).
- Close the door and have your helper support the front of the unit while you pull it straight out from the cabinet opening, taking care with supply or drain hoses.
- Pull the MDB8959SKZ out approximately 12-18 inches to access the rear connections.
Step 3: Disconnect Water Supply and Drain Hose
- Locate the water supply line connection at the rear lower left of the MDB8959SKZ. Place a towel beneath it to catch any residual water.
- Using an adjustable wrench, turn the compression nut counterclockwise to disconnect the supply line. Expect a small amount of water to drip.
- Locate the drain hose at the rear of the MDB8959SKZ and loosen the hose clamp with a flathead screwdriver to slide the hose off.
- Direct any water in the hose into a bucket or drain pan.
- If the drain hose is clamped directly to the pump outlet, leave it connected for now until later steps.
Step 4: Tip the MDB8959SKZ for Bottom Access
- After pulling out the MDB8959SKZ and disconnecting the drain hose, tip it backward to access the drain pump underneath.
- Have your helper support the unit while you place wooden blocks or a drain pan beneath the front lower corners to prevent the door from swinging open.
- Carefully tip the MDB8959SKZ backward onto its back or to one side (left side is usually easier). Ensure it rests securely without shifting.
- Place shop towels or a drain pan beneath the pump area to catch any water that drips as you disconnect hoses.
Step 5: Remove the Lower Spray Arm and Filter Assembly
- Access the interior of the tub with the MDB8959SKZ tipped back.
- Remove the lower spray arm by twisting it counterclockwise.
- Lift the circular filter assembly straight up out of the sump well.
Step 6: Locate and Access the Drain Pump Housing
- In the sump area at the bottom center of the MDB8959SKZ tub, you’ll see the cylindrical housing where the drain pump motor sits.
- This housing is secured by three Phillips head screws positioned around the circumference.
- Trace the electrical connector running to the pump motor; it’s a two-wire connector at the 6 o’clock position of the housing, pointing downward.
- Note the connector orientation for proper reinstallation.
Step 7: Disconnect the Drain Pump Electrical Connector
- Before removing screws, disconnect the electrical connector from the drain pump motor.
- Press the release tab on the side of the connector and gently pull it straight out, avoiding tugging on the wires.
- Set the connector aside, keeping the wires clear of your work area.
- If it’s stubborn, use needle-nose pliers to help release the tab while supporting the plug body.
Step 8: Remove the Drain Pump Housing Screws
- Using a Phillips head screwdriver, remove all three screws securing the pump housing to the tub floor.
- Keep these screws in a safe location for reinstallation.
- As you remove the last screw, support the pump housing to prevent it from falling into the cavity.
Step 9: Remove the Old Drain Pump from the MDB8959SKZ
- With the screws removed, the drain pump housing will be held only by the drain hose connection at the rear.
- On the MDB8959SKZ, the pump is removed with a twist-lock mechanism. Grasp the pump housing and rotate it counterclockwise about 45 degrees.
- If it’s stuck, gently wiggle it side to side while rotating to break the seal.
- Once rotated, lift the pump housing straight up and out. Expect water in the drain hose to spill—position your drain pan accordingly.
- The drain hose can hang loose; you can disconnect it later if needed for cleaning.
Step 10: Install the New Drain Pump in the MDB8959SKZ
- Remove the new drain pump assembly (part number 12002531) from its packaging and inspect it for damage.
- Verify that the intake port and outlet port are oriented correctly before installation.
- Align the new pump housing into the cavity beneath the tub floor, connecting the intake port to the sump pickup and the outlet toward the rear of the dishwasher.
- Rotate the pump housing clockwise until you hear or feel it click into place against the tub floor.
- Ensure the pump doesn’t shift or move after locking it in place.
Step 11: Secure the Pump Housing with Screws
- Align the three mounting holes of the new pump housing with the holes in the tub floor.
- Insert the three Phillips head screws and tighten them firmly but without over-tightening.
- Verify the pump housing is flush against the tub floor with no gaps.
Step 12: Reconnect the Electrical Connector
- Locate the electrical connector you removed earlier.
- Inspect the connector pins for any corrosion or damage; they should be shiny and clean.
- Align the connector with the outlet on the new pump motor and push it in until it clicks securely.
- Gently tug on the connector to ensure it’s fully seated.
Step 13: Reinstall the Filter Assembly and Spray Arm
- With the MDB8959SKZ still tipped, insert the filter assembly back into the sump and rotate it clockwise until it seats completely.
- Replace the lower spray arm by inserting it back into the sump and twisting clockwise until snug.
- These components should now be firmly secured.
Step 14: Return the MDB8959SKZ to Upright Position
- With your helper supporting the unit, carefully tip it back to its upright position.
- Ensure it sits level and stable. Remove any wooden blocks or supports.
- Don’t reconnect power or water supply just yet—you need to test for leaks first.
Step 15: Reconnect Water Supply and Drain Hose
- Reconnect the water supply line by tightening the compression nut at the rear lower left of the MDB8959SKZ.
- If you disconnected the drain hose, reconnect it now by sliding it onto the fitting and tightening the clamp.
- If the drain hose was left connected to the pump outlet, ensure that connection is still secure.
Step 16: Slide the MDB8959SKZ Back into the Cabinet
- With your helper supporting the unit, gently push it back into the cabinet opening.
- Move slowly to avoid kinking the supply or drain hoses.
- Once it’s fully pushed back, check that everything is aligned properly and secure.
Recommended Parts & Tools
Maytag Dishwasher Drain Pump Assembly
This OEM replacement drain pump is specifically designed for Maytag MDB8959SKZ models and ensures proper drainage performance after installation. Using the correct OEM part guarantees compatibility and reliable operation for years to come.
LEXIVON Inch Pound Torque Wrench 1/4-Inch Drive
A precision torque wrench helps you tighten pump fasteners and connections to the manufacturer’s specifications without over-tightening, which could damage components or cause leaks. This tool is essential for reassembling your dishwasher correctly after pump replacement.
Clorox Bleach Cleaner for Drain Lines
Running this bleach-based cleaner through your dishwasher’s drain system after pump replacement removes debris, sediment, and odors that may have accumulated in the lines. This maintenance step helps prevent future clogs and ensures optimal drainage performance.
The Drain Pump Assembly That Stops Standing Water in Your MDB8959SKZ
If you’ve confirmed that the pump is seized or burned out (not just clogged), ordering the correct OEM-spec drain pump assembly for this model is your first move. This is the part that’s going to restore proper drainage and eliminate those puddles at the bottom of your dishwasher.
What works
- Matches the MDB8959SKZ connection points and motor voltage exactly—no adapter hunting or voltage compatibility guessing.
- Comes with the mounting bracket and gasket already attached, which saves you from disassembling the old pump and reusing worn seals that may leak again.
- The motor spins freely out of the box and runs quietly once installed, which tells you immediately whether you’ve got a good part before you button everything back up.
What doesn’t
- You’ll need to pull the lower access panel and tub assembly to reach the pump location—this isn’t a top-access part, so budget 45 minutes to an hour for the full job.
- If your standing water is actually from a clogged filter or kinked drain hose instead of pump failure, this part won’t solve the problem and you’ll have wasted the cost and your time.
I’ve had more than one homeowner order a new pump only to discover the actual issue was a twist in the drain line or food debris blocking the sump screen—so before you commit to this replacement, run a manual drain cycle with the tub empty and listen for motor noise to confirm the pump itself is actually dead. Once you’ve ruled that out, grab the Maytag Dishwasher Drain Pump Assembly and you’re ready to go.
About This Article

Written by Dave Holt. Dave Holt has been taking apart and fixing household appliances since he was a teenager who couldn't leave a broken one alone. Eighteen years later, after fixing things for neighbors, friends, and anyone who'd let him, he's seen almost every failure mode there is. When he writes a repair guide here, it's based on the actual job, not a manufacturer overview. More about this site.
Scope and limits. Dave is a self-taught repairer, not a certified appliance technician. Unplug before you open anything, and leave sealed refrigeration systems, gas connections, and hardwired circuits to a qualified technician.



