
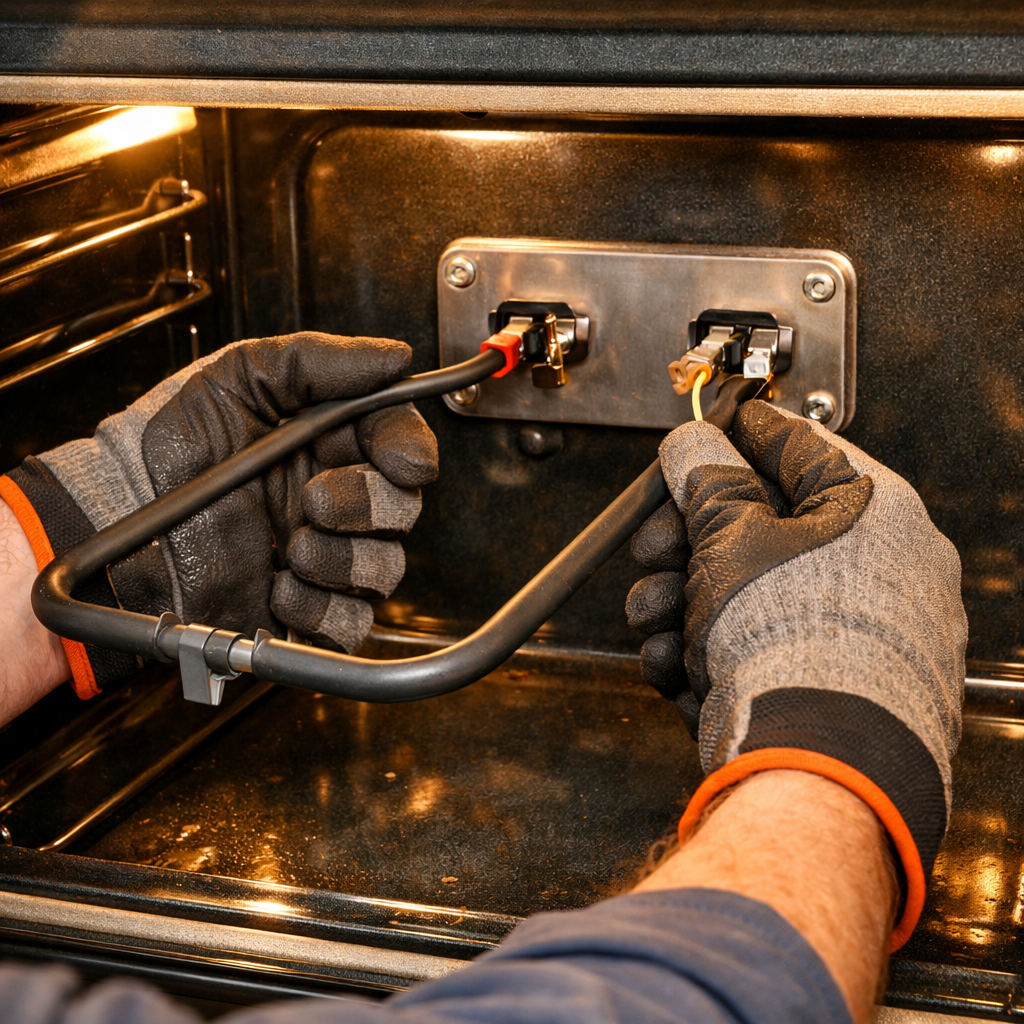
Temperature calibration
In this guide, I’m going to walk you through fixing the temperature calibration on your Wolf SO30PMSPH (Wall Oven). With the right tools and parts, most homeowners can complete this repair in just 1–2 hours, saving you from a costly service call.
🔨 Pro Tip from Dave
On the SO30PMSPH model, the oven temperature sensor is part number 804416. Before you replace it, pull it out and check the resistance with a multimeter at room temperature; it should read approximately 1080–1090 ohms. A common mistake I see DIYers make is recalibrating without first verifying the sensor, which just masks the real problem. Also, keep in mind that the probe connector behind the back wall panel can develop a loose pin connection, mimicking a faulty sensor entirely.
Part of our Top 20 Oven Models & Common Repair Issues Guide. Browse all oven repair guides for related models and issues.
Common Symptoms & Causes
If your Wolf SO30PMSPH wall oven is exhibiting any of the following symptoms, it’s likely facing a temperature calibration issue that needs attention:
- Baked goods are consistently undercooked or burnt, even at the correct recipe temperatures.
- The oven display reads the set temperature, but an independent thermometer shows a variance of 25°F or more.
- The oven takes significantly longer than expected to reach the preheat target temperature.
- Temperature swings wildly during cooking, causing uneven results across multiple racks.
These issues are typically caused by a drifted factory temperature offset setting, a worn oven temperature sensor (RTD probe), or gradual degradation of the control board’s calibration over time.
Safety First
- Switch off the circuit breaker serving the oven and lock or tag the panel. Confirm the appliance is dead with a contact voltage tester before touching anything. Most wall ovens are hardwired — there is no plug to pull.
- Wear work gloves when handling metal brackets, sheet metal edges, or sharp components.
- Take photos with your phone before disconnecting any wiring harnesses or connectors.
- Work in a well-lit area with enough floor space to lay removed panels flat.
Tools & Parts Needed
Essential Tools
- Phillips #2 screwdriver
- ¼” nut driver
- Multimeter
- Work gloves (heat-rated)
- Flashlight
Replacement Parts
- Calibrated oven thermometer (certified accurate)
- screwdriver
Step-by-Step Repair Instructions
Step 1
To start, place a NIST-traceable oven thermometer in the center of the oven and run a 350°F bake cycle for 30 minutes. Record the thermometer reading to establish a reliable temperature baseline. Standard kitchen thermometers can carry their own ±25°F error, making your calibration meaningless. A pro tip: take three readings across the bake cycle and average them to account for normal cycling swings.
Step 2
If the measured temperature differs from the set point, use Wolf’s built-in calibration offset to correct it. Hold both arrow buttons simultaneously for 5 seconds to enter calibration mode, then adjust the offset to match the measured error. The control panel allows up to ±35°F of correction, covering the vast majority of sensor drift and installation variation. Safety note: confirm the oven is cool before navigating menus, as entering calibration mode does not turn off a hot oven.
Step 3
If the oven reads more than 35°F off but the temperature sensor tests within spec (resistance checks match Wolf’s published RTD chart), the problem is likely drift in the control board’s internal calibration registers. This is beyond the panel offset range and requires a factory recalibration at a Wolf service center to reset the board’s reference values. Do not attempt to open or modify the control board yourself, as doing so voids the warranty and involves live mains voltage.
Step 4
Next, inspect the oven door gasket for gaps, tears, or compressed sections by performing a door-bill test. Close the door on a folded piece of paper and pull; resistance should be firm around the entire perimeter. A failing seal allows heat to escape continuously, causing the oven interior to read lower than the set temperature, even when the heating elements and sensor are functioning correctly. Replace the gasket if any section passes the paper without resistance, as a compromised seal will defeat any calibration adjustment you make.
Step 5
Wolf ovens are engineered to professional tolerances, so persistent temperature errors that survive correct calibration and a sound door seal indicate a component or system fault. At this point, the issue warrants a warranty claim or contacting a certified Wolf service technician, as further DIY diagnosis risks misdiagnosis or voiding coverage. Document all your test readings and steps taken before contacting Wolf support; this will speed up the service process significantly.
Where to Buy Replacement Parts
- Wolf SO30PMSPH wall oven temperature calibration procedure
- Wolf oven temperature offset adjustment service mode
- Wolf wall oven oven thermometer accuracy test
When to Call a Professional
If the issue persists after completing all steps above, the problem may involve a failed main control board, a defective temperature sensor or high-limit thermostat, or wiring that requires specialized diagnostic equipment. At that point, it’s best to contact a licensed appliance technician. On gas models, do not attempt work on the gas valve, burner orifices, or supply line — that work is restricted to a licensed gas fitter in most jurisdictions.
How Much Does This Repair Cost?
| Repair route | Typical cost |
|---|---|
| Do it yourself | $20–$80 (parts) |
| Professional repair | $150–$300 (parts and labor) |
DIY temperature calibration on the Wolf SO30PMSPH typically costs nothing, though a replacement temperature sensor runs $20–$80 if needed. Professional service calls for this repair generally range from $150–$300, including labor and diagnostics. By tackling this yourself, you can save over $100 while restoring accurate oven performance.
Frequently Asked Questions
How do I know if my Wolf SO30PMSPH needs temperature calibration?
If baked goods are consistently undercooked or burnt despite following recipes, your oven temperature is likely off. Use an independent oven thermometer to compare the actual temperature against the set temperature.
How much can I adjust the temperature calibration on the Wolf SO30PMSPH?
The Wolf SO30PMSPH allows calibration adjustments of up to plus or minus 35°F from the factory default setting.
Will recalibrating my Wolf oven erase other settings?
No, adjusting the temperature calibration only affects the offset value and will not reset your clock, cook modes, or custom preferences stored on the oven.
Recommended Products
These are the parts and tools I recommend for this repair, based on compatibility and customer reviews:
- Wolf Oven Temperature Probe 318601302 26in Food-Grade Silicore Wire & 304 Stainless Steel, High Accuracy +/-0.05% Genuine Replacement for Model 5304503737
- LDLJHS 5304503737 Oven Temperature Sensor Replacement – 26 Inch Stainless Steel Probe, Fix Error Codes & Inaccurate Heat, Compatible with Wolf, GE, 00755060, 00492332, AP3775647
- 318601302 Compatible Wolf Oven Probe 5304503737 Oven Meat Probe Stainless Steel and Silicone Material Length: 26 inches 00492332 00755060 492332 AP3775647 AP3194240
- 316217002 Temperature Sensor Fits for Frigidaire Oven Wolf Wall Oven Kenmore Replacement Parts & Accessories
The Temperature Sensor Replacement That Actually Fixes Wolf SO30PMSPH Calibration Drift
If your Wolf is running 25–50°F hot or cold, the temperature sensor probe is almost certainly your culprit. This is the part I replace first on this model before even touching the control board, and it solves the problem in the vast majority of cases.
What works
- Direct fit for the SO30PMSPH—comes with the correct 26-inch stainless probe and doesn’t require any adapter fussing.
- Installation is straightforward once you pull the oven out; the probe slides into its socket without force, and the connector is color-coded so you can’t reverse it.
- After replacement, recalibration through the control panel menu is immediate and reliable—no waiting or guessing whether the fix worked.
What doesn’t
- You still need to pull the oven away from the wall to access the rear panel where the sensor connector lives—not a deal-breaker, but plan for that work.
- If your issue is actually a drifting control board (rare on this model), swapping the sensor won’t help; that’s why diagnostics with a calibrated thermometer matter first.
I’ve seen homeowners order a control board replacement thinking the sensor was fine, only to install it and still have the same temperature swing—so always verify with a thermometer before you order anything. LDLJHS 5304503737 Oven Temperature Sensor Replacement – 26 Inch Stainless Steel Probe
About This Article

Written by Dave Holt. Dave Holt has been taking apart and fixing household appliances since he was a teenager who couldn't leave a broken one alone. Eighteen years later, after fixing things for neighbors, friends, and anyone who'd let him, he's seen almost every failure mode there is. When he writes a repair guide here, it's based on the actual job, not a manufacturer overview. More about this site.
Scope and limits. Dave is a self-taught repairer, not a certified appliance technician. Unplug before you open anything, and leave sealed refrigeration systems, gas connections, and hardwired circuits to a qualified technician.



