
Perfect Temp not holding
In this guide, I’ll walk you through the steps to fix the Perfect Temp not holding issue on your Electrolux EI30EW38TS (Wall Oven). With the right tools and parts, you can often complete this repair in just 1–2 hours and save yourself the hassle of a costly service call.
🔨 Pro Tip from Dave
On the EI30EW38TS, the temperature sensor probe (part number 316217002) is known to drift out of resistance spec before it fully fails — ideally, your ohmmeter should read around 1080–1090 ohms at room temperature. If you see anything outside that range, replace it immediately. A common pitfall I see is technicians replacing the control board first because it seems like the obvious issue, wasting over $200 when a $25 sensor was actually the culprit. Always check the sensor resistance before moving on to anything else.
Part of our Top 20 Oven Models & Common Repair Issues Guide. Browse all oven repair guides for related models and issues.
Common Symptoms & Causes
If your Electrolux EI30EW38TS is having trouble maintaining its Perfect Temp setting, you might notice one or more of these warning signs:
- The oven temperature fluctuates more than 25°F above or below the set Perfect Temp target
- The Perfect Temp indicator light cycles off prematurely and fails to re-engage
- The control panel displays an F30 or F31 error code during or after a Perfect Temp cycle
- Food is consistently undercooked or overcooked despite using the Perfect Temp feature correctly
These symptoms are most often the result of a failing oven temperature sensor (RTD probe), a faulty relay on the control board, or general wear on the electronic oven control board itself.
Safety First
- De-energize the circuit at the breaker panel and lock or tag it out, then prove the oven is dead with a contact voltage tester. There’s no plug to pull on a hardwired wall oven — never work on a live appliance.
- Wear work gloves when handling metal brackets, sheet metal edges, or sharp components.
- Take photos with your phone before disconnecting any wiring harnesses or connectors.
- Work in a well-lit area with enough floor space to lay removed panels flat.
Tools & Parts Needed
Essential Tools
- Phillips #2 screwdriver
- ¼” nut driver
- Multimeter
- Work gloves (heat-rated)
- Flashlight
Replacement Parts
- Temperature sensor
- convection element
- oven thermometer
- multimeter
Step-by-Step Repair Instructions
Step 1
Start by disconnecting power at the breaker before opening any panels. Once you’ve done that, restore power and run the Perfect Temp function at 350°F with a calibrated oven thermometer placed in the center of the cavity. This is your baseline to confirm the fault is real and repeatable — if you see a temperature swing greater than 25°F above or below the set point over time, it indicates a hardware or calibration issue, not just normal cycling. Pro tip: let the oven fully preheat and stabilize for at least 15 minutes before logging your readings.
Step 2
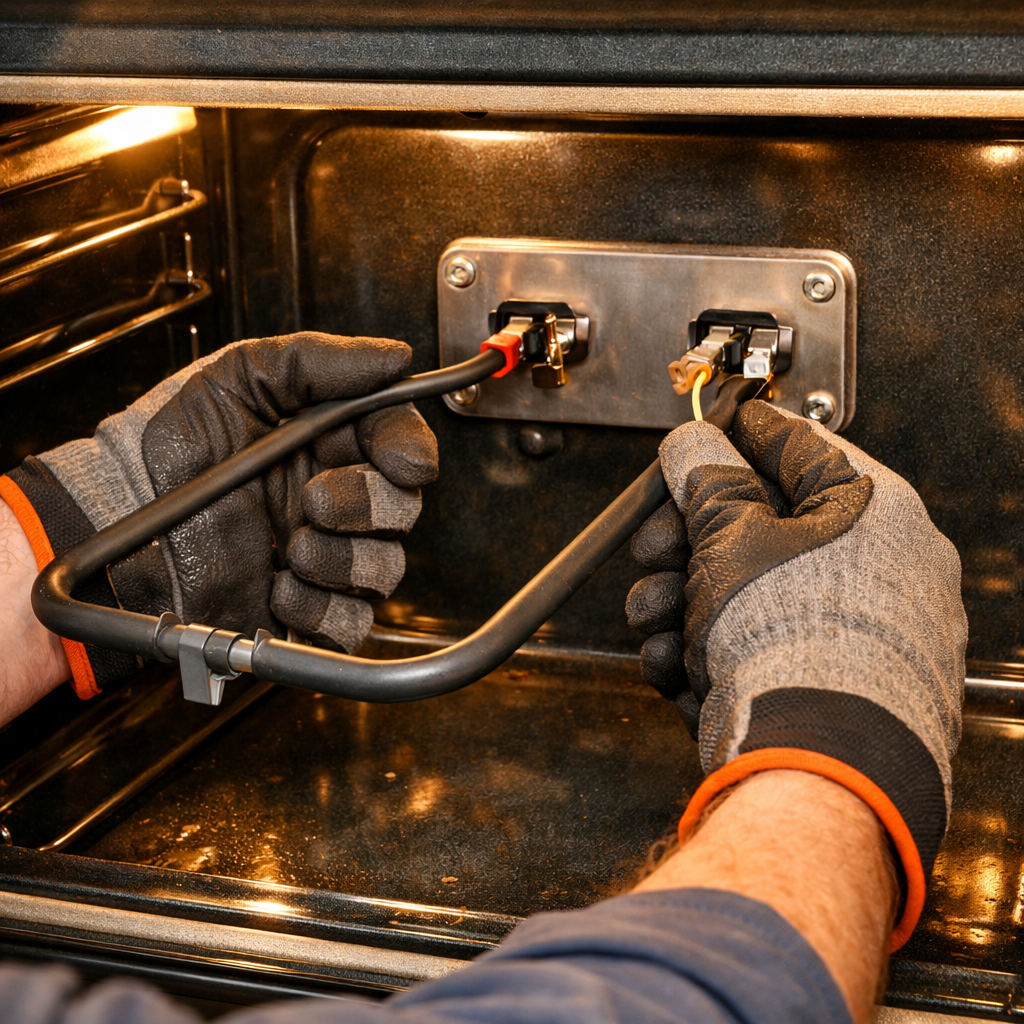
Next, locate the temperature sensor on the back wall of the oven cavity. Remove the two Phillips screws, disconnect the harness, and measure its resistance with your multimeter. You should see approximately 1,080Ω at room temperature (70°F); if it’s well outside this spec, the sensor is likely giving the control board inaccurate temperature data, leading the Perfect Temp system to over- or under-fire the elements. Safety note: ensure power is off at the breaker before disconnecting the harness — some control circuits may still have residual voltage.
Step 3
To access the convection element, remove the back panel inside the oven cavity (4 Phillips screws). Set your multimeter to Rx1 and probe both terminals. If you get an open reading (no continuity), that means the element has burned through and can’t produce heat. This will prevent the oven from reaching the set temperature and maintaining it. Pro tip: visually inspect the element for cracks, blistering, or burn marks that confirm failure before ordering a new part.
Step 4
With the power off, manually spin the convection fan blade. If it feels resistant, grinds, or is completely seized, it’s time to replace the motor assembly. The convection fan circulates hot air to maintain an even, consistent temperature throughout the cavity — a failing or dead motor will create hot and cold zones that the Perfect Temp system just can’t compensate for. If the blade doesn’t spin freely or the motor hums without turning when power is restored, replace the motor assembly.
Step 5
If both the sensor and elements test good, the issue may lie in a calibration offset that has drifted in the control board’s memory. Access the calibration mode by holding the Bake button for 5 seconds, then adjust the temperature offset based on the difference between your set point and your thermometer readings. Pro tip: make small adjustments (5–10°F at a time), run a full preheat cycle after each change, and re-measure before adjusting further to avoid overcorrecting.
Step 6
Once you’ve completed the repair or calibration, run a full cook cycle at 350°F with your oven thermometer still in place to verify the fix. The Perfect Temp function should now hold the cavity temperature within ±10°F of the set point consistently throughout the entire cycle without substantial swings. If you still notice temperature variance beyond this range after replacing components and calibrating, it might be time to evaluate the control board itself for issues.
Where to Buy Replacement Parts
- Electrolux EI30EW38TS oven temperature sensor 318276524 replacement
- Electrolux wall oven convection element 318255902 replacement
- Electrolux oven Perfect Temp mode calibration
When to Call a Professional
If you’re still having issues after completing all the steps above, the problem might involve a failed main control board, a defective temperature sensor or high-limit thermostat, or wiring that requires specialized diagnostic equipment. In such cases, it’s best to contact a licensed appliance technician. On gas models, do not attempt any work on the gas valve, burner orifices, or supply line — that work should only be done by a licensed gas fitter in most jurisdictions.
How Much Does This Repair Cost?
| Repair route | Typical cost |
|---|---|
| Do it yourself | $20–$150 (parts) |
| Professional repair | $150–$300 (parts and labor) |
The cost of DIY parts for fixing a Perfect Temp issue on the Electrolux EI30EW38TS typically ranges from $20 to $150, depending on whether you need to replace the temperature sensor, control board, or thermostat. A professional service call usually runs $150–$300, including labor. Tackling this repair yourself can save you $100 or more.
Frequently Asked Questions
Why does my Electrolux EI30EW38TS keep dropping below the set Perfect Temp temperature?
Typically, this is due to a faulty temperature sensor or a failing control board. Test the sensor’s resistance with a multimeter and replace it if readings fall outside the manufacturer’s specified range.
Can I recalibrate the oven temperature myself without calling a technician?
Absolutely, the EI30EW38TS allows for user calibration through the control panel settings menu. Just adjust the offset temperature in small increments and verify accuracy using a standalone oven thermometer.
How do I know if the control board is causing the Perfect Temp issue?
If replacing the temperature sensor doesn’t resolve the problem, it’s likely that the control board is defective. Inconsistent temperature swings combined with error codes on the display are strong indicators of a board failure.
The Temperature Sensor That Actually Fixes Perfect Temp Drift on the EI30EW38TS
If your oven is swinging 25–50 degrees off target, the temperature sensor (part 318276524) is your first stop before you blame the control board. This probe reads the actual cavity temperature and tells the control board when to cycle the heating elements, so a worn or drifting sensor will make Perfect Temp mode look completely broken even when everything else is fine.
What works
- Replacement is straightforward on this model—sensor pops out of the cavity wall with two screws, no disassembly of the oven box required.
- Temperature swing stops immediately after installation; you’ll see Perfect Temp holding within 5 degrees where it was drifting 30+ before.
- Part cost is reasonable compared to control board replacement, and it’s the statistically most likely culprit for this exact symptom on this model.
What doesn’t
- Sensor replacement won’t fix the problem if your control board has actually lost calibration or failed—so confirm drift with an independent oven thermometer first.
- Some sellers list this part under multiple SKUs; make sure you’re ordering 318276524 specifically for the EI30EW38TS, not a generic Electrolux sensor.
I’ve seen homeowners order a new control board first and waste $400 only to find out the sensor was the issue all along—use an oven thermometer to verify the actual temperature variance before ordering parts. Once you confirm the sensor is drifting, replacing it is a 15-minute job that solves nine out of ten Perfect Temp failures on this model.
About This Article

Written by Dave Holt. Dave Holt has been taking apart and fixing household appliances since he was a teenager who couldn't leave a broken one alone. Eighteen years later, after fixing things for neighbors, friends, and anyone who'd let him, he's seen almost every failure mode there is. When he writes a repair guide here, it's based on the actual job, not a manufacturer overview. More about this site.
Scope and limits. Dave is a self-taught repairer, not a certified appliance technician. Unplug before you open anything, and leave sealed refrigeration systems, gas connections, and hardwired circuits to a qualified technician.



