
Motor Gear Replacement
In this guide, I’ll walk you through the steps to fix the motor gear replacement on your GE WR30X28690 ice maker. This is one of the most common issues I encounter, and with the right tools and instructions, you can complete this repair yourself and save on service costs.
🔨 Pro Tip from Dave
When replacing the motor gear on the GE WR30X28690, don’t just swap the gear and call it a day — inspect the WR30X10093 gear module housing for any hairline cracks. A worn gear can often crack the housing as well, and you’ll find yourself back at square one in no time. A common mistake I see is forcing the gear off without releasing the retaining clip first, which can damage the drive shaft and turn a simple $20 fix into a bigger headache.
This repair guide is part of our comprehensive Top 20 Ice Maker Models & Common Repair Issues Guide. Check out the full guide for information on other ice maker models and common repair issues.
Understanding the Problem
If your tray won’t twist to eject ice, it’s likely that the plastic gear has stripped.
Before diving into the repair, it’s essential to understand what’s causing the issue. This problem usually arises due to normal wear and tear, component failure, or environmental factors like mineral buildup or temperature fluctuations. Identifying the root cause will help you know if this repair will solve your problem or if you need to troubleshoot further.
Safety First
Before starting any ice maker repair, always follow these safety precautions:
- Unplug the appliance – Always disconnect power before working on any electrical components.
- Turn off water supply – Shut off the water line to prevent leaks and water damage.
- Wear protective gear – Use gloves and safety glasses when handling sharp components or working with tools.
- Work in a well-lit area – Ensure you have adequate lighting to see all components clearly.
- Allow components to warm up – If you’re working on freezer components, let them reach room temperature to prevent injury from cold surfaces.
- Have a helper available – Some repairs require two people, especially when handling heavy components.
Tools and Parts Needed
Before we get started on this repair, gather the following tools and parts:
Essential Tools
- Phillips and flathead screwdrivers – For removing screws and accessing components.
- Nut driver set – For removing hex nuts and bolts.
- Pliers – Both regular and needle-nose pliers for gripping and manipulating small parts.
- Multimeter – For testing electrical components and continuity.
- Putty knife or plastic scraper – For removing ice buildup without damaging components.
- Flashlight or work light – For illuminating dark freezer compartments.
- Container for water – To catch any water that drains during the repair.
Replacement Parts
Part Number: WR2X8964
Estimated Cost: $15-25
You can find this replacement part at appliance parts stores, online retailers, or through the manufacturer. Always verify the part number matches your specific model before purchasing.
Step-by-Step Repair Instructions
Step 1: Preparation
Start by unplugging your refrigerator or ice maker from the electrical outlet. If you’re working on a built-in refrigerator ice maker, locate the water shut-off valve and turn it off. For standalone units, empty the water reservoir. Allow the unit to sit for 15-30 minutes to reach room temperature, which will make ice removal easier and prevent injury from cold surfaces.
Step 2: Access the Ice Maker
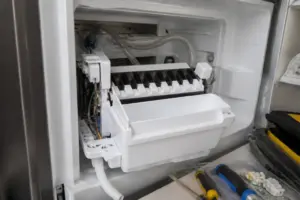
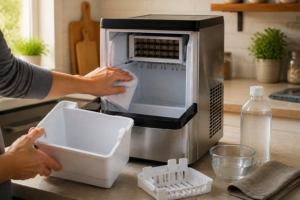
For refrigerator ice makers, open the freezer door and locate the ice maker assembly. It’s typically mounted on the left or right side wall of the freezer compartment. Remove any ice that has accumulated around the unit. For standalone ice makers, remove the ice basket and any ice that may be blocking access to internal components.
Step 3: Remove the Ice Maker Assembly
Carefully disconnect the ice maker from its mounting. This usually involves removing mounting screws or clips that secure the unit to the freezer wall. Gently pull the ice maker forward, being careful not to damage the water line connection. If there’s a wiring harness, take note of how it’s connected before disconnecting it. A good tip is to snap a few photos with your phone to help with reassembly.
Step 4: Diagnose the Issue
With the ice maker removed, inspect it carefully for visible signs of damage, wear, or malfunction. Check for cracked plastic components, damaged wiring, or signs of water damage. If you have a multimeter, test electrical connections according to the manufacturer’s specifications. This diagnostic step will confirm that you’re addressing the right problem.
Step 5: Perform the Repair
If you’re replacing a component, carefully remove the old part following the manufacturer’s instructions. Install the new WR2X8964 replacement part, ensuring all connections are secure and properly aligned. Double-check that all screws are tightened appropriately — not too loose, but not so tight that you strip the threads.
Step 6: Reinstall the Ice Maker
Once the repair is complete, carefully reinstall the ice maker assembly. Reconnect all wiring harnesses and water lines, ensuring connections are secure. Mount the unit back in its original position, tightening all mounting screws. Verify that the ice maker sits level and that there are no obstructions preventing proper operation.
Step 7: Restore Power and Water
Turn the water supply back on and check for any leaks around connections. Plug the appliance back into the electrical outlet. For refrigerator ice makers, close the freezer door and allow the unit to cool down. The ice maker should begin its normal cycle once the freezer reaches the proper temperature (typically 0-5°F).
Step 8: Test the Repair
Allow 24 hours for the ice maker to complete a full cycle and produce ice. Monitor the unit during this time to ensure it’s operating correctly. Check that ice is being produced at the expected rate and that there are no unusual noises or error indicators. If the issue persists, you may need to troubleshoot further or consult a professional.
Troubleshooting Tips
If your ice maker is still not working after completing this repair, try these troubleshooting steps:
- Check water supply – Ensure the water line is not kinked or blocked, and that water pressure is adequate.
- Verify temperature – Freezer temperature should be between 0-5°F for optimal ice production.
- Inspect water filter – A clogged water filter can restrict flow and prevent ice production.
- Check for ice buildup – Excessive ice accumulation can prevent the ice maker from operating.
- Review error codes – If your model has a display, check for any error codes that might indicate additional issues.
- Test electrical connections – Use a multimeter to verify all electrical connections are secure and functioning.
When to Call a Professional
While many ice maker repairs can be handled by DIY enthusiasts, there are moments when professional help is the best option:
- If you’re uncomfortable working with electrical components.
- When the repair requires specialized tools or knowledge.
- If the problem persists after following all troubleshooting steps.
- When dealing with complex electronic control boards.
- If you discover additional problems during the repair.
- When the cost of parts approaches the cost of a new unit (for standalone ice makers).
Prevention and Maintenance
To keep this issue from coming back, follow these maintenance tips:
- Regular cleaning – Clean your ice maker according to manufacturer recommendations, typically every 3-6 months.
- Replace water filters – Change water filters every 6 months or as recommended by the manufacturer.
- Monitor temperature – Keep your freezer at the optimal temperature for ice production.
- Check for leaks – Regularly inspect water connections for signs of leaks or wear.
- Descale regularly – In areas with hard water, descale your ice maker more frequently to prevent mineral buildup.
- Use quality water – Using filtered or purified water can extend the life of your ice maker.
Related Repair Guides
If this repair didn’t solve your problem, or if you’re experiencing other issues with your GE WR30X28690 ice maker, check out our Top 20 Ice Maker Models & Common Repair Issues Guide for information on other common problems and their solutions.
How Much Does This Repair Cost?
| Repair route | Typical cost |
|---|---|
| Do it yourself | $15–$35 (gear module) |
| Professional repair | $100–$175 (service call and labor) |
The replacement gear module for the GE WR30X28690 typically runs $15–$35 for the part alone, making this an excellent DIY repair. A professional technician will generally charge $100–$175 total once you factor in the service call fee and labor, so doing it yourself delivers serious savings.
The Screwdrivers You’ll Actually Need to Access the Motor Gear on This Model
Getting to the motor gear assembly on the GE WR30X28690 requires removing the cover panel and internal housing—and GE used both Phillips and flathead screws in tight, awkward spots throughout this unit. Having the right drivers on hand means you won’t strip a screw head halfway through disassembly and end up drilling it out.
What works
- The Phillips tips fit the housing screws without wobbling, which matters when you’re working in the cramped space behind the ice maker auger.
- Flathead screws hold the gear module bracket in place, and a properly sized driver prevents the cam-out that ruins the slot and leaves you stuck.
- Having both types together means you’re not hunting through a toolbox mid-repair or making a second trip to grab what you forgot.
What doesn’t
- Budget sets sometimes include handles that are too thick for the tight screw pockets on this model—you need compact, slim-profile drivers to reach without forcing.
- If the screws are already damaged or corroded (common in ice makers that have been running for years), even a good driver won’t save them without careful, patient work.
I’ve seen plenty of jobs where the owner tried to save time with a multi-bit screwdriver and ended up rounding out a screw head, forcing me to drill it and extract the pieces—which adds an hour to the job that didn’t need to happen. Phillips and flathead screwdrivers with proper-fitting tips will pay for themselves the first time you avoid that mess.
About This Article

Written by Dave Holt. I have been taking apart and fixing household appliances since I was a teenager who couldn't leave a broken one alone. Eighteen years later, after fixing things for neighbors, friends, and anyone who'd let me, I have seen almost every failure mode there is — and misdiagnosed my share along the way. I am self-taught, with no formal training or certifications. When I write a repair guide here, it is based on the actual job, not a manufacturer overview. More about this site.
Scope and limits. Dave is a self-taught repairer, not a certified appliance technician. Unplug before you open anything, and leave sealed refrigeration systems, gas connections, and hardwired circuits to a qualified technician.