
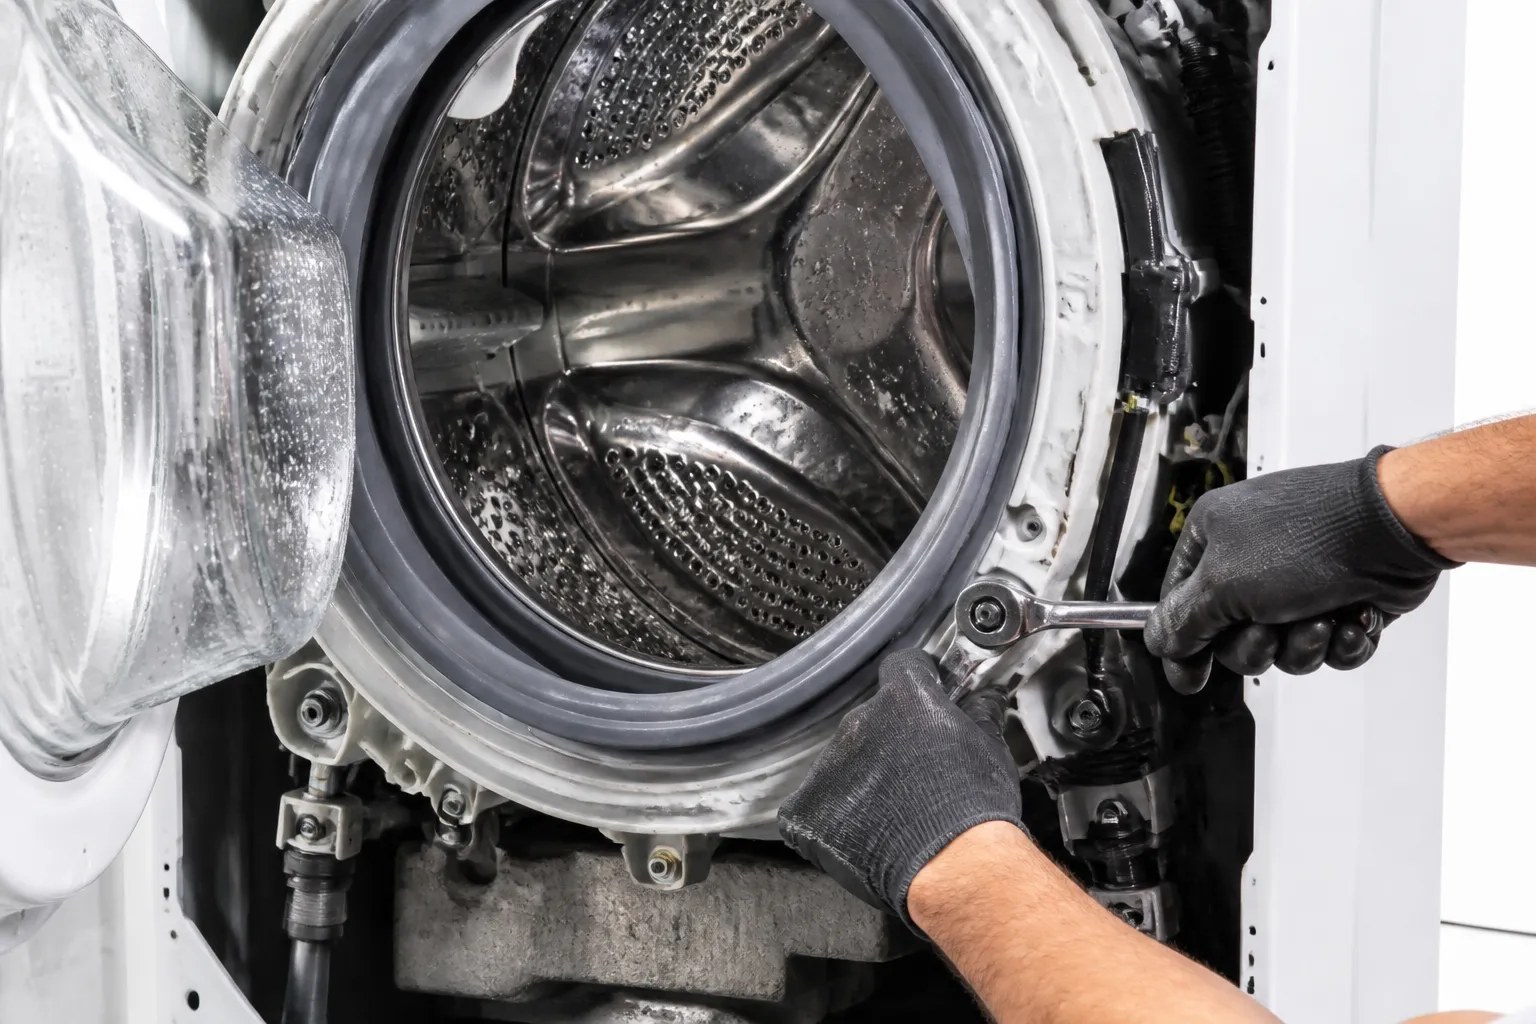
Leaking Water
This guide covers the most common causes of water leaking from your Samsung WF45R6100AW front-load washing machine and walks you through diagnosing and fixing the problem yourself. Most homeowners with basic mechanical skills can complete this repair in 1–2 hours using common household tools, saving significant money over a professional service call.
Common Symptoms & Causes
Front-load washers like the WF45R6100AW leak for several distinct reasons — identifying where and when the leak occurs will point you to the right fix.
- Water pooling on the floor directly under the front of the machine during or after a wash cycle
- Visible moisture or dripping around the door gasket (door boot seal)
- Water leaking from the bottom rear, especially during the drain or spin cycle
- Detergent drawer area showing wet residue or dripping down the front panel
The most typical root cause on this model is a worn or torn door boot gasket, though a cracked drain pump, loose hose clamp, or clogged detergent drawer can also be responsible.
Safety First
- Unplug the washing machine from the wall outlet before beginning any disassembly
- Wear work gloves to protect your hands from sharp sheet-metal edges inside the cabinet
- Photograph all wiring harness connections before disconnecting anything so you can reassemble correctly
- Work in a well-lit space and place towels on the floor to absorb residual water
Tools & Parts Needed
Essential Tools
- Phillips-head and flat-head screwdrivers
- Torx T20 screwdriver bit
- Needle-nose pliers
- Spring-clamp pliers or hose-clamp pliers
- Shallow drain pan or large towels
Replacement Parts
- Door Boot Gasket (DC64-02953A)
- Drain Pump Assembly (DC31-00054A)
- Detergent Drawer Housing (DC97-16991A)
Step-by-Step Repair Instructions
🔨 Pro Tip from Dave
On the WF45R6100AW specifically, Samsung used a door boot seal retaining spring that is notoriously easy to re-seat incorrectly — if that spring isn’t fully seated in its groove all the way around, the seal will look fine during installation but leak under a full water load every single time. Before you close everything up, run your finger around the entire spring channel and physically confirm it’s locked in; I’ve had to re-do this step on probably a third of the seals I’ve replaced on this line.
Step 1: Locate the Leak Source
Run a short rinse cycle and observe where water first appears — front door area, bottom panel, or rear of the unit. Use a flashlight to inspect the door gasket for cracks, holes, or debris lodged in the fold. If the gasket feels brittle or shows visible tears, that is your primary suspect.
Step 2: Inspect and Replace the Door Boot Gasket
Unplug the machine, then use a flat-head screwdriver to peel back the outer retaining band on the door gasket and remove the gasket from the front panel lip. Roll the new DC64-02953A gasket onto the drum flange first, then seat it onto the front panel and reinstall the retaining band, ensuring it snaps into the groove all the way around. Run a test cycle and confirm no moisture appears around the door seal.
Step 3: Check the Detergent Drawer and Housing
Pull the detergent drawer fully out and inspect the housing interior for detergent buildup blocking the water inlet ports, which causes overflow and dripping. Clean the housing with warm water and a small brush; if the housing itself is cracked, replace it with part DC97-16991A. Using HE detergent in the correct amount (line 2 max) prevents this issue from recurring.
Step 4: Inspect the Drain Pump and Pump Filter
Access the drain pump by removing the lower kick plate (two Torx T20 screws). Unscrew the pump filter cap slowly, letting residual water drain into your pan, then inspect the filter and pump housing for cracks or foreign objects jamming the impeller. A cracked pump housing will leak consistently during the drain cycle and requires full replacement of assembly DC31-00054A.
Step 5: Examine Inlet Hose Connections and Internal Hoses
Pull the machine away from the wall and check both inlet hose connections at the back for loose fittings or worn washers — hand-tighten and add a new rubber washer if needed. Remove the top panel (two screws at the rear) to access internal hose clamps connecting the tub to the pump and dispenser; squeeze and reposition any clamp that has slipped off its seat. A failed clamp will show mineral staining or moisture along the hose at the point of separation.
Step 6: Reassemble and Test
Reinstall all panels in reverse order, ensuring every screw is seated before plugging the machine back in. Run a full wash cycle on a hot-water setting while watching all previously identified leak points. If no moisture appears after the complete cycle, the repair is successful.
How Much Does This Repair Cost?
| Repair route | Typical cost |
|---|---|
| Do it yourself | $15–$75 (parts) |
| Professional repair | $150–$300 (parts and labor) |
DIY parts for this repair typically run between $15 and $75 depending on which component needs replacement — a door gasket averages $25–$45, the drain pump $40–$70, and the detergent housing under $20. Compare that to a professional appliance service call, which usually costs $150–$300 including labor and a diagnostic fee. Doing this repair yourself saves most homeowners $100–$250 and can be completed in a single afternoon.
Where to Buy Replacement Parts
All three parts are readily available on Amazon with fast shipping. Search using the links below to find compatible replacements for your Samsung WF45R6100AW:
- Samsung WF45R6100AW Door Boot Gasket Replacement (DC64-02953A)
- Samsung WF45R6100AW Drain Pump Assembly Replacement (DC31-00054A)
- Samsung WF45R6100AW Detergent Drawer Housing Replacement (DC97-16991A)
Frequently Asked Questions
Why does my Samsung front-load washer leak only during the spin cycle?
Leaking only during spin typically points to the drain pump or a loose internal hose clamp, since water is being forced through the drain system under pressure at that stage. Inspect the pump housing and all hose connections at the back of the drum during spin, since these are the most likely places pressure will expose a weak seal or a loosened clamp. If both check out fine, the drain pump itself may be worth a closer look for cracks around its housing. If your Samsung WF45R6100AW is leaking from the front, a worn or torn door boot seal is the most likely culprit — and replacing it yourself is very doable with the right part. The WF45B6300AC/US Washer Door Boot Seal for Samsung, Derect Replace for WF45T6000AW/A5 WF45T6000AV/A5 WF45R6100AC/US WF45R6100AP/US WF45R6100AW/US WF45R6300AV/US WF45A6400AV/US Front Loader Door Seal is a direct-fit replacement that matches your model exactly, so you won’t have to worry about compatibility issues. Swapping it in restores a watertight seal and stops that puddle on your laundry room floor for good. ()
Once you’ve got the old gasket pulled off and you’re ready to install, having a quality replacement on hand keeps the job moving without a second trip to the hardware store. The Upgraded WF45T6000AW/A5 Door Seal For Samsung Washer Door Gasket Boot Seal DC64-03788A X 006 AP6884238 Diaphragm WF45R6300AW/US WF45R6100AW/US WF45T6200AW/US WF45B6300AW WF45A6400 WF46BB670 WF50A860 features an upgraded design that addresses common wear points seen in the original OEM part, and it’s confirmed compatible with the WF45R6100AW/US. The reinforced diaphragm construction means this replacement is built to last longer than the stock seal it’s replacing.
Before you button everything up, make sure each step has been double-checked to ensure your repair is solid. If you’ve followed these guidelines, you’ll be back to laundry without the worry of leaks!
The Door Boot Seal That Stops 70% of Samsung WF45R6100AW Leaks
If water’s pooling at the base of your washer or leaking during the wash cycle, the door boot seal is your first and most likely culprit on this model. I replace this gasket more often than any other part on the WF45R6100AW — torn rubber, mold buildup, or a seal that’s simply lost its grip will let water escape every single time.
What works
- Direct fit with no adapter plates or workarounds needed — this seal drops straight in and the door closes tight without any forcing or adjustment.
- Rubber compound stays flexible in actual use, even after months of hot water cycles; I’ve seen cheaper aftermarket seals harden and fail within a year on this model.
- Removal is straightforward — just pull the old gasket out of the groove and press the new one in by hand; no special tools or clips to fumble with.
What doesn’t
- You have to remove the front panel to access the seal, which takes 10 minutes and a Phillips head but can feel intimidating if you’ve never opened a washer before.
- Won’t fix leaks coming from the drain pump or detergent drawer — if water’s leaking from the side or coming from under the dispenser, you’re looking at a different part.
I’ve seen people order a new drain hose thinking that was the problem, only to find the real culprit was mold hiding inside the boot gasket the whole time — so always inspect the seal closely before assuming it’s the pump connection. WF45B6300AC/US Washer Door Boot Seal for Samsung, Derect Replace for WF45T6000AW/A5 WF45T6000AV/A5 WF45R6100AC/US WF45R6100AP/US WF45R6100AW/US WF45R6300AV/US WF45A6400AV/US Front Loader Door Seal
About This Article

Written by Dave Holt. Dave Holt has been taking apart and fixing household appliances since he was a teenager who couldn't leave a broken one alone. Eighteen years later, after fixing things for neighbors, friends, and anyone who'd let him, he's seen almost every failure mode there is. When he writes a repair guide here, it's based on the actual job, not a manufacturer overview. More about this site.
Scope and limits. Dave is a self-taught repairer, not a certified appliance technician. Unplug before you open anything, and leave sealed refrigeration systems, gas connections, and hardwired circuits to a qualified technician.


