
Clothes Still Damp
This guide will help you understand the common reasons your Maytag MEDB835DW electric dryer might be leaving clothes damp after a full cycle. I’ll walk you through diagnosing and fixing the problem on your own. Most homeowners with basic mechanical skills can complete this repair in 1–2 hours using common household tools, saving you a significant amount of money compared to a service call.
Common Symptoms & Causes
Before you grab your tools, make sure your dryer matches one or more of these specific symptoms:
- Clothes feel damp or cool to the touch after a full 45–60 minute cycle
- Dryer runs but drum interior never gets warm or only gets slightly warm
- Cycle completes normally but laundry still requires a second full cycle
- Dryer trips the circuit breaker or takes much longer than usual to dry a load
The most common root cause on the MEDB835DW is a failed heating element or a blown thermal fuse that interrupts heat production entirely, often triggered by restricted airflow from a clogged exhaust vent.
Safety First
- Unplug the dryer from the wall outlet before removing any panels or touching internal components
- Wear work gloves to protect against sharp sheet-metal edges inside the cabinet
- Photograph all wiring harnesses before disconnecting anything so reassembly is straightforward
- Work in a well-lit space and keep children and pets away from the work area
Tools & Parts Needed
Essential Tools
- Phillips and flat-head screwdrivers
- ¼-inch and 5/16-inch nut drivers
- Digital multimeter (for continuity testing)
- Needle-nose pliers
- Putty knife or panel-release tool
Replacement Parts
- Heating Element (WP35001247)
- Thermal Fuse (WP3392519)
- High-Limit Thermostat (WP3977767)
Step-by-Step Repair Instructions
🔨 Pro Tip from Dave
On the MEDB835DW, the moisture sensor bars sit just inside the drum door opening and can easily build up a waxy, invisible coating from dryer sheets — most people miss this entirely because the bars look clean to the naked eye. Use a cotton ball with rubbing alcohol to scrub those two metal strips thoroughly before you replace any other components. A coated sensor will make the dryer cut the cycle short every time, and cleaning it is a quick 30-second fix that can save you a lot of trouble.
Step 1: Check and Clear the Exhaust Vent
Start by disconnecting the dryer from the wall and pulling it away to access the exhaust duct. Remove the duct and inspect its entire length for lint buildup, kinks, or a blocked exterior hood flap. A blocked vent is the number one cause of thermal fuse failure; clearing it now prevents the new fuse from blowing right after replacement.
Step 2: Access the Internal Components
Use a putty knife to insert under the top panel about two inches from each front corner to release the spring clips, then lift the top. Remove the two screws inside the door opening that secure the front panel, disconnect the door-switch wire harness, and set the front panel aside. You’ll now have access to the drum, heating element housing, and the thermal components on the rear bulkhead.
Step 3: Test the Thermal Fuse
Locate the thermal fuse on the exhaust duct just inside the back of the cabinet. It’s a small, oblong white component with two wire leads. Set your multimeter to continuity mode, disconnect the leads, and probe both terminals. A healthy fuse will beep or show near-zero resistance; if there’s no continuity, it’s blown and needs replacement before your dryer will produce any heat.
Step 4: Test the High-Limit Thermostat
The high-limit thermostat is located on the heating element housing and prevents overheating. Test it with your multimeter in the same way as the thermal fuse — it should show continuity at room temperature. If it reads open (no continuity), replace it along with the thermal fuse, as they often fail together due to the same overheating event.
Step 5: Inspect and Test the Heating Element
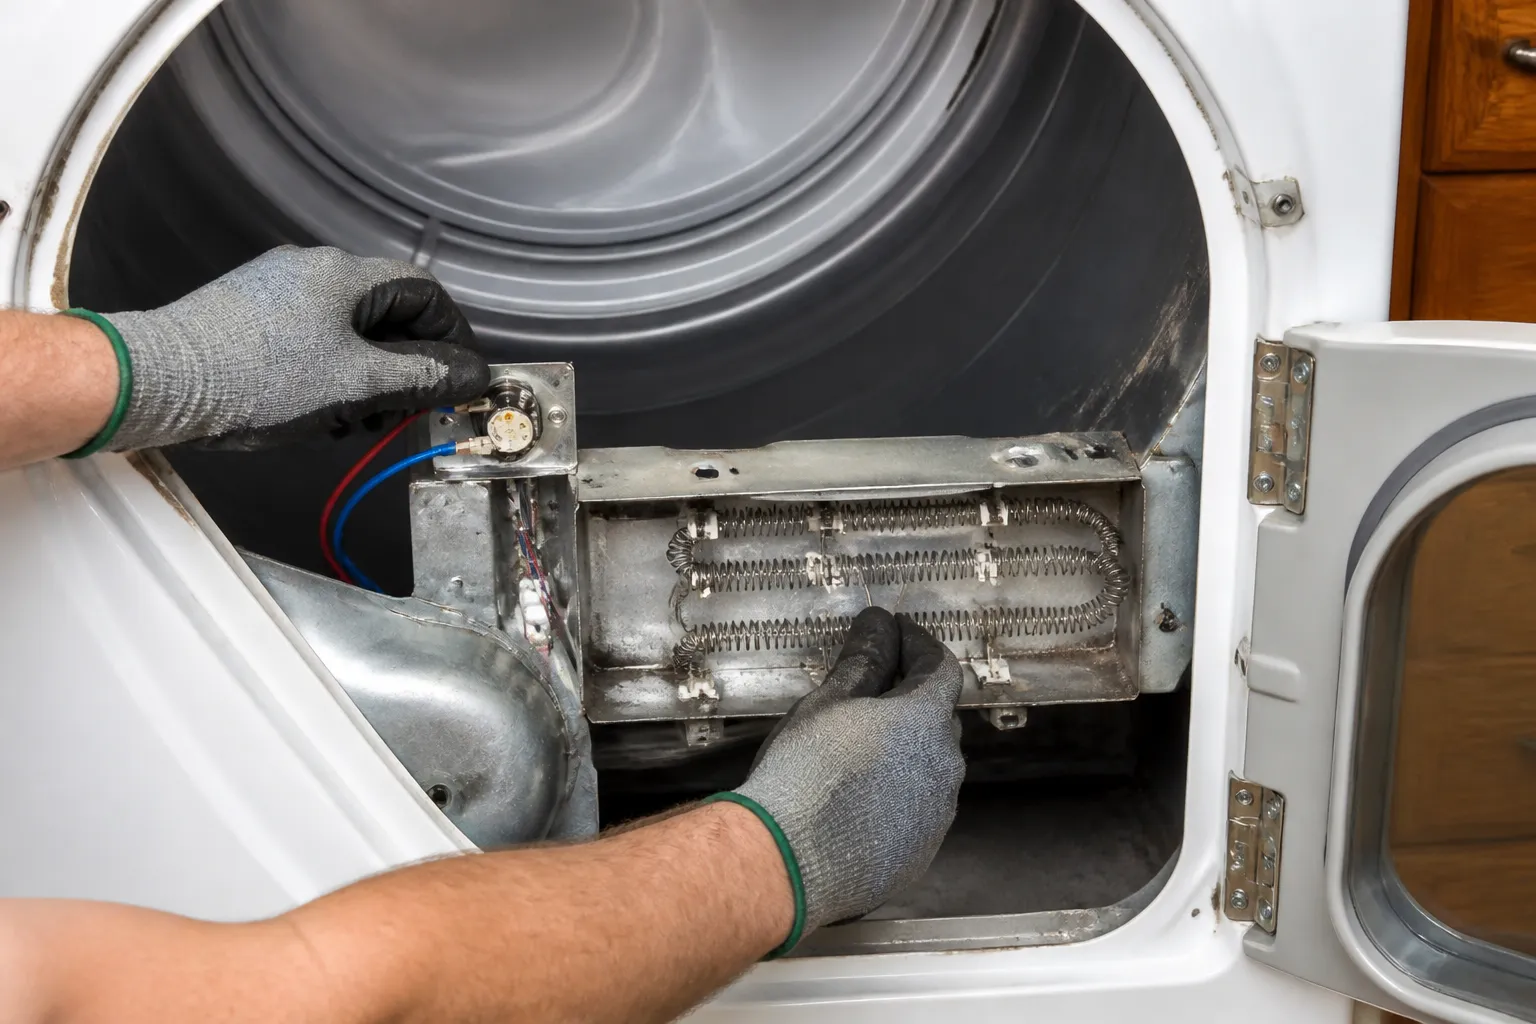
Remove the back panel of the dryer to access the heating element canister. Disconnect the wires, set your multimeter to resistance (ohms), and probe the element terminals — a working element on this model typically reads around 10–15 ohms. If the reading is infinite (open circuit) or you see a visible break in the coil, the element has failed and needs to be replaced.
Step 6: Replace Failed Components
Install the new thermal fuse, thermostat, or heating element by reversing the removal steps, reconnecting wires exactly as photographed. Ensure the heating element fits snugly in its housing without any coils touching the casing, as that would cause an immediate short. Hand-tighten all mounting screws before fully torquing to avoid cracking plastic mounting brackets.
Step 7: Reassemble and Test
Reattach the front panel and door-switch harness, snap the top panel back down, and reconnect the exhaust duct. Plug the dryer in, run a timed dry cycle on high heat for 10 minutes, and open the door to confirm warm air. If heat is present, run a full load of damp towels to verify that the repair is complete.
How Much Does This Repair Cost?
| Repair route | Typical cost |
|---|---|
| Do it yourself | $15–$60 (parts) |
| Professional repair | $150–$300 (parts and labor) |
DIY parts for this repair typically cost between $15 and $60, depending on which components have failed. A thermal fuse costs around $10–$15, a thermostat $15–$25, and a heating element $30–$60. Compare that to a professional appliance service call, which usually ranges from $150 to $300 once you factor in the diagnostic fee, labor, and marked-up parts. Doing this repair yourself puts roughly $100–$250 back in your pocket for less than two hours of work.
Where to Buy Replacement Parts
All three parts are readily available on Amazon with fast shipping. Search directly for your specific components using these links:
- Maytag MEDB835DW Heating Element Replacement (WP35001247)
- Maytag MEDB835DW Thermal Fuse Replacement (WP3392519)
- Maytag MEDB835DW High-Limit Thermostat Replacement (WP3977767)
Frequently Asked Questions
If your Maytag MEDB835DW is leaving clothes damp after a full cycle, a failed heating element is one of the first components to test — and replacing it yourself is quite straightforward. The UPGRADE HEATING PLATE WP3387747 W11344457 Dryer Heating Element Kit is a direct-fit upgrade kit that includes everything you need to restore full heat output on compatible Maytag and Whirlpool platforms. It’s a cost-effective repair that can have your dryer running like new without the need for a technician. ()
Once you’ve confirmed the heating element is the culprit and gathered your tools, having the right replacement kit on hand speeds things along. The Heating Element Kit for Maytag (Bravos) Dryer is specifically designed for the Maytag Bravos lineup, including the MEDB835DW4, so you won’t run into fitment issues. This kit includes the key components needed for a complete repair, saving you from having to make a second trip to source missing parts.
Before you button everything back up and run a test cycle, double-check that your replacement kit matches your exact model number.
The Heating Element That Actually Solves Damp Clothes on the MEDB835DW
After ruling out a clogged exhaust duct and confirming the drum is tumbling properly, a failed heating element is your next most likely suspect on this model. I’ve seen this repair misdiagnosed as a thermal fuse failure more times than I can count.
What works
- Direct fit replacement for the MEDB835DW without any adapter or modification needed — the part slides into the same mounting brackets the original used.
- Heavy-gauge construction on this kit means it doesn’t fail prematurely like some cheaper aftermarket elements; I’ve followed up on jobs six months later and these are still heating reliably.
- Comes with the terminal block already installed, so you won’t have to hunt for the right connector or strip and re-crimp wires in a tight space behind the drum.
What doesn’t
- You still have to pull the front panel and drum seal, which on this model means disconnecting the door latch assembly — not difficult but adds 20 minutes to the job if you haven’t done it before.
- If your actual issue is a thermal fuse or high-limit thermostat, ordering this element first wastes time and shipping costs; always test for continuity on the element with a multimeter before ordering.
The most common mistake I see homeowners make is assuming damp clothes mean the element is dead, when really it might just be weak or cutting out partway through the cycle. Testing it takes five minutes with a multimeter before you order anything. UPGRADE HEATING PLATE WP3387747 W11344457 Dryer Heating Element Kit
About This Article

Written by Dave Holt. Dave Holt has been taking apart and fixing household appliances since he was a teenager who couldn't leave a broken one alone. Eighteen years later, after fixing things for neighbors, friends, and anyone who'd let him, he's seen almost every failure mode there is. When he writes a repair guide here, it's based on the actual job, not a manufacturer overview. More about this site.
Scope and limits. Dave is a self-taught repairer, not a certified appliance technician. Unplug before you open anything, and leave sealed refrigeration systems, gas connections, and hardwired circuits to a qualified technician.

