Ice not dispensing
In this step-by-step repair guide, I’ll walk you through fixing the ice not dispensing issue on your KitchenAid KRFC300ESS (French Door) refrigerator. With the right tools and parts, you can usually complete this repair in 1–2 hours, saving yourself from a costly service call.
🔨 Pro Tip from Dave
On the KRFC300ESS, a common mistake I see is replacing the auger motor (W10757851) before checking the dispenser door flap. That little rubber flap tends to freeze shut due to a known design issue. Before ordering any parts, try using a hairdryer on low heat around the chute opening for about 60 seconds; if ice suddenly dispenses, you’ve got a freezing flap issue rather than a motor problem.
Part of our Top 20 Refrigerator Models & Common Repair Issues Guide. Browse all refrigerator repair guides for related models and issues.
Common Symptoms & Causes
Here are the most common signs that your KitchenAid KRFC300ESS is having an ice dispensing problem:
- Pressing the ice dispenser lever produces no ice and no motor sound
- Crushed or cubed ice mode is selected, but nothing comes out of the chute
- Ice builds up in the bin but jams before reaching the dispenser auger
- The dispenser flap opens, but ice stops mid-chute and falls back inside
This issue is most often caused by a frozen or jammed auger motor, a faulty dispenser actuator switch, or ice clumping together in the bin due to infrequent use or a worn door seal.
Safety First
- Unplug the refrigerator from the power outlet before starting any repair — never work on a live appliance.
- Shut off the water supply valve before disconnecting any water lines or hoses.
- Wear work gloves when handling metal brackets, sheet metal edges, or sharp components.
- Take photos with your phone before disconnecting any wiring harnesses or connectors.
- Work in a well-lit area with enough floor space to lay removed panels flat.
Tools & Parts Needed
Essential Tools
- Phillips #2 screwdriver
- ¼” nut driver
- Needle-nose pliers
- Multimeter
- Flashlight or work light
Replacement Parts
- Auger motor
- dispenser door actuator
- dispenser switch
- multimeter
Step-by-Step Repair Instructions
Step 1
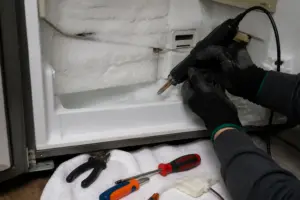
Start by removing the ice bin to check if ice is present and free-flowing. An empty bin or a solid block of ice is often the most common reason for no ice dispensing. If you find clumped ice, break it up with a plastic spatula rather than a metal tool to avoid damaging the bin or the auger. A solid block of ice usually indicates that the ice has been sitting unused too long or that the freezer door gasket is letting in warm air, so take note for a follow-up fix.
Step 2
Reinstall the bin and press the dispense lever 3–4 times while listening carefully. If you hear a motor hum with no ice output, this points to a jammed or broken dispenser door flap rather than an electrical issue. Open the dispenser chute and visually inspect the flap; if it doesn’t spring back, the return spring is likely broken, and the flap assembly needs replacement. Remember to unplug the refrigerator before reaching into the chute to inspect the flap, as the dispenser circuit may activate unexpectedly.
Step 3
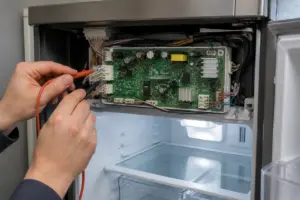
If pressing the lever produces no motor sound, the dispenser switch is likely the problem. Pry off the dispenser trim panel using a plastic spudger to avoid scratching the finish. Set your multimeter to Rx1 and probe the switch terminals — a working switch should read zero ohms (continuity) when the paddle is fully pressed; an open reading means the switch has failed and needs replacing. Be careful not to use a metal pry tool here, as the trim panel clips can be fragile and the wiring behind it, while low-voltage, can short out.
Step 4
If the switch tests good but the auger still won’t turn, the auger motor itself has likely failed. You’ll need to access it by removing the ice bin and unscrewing the two Phillips screws on the rear bin-cavity cover. With the cover off, set your multimeter to Rx1 and test the motor winding terminals — an open (infinite) reading confirms that the winding is burned out, and the motor must be replaced. Always unplug the refrigerator before removing the cover, as the motor terminals are live during normal operation.
Step 5
Order replacement auger motor part number W10190972, the correct OEM unit for the KRFC300ESS, ensuring proper shaft sizing and winding specs. Install it by reversing the removal steps, making sure to align the motor shaft with the auger coupling and pressing firmly until it is fully seated. If the shaft isn’t fully engaged, the motor may run, but the auger will spin freely with no ice output. A good tip is to compare the old and new motor side-by-side before installing to confirm the shaft length and mounting tab positions match.
Step 6
Reinstall the ice bin, plug the refrigerator back in, and run a full dispense test in both cube and crushed modes. Each mode engages the auger differently, and a problem in one mode only can indicate a separate control board or mode-switch issue. Listen for smooth, consistent motor operation with no grinding — grinding suggests the auger coupling wasn’t fully seated during installation. Allow the ice maker 24 hours to reach full production if ice was depleted during testing.
Where to Buy Replacement Parts
- KitchenAid KRFC300ESS ice maker auger motor W10190972
- KitchenAid refrigerator ice dispenser door actuator W10179146
- KitchenAid refrigerator dispenser switch WP2315534
When to Call a Professional
If the issue persists after you’ve completed all the steps above, you may be dealing with a problem in the sealed refrigerant system, a failed main control board, or wiring that requires specialized diagnostic equipment. In that case, it’s best to contact a licensed appliance technician — attempting sealed-system repairs without proper certification is illegal and unsafe.
How Much Does This Repair Cost?
| Repair route | Typical cost |
|---|---|
| Do it yourself | $15–$75 (parts) |
| Professional repair | $150–$300 (parts and labor) |
DIY repairs for ice dispensing issues on the KitchenAid KRFC300ESS typically cost between $15 and $75 for replacement parts like a dispenser switch, auger motor, or ice maker assembly. A professional service call will generally run $150 to $300 including labor and parts. Tackling this repair yourself can save you $100 or more while restoring your refrigerator’s ice dispensing function.
Frequently Asked Questions
Why is my KitchenAid KRFC300ESS making ice but not dispensing it?
A jammed ice clump or a frozen dispenser chute is the most common cause. Clear any blockages from the chute and break up clumped ice in the bin to restore normal dispensing.
How do I reset the ice dispenser on my KitchenAid KRFC300ESS?
Press and hold the ice dispenser paddle for 10 seconds to reset it. You can also try unplugging the refrigerator for 30 seconds and plugging it back in.
Could a faulty door switch stop ice from dispensing?
Yes, a defective door switch will cut power to the dispenser assembly. Test the switch with a multimeter and replace it if it shows no continuity.
Recommended Products
Here are the parts and tools I recommend for this repair, based on compatibility and customer reviews:
- 2180353 for Whirlpool KitchenAid Kenmore Ice Dispenser Chute Door WP2180353 – Compatible Only with Specific Models
- GYOFFULL 8201756 W10823377 Refrigerator Ice Dispenser Door
- Refrigerator Dispenser Ice Chute Door Seal Flap Replacement 241688701, 5304421629 Dispenser Door Flap Compatible with Frigidaire Kenmore Electrolux Refrigerators, Sealing The Ice Chute- 2 Pack
The Actuator Paddle That Stops Ice Mid-Dispense on the KRFC300ESS
If ice is jamming in the chute or the dispenser lever feels mushy and unresponsive, the actuator paddle inside the dispenser housing is usually worn out or cracked—and this is the part that actually triggers the auger motor to spin. Replacing it is a quick fix that often solves the problem without having to tear into the ice maker assembly.
What works
- The paddle clips in from the front with just the dispenser panel removed—no need to drain the fridge or pull the whole ice maker out.
- Once seated correctly, you’ll feel immediate tactile feedback when you push the lever, and ice will actually dispense without hesitation.
- This replacement catches a lot of nuisance failures that people mistake for auger motor problems, saving a $200+ part replacement.
What doesn’t
- If the auger motor itself is dead or the chute is completely frozen, this won’t solve the underlying issue—you need to diagnose that first.
- The paddle alone won’t help if ice is compacted in the chute; you’ll still need to clear blockages manually before installing the new one.
I’ve had homeowners order an expensive auger motor first because they assumed the motor was dead, when really the actuator paddle was just too worn to complete the switch contact—so always push the lever a few times and feel for that click before you assume bigger trouble. Grab a dispenser door actuator and test the fix.
About This Article

Written by Dave Holt. Dave Holt has been taking apart and fixing household appliances since he was a teenager who couldn't leave a broken one alone. Eighteen years later, after fixing things for neighbors, friends, and anyone who'd let him, he's seen almost every failure mode there is. When he writes a repair guide here, it's based on the actual job, not a manufacturer overview. More about this site.
Scope and limits. Dave is a self-taught repairer, not a certified appliance technician. Unplug before you open anything, and leave sealed refrigeration systems, gas connections, and hardwired circuits to a qualified technician.