Ice bin cracking
In this step-by-step repair guide, I’ll show you how to fix ice bin cracking on your LG LRSXS2706V (Side-by-Side). With the right tools and parts, most homeowners can complete this repair in 1–2 hours and avoid a costly service call.
🔨 Pro Tip from Dave
When dealing with the LG LRSXS2706V, be sure to order the updated ice bin assembly AKC73029603 instead of the older version — LG has revised the plastic formula after widespread cracking complaints. I often see the mistake of reinstalling the bin without checking the auger motor coupling for wear; a damaged coupling can create uneven torque on the bin and will crack a brand-new replacement within months.
Part of our Top 20 Refrigerator Models & Common Repair Issues Guide. Browse all refrigerator repair guides for related models and issues.
Common Symptoms & Causes
If your LG LRSXS2706V is experiencing ice bin cracking, you may notice one or more of the following signs before the problem worsens.
- Visible hairline cracks or fractures along the sides or bottom of the ice bin
- Ice cubes spilling into the freezer compartment instead of dispensing properly
- The ice dispenser jams or fails to cycle because the broken bin edge catches on the auger
- A grinding or popping noise when the ice maker attempts to dispense ice
This issue is most commonly caused by normal wear and temperature stress on the plastic bin over time, though improper removal or forcing a jammed ice bin can accelerate cracking.
Safety First
- Unplug the refrigerator from the power outlet before starting any repair — never work on a live appliance.
- Shut off the water supply valve before disconnecting any water lines or hoses.
- Wear work gloves when handling metal brackets, sheet metal edges, or sharp components.
- Take photos with your phone before disconnecting any wiring harnesses or connectors.
- Work in a well-lit area with enough floor space to lay removed panels flat.
Tools & Parts Needed
Essential Tools
- Phillips #2 screwdriver
- ¼” nut driver
- Needle-nose pliers
- Multimeter
- Flashlight or work light
Replacement Parts
- LG ice bin
- auger assembly
- inline sediment water filter
- mild dish soap
Step-by-Step Repair Instructions
Step 1
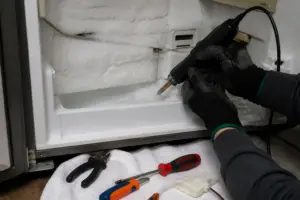
Start by removing the ice bin. Pull it straight out of the freezer compartment, then carefully inspect all four corners and the auger hub for hairline fractures or full cracks. This is crucial because a cracked bin can shed plastic shards directly into your ice cubes, posing a serious ingestion hazard. Pro tip: shine a flashlight at an angle across the bin surface to make hairline cracks visible before they become larger failures.
Step 2
Order the replacement ice bin using LG part number AKC72948909 to ensure an exact fit. While you have the compartment accessible, run your finger along the auger blades and shaft to feel for burrs or rough edges that can accelerate bin wear. If you notice any roughness, smooth it with 220-grit sandpaper — leaving burrs can cause the new bin to crack prematurely. Remember to wear gloves when handling the auger, as metal burrs can cause cuts.
Step 3
Next, wash the auger, auger housing, and any removable ice maker components with warm water and mild dish soap to remove mineral scale, old ice residue, and any plastic debris from the cracked bin. Be sure to rinse each component thoroughly; soap residue can contaminate ice taste and potentially foam up inside the ice maker. Allow all parts to air dry completely or dry them with a clean towel before reassembly — moisture trapped during reinstallation can lead to ice bridging.
Step 4
Check your household water quality because high mineral content can cause ice cubes to fuse together, creating clumps that exert outward pressure on the bin walls, which is a leading cause of premature cracking. If you notice white scale buildup on components or cloudy ice cubes, install an inline sediment and carbon block filter on the refrigerator supply line to address the root cause. Pro tip: most inline filters are inexpensive and can be installed in minutes between the shutoff valve and the refrigerator’s water line connection.
Step 5
Slide the new bin straight in along the tracks and press it fully into the compartment until you feel and hear the auger shaft engage the motor coupling with a distinct click. An improperly seated bin will not receive drive from the motor, meaning the auger cannot rotate, and ice will pile up and jam instead of dispensing — so don’t skip confirming that click. Pro tip: gently try to pull the bin back out after seating it; if it releases too easily without resistance, realign and reseat it.
Step 6
Finally, plug the refrigerator back in and allow approximately two hours for the ice maker to complete its first production cycle and for the bin to reach operating temperature. It’s a good idea to discard the first two to three batches of ice after any bin replacement to flush out residual soap, dust, or plastic odor from new components before consuming the ice. This purge step is especially important if the old bin was cracked for an extended period, as contamination from plastic shards may have reached the ice maker components.
Where to Buy Replacement Parts
- LG LRSXS2706V ice bin replacement AKC72948909
- LG refrigerator auger motor ACQ85710502 replacement
- refrigerator inline water sediment filter replacement
When to Call a Professional
If the issue persists after completing all the steps above, there may be a problem involving the sealed refrigerant system, a failed main control board, or wiring that requires specialized diagnostic equipment. It’s best to contact a licensed appliance technician — attempting sealed-system repairs without proper certification is illegal and unsafe.
How Much Does This Repair Cost?
| Repair route | Typical cost |
|---|---|
| Do it yourself | $25–$65 (parts) |
| Professional repair | $150–$300 (parts and labor) |
Replacing a cracked ice bin on the LG LRSXS2706V typically costs $25–$65 for the replacement part when you do it yourself. A professional service call for the same repair usually runs $150–$300 once you factor in labor and fees. Tackling this repair yourself can save you over $100 while restoring your ice maker’s full function.
Frequently Asked Questions
Why does the ice bin on my LG LRSXS2706V keep cracking?
Ice bins on this model often crack due to brittle plastic caused by freezer temperature fluctuations or overfilling. Keeping the bin at the recommended fill level and ensuring your freezer stays at 0°F can help prevent recurring cracks.
Can I use my LG LRSXS2706V while the ice bin is cracked?
A cracked ice bin can allow ice to jam the dispenser mechanism or leak water into the freezer. It’s best to remove the bin and replace it before continuing to use the ice maker.
Is replacing the ice bin on the LG LRSXS2706V a job I can do myself?
Absolutely, replacing the ice bin is a straightforward repair that requires no special tools. Just pull out the cracked bin, order the correct LG replacement part, and slide the new bin into place.
Recommended Products
These are the parts and tools I recommend for this repair, based on compatibility and customer reviews:
- HLZDS AKC72949319 Ice Bucket Assembly Compatible with LG LFX21976ST LFX25974ST LFX28968ST LFX28979ST Refrigerator Ice Maker Tray, Replaces AKC72949314 AP5677094 2660342 Ice Container
- Genuine LG-5075JJ1003A Bucket Assembly, Ice
- AKC72949319 Ice Bucket Assembly Compatible with LG LFX21976ST LFX25974ST LFX28968ST LFX28979 Refrigerator Ice Maker Tray, Replaces AKC72949314, AKC72949301, AKC72949309, AKC72949315, Ice Container
The Genuine LG Ice Bin Assembly That Actually Fits the LRSXS2706V Without Modification
When you’ve got a cracked ice bin on this model, you need the OEM part—not a universal replacement that requires jerry-rigging. The genuine LG assembly is the direct swap that avoids fitment headaches and guarantees the auger motor will align properly.
What works
- Drops straight in without modification—no forcing the mounting clips or shimming the auger shaft to get clearance.
- The plastic thickness matches the original, so freeze-thaw stress distributes the same way and you’re not just replacing one cracked bin with a thinner aftermarket version that’ll crack again in two years.
- Ice dispensing is smooth because the auger cavity tolerances are exact—aftermarket bins sometimes bind or create grinding noise because the hole diameter is off by a millimeter.
What doesn’t
- Genuine LG parts run higher in price than the knock-off bucket assemblies floating around on Amazon—expect to pay more, but you’re buying peace of mind and longevity.
- Supply can be spotty depending on the season and your region, so if it’s backordered when you order, you’re looking at a wait rather than a next-day ship.
I’ve seen too many DIYers order a cheap third-party ice bucket that looked compatible in the photo, only to find the auger doesn’t seat right or the bin rocks in the cavity when they’re done. Grab the Genuine LG-5075JJ1003A Bucket Assembly and you’ll skip that frustration.
About This Article

Written by Dave Holt. Dave Holt has been taking apart and fixing household appliances since he was a teenager who couldn't leave a broken one alone. Eighteen years later, after fixing things for neighbors, friends, and anyone who'd let him, he's seen almost every failure mode there is. When he writes a repair guide here, it's based on the actual job, not a manufacturer overview. More about this site.
Scope and limits. Dave is a self-taught repairer, not a certified appliance technician. Unplug before you open anything, and leave sealed refrigeration systems, gas connections, and hardwired circuits to a qualified technician.