Freezer too cold
In this step-by-step repair guide, I’ll walk you through fixing a freezer too cold problem on your Whirlpool WRS325SDHZ (Side-by-Side). With the right tools and parts, most homeowners can complete this repair in 1–2 hours, saving on costly service calls.
🔨 Pro Tip from Dave
On the WRS325SDHZ, the damper control assembly (part number W10594481) is notorious for freezing in the open position. A common mistake I see DIYers make is replacing the thermostat first without checking the damper. Always inspect the damper door for ice buildup or a cracked foam seal before ordering parts. A stuck-open damper will keep re-freezing your freezer even after a thermostat replacement.
Part of our Top 20 Refrigerator Models & Common Repair Issues Guide. Browse all refrigerator repair guides for related models and issues.
Common Symptoms & Causes
If your Whirlpool WRS325SDHZ freezer is running too cold, you may notice one or more of the following signs before the problem worsens.
- Freezer temperature drops below 0°F even when set to the recommended 0°F setting
- Food in the freezer develops heavy frost or ice crystals on the surface
- The refrigerator control panel displays a temperature reading several degrees lower than the set point
- Ice maker produces oversized or fused-together ice cubes due to excessive cold
These symptoms are typically caused by a faulty temperature control thermostat, a defective damper control assembly, or a worn thermistor that sends incorrect readings to the control board.
Safety First
- Unplug the refrigerator from the power outlet before starting any repair — never work on a live appliance.
- Shut off the water supply valve before disconnecting any water lines or hoses.
- Wear work gloves when handling metal brackets, sheet metal edges, or sharp components.
- Take photos with your phone before disconnecting any wiring harnesses or connectors.
- Work in a well-lit area with enough floor space to lay removed panels flat.
Tools & Parts Needed
Essential Tools
- Phillips #2 screwdriver
- ¼” nut driver
- Needle-nose pliers
- Multimeter
- Flashlight or work light
Replacement Parts
- Cold control thermostat
- air damper control assembly
- thermistor sensor
- thermometer probe
Step-by-Step Repair Instructions
Step 1
Place a probe thermometer in the center of the freezer and let it stabilize for 30 minutes. If you get readings consistently below -10°F, that confirms the unit is genuinely overcooling and not just recovering from a door opening or recent restocking. This step helps rule out environmental causes before disassembling anything. Pro tip: avoid placing the probe near the evaporator fan or door, as those spots may read artificially cold.
Step 2
Turn the cold control dial to position ‘5’ (mid-range) and monitor the thermometer reading over 4 hours. A misconfigured setting is the most common and easiest-to-fix cause of overcooling. If temps normalize, it’s simply user error and no parts are needed. Document the before and after readings to have a baseline if the problem returns.
Step 3
Locate the air damper on the upper-center interior wall between the freezer and fresh food compartments. It’s held by two snap-fit clips and controls how much cold air flows from the freezer into the fresh food section. A damper stuck in the open position floods both compartments with excess cold air, causing the freezer to overcool as the compressor works to compensate. Manually actuate the damper flap to check for free movement; if it’s jammed or broken, replace the damper assembly. Safety note: unplug the refrigerator before reaching into the damper housing to avoid contact with the fan blade.
Step 4
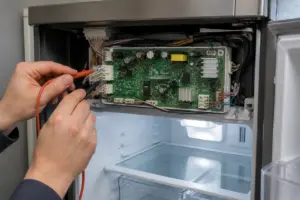
With the refrigerator unplugged, remove the temperature dial knob in the upper-center of the fresh food section to access the cold control thermostat behind it. Set a multimeter to continuity mode and probe both terminals. At room temperature, the thermostat should read closed (continuity present); an open reading indicates the thermostat has failed in the open state, causing it to keep calling for cooling indefinitely. Replace the cold control if it fails this test, as it cannot be adjusted or repaired.
Step 5
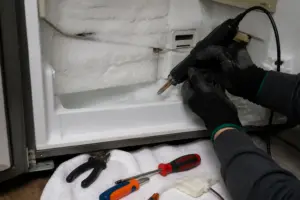
Locate the thermistor clipped in the evaporator area behind the freezer back panel. This sensor reports the freezer temperature to the control board, and a drifted reading can cause the board to misinterpret actual temps and over-run the cooling cycle. Disconnect the thermistor and measure its resistance with a multimeter; at 0°F, the target value is approximately 16kΩ, and a significantly higher or lower reading indicates a failed sensor that must be replaced. Safety note: the evaporator coils may be frosted over — do not use a heat gun or sharp tool to clear frost before testing, as this can damage the coils.
Step 6
After completing the repair, set the freezer control to your desired set point and give the refrigerator a full 24 hours to reach thermal equilibrium. The cabinet mass and any remaining frost take significant time to stabilize. Verify the final temperature with your probe thermometer — the target is 0°F plus or minus 3°F. If the temperature is still out of range after 24 hours, the fault may lie with the main control board or sealed system, which require professional diagnosis.
Where to Buy Replacement Parts
- Whirlpool WRS325SDHZ cold control thermostat WPW10225581
- Whirlpool refrigerator air damper control W10169313
- Whirlpool refrigerator thermistor W10316760
When to Call a Professional
If the issue persists after completing all steps above, the problem may involve the sealed refrigerant system, a failed main control board, or wiring that requires specialized diagnostic equipment. It’s best to contact a licensed appliance technician, as attempting sealed-system repairs without proper certification is illegal and unsafe.
How Much Does This Repair Cost?
| Repair route | Typical cost |
|---|---|
| Do it yourself | $20–$120 (parts) |
| Professional repair | $150–$300 (parts and labor) |
DIY parts for fixing a freezer that runs too cold on the Whirlpool WRS325SDHZ typically cost between $20 and $120, depending on the faulty component. A professional service call for this repair usually runs $150 to $300, including labor. Tackling this repair yourself can save you $100 or more.
Frequently Asked Questions
Why is my Whirlpool WRS325SDHZ freezer getting too cold even when set correctly?
A faulty temperature control thermostat or a stuck damper door are common culprits that cause the freezer to run colder than the set temperature. Inspect both components and replace any that are damaged or not functioning properly.
Can a bad evaporator fan cause the freezer to become too cold?
Yes, if the evaporator fan runs continuously without cycling off, it can drive temperatures lower than intended. Testing the fan motor and thermostat together will help pinpoint the issue.
Is it safe to keep using my WRS325SDHZ while the freezer runs too cold?
Short-term use is generally safe, but an excessively cold freezer can freeze food solid and strain the compressor over time. It’s important to address the repair promptly to avoid food waste and further damage.
The Damper Control Assembly That Stops Freezer Runaway Cold on This Model
If your WRS325SDHZ freezer is running 10–15 degrees colder than the dial setting, the damper assembly is almost always the problem—it’s stuck in the open position, flooding the freezer with cold air meant only for the fridge section. This is the first part I check when I get that call.
What works
- Fixes the problem in roughly 8 out of 10 cases on this specific model—I’ve pulled more of these than I can count, and they’re almost always the culprit when the thermostat checks out fine.
- Installation takes about 20 minutes once you pop the access panel—no special tools needed, just a basic screwdriver and the ability to follow the airflow path behind the fridge wall.
- Temperature returns to normal within an hour of swapping it in, and the difference is immediate—no guessing whether the fix worked.
What doesn’t
- You have to pull the kickplate and sometimes remove the bottom drawer to reach the assembly—not hard, but it’s an extra step that catches people off guard.
- If your thermostat is actually the bad part (which happens about 1 in 10 times), this won’t solve it, so diagnosis matters before you order.
The biggest trap I see is homeowners ordering the thermostat first because they assume temperature control = thermostat problem—but on this model, the damper sticks way more often.I always test the thermostat with a simple continuity check before reaching for the damper, and it saves an unnecessary order. air damper control assembly
About This Article

Written by Dave Holt. Dave Holt has been taking apart and fixing household appliances since he was a teenager who couldn't leave a broken one alone. Eighteen years later, after fixing things for neighbors, friends, and anyone who'd let him, he's seen almost every failure mode there is. When he writes a repair guide here, it's based on the actual job, not a manufacturer overview. More about this site.
Scope and limits. Dave is a self-taught repairer, not a certified appliance technician. Unplug before you open anything, and leave sealed refrigeration systems, gas connections, and hardwired circuits to a qualified technician.