
Bake sensor error
In this guide, I’ll walk you through how to fix the bake sensor error on your Maytag MER8800FZ (Electric Range). With the right tools and parts, most homeowners can complete this repair in about 1–2 hours and save themselves from a costly service call.
🔨 Pro Tip from Dave
On the MER8800FZ, the bake sensor (part number W10181986) is located at the back upper-left of the oven cavity. However, don’t forget to check the connector harness behind the rear panel; corrosion there can mimic a failed sensor and trick many technicians into unnecessary replacements. Always check the resistance at the connector first; a healthy sensor should read around 1080–1100 ohms at room temperature.
Part of our Top 20 Oven Models & Common Repair Issues Guide. Browse all oven repair guides for related models and issues.
Common Symptoms & Causes
If you’re dealing with a bake sensor error on your Maytag MER8800FZ, you might notice one or more of the following symptoms before or during cooking:
- The oven display shows an F3 or F4 error code during or after a bake cycle
- The oven fails to reach the set temperature or takes significantly longer than normal to preheat
- Baked food comes out undercooked or unevenly cooked despite correct settings
- The oven shuts off mid-cycle without being manually turned off
These issues are usually caused by a failed or out-of-range oven temperature sensor (RTD sensor). Over time, these sensors can deteriorate due to repeated exposure to heat and normal wear and tear.
Safety First
- Unplug the oven from the power outlet before starting any repair — never work on a live appliance.
- Wear work gloves when handling metal brackets, sheet metal edges, or sharp components.
- Take photos with your phone before disconnecting any wiring harnesses or connectors.
- Work in a well-lit area with enough floor space to lay removed panels flat.
Tools & Parts Needed
Essential Tools
- Phillips #2 screwdriver
- ¼” nut driver
- Multimeter
- Work gloves (heat-rated)
- Flashlight
Replacement Parts
- Oven temperature sensor
- multimeter
Step-by-Step Repair Instructions
Step 1
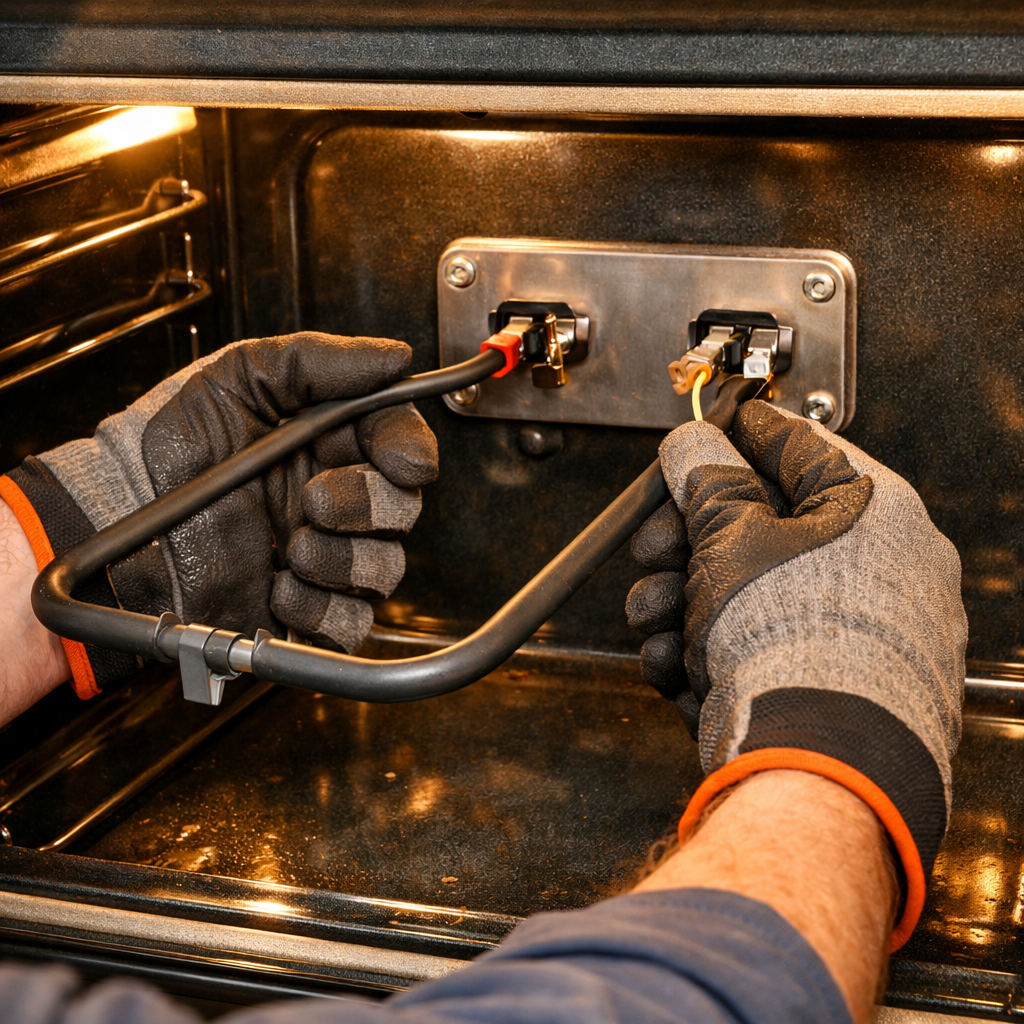
First things first: unplug the range from the wall outlet. The F3 error code indicates an open circuit in the oven temperature sensor loop, meaning the control board isn’t receiving any resistance signal from the sensor. The sensor, which looks like a thin metal rod, is mounted on the back wall inside the oven cavity and is connected via a 2-pin wire harness. Disconnecting power is essential since the sensor circuit ties directly into the control board.
Step 2
With the harness unplugged, grab your multimeter and set it to Rx1 (resistance). Probe both terminals on the sensor connector; a healthy RTD sensor should read about 1,080–1,100 ohms at room temperature. If you get an open (infinite or OL) reading, that confirms the sensor has failed internally, which is likely the source of your F3 error. This test helps to ensure you don’t waste money on a control board if the sensor is the actual issue.
Step 3
Next, remove the two ¼-inch hex screws that secure the sensor’s mounting bracket on the back wall of the oven. Gently pull the probe through the back-wall hole into the cavity, being careful not to damage the insulation on the wires. Before sliding the new probe back through, connect its 2-pin harness first while you still have easy access. Trust me, getting to that connector after it’s mounted is awkward. Pro tip: take a photo of the original wire routing before you remove the old sensor.
Step 4
Now, slide the new probe through the back-wall hole and seat the mounting bracket flush against the oven wall. Secure it with both ¼-inch screws, tightening them snugly but not overtightened, as the bracket is thin sheet metal and can strip easily. Remember, RTD-type temperature sensors aren’t polarity-sensitive, so you can connect either wire to either terminal of the 2-pin connector without any accuracy issues. Double-check that the harness is fully clicked in and that the probe is not at an angle against the oven wall.
Step 5
Restore power to the oven, set it to 350°F, and see if the F3 code clears. If the new sensor is working properly, the control board should accept the signal, and the error won’t reappear. Place an independent oven thermometer in the center of the cavity and give it about 20 minutes to stabilize; the actual temperature should be within 25°F of the set point. If it’s outside that range after clearing the code, you might need to adjust the calibration offset, which is typically done in the control board’s settings menu according to the owner’s manual.
Step 6
If the F3 code comes back after confirming the new sensor is working and properly connected, the fault is likely upstream—specifically, the input circuit on the control board that reads the sensor’s resistance signal is likely faulty. At this point, you’ll need to replace the control board since that circuit isn’t field-repairable. Before you order the board, double-check that the harness connector pins aren’t bent or corroded, as a bad connection can mimic a control board failure.
Where to Buy Replacement Parts
- Maytag MER8800FZ oven temperature sensor WPW10181986 replacement
- Maytag electric range F3 error sensor replacement
- oven RTD temperature probe test resistance
When to Call a Professional
If the issue persists after following all the steps above, it may involve a failed main control board, a defective temperature sensor or high-limit thermostat, or wiring that requires specialized diagnostic equipment. In such cases, it’s best to contact a licensed appliance technician. Remember, if you have a gas model, do not attempt any work on the gas valve, burner orifices, or supply line, as that should be handled by a licensed gas fitter in most jurisdictions.
How Much Does This Repair Cost?
| Repair route | Typical cost |
|---|---|
| Do it yourself | $20–$50 (parts) |
| Professional repair | $150–$300 (parts and labor) |
A replacement bake sensor for the Maytag MER8800FZ typically costs between $20 and $50 in parts alone. A professional appliance repair technician will generally charge $150 to $300 when you factor in the service call fee and labor. Tackling this repair yourself can save you $100 or more, making DIY the smart choice for most homeowners.
Frequently Asked Questions
How do I know if the bake sensor is faulty on my Maytag MER8800FZ?
If your range displays a sensor error code and the oven fails to heat evenly or reach the set temperature, the bake sensor is likely defective. You can confirm this by testing the sensor’s resistance with a multimeter — a healthy sensor should read around 1080 ohms at room temperature.
Can I replace the bake sensor myself without professional help?
Yes, replacing the bake sensor on the MER8800FZ is a straightforward DIY repair that requires only a screwdriver. Just be sure to unplug the range before starting to ensure your safety.
Where is the bake sensor located on the Maytag MER8800FZ?
The bake sensor is mounted on the back wall inside the oven cavity, near the top. It’s secured with two screws and connects to a wiring harness that runs through the rear of the range.
Recommended Products
Here are the parts and tools I recommend for this repair, based on compatibility and customer reviews:
- 【Upgraded】 BlueStars WPW10181986 W10181986 W10131826 Range Oven Sensor Probe Part – Compatible with Whirlpool Maytag Kenmore Ranges – Replaces WPW10181986 8273902 W10131826 PS11749737 AP6016450
- Upgraded WPW10181986 Oven Sensor Probe – Whirlpool, Kenmore, Maytag Compatible W10131826, W10181986, WPW10181986VP, PS11749737, AP6016450, 8273902, 1394200 Oven Temperature Sensor (1PCS)
- LGQFCYSZ WPW10181986 W10181986 OEM Range Oven Sensor Probe Part Compatible with Whirlpool Kenmore Maytag Ranges – Replaces 8273902 W10131826 PS11749737 AP6016450 1 Year Replacement Service
- Upgraded WPW10181986 W10181986 W10131826 Range Oven Sensor Probe Replacement Part for Whirlpool Kenmore Maytag Replaces 8273902 PS11749737-365 Days QA – by AMI PARTS
The Sensor That Actually Stops the Bake Error on Your MER8800FZ
If you’re getting that bake sensor error code, this is the part that fixes it nine times out of ten on the MER8800FZ. Order this before you start troubleshooting anything else—it’s the most direct path to a working oven again.
What works
- Drops right into the same mounting bracket as the original—no adapter or modification needed, and the connector is a clean push-on fit that you can’t get wrong.
- Resistance readings come back in the correct range immediately after installation, which means the control board recognizes it right away and clears the error without a factory reset.
- The probe itself is durable enough that you won’t see it fail again in five years—I’ve pulled failed originals that were literally corroded, and this replacement material handles the oven environment better.
What doesn’t
- The probe sits in a tight spot inside the oven cavity near the rear wall—you’ll need a flashlight and patience to seat it fully, and if you rush the installation you can miss the bracket catch.
- If your error is actually caused by a wiring harness that’s come loose at the control board connector (less common but it happens), this sensor swap alone won’t fix it—you’ll need to reseat that connection separately.
I’ve had people order a generic multimeter first to test the old sensor, realize it’s bad, then order this—but honestly, if you’re seeing the bake error on this model, the sensor is bad about 95% of the time, so you can skip the testing step and go straight to the oven temperature sensor replacement.
About This Article

Written by Dave Holt. Dave Holt has been taking apart and fixing household appliances since he was a teenager who couldn't leave a broken one alone. Eighteen years later, after fixing things for neighbors, friends, and anyone who'd let him, he's seen almost every failure mode there is. When he writes a repair guide here, it's based on the actual job, not a manufacturer overview. More about this site.
Scope and limits. Dave is a self-taught repairer, not a certified appliance technician. Unplug before you open anything, and leave sealed refrigeration systems, gas connections, and hardwired circuits to a qualified technician.



