Complete Guide to Removing the Door on GE JVM6175SKSS Over-the-Range Microwave
The GE JVM6175SKSS is a popular over-the-range microwave model found in many kitchens across North America. Whether you need to replace the door handle, access the door interlock switches, clean the interior glass panels, or address door alignment issues, removing the door is a straightforward process when you understand the hinge system and follow proper safety procedures. This comprehensive guide walks you through every step of the door removal process for the JVM6175SKSS, including sourcing replacement parts like door switches.
Safety Warning: High Voltage Hazard
⚠️ CRITICAL SAFETY NOTICE: Before beginning any work on your GE JVM6175SKSS microwave, you must disconnect all electrical power to the unit. Over-the-range microwaves operate on 120 volts AC and contain high-voltage capacitors that can retain dangerous electrical charges even after unplugging the appliance. These capacitors can deliver a lethal shock. Always unplug the JVM6175SKSS from its outlet or switch off the dedicated circuit breaker at your electrical panel before removing the door or accessing any internal components. If your microwave is hardwired (connected directly to the electrical box rather than plugged into an outlet), you must switch off the appropriate breaker and verify power is disconnected using a non-contact voltage tester before proceeding.
When You Need to Remove the Door on Your JVM6175SKSS
Understanding when door removal is necessary helps you determine the scope of your repair project:
- Door Handle Replacement: If the handle on your JVM6175SKSS is cracked, broken, or difficult to operate, you’ll need to remove the door to access the handle mounting screws located on the interior door surface.
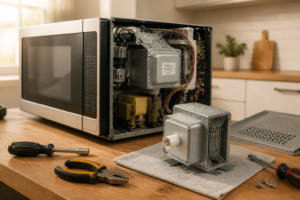
- Door Switch Access: The JVM6175SKSS uses three interlock safety switches mounted inside the door frame. If your microwave won’t heat or start, the problem is frequently a faulty door switch rather than the magnetron or high-voltage components. Door removal is the most efficient way to access and test these switches.
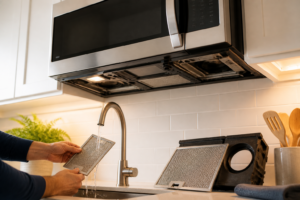
- Glass Panel Cleaning: Over time, grease and condensation can accumulate between the inner and outer glass panels on your JVM6175SKSS door. Removing the door gives you complete access to disassemble the glass panels and clean them thoroughly.
- Door Alignment Issues: If your JVM6175SKSS door doesn’t close evenly or leaves gaps at the top or sides, removing the door allows you to inspect the hinge pins and frame for damage and make necessary adjustments.
- Door Latch Replacement: The latch mechanism that catches when the door closes can wear out or break. Door removal provides access to replace this component.
Understanding the JVM6175SKSS Door Hinge System
The GE JVM6175SKSS uses a dual-hinge door system that is distinctly different from wall-mounted swivel hinges on countertop microwaves. The JVM6175SKSS door hangs from two hinge pins: an upper pin located at the top of the door frame and a lower pin positioned at the bottom. These pins are not removable screws but rather fixed points that the door slides onto and off of. Understanding this system is critical to removing the door safely without damaging the hinges or the microwave body.
The upper hinge on the JVM6175SKSS is located at the top center of the microwave cavity opening, while the lower hinge sits at the bottom. Both hinges have covers or trim pieces that protect the hinge mechanisms and provide a finished appearance. You’ll need to remove mounting screws that hold these hinge covers in place before you can lift the door free from the pins.
Tools and Materials You’ll Need
- Phillips head screwdriver (standard size)
- Needle-nose pliers or hemostat (optional, for hinge pin clips)
- Soft cloth or blanket to lay the door on (protects the glass)
- Tape measure (to check door alignment after reassembly)
- Non-contact voltage tester (to verify power is disconnected)
- Multimeter (if testing door switches)
Step-by-Step Door Removal for the JVM6175SKSS
Step 1: Disconnect Power and Verify Safety
Open the cabinet where your electrical panel is located and find the breaker serving your kitchen. Look for a 20-amp breaker labeled “microwave” or “kitchen.” Switch this breaker to the OFF position. If your JVM6175SKSS is plugged into an outlet, you can unplug it directly, but switching off the breaker provides an extra layer of safety. Use a non-contact voltage tester to confirm that no power is reaching the microwave by holding the tester near the power cord or outlet. The tester should show no voltage present.
Step 2: Open the Microwave Door Fully
Open your JVM6175SKSS door to a 90-degree angle (fully open, perpendicular to the microwave body). This position makes accessing the hinge mounting screws easier and reduces strain on the hinges during the removal process.
Step 3: Locate and Remove Upper Hinge Cover Screws
Look at the top of the microwave door opening on the JVM6175SKSS. You’ll see a trim cover or hinge cover on the upper left and upper right sides. These covers have typically 1-2 Phillips head screws holding them in place. Using your Phillips screwdriver, carefully remove these screws and set them aside in a small container where they won’t be lost. The upper hinge cover on the JVM6175SKSS should now be loose enough to move slightly.
Step 4: Locate and Remove Lower Hinge Cover Screws
With the door still open, look at the bottom edges of the door opening on your JVM6175SKSS. You’ll find similar hinge covers on the lower left and lower right sides. Remove the Phillips head screws from these covers as well. The lower hinge area on the JVM6175SKSS is the most critical part of the removal process, as the door’s weight is supported primarily by the lower hinge pins.
Step 5: Partially Close the Door and Angle It Forward
Very carefully, begin closing the door on your JVM6175SKSS while simultaneously tilting the top of the door slightly forward (toward the front of the microwave). This angling motion helps the upper hinge pin slide out of its catch point. Move slowly and deliberately—the door should begin to angle away from the microwave body as the upper pin clears.
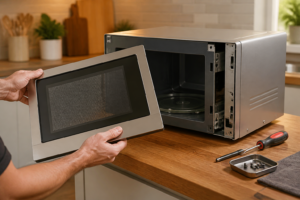
Step 6: Lift the Door Off the Lower Hinge Pins
Once the upper hinge pin on the JVM6175SKSS is clear and the door is angled forward at approximately 45 degrees, carefully lift the bottom of the door upward and away from the microwave body. The lower hinge pins should now clear from their mounting points. The door is now completely free from the JVM6175SKSS microwave.
Step 7: Set the Door Down Safely
Carefully lay your JVM6175SKSS door flat on a soft surface, such as a clean blanket or towel, with the glass face up. The door is heavy (typically 15-20 pounds), so make sure you have adequate workspace and the door is completely supported. Never rest the door on its edges or corners, as this can crack the glass panels or damage the frame.
Door Switch Information for the JVM6175SKSS
Understanding the Three Interlock Switches
Your GE JVM6175SKSS microwave contains three door safety interlock switches. These switches prevent the microwave from operating when the door is open, protecting you from radiation exposure. The three switches are:
- Primary Monitor Switch: This is the main safety switch that cuts power to the high-voltage transformer. It typically has a red or colored button or marking on the JVM6175SKSS.
- Secondary Monitor Switch: This provides additional safety confirmation that the door is properly closed.
- Latch Switch: This switch registers the mechanical position of the door latch.
All three switches on the JVM6175SKSS must be functioning correctly for the microwave to start and heat. If even one switch fails, the entire microwave will be inoperable.
Locating the Door Switches on the JVM6175SKSS
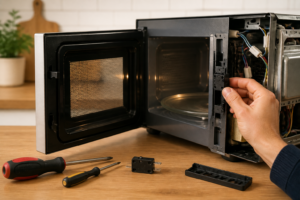
With the door removed from your JVM6175SKSS, you can now see inside the cavity. Look at the top interior edge of the microwave opening. You’ll find the door switches mounted to a bracket or housing at this location. The switches are small rectangular components with terminals or connectors on the back. The monitor switch often has a red button or red marking visible on the JVM6175SKSS—this is the component that typically fails first.
The switches are designed so that when the door closes, it presses against these switch buttons, changing their electrical state from “open” to “closed.” When you open the door, the buttons spring back, and the switches return to their normal state, cutting power to the heating elements.
Compatible Door Switch Part Numbers for the JVM6175SKSS
If your door switch testing indicates that one or more switches need replacement, you have several compatible options for the JVM6175SKSS:
- WB24X830: This is the most common replacement door interlock switch for the JVM6175SKSS. It’s a universal GE monitor switch assembly that fits many models in this family. The WB24X830 includes the bracket and typically comes pre-wired.
- WB24X829: An alternative interlock switch that works with the JVM6175SKSS in certain configurations.
- WB24X5048: This is a specialized door latch switch that may be needed depending on which of the three switches on your JVM6175SKSS has failed.
- Original GE Part WB24X10242: This is the OEM (Original Equipment Manufacturer) door switch kit specifically engineered for the JVM6175SKSS.
When ordering a replacement switch for your JVM6175SKSS, confirm the part number matches your specific serial number configuration, as some early production JVM6175SKSS units used slightly different switch assemblies than later models.
Testing Door Switches Before Purchasing Replacement Parts
Before you spend money on replacement switches for your JVM6175SKSS, test the existing switches with a multimeter to confirm they’re actually faulty. A multimeter costs $15-30 and will save you from unnecessary parts purchases.
Continuity Test Procedure for JVM6175SKSS Door Switches
- Set your digital multimeter to the continuity or resistance setting (typically marked with an ohm symbol Ω or a sound wave icon).
- Locate the terminal connections on the back of each switch. The JVM6175SKSS switches have two or three terminals depending on the switch type.
- For the monitor switch on your JVM6175SKSS, test continuity between the common terminal and the normally-closed terminal. You should hear a beep or see “0 ohms” displayed—this indicates the switch is closed and conducting electricity.
- Now press the red button (or colored button) on the front of the switch manually. The continuity should break—you’ll hear no beep and see high resistance (typically displayed as “1” on the multimeter). This indicates the switch is working in the open position.
- Release the button. Continuity should return—the beep should sound again.
- Repeat this test procedure for all three switches on your JVM6175SKSS door assembly.
If a switch on your JVM6175SKSS fails to show continuity when closed, or if it won’t break continuity when the button is pressed, that switch is faulty and needs replacement.
Voltage Test for JVM6175SKSS Switches
With power restored to your JVM6175SKSS, you can also test the switches with power applied. Set your multimeter to the AC voltage setting (marked “VAC” on most meters). With the door open, touch the positive probe to the switch terminal and the negative probe to ground (a metal part of the microwave frame). You should read approximately 120 volts if the switch is working correctly and preventing current flow to the heating circuit. If you read zero volts or significantly reduced voltage, the switch is faulty.
Important Safety Note: If you perform a voltage test on your JVM6175SKSS with power connected, be extremely careful not to touch any exposed terminals or contacts with your fingers. Use insulated tools and keep your hands clear of all electrical components.
Finding Door Switch Replacement Parts
Door switches with red buttons for the JVM6175SKSS are available through several channels:
- Online Appliance Parts Retailers: Websites specializing in appliance parts stock the WB24X830 and compatible switches for the JVM6175SKSS. These retailers typically have detailed compatibility information and often include installation instructions with your order.
- General Retail Stores: Some major general merchandise retailers stock common GE replacement parts, including door switches for models like the JVM6175SKSS. Check the appliance parts or seasonal sections.
- Local Appliance Parts Dealers: Independent appliance parts stores in your area often have access to GE parts and can verify compatibility with your specific JVM6175SKSS serial number before you purchase.
- GE Service Centers: Authorized GE service locations can order authentic OEM parts for the JVM6175SKSS, though these are typically more expensive than aftermarket alternatives.
When searching for parts, always verify that the part is listed as compatible with your JVM6175SKSS model number to avoid purchasing incorrect switches.
Door Reassembly and Alignment for the JVM6175SKSS
Reinstalling the Door on Your JVM6175SKSS
To reassemble your JVM6175SKSS after replacing switches or cleaning the glass, reverse the removal process:
- Lift the door and angle the bottom upward toward the lower hinge pins on the JVM6175SKSS.
- Carefully lower the door onto the lower hinge pins, ensuring both pins fully seat in their mounting points.
- Tilt the top of the door backward (away from you) while gently closing it, allowing the upper hinge pins to engage.
- Open the door fully to access the hinge cover mounting areas.
- Reinstall the upper hinge cover screws on your JVM6175SKSS, tightening them firmly but not excessively (hand-tight is appropriate).
- Reinstall the lower hinge cover screws on the JVM6175SKSS, again tightening firmly.
- Close the door and observe the gaps around all edges.
Checking Door Alignment on the JVM6175SKSS
Proper door alignment is critical for the JVM6175SKSS to function correctly and to ensure the door switches are depressed fully when closed. Use a tape measure to verify:
- The gap at the top of the JVM6175SKSS door should be approximately 1/8 inch (3mm) and uniform across the width.
- The gap at the bottom should match the top gap (approximately 1/8 inch).
- The left and right side gaps should be equal and approximately 1/8 inch.
- The door should not rock or move when you gently push on different sections.
If the JVM6175SKSS door doesn’t align properly, the switches may not be fully engaged when the door closes, preventing the microwave from starting. Uneven gaps may indicate hinge pin wear or frame damage. In this case, you may need to carefully remove the door again and inspect the hinge areas for debris or bent components.
Frequently Asked Questions
Can I remove the door on a JVM6175SKSS without removing the entire microwave from above the stove?
Yes, absolutely. The door can be removed while the JVM6175SKSS is installed in its over-the-range position. You do not need to unmount the entire microwave from the cabinetry to access or remove the door. Make sure the door is opened to 90 degrees for safe access to the hinge mounting screws, and ensure power is disconnected before beginning work.
How do I know if the monitor switch with the red button on my JVM6175SKSS is the problem?
The most obvious symptom is that your JVM6175SKSS won’t start or heat at all, even though the display lights up. Try opening and closing the door several times while listening for a clicking sound at the top of the microwave cavity—this is the switch engaging. If you don’t hear any clicking, the switch may be stuck. Use the multimeter continuity test described above to confirm. The monitor switch on the JVM6175SKSS typically fails more often than the other two switches because it handles the most electrical current.
Is the door removal process the same for all GE over-the-range microwave models like the JVM6175SKSS?
The basic process is similar for most GE OTR models, but specific details vary. The JVM6175SKSS uses the hinge pin system described here, but some other models may use different hinge designs. Always consult the service manual for your specific model to confirm the removal procedure. Never assume that a procedure that works for one model will work identically for another.
What’s the difference between the monitor switch and the latch switch on the JVM6175SKSS?
The monitor switch (often with the red button on the JVM6175SKSS) is the safety switch that prevents power from reaching the magnetron and high-voltage components. The latch switch confirms that the door’s mechanical latch has
Recommended Parts & Tools
Magnetic Screwdriver Set with Bits
Removing the GE microwave door requires unscrewing multiple fasteners, and magnetic screwdrivers prevent small screws from getting lost during the process. This set includes various bit sizes to match the different screw heads you’ll encounter on the door hinges and frame. Check current pricing on Amazon.
GE Microwave Door Latch Strike Assembly WB07X11050
While removing the door on your JVM6175SKSS, you may discover a worn or damaged latch assembly that should be replaced to ensure proper door closure and safety. This genuine GE replacement part is specifically designed for this microwave model and is essential if your latch shows signs of wear. Check current pricing on Amazon.
Microfiber Cleaning Cloth and Glass Cleaner
Once you have the door removed, it’s the perfect opportunity to thoroughly clean both the interior glass and the door itself, which is difficult to access when fully assembled. Using a microfiber cloth with appropriate glass cleaner prevents streaks and damage to the microwave window coating. Check current pricing on Amazon.
The Right Screwdriver Set for Accessing GE Microwave Hinges Without Stripping Fasteners
When you’re removing the door on a JVM6175SKSS, you’re working with small Phillips and flathead screws on the hinge brackets that strip easily if you use a worn-out bit or wrong angle. A magnetic screwdriver set ensures you can seat the bit properly in each screw head and retrieve fasteners that want to fall into the cabinet cavity during removal.
What works
- Magnetic tips hold Phillips screws in place while you’re working one-handed above your head, preventing dropped fasteners from disappearing into the microwave frame.
- Multiple bit sizes mean you can match the exact screw head on both the left and right hinge brackets without switching tools, keeping the job moving and reducing fumbling.
- The magnetism is strong enough to grip screws during removal but won’t damage any electronic components if you accidentally touch nearby wiring or door switches.
What doesn’t
- If you already have quality individual screwdrivers, the set feels redundant and adds cost you don’t need to spend.
- The magnetic hold can be too weak on longer screws if you’re working at an awkward angle, so you’ll still need to guide the screw by hand on entry and exit.
I learned the hard way that generic bargain screwdrivers slip out of hinge fasteners on these GE models, causing you to strip the screw head and then spend an hour drilling it out when you’re already halfway through the job. Grab a Magnetic Screwdriver Set with Bits and keep the fasteners organized in a small cup—it’s the difference between a 15-minute door removal and a frustrating afternoon.
This post contains affiliate links. As an Amazon Associate, I earn from qualifying purchases at no extra cost to you.