
Lid Won’t Lock — Lid Switch Assembly Replacement on GE GTW720BSNWS
When the lid of your GE GTW720BSNWS top-load washer won’t lock or latch properly, the most common culprit is a faulty lid switch assembly. This component is responsible for detecting when the lid is closed and signaling the washer’s control board that it’s safe to begin the wash cycle. A worn or broken lid switch assembly prevents the washer from starting and may cause the lid to feel loose or unstable during operation. This repair is rated MODERATE in difficulty—it requires basic mechanical aptitude and the ability to work with electrical connectors, but no specialized knowledge. Most homeowners can complete this repair in 45 minutes to 1 hour with the proper tools and parts.
Symptoms
- Lid does not latch or lock when closed on the GE GTW720BSNWS
- Washer will not start a cycle even though the lid appears closed
- Lid feels loose, wobbly, or unstable when you press down
- Clicking or grinding sound coming from beneath the lid when you try to close it
- Error codes displayed on the control panel, such as “LE” or “dL” (door/lid error)
- Lid lock mechanism physically broken or cracked; visible damage to the strike or latch assembly
⚠️ Safety Warning
- Unplug the washer from the electrical outlet before beginning any work. Do not rely on the power button alone—a complete electrical disconnect is essential when working with the lid switch assembly and internal components.
- Shut off the water supply valves (both hot and cold) located behind the GE GTW720BSNWS. This prevents accidental water discharge if hoses are disturbed during the repair.
- The lid is heavy and supported by hinges. When you remove fasteners, support the lid with your free hand or have a helper assist you. Dropping the lid can cause injury or damage.
- Allow the washer to cool for at least 15 minutes after operation before beginning work to avoid burns from hot water residue inside the tub.
- Do not operate the GE GTW720BSNWS without the lid switch assembly properly installed. A missing or faulty switch can allow the tub to spin with an open lid, creating a serious laceration or entanglement hazard.
Parts Needed
- Lid Switch Assembly (Primary Option): WH12X10527 — This is the OEM lid switch assembly for the GE GTW720BSNWS. It includes the switch mechanism, strike plate, and mounting bracket as a complete unit.
- Lid Switch Assembly (Alternate Option): WH01X10671 — An alternative OEM lid switch assembly compatible with the GE GTW720BSNWS and other GE top-load models. Verify compatibility with your serial number before ordering.
- Gasket or Seal (if damaged): WH02X10241 or equivalent lid gasket. If the lid gasket is cracked or compressed, replacement improves the seal and latch engagement.
Tools Required
- Flathead screwdriver (for removing trim panels and clips)
- Phillips head screwdriver (for removing mounting fasteners on the switch assembly)
- Socket wrench set with 5/16″ and 1/4″ sockets (for securing bolts on the hinge assembly)
- Needle-nose pliers (for disconnecting wire connectors and removing small clips)
- Multimeter (optional but recommended to test the old switch for continuity before disposal)
- Work light or flashlight (to illuminate the area beneath the lid)
- Helper (highly recommended to support the heavy lid while you work)
Step-by-Step Instructions
Step 1: Unplug the Washer and Shut Off Water Supply
Locate the power cord at the back of the GE GTW720BSNWS and unplug it from the wall outlet. Move to the water shutoff valves behind the washer—turn both the hot and cold water supply knobs clockwise until they stop. This ensures no water enters the machine during your repair and eliminates electrical hazards while you work with the switch assembly.
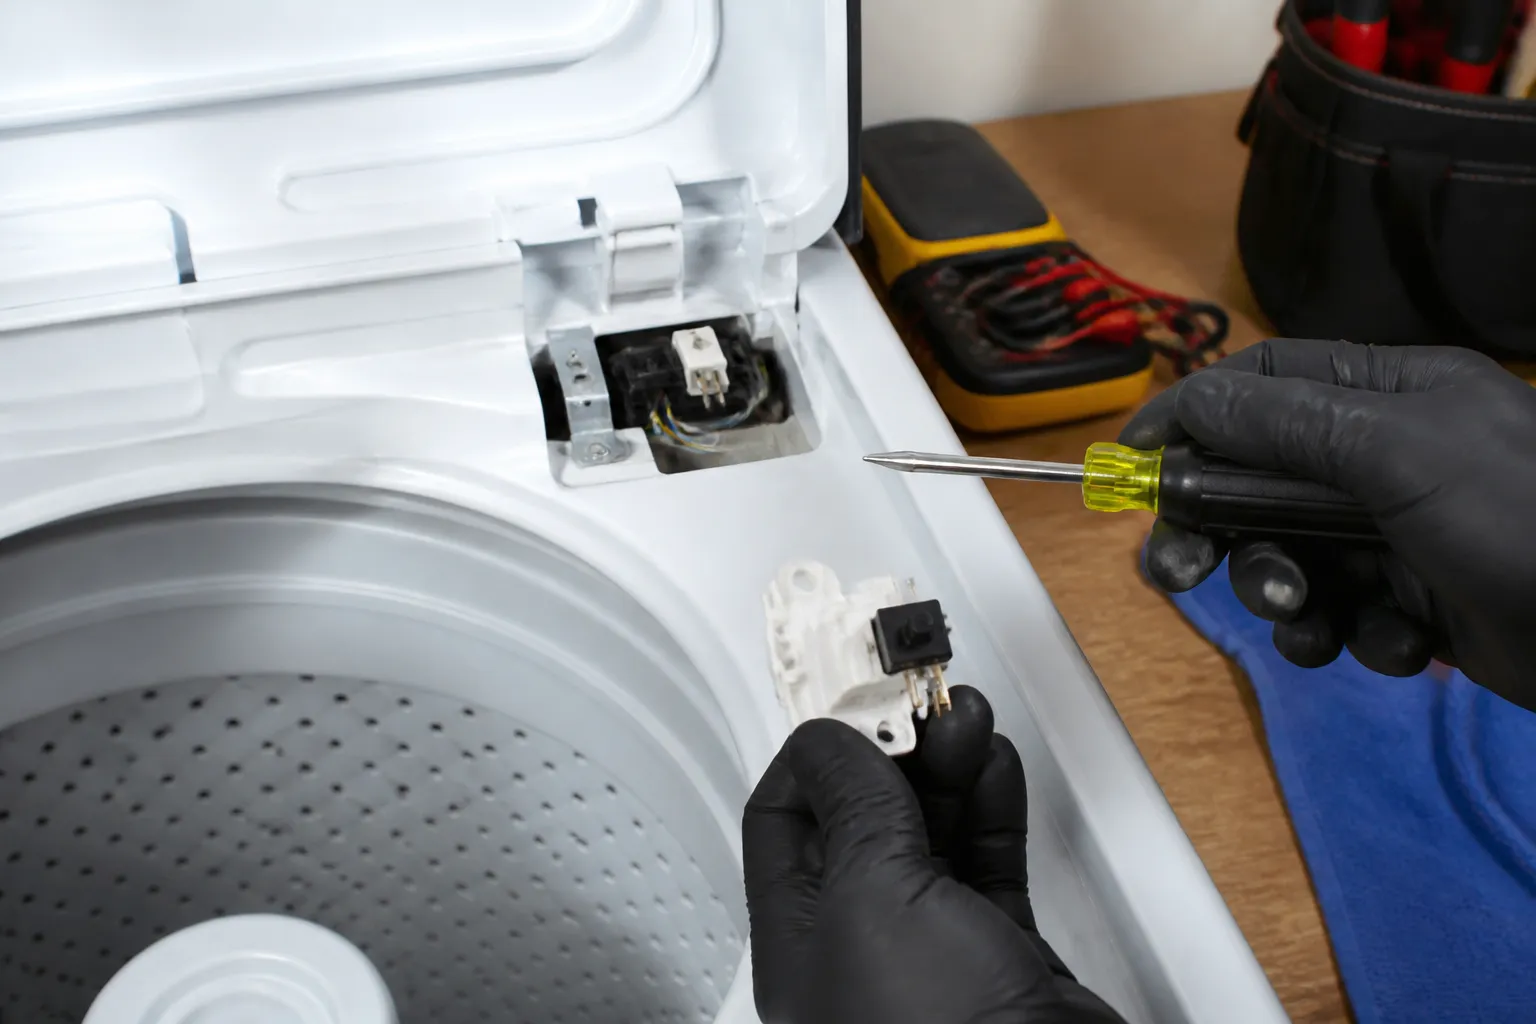
Step 2: Open the Lid and Inspect the Lid Switch Area
Gently raise the lid of the GE GTW720BSNWS to its full open position. Look directly beneath the lid on the interior rim of the washer cabinet, toward the top-left or top-right corner (depending on your machine’s configuration). You’ll see a small rectangular plastic or metal module mounted to the underside of the lid frame—this is the lid switch assembly. Note its orientation and the wire connector attached to it (typically a white or gray multi-pin connector). Photograph this area with your phone for reference.
Step 3: Disconnect the Electrical Connector
Using needle-nose pliers or your fingers, gently squeeze the small tab or lever on the wire connector attached to the lid switch assembly. The connector should disengage with minimal force. Pull the connector straight away from the switch—do not twist or force it, as the pins inside are delicate. Set the connector aside on a clean surface. If the connector is stubborn, apply a small amount of penetrating oil and wait 5 minutes before trying again.
Step 4: Remove the Fasteners Securing the Old Lid Switch Assembly
The lid switch assembly on the GE GTW720BSNWS is typically secured with two Phillips head screws, located on the top and bottom of the mounting bracket. Using a Phillips head screwdriver, turn these fasteners counterclockwise to remove them. Keep these screws in a small container—you will reuse them for the new switch. If your machine uses clips instead of screws, use needle-nose pliers to release the tabs holding the assembly in place.
Step 5: Carefully Remove the Old Lid Switch Assembly
Once the fasteners are removed, gently pull the old lid switch assembly straight away from its mounting location on the GE GTW720BSNWS. Do not force it—if resistance is felt, check that all fasteners have been removed and that the wire connector is fully disconnected. Inspect the mounting surface on the underside of the lid frame for any dirt, rust, or corrosion. Use a dry cloth to wipe this area clean. Discard the old switch assembly or keep it for recycling.
Step 6: Prepare the New Lid Switch Assembly (WH12X10527 or WH01X10671)
Remove the new lid switch assembly from its packaging. Verify that the strike plate (the curved metal or plastic tab that the switch contacts when the lid closes) is included and properly aligned on the new assembly. Check that the wire connector is intact and that the connector pins are not bent or damaged. If you are also replacing the lid gasket (WH02X10241), install it now onto the lid frame before reinstalling the switch, as it provides a proper seal and helps the lid latch with the correct pressure.
Step 7: Position and Install the New Lid Switch Assembly on the GE GTW720BSNWS
Align the new lid switch assembly with the mounting holes on the underside of the lid frame of the GE GTW720BSNWS. The switch module should sit flush against the bracket, with the strike plate facing downward and inward toward the cabinet rim. Insert the two Phillips head screws (the original fasteners from your old assembly) through the mounting holes and turn clockwise by hand until finger-tight. Do not over-tighten—once the assembly is snug against the frame, stop turning. Over-tightening can crack the plastic housing or misalign the strike plate.
Step 8: Reconnect the Electrical Connector
Take the wire connector that you set aside in Step 3. Align the connector with the port on the new lid switch assembly (you should hear or feel a subtle click when it fully seats). Push the connector in firmly until you hear a clicking sound or feel resistance stop—this indicates the connector is fully engaged. Gently tug on the connector to verify it does not pull free. If the connector does not seat fully, remove it and inspect the pins for debris or damage, then try again.
Step 9: Test the Lid Latch Mechanism Manually (Before Powering On)
Lower the lid of the GE GTW720BSNWS slowly until it is fully closed. You should feel a smooth resistance and then a distinct “click” or locking sensation as the strike plate engages with the switch. The lid should not move up and down when you press down on it with moderate hand pressure (approximately 5 pounds of downward force). If the lid feels loose or does not click, the switch may be misaligned. Stop and proceed to the troubleshooting section.
Step 10: Restore Power and Water Supply
Turn the hot and cold water shutoff valves back counterclockwise until they are fully open. Return to the electrical outlet and plug the GE GTW720BSNWS back in. Listen for any audible clicks from the control board or motor as it powers up—this is normal. The machine is now ready for a test cycle.
Step 11: Run a Test Cycle
Close the lid fully on the GE GTW720BSNWS and press the power button or start button. The display should light up and respond to your input. Select a short wash cycle (such as Quick Wash or Delicates) and press the start button. The washer should begin to fill with water, and you should hear the lid lock engage (a soft click or hum from the switch area). Allow the cycle to run for 2-3 minutes, then observe the lid. It should not unlock until the cycle completes or you press the stop/pause button.
Step 12: Verify the Lock Remains Engaged and Check for Leaks
Once the test cycle is complete, open the lid normally. Check beneath the lid and around the seal for any water leaks. Inspect the area where the new lid switch assembly is mounted (top-left or top-right corner beneath the lid frame) for any drips or moisture accumulation. If everything is dry and the lid latches and unlocks smoothly, the repair is successful. If error codes reappear or the lid does not lock, refer to the troubleshooting section below.
Troubleshooting
- Lid still won’t lock after installing the new switch: The strike plate on the new assembly may be misaligned. Remove the two Phillips head screws, carefully reposition the assembly so the strike plate is directly above the latch on the cabinet rim, and retighten. Test the latch again before running a cycle.
- Error code “dL” or “LE” appears on the control panel: The wire connector may not be fully seated. Power off the GE GTW720BSNWS, unplug it, and reseat the connector by pushing it firmly until you hear a distinct click. Plug the washer back in and try a test cycle.
- Lid latch feels too tight or won’t open: The new gasket (if installed) may be too thick or the strike plate may be over-engaged. Remove the assembly, verify that the gasket is properly positioned and not pinched, and check that the mounting screws are not over-tightened. Loosen the screws by 1/4 turn and test again.
- Water leaks from around the lid after the repair: The lid gasket may be damaged or improperly seated. Verify the gasket (WH02X10241 or equivalent) is correctly positioned around the entire lid rim with no twists or folds. If the gasket is cracked or missing, order a replacement gasket and install it before running another cycle.
- Clicking or grinding sound persists: Internal components of the switch assembly may be damaged despite appearing intact externally. Test the new assembly using a multimeter to verify continuity—if the switch shows no continuity or erratic continuity when the lid is opened and closed, the part may be defective. Contact the parts supplier or manufacturer for a replacement.
- Washer starts cycle with the lid open: The lid switch may be faulty or not properly connected. Immediately unplug the GE GTW720BSNWS to stop the cycle. This is a safety hazard. Recheck the electrical connector and ensure it is fully seated. If the problem persists after reseating the connector, the new switch assembly may be defective and should be replaced under warranty.
When to Call a Professional
- The control board does not respond to the lid switch: If you have successfully installed the new lid switch assembly (WH12X10527 or WH01X10671) on the GE GTW720BSNWS, reconnected all connectors, and the washer still displays error codes or will not recognize when the lid is closed, a fault in the main control board or wiring harness may be present. A professional technician with diagnostic equipment can identify this issue.
- Water leaks persist after gasket replacement: If you have installed a new gasket and the lid switch assembly, but water continues to leak from around the lid during operation, the problem may involve the lid frame itself or the cabinet rim seal. These components may require professional service or replacement.
- The lid hinge is cracked, broken, or misaligned: If the hinge that supports the lid is visibly damaged or the lid hangs unevenly when open, do not attempt to repair it yourself. Hinge replacement requires more extensive disassembly of the GE GTW720BSNWS and should be handled by a qualified technician.
- You do not feel confident working with electrical components or water connections: If at any point during the repair you feel uncomfortable disconnecting electrical connectors, handling the heavy lid, or working in confined spaces beneath the lid frame, it is wise to contact a professional appliance repair service. Mistakes with electrical or water connections can lead to injury or damage to the washer.
Recommended Parts & Tools
GE WH12X10527 Washer Lid Switch Assembly
This is the OEM replacement lid switch assembly designed specifically for GE top-load washers including the GTW720BSNWS model. The switch mechanism controls the lid lock function and prevents the washer from operating when the lid is open, making it essential for this repair. Check current pricing on Amazon.
Magnetic Screwdriver Set for Appliance Repair
This precision magnetic screwdriver set includes the multiple bit sizes needed to safely remove and install the lid switch assembly on your GE washer without stripping screws. The magnetic tips prevent small fasteners from dropping into hard-to-reach areas during disassembly. Check current pricing on Amazon.
The Lid Switch Assembly That Actually Stops the “Won’t Lock” Problem on Your GE Top-Load
When your GTW720BSNWS lid won’t latch and the washer refuses to start, the OEM lid switch assembly is the first part you need to swap out. This is the actual sensor detecting lid position—not a latch mechanism, not a cable—so getting the right part matters.
What works
- Plugs directly into the existing harness under the lid—no rewiring or adapter frustration needed.
- Mounting bracket sits flush in the original cavity, so you’re not hunting for alignment or dealing with loose fitment after installation.
- Once installed, the washer recognizes the closed lid immediately and the control board stops throwing lock-related error codes.
What doesn’t
- If your actual lid latch catch is stripped or broken, swapping the switch assembly won’t help—you’ll still have a loose-feeling lid even with the new switch.
- Part-only approach means you need to verify the problem is the switch and not the latch mechanism itself before ordering, or you’ll end up buying two parts.
I’ve seen people grab this switch first, then discover the plastic latch catch on the lid itself was actually cracked—symptom was identical, but the fix required ordering the lid assembly instead. Test your diagnosis carefully by checking if the lid physically closes and feels stable before assuming the switch is at fault; if it does, this part solves it. Order the GE WH12X10527 Washer Lid Switch Assembly once you’ve confirmed the lid itself isn’t damaged.
This post contains affiliate links. As an Amazon Associate, I earn from qualifying purchases at no extra cost to you.


