
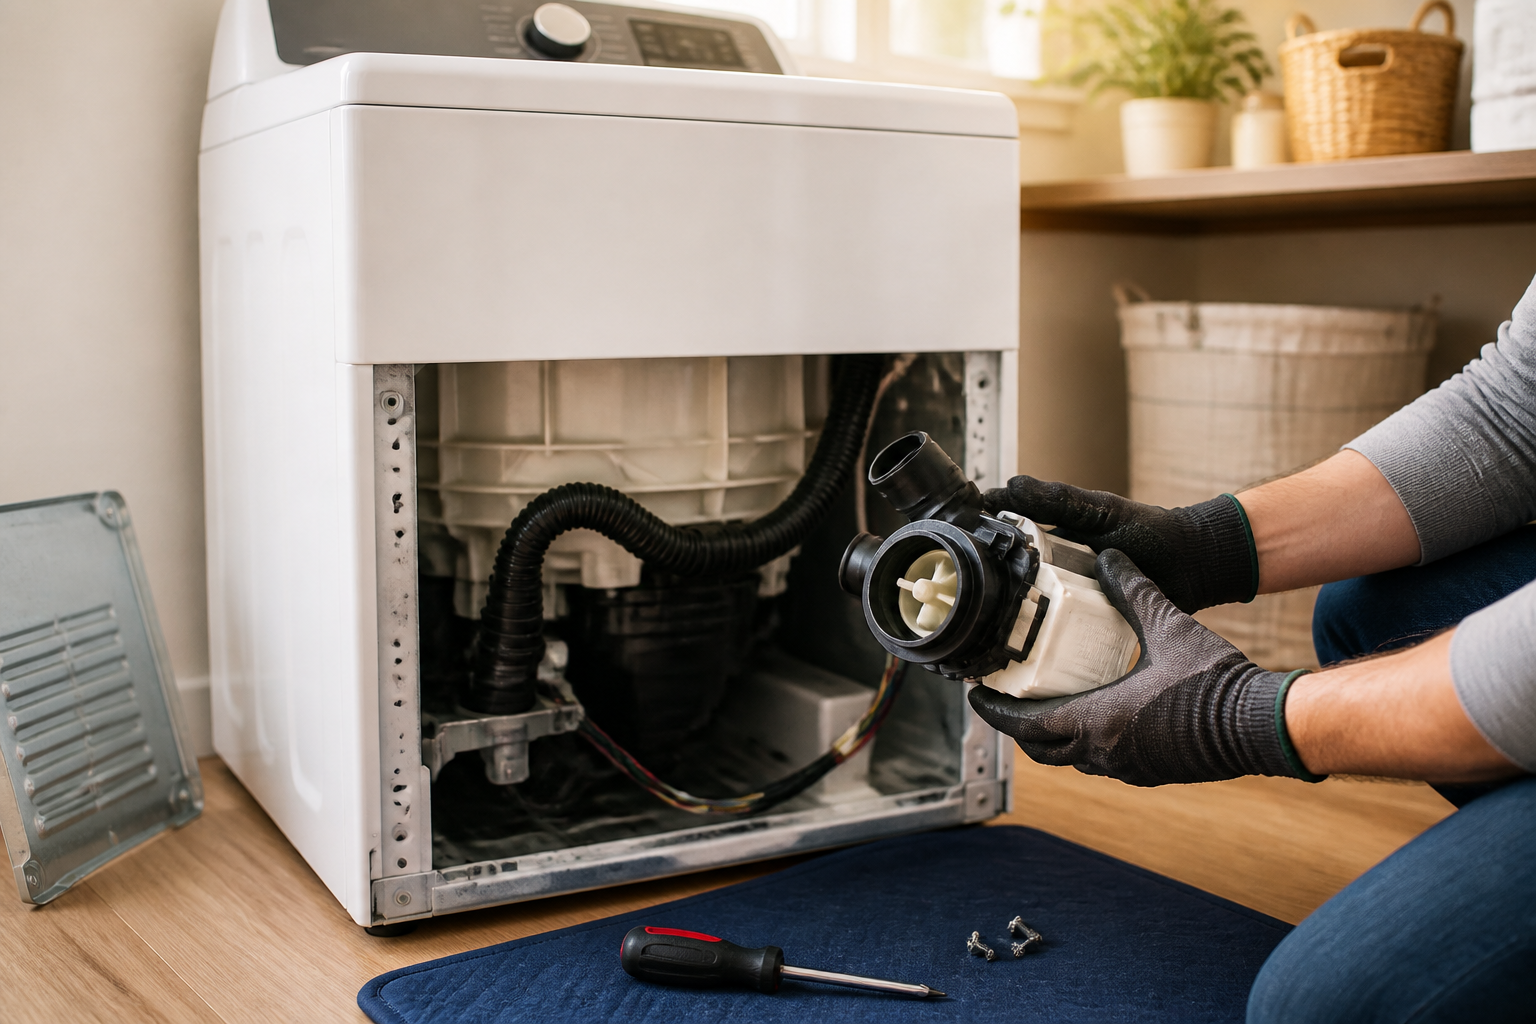
Drain Pump Replacement for GE GTW720BSNWS Top-Load Washer
Today I want to help you tackle a common issue with the GE GTW720BSNWS top-load washer: when it won’t drain. More often than not, the drain pump is the culprit. This pump is vital for pushing water out of the tub and into your home’s drain system. Over time it can fail due to motor burnout, mechanical wear, or debris blockage harming the impeller. Replacing the pump involves removing the pump assembly from the bottom of the washer cabinet and installing a replacement unit (WH23X10030 or equivalent). Difficulty Level: MODERATE. You’ll need basic mechanical skills, careful attention to water connections, and about 45-60 minutes to complete this job.
Symptoms
- Water remains standing in the tub after the wash cycle completes
- Washer makes grinding or squealing noises during the drain cycle
- Error code displays on the control panel (often “OE” or “DE” codes indicating drain errors)
- Water drains very slowly or intermittently during the spin cycle
- Visible water leaking from beneath the GE GTW720BSNWS cabinet during operation
- Pump runs but no water exits the drain outlet hose
⚠️ Safety Warning
- Unplug the washer before beginning any work. Do not rely on the power switch alone—disconnect the unit completely from the electrical outlet to prevent shock hazard.
- Turn off the water supply valves at both hot and cold water connections behind the GE GTW720BSNWS. This prevents accidental flooding if hoses are disturbed.
- The washer lid is heavy. Use proper lifting technique or have a helper support it while you work. Propping the lid open with a safe object prevents it from dropping unexpectedly.
- Drain all water from the tub before beginning. Use a manual siphon, wet/dry vacuum, or towels to remove standing water. Wear gloves—washer water may contain detergent residue or bacteria.
- The pump housing may be hot if the washer was recently running. Allow 30 minutes for the appliance to cool before touching internal components.
Parts Needed
- Drain Pump Assembly: WH23X10030 (OEM GE part, genuine replacement for GE GTW720BSNWS and similar models)
- Alternative Part Number: WH23X10009 (compatible substitute pump assembly if WH23X10030 is unavailable)
- Inlet Hose or Water Seal Kit (if original appears cracked or damaged): Consider ordering a replacement hose clamp kit (typically includes 2-3 stainless steel hose clamps, size #40 or #50) as a precaution
- Gasket or seal material (optional): Some technicians apply a thin bead of food-grade silicone around the pump outlet connection for added watertight security
Tools Required
- Phillips head screwdriver (for cabinet screws and pump mounting bolts)
- Flathead screwdriver (for prying and hose clamp adjustment)
- Adjustable wrench or socket set (7/16″ and 1/2″ sockets recommended) for hose clamp nuts
- Needle-nose pliers (for removing hose clamps and connector clips)
- Bucket or drain pan (to catch residual water from disconnecting hoses and pump inlet)
- Wet/dry vacuum or towels (to remove standing water from the tub)
- Flashlight or headlamp (the drain pump is located at the base of the cabinet, where lighting is dim)
Step-by-Step Instructions
Step 1: Prepare the Washer and Workspace
First things first, unplug the GE GTW720BSNWS from the electrical outlet. Then locate the water supply shutoff valves behind the washer—these are usually two knobs or lever handles on the wall at the connection point. Turn both the hot and cold water supply valves clockwise until they stop. Just a gentle hand-tight is enough, no need to force it. Place a bucket or drain pan beneath the washer to catch any water that will drip when you disconnect hoses. A flashlight or headlamp will help you see the underside of the washer cabinet where the pump is located.
Step 2: Remove Standing Water from the Tub
With the lid open, use a wet/dry vacuum, siphon, or clean towels to remove all standing water from inside the tub. Tilt the unit slightly or use a vacuum hose to extract water around the pump inlet area to empty its internal water reservoir. This step prevents any spillage and makes handling the pump much safer. Don’t forget to wring out those towels into your bucket as needed.
Step 3: Access the Drain Pump Housing
The pump on the GE GTW720BSNWS is located at the bottom-front-left of the cabinet when you’re facing the machine. You might need to tilt the entire washer backward slightly or place it on its back on a sturdy work surface (definitely get some help for this) to access the pump. If you prefer, you can remove the front lower access panel by unbolting 2-3 Phillips head screws located along the bottom edge of the cabinet. If your model has a removable base panel, make sure to disconnect the power cord clip that may be fastened to it. Keep track of the positions of any electrical connectors for reassembly.
Step 4: Disconnect the Pump Inlet Hose
Next, find the inlet hose connected to the pump; this is the hose running from the pump upward into the washer tub area. Using a flathead screwdriver or hose clamp pliers, loosen the hose clamp on the pump side by turning the screw counterclockwise 3-4 full turns until it’s loose enough to slide off. Slide the hose clamp off toward the pump outlet to free the hose, then gently pull the inlet hose away from the pump connection. Expect a small amount of water to spill—be ready with your bucket underneath. Cap or plug the hose opening with a cloth to keep it clean.
Step 5: Disconnect the Pump Outlet Hose
The outlet hose is the larger diameter hose that exits the pump toward the rear or side of the washer cabinet and leads to the drain standpipe or home drain line. Using your wrench or adjustable pliers, locate the hose clamp that secures this connection. Turn the clamp screw counterclockwise 4-5 full turns until the band is loose. Slide the clamp off and disconnect the outlet hose carefully—there might be quite a bit of trapped water inside. Let it drain into your bucket and then set the outlet hose aside.
Step 6: Disconnect the Pump Motor Connector
The drain pump motor gets its power from a small electrical connector, typically a 2-pin or 3-pin plastic push-fit connector with a colored clip. Locate this connector on the pump body or nearby on the wiring harness. Gently squeeze or press the clip on the connector and pull straight away from the pump. Don’t yank the wires; it should come apart cleanly. If there’s a secondary ground wire or clip, make a note of where it attaches for reassembly.
Step 7: Remove the Old Pump Assembly
The pump housing is secured to the washer cabinet or pump mounting bracket by 2-3 Phillips head screws. These are usually located around the perimeter of the pump body. Using your Phillips screwdriver, remove all mounting bolts by turning counterclockwise. Keep these screws safe; you’ll be reusing them. Carefully slide the old pump assembly away from its mounting location and lift it out of the cabinet, angling it as needed to clear any nearby parts. If the pump is stuck, don’t force it; gently rock it side to side while pulling.
Step 8: Inspect the Pump Mounting Area and Connections
Before you install the new pump, take a moment to check the mounting bracket on the GE GTW720BSNWS and the connection points on the hoses. Look for any cracks, corrosion, or debris inside the hose connections. If the inlet or outlet hoses seem cracked, kinked, or discolored, now’s a great time to replace them too. Clean the mounting area with a damp cloth and let it dry completely. Make sure all hose clamps are in good shape; replace any that look bent or rusted.
Step 9: Position and Install the Replacement Pump (WH23X10030)
Unpack the new drain pump (WH23X10030 or equivalent) and visually compare it with the old pump to ensure compatibility. The inlet and outlet ports should be in the same relative positions. Carefully place the new pump into its mounting location on the GE GTW720BSNWS, aligning the screw holes with the mounting bracket. Insert the 2-3 Phillips head mounting screws through the pump housing into the bracket, turning clockwise by hand first to ensure there’s no cross-threading. Once hand-tight, finish tightening each screw fully with your screwdriver (snug, but don’t over-tighten—aim for about 6-8 foot-pounds of torque if you have a torque screwdriver).
Step 10: Reconnect the Pump Inlet Hose
Slide the inlet hose onto the pump’s inlet port. Place a hose clamp onto the hose from the pump side. Push the hose fully onto the inlet port until it seats completely. Center the hose clamp over the connection joint and tighten by turning the clamp screw clockwise 3-4 full turns until it’s snug. Just a heads up—don’t over-tighten; the goal is a watertight seal without crushing the hose.
Step 11: Reconnect the Pump Outlet Hose
Push the outlet hose firmly onto the pump’s outlet port until it seats completely and you feel some resistance. Slide a hose clamp onto the outlet hose and position it over the connection joint. Tighten the clamp screw counterclockwise 4-5 full turns until the connection is snug and water-tight. Make sure the outlet hose is clear and not kinked, allowing it to route properly to the drain standpipe or household drain line.
Step 12: Reconnect the Pump Motor and Test
Align the pump motor electrical connector with its mate on the wiring harness and press firmly until you hear or feel a click. The connector should be fully seated. If there’s a secondary ground wire, reconnect it to the appropriate terminal (usually a screw on the pump housing or bracket). Reattach any access panels or base cover, securing them with the original Phillips head screws. Turn the water supply valves back on by rotating the shutoff knobs counterclockwise until they stop. Finally, plug the GE GTW720BSNWS back into the electrical outlet. Run a short drain cycle (hit the Drain & Spin button or complete a cycle) and keep an eye out for leaks around the pump connections. The tub should drain within 2-3 minutes. If everything drains properly and no leaks appear, you’re all done!
Troubleshooting
- Water still doesn’t drain after pump replacement: Check the outlet hose for kinks, clogs, or improper connection to the home drain system. Ensure that the hose clamps are tight and that the outlet hose isn’t kinked where it exits the cabinet. A clogged drain line beyond the washer may require professional plumbing service.
- Leaking from the inlet or outlet connection: Disconnect the hose, inspect the port for cracks or debris, and verify that the hose is pushed fully onto the port. Retighten the hose clamp an additional 1-2 turns. If leaking continues, the pump port may be damaged, and you might need to replace the unit.
- Pump motor does not run during drain cycle: Confirm that the electrical connector is fully seated and the clip is locked. Check for tripped circuit breakers on your home’s electrical panel. If the connector looks corroded, gently clean the pins with a dry cloth and reseat. If the motor still doesn’t run, the replacement pump might be defective (contact the manufacturer).
- Grinding or squealing noises from the new pump: Stop the washer immediately. Turn off water and power. This could indicate debris inside the pump (like sand, lint, or coins). Open the pump inlet and flush it with clean water, or reach out to GE customer service for a warranty replacement.
- Washer displays drain error code after replacement: The pressure switch or drain sensor may need some time to reset. Unplug the washer for 5 minutes, then plug it back in and run a test cycle. If the error persists, the pressure switch or wiring harness may need inspection by a technician.
- Small amount of water pooling at the base of the GE GTW720BSNWS: This is normal during the first drain cycle as residual water in the pump housing is expelled. Run a second empty cycle to clear any remaining water. If pooling continues, double-check the hose clamp tightness and inlet/outlet seals.
When to Call a Professional
- If the drain pump replacement does not resolve the no-drain issue after verifying that hoses are properly connected and the home drain line is clear. This might indicate a faulty pressure switch, clogged drain line deeper in the plumbing system, or control board malfunction that requires professional diagnosis.
- If you discover cracks in the pump housing, cracked hoses, or damage to the mounting bracket during disassembly. These components may need replacement beyond a simple pump swap, and improper repair could lead to water damage.
- If the washer cabinet needs to be tilted or disassembled in ways not described here (such as complete cabinet separation). This requires specialized tools and knowledge of the GE GTW720BSNWS internal structure and may void your warranty if performed incorrectly.
- If you’re uncomfortable working with electrical connectors, hoses, or water connections, or if this is your first major appliance repair. A professional technician can complete the GE GTW720BSNWS drain pump replacement safely and efficiently, often with a warranty on both parts and labor.
Recommended Parts & Tools
GE Appliances WH23X10030 Washer Drain Pump
This OEM-equivalent drain pump is a direct replacement for the GE GTW720BSNWS and resolves drainage issues caused by pump failure or blockage. The WH23X10030 is engineered to match the original specifications and restore proper water evacuation in your top-load washer.
Pump and Drain Cleaning Tool Kit for Washing Machines
Before replacing the drain pump on your GE GTW720BSNWS, use this multi-piece cleaning kit to clear lint, debris, and blockages that may be preventing proper drainage. The kit includes a flexible auger and cleaning brushes designed specifically for washer drain lines and pump chambers.
The Drain Pump That Actually Solves the GTW720BSNWS No-Drain Problem
When water sits in the tub after the cycle ends, nine times out of ten it’s this pump that’s failed. Ordering the correct OEM part the first time saves you from the frustration of installing a knockoff that either doesn’t fit tight or burns out again in six months.
What works
- Drop-in replacement—mounting bracket and electrical connector align perfectly without modification or adapter hunting.
- Motor torque is strong enough to push water even when the drain line has minor buildup, so you’re not fighting weak flow halfway through.
- Impeller design matches OEM specs, so it handles the lint and soap residue that actually comes through a top-loader without jamming.
What doesn’t
- If your drain hose is kinked or your home’s drain line is actually blocked, this pump won’t force water through—you’ll solve the symptom but not the root cause.
- Shipping time matters if you have standing water in the tub; this isn’t an overnight fix, so plan ahead.
I’ve seen homeowners order generic pumps online and end up with a unit that fits loosely or has a weaker motor, forcing a second teardown after two weeks of use. Getting the WH23X10030 part number right from the start means you’re installing the same unit GE engineers designed for this specific model. GE Appliances WH23X10030 Washer Drain Pump
About This Article

Written by Dave Holt. Dave Holt has been taking apart and fixing household appliances since he was a teenager who couldn't leave a broken one alone. Eighteen years later, after fixing things for neighbors, friends, and anyone who'd let him, he's seen almost every failure mode there is. When he writes a repair guide here, it's based on the actual job, not a manufacturer overview. More about this site.
Scope and limits. Dave is a self-taught repairer, not a certified appliance technician. Unplug before you open anything, and leave sealed refrigeration systems, gas connections, and hardwired circuits to a qualified technician.


