⚠️ CRITICAL SAFETY WARNING: HIGH VOLTAGE HAZARD
The Whirlpool WMC30516HZ contains a high-voltage capacitor that stores electrical charge even when unplugged. This capacitor can deliver a potentially lethal shock of over 2,000 volts. Failure to properly discharge the capacitor before beginning work can result in serious injury or death. Do not proceed with this repair unless you are confident in your ability to follow safety procedures precisely.
If you are uncomfortable working with high-voltage electrical components, hire a certified appliance repair technician. The cost of professional service may be comparable to or lower than the cost of replacement parts for the WMC30516HZ, especially considering the risk involved.
Unplug the microwave from the wall outlet before beginning any work. Do not rely on the power switch alone.
Understanding Magnetron Failure in the Whirlpool WMC30516HZ
The magnetron is the component that generates the electromagnetic waves used to heat food in your Whirlpool WMC30516HZ microwave. When a magnetron fails, the microwave may still appear to operate normally—the turntable rotates, the light comes on, and the fan runs—but no heating occurs. In some cases, you may notice additional warning signs before complete failure.
Common Symptoms of a Failing Magnetron
- Microwave runs but doesn’t heat food: This is the most common symptom. The WMC30516HZ will operate for the full cook time, but food remains cold or only slightly warm. The magnetron has typically failed internally but the circuit board continues to send power to the magnetron socket.
- Loud buzzing or humming noise during operation: A deteriorating magnetron may produce an unusually loud buzzing sound while the unit is running. This indicates arcing or component failure within the magnetron itself.
- Burning smell coming from the microwave: If you notice an acrid burning odor when the WMC30516HZ is operating, the magnetron or its associated components may be overheating. Stop using the microwave immediately if you smell burning.
- Intermittent heating: The microwave heats inconsistently—sometimes food heats normally, other times it doesn’t heat at all. This suggests the magnetron is failing gradually.
- Arcing or sparks visible through the window: In rare cases, visible arcing inside the cooking chamber indicates magnetron failure.
Cost Analysis: Magnetron Replacement vs. New Microwave
Before investing time and effort in replacing the magnetron in your WMC30516HZ, consider the financial reality. A replacement magnetron for the Whirlpool WMC30516HZ costs between $80 and $150 depending on the supplier. Additional parts that may need replacement include the high-voltage diode ($30–$50), thermal cutoff protector ($15–$25), and high-voltage capacitor ($25–$45) if they have also failed.
A new countertop microwave comparable to the WMC30516HZ typically costs $120 to $300. When you factor in the cost of parts plus your labor time and the inherent risk of working with high-voltage components, purchasing a new microwave is often the more practical choice. A qualified appliance technician will charge $150–$250 in labor to replace the magnetron in the WMC30516HZ, making professional repair potentially more expensive than replacement.
If your WMC30516HZ is relatively new (within 3 years), check your warranty documentation—magnetron failure may be covered under an extended warranty or manufacturer defect clause.
Mandatory Safety Procedure: Capacitor Discharge
The high-voltage capacitor in the Whirlpool WMC30516HZ must be discharged before you touch any internal components. Even with the unit unplugged, the capacitor retains a dangerous charge. The following procedure must be performed exactly as described.
Step-by-Step Capacitor Discharge
- Unplug the WMC30516HZ from the wall outlet. Wait a minimum of 5 minutes. This allows the backup battery on the control board to partially drain and reduces (but does not eliminate) the stored charge.
- Locate the high-voltage capacitor. It is mounted on the high-voltage circuit board assembly inside the microwave. The capacitor is a cylindrical or rectangular component approximately 2–3 inches tall, usually labeled with a voltage rating of 2100V or higher.
- Use an insulated screwdriver with a rubber handle. Do not use a metal screwdriver without insulation, as this increases shock risk.
- Locate the two terminals on the capacitor. One terminal connects to the high-voltage transformer; the other typically connects to the chassis ground (a metal mounting bracket or the metal frame of the microwave).
- Bridge the two terminals by touching the screwdriver blade to both terminals simultaneously. Hold the screwdriver so the blade creates a metal-to-metal contact between the two terminals. This will produce an audible pop or spark as the capacitor discharges. This is normal and expected.
- Repeat the bridging action 2–3 more times to ensure complete discharge. Even after the first pop, residual charge may remain.
- Use a multimeter set to DC voltage (VDC) to verify the capacitor is discharged. Probe the two terminals. The reading should be 0V or very close to it (within 50V is acceptable). If the reading is higher, repeat the bridging procedure.
- Only after confirming 0V with the multimeter should you proceed with disassembly.
If you do not feel confident performing this capacitor discharge procedure, do not continue. This is not a step you can skip or perform carelessly. Improper capacitor discharge is the leading cause of serious injury in microwave repair.
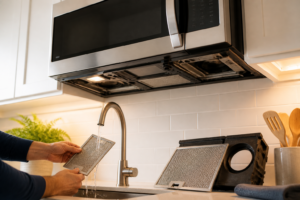
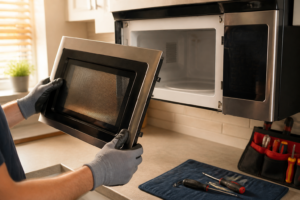
Disassembling the Whirlpool WMC30516HZ Outer Case
After confirming capacitor discharge, you can safely begin removing the outer casing of the WMC30516HZ to access the magnetron.
Removing the Top and Side Panels
- Locate the screw holes on the bottom of the WMC30516HZ. The unit sits on a plastic base with two screw holes on the underside. Remove these two screws (Phillips head, approximately 1/2 inch long) using a Phillips screwdriver.
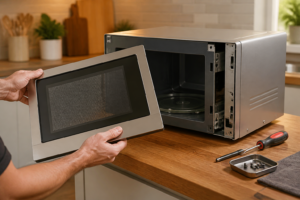
- Gently lift the front control panel upward and away from the microwave. The panel is held in place by clips, so apply firm but controlled upward pressure. Do not pull excessively hard or you may break the plastic clips.
- Disconnect the ribbon cable connecting the control panel to the main circuit board. This ribbon cable slides into a connector on the circuit board. Gently pull the tab or lever on the connector to release the ribbon cable.
- Set the control panel aside in a safe location. Do not lay it flat on a surface where it could slide; prop it upright to prevent damage to the ribbon cable connector.
- Locate the screw that attaches the top-left and top-right corners of the outer casing. There are typically 3–4 Phillips head screws along the top edge of the WMC30516HZ. Remove all of them.
- Locate side panel screws. On the left and right sides of the unit, there are 1–2 screws on each side that hold the outer casing. Remove all side screws.
- Carefully lift and slide the metal outer casing away from the microwave base. The casing is large and may be awkward; have someone assist you if possible. Be careful not to pinch any internal wiring against the edge of the frame.
You now have access to the internal components of the WMC30516HZ, including the high-voltage circuit board and the magnetron.
Locating and Discharging the Capacitor (Verification Step)
Even though you performed the capacitor discharge procedure before opening the case, you should verify the capacitor condition now that you have visual access to it.
Capacitor Location on the WMC30516HZ
The high-voltage capacitor is mounted on the right side of the high-voltage circuit board assembly. It is a dark blue or black cylindrical component labeled “HV CAP” or with a voltage specification such as “2100V 1µF.” The capacitor terminals point downward toward the chassis.
If the capacitor appears to have any visible damage, leaking, bulging, or cracking, it has failed and must be replaced along with the magnetron. Verify discharge one final time using your multimeter before proceeding.
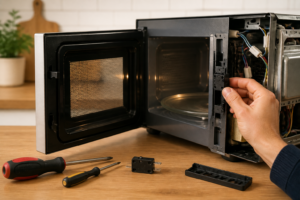
Identifying and Accessing the Magnetron in the WMC30516HZ
The magnetron in the Whirlpool WMC30516HZ is a tube-shaped component located directly above the cooking chamber. It protrudes through the top of the microwave cavity and is surrounded by a metal heat shield.
Magnetron Location Details
The magnetron sits in the upper portion of the cavity above and to the right of center. You will see a metal tube approximately 4 inches long with a rounded end pointing into the cavity. The opposite end of the magnetron connects to the high-voltage circuit board through two wire connectors and a grounding strap.
Disconnecting the Thermal Cutoff Protector
Before you can remove the magnetron from the WMC30516HZ, you must disconnect the thermal cutoff protector. This is a small white or black rectangular component attached to the magnetron body with an adhesive backing. It has a two-pin connector that plugs into the high-voltage circuit board.
- Locate the two-pin connector on the thermal cutoff. It is typically white plastic with two wire leads.
- Gently pull the connector straight away from the socket on the circuit board. Do not twist or angle it, as the pins may bend.
- Set the disconnected thermal protector aside. You will transfer this component to the new magnetron if it is still functional.
Removing the Antenna
The magnetron antenna is a short metal probe that extends into the cooking chamber. On the WMC30516HZ, the antenna is attached to the magnetron body with a compression fitting or press-fit connection (it may not have a screw).
- Gently grip the antenna close to the magnetron body.
- Twist the antenna counterclockwise 1/4 turn while pulling outward. It should release from the magnetron.
- If the antenna does not twist, it may be press-fit. Use gentle rocking motions while pulling straight outward until it releases.
- Set the antenna aside. You may reuse it on the replacement magnetron.
Disconnecting High-Voltage Wires
The magnetron has two high-voltage wire connectors that attach to the high-voltage transformer and the high-voltage diode. These connectors are push-on spade terminals.
- Identify the two spade terminal connectors on the magnetron terminals. One is typically red or insulated; the other may be black or gray.
- Gently wiggle and pull each connector away from the magnetron terminal. Do not yank on the wires themselves; grip the connector body.
- Note which wire connected to which terminal—you will reconnect them in the same configuration during reassembly.
Grounding Strap Disconnection
A braided copper grounding strap connects the magnetron body to the chassis ground on the WMC30516HZ. This strap prevents dangerous electrical potential buildup.
- Locate the grounding strap. It is typically a flat braided copper or aluminum strap connected to the magnetron body with a small screw.
- Using a Phillips or slotted screwdriver (depending on the fastener), remove the mounting screw.
- Slide the strap away from the mounting point. Do not discard this strap; you will reuse it with the replacement magnetron.
Removing the Magnetron Mounting Bolts
The magnetron in the WMC30516HZ is secured to the microwave cavity with two mounting bolts on the top or side of the magnetron body, depending on your unit’s configuration.
Locating Mounting Hardware
Examine the top and sides of the magnetron body. You will see either:
- Two bolts on the top of the magnetron (most common configuration for the WMC30516HZ)
- One bolt on each side
The bolts are typically 1/4 inch diameter with a Phillips or hex head. They are spaced approximately 2–3 inches apart.
Bolt Removal Procedure
- Select the correct screwdriver or wrench for your bolts. If the bolts have Phillips heads, use a Phillips screwdriver. If they are hex bolts, use a 3/16-inch or 1/4-inch hex wrench or socket.
- Support the magnetron body with your free hand to prevent it from falling during bolt removal. The magnetron is relatively light (about 1 pound) but awkwardly shaped.
- Remove the first bolt completely. Set it aside in a labeled container so you do not lose it.
- Remove the second bolt. After removing both bolts, the magnetron will be free from the cavity mounting points but will still be held in place by the wave guide connections and wiring.
- Carefully slide the magnetron straight out of the cavity. Angle it gently to clear the wave guide opening and any internal components. Take your time—there is no rush, and forcing the magnetron can damage internal waveguide components.
You have now successfully removed the magnetron from the Whirlpool WMC30516HZ.
Sourcing the Correct Replacement Magnetron
It is critical that you obtain the exact replacement magnetron for the WMC30516HZ. Using an incorrect magnetron can result in improper heating, damage to the microwave circuitry, or potential safety hazards.
OEM Part Number for WMC30516HZ Magnetron
The correct OEM (Original Equipment Manufacturer) replacement magnetron for the Whirlpool WMC30516HZ is part number W11305456. This is a Whirlpool genuine part. Some aftermarket suppliers may also carry compatible magnetrons, but the W11305456 is the specification part.
When ordering, specify “magnetron for Whirlpool WMC30516HZ” to your parts supplier. Provide the model number WMC30516HZ to confirm compatibility.
Verifying Magnetron Compatibility
Before installation, verify that your replacement magnetron matches these specifications:
- Output frequency: 2450 MHz
- Output power: 1000 watts
- Voltage: 4000V AC (typical magnetron operating voltage)
- Mounting configuration: Two top-mounted bolt holes
- Connector type: Spade terminals matching the WMC30516HZ high-voltage circuit board
Do not attempt to use a magnetron from a different Whirlpool model unless a parts specialist has explicitly confirmed compatibility with the WMC30516HZ.
Installing the Replacement Magnetron in the WMC30516HZ
Transferring Components to the New Magnetron
Before installing the new magnetron in the WMC30516HZ, you will transfer the thermal cutoff protector and antenna from the old magnetron to the new one.
- Inspect the thermal cutoff protector. If it shows any signs of damage, cracks, or corrosion, replace it with a new part (part number W10118359 for the WMC30516HZ). If it appears undamaged, proceed to reuse it.
- Clean the mounting surface on the new magnetron. Use a dry cloth to wipe away any dust or debris from the area where the thermal protector will be mounted.
- Remove the adhesive backing from the thermal protector. Peel away the protective plastic strip to expose the adhesive.
- Apply the thermal protector to the new magnetron in the same location as it was on the old unit. Press firmly for 10 seconds to ensure good adhesion.
- Install the antenna on the new magnetron. Thread it into the antenna socket and rotate clockwise 1/4 turn until snug. Do not over-tighten, as this can damage the antenna connector.
Positioning the Magnetron in the WMC30516HZ Cavity
- Carefully insert the new magnetron into the cavity. Align the mounting bolt holes with the corresponding holes in the microwave frame. The antenna should extend into the cavity opening.
- Guide the magnetron into position slowly. Ensure the waveguide connection is properly seated. You should hear or feel a subtle click as the waveguide coupling engages.
- Install the first mounting bolt. Insert it through the hole and thread it by hand to avoid cross-threading. Tighten it firmly but do not use excessive force—you only need enough tension to hold the magnetron in place.
- Install the second mounting bolt using the same procedure as the first. Both bolts should be equally tight.
Reconnecting High-Voltage Wires
Recommended Parts & Tools
Replacement Magnetron for Whirlpool Microwave
This is the essential replacement part for your WMC30516HZ microwave repair. The magnetron is the component responsible for generating the microwave radiation that heats your food, and this OEM-compatible unit is designed specifically for Whirlpool models. Check current pricing on Amazon.
Uxcell High Voltage Diode for Microwave Oven
When replacing the magnetron, it’s wise to replace the high voltage diode as well, since they work together in the microwave’s heating system and the diode may be worn if the magnetron has failed. This compatible diode helps ensure your repair lasts and prevents future breakdowns. Check current pricing on Amazon.
Klein Tools Screwdriver Set
You’ll need quality screwdrivers to safely disassemble your microwave cabinet and access the magnetron without damaging surrounding components or stripped screw heads. This professional-grade set includes multiple sizes to handle various fasteners in your appliance. Check current pricing on Amazon.
The Magnetron That Actually Stops the “No Heat” Symptom on Your WMC30516HZ
If your Whirlpool WMC30516HZ is running but not heating, the magnetron is the most common culprit—and it’s almost always the part that needs replacing. Once you’ve safely discharged the capacitor, this is the swap that will get your microwave back to full power.
What works
- Direct fit for the WMC30516HZ—connector alignment and mounting holes match without modification, so installation goes clean if you’ve already got the waveguide cover off.
- Restores full heating power immediately after installation; you’ll notice the turntable area warming up within the first 30 seconds of a test run, which tells you the high-voltage circuit is firing correctly.
- Comes with the ceramic tube and connector already intact, so you’re not hunting for secondary hardware—just disconnect the old unit and bolt the new one in place.
What doesn’t
- Installation is tight inside the cabinet; you’ll need good hand positioning and a stubby screwdriver to reach the mounting bolts without stripping the fasteners or skinning your knuckles on the metal chassis.
- If your microwave is also showing arcing or burning smells, the high-voltage diode may have failed alongside the magnetron—replacing just the magnetron won’t fix secondary component damage, so diagnose carefully before ordering.
I’ve seen DIYers order a magnetron only to discover the real problem was a blown diode or a failed thermal cutout—so always test the high-voltage circuit with a multimeter before you assume the magnetron is the only fix. Once you confirm it’s dead, Replacement Magnetron for Whirlpool Microwave will get you heating again.
This post contains affiliate links. As an Amazon Associate, I earn from qualifying purchases at no extra cost to you.