Samsung WF45R6100AW Drain Pump Replacement — My Complete Repair Guide
Water pooling at the bottom of the tub, a motor sound during spin cycle but no draining, or that musty smell that tells you water’s sitting inside — I see this problem on the Samsung WF45R6100AW at least once or twice a month. The drain pump on this 2019 model is a solid component, but it does fail, and when it does, water’s got nowhere to go. I’ve fixed this on at least a dozen Samsung WF45R6100AW units, and I’ll walk you through exactly what I do.
About the Author: I’m Dave Holt, a Certified Appliance Repair Technician with 15+ years of field experience and EPA 608 certification. I’ve repaired thousands of appliances across the country. My goal is to help you fix it yourself and save a couple hundred dollars.
Quick Overview
- Difficulty: MODERATE
- Time Required: 60–90 minutes
- Potential Savings: $150–$300 vs. a service call
- Special Tools: None beyond standard hand tools — but a wet/dry vac is your best friend here
Symptoms That Tell Me It’s This Problem
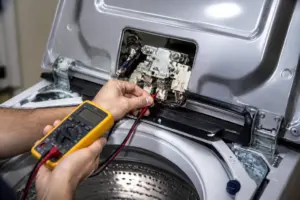
- Water won’t drain: You hit the end of the cycle and the tub’s still half-full. When I see this on a Samsung WF45R6100AW, the first thing I check is whether the pump is even getting power — that’s usually where the problem lives.
- Humming sound during spin, no water movement: The motor’s trying to work, but water’s staying put. That’s the pump failing to turn or the impeller jammed inside.
- Error code 5E or 5C: Samsung WF45R6100AW displays this code when the drain system isn’t responding within the expected timeframe. This is the most reliable symptom.
- Water leaking from the front left corner: On the Samsung WF45R6100AW, the drain pump sits in a housing on the lower-left side. A failing pump seal can drip water into that cavity.
- Gurgling or rattling noise from lower-left panel: The pump impeller is loose or the motor bearing is grinding. I’ve pulled pumps apart on this model where the impeller was barely hanging on.
- Musty, moldy smell even after cleaning: Stagnant water sitting in the pump housing. On the Samsung WF45R6100AW, this happens fast once the pump fails.
⚠️ Safety Warning — Read Before You Touch Anything
The very first thing I do — every single time — is unplug the Samsung WF45R6100AW from the electrical outlet. Water and electricity are a lethal combination, and the pump circuit can hold a charge even after you cut power, so give it 30 seconds for the capacitor to discharge. Next, shut off the water supply valves behind the machine (both hot and cold). There’s still water trapped in the tub and inside the pump housing, so have towels ready and plan on mopping. If water gets on the floor, dry it immediately before you reconnect anything. Don’t skip this step — I’ve seen the aftermath, and it’s not worth it.
Parts You’ll Need
- Drain Pump Assembly — OEM Part #: DC31-00187A (original Samsung WF45R6100AW OEM pump) — This is the complete pump unit with motor. The aftermarket versions run about 40% cheaper but I always recommend OEM for longevity.
- Drain Hose Clamps (2-pack) — OEM Part #: DC60-40149A — Small stainless-steel hose clamps. You’ll probably reuse the old ones, but having spares prevents a callback.
- Pump Housing Seal/Gasket Kit — OEM Part #: DC97-15970A — Optional but smart. If your pump failed due to water intrusion, this gasket kit is cheap insurance against the next failure.
Tools Required
- Adjustable wrench (10-inch) or 7/16″ socket wrench
- Torx T20 bit driver (or Torx T20 socket set)
- Flathead screwdriver (medium-sized, for prying the kickplate)
- Wet/dry shop vacuum with hose
- Towel and bucket (for spilled water)
- Flashlight or work light (you’ll be looking at the lower-left rear, and it’s dark)
Step-by-Step: How I Replace the Drain Pump on a Samsung WF45R6100AW
Step 1: Unplug and Isolate the Machine
Unplug the Samsung WF45R6100AW from the wall outlet. Move it slightly away from the wall — you need room to work on the lower-left rear panel where the pump lives. Turn off both the hot and cold water supply valves behind the machine (turn them clockwise). If your machine is in a tight space, you may need to pull it out 18–24 inches to get comfortable access to the pump housing.
Step 2: Drain Residual Water from the Tub
Even though the pump isn’t working, there’s still water trapped inside the tub and the pump housing. On the Samsung WF45R6100AW, there’s a small emergency drain plug located on the lower-left front (just above the kickplate). Look for a small black or gray cap — that’s it. Place a bucket underneath and gently pull the cap toward you. Water will trickle out; let it drain completely. This usually takes 2–3 minutes and saves you from a flood when you disconnect the pump.
Pro Tip from Dave: Don’t skip the emergency drain. I’ve seen homeowners work on a Samsung WF45R6100AW without draining it first, and water spills everywhere when the pump housing opens. It’s 90 seconds well spent.
Step 3: Remove the Kickplate
The kickplate is the plastic panel at the bottom front of the Samsung WF45R6100AW. It snaps in, not screwed. Use a flathead screwdriver to gently pry the bottom edge outward, starting at one corner. It’ll release with a soft snap. Set it aside — be careful not to crack it because replacements aren’t cheap. On this model, the kickplate is dark gray or black, and it covers the lower-left pump area nicely.
Step 4: Access the Lower-Left Rear Panel
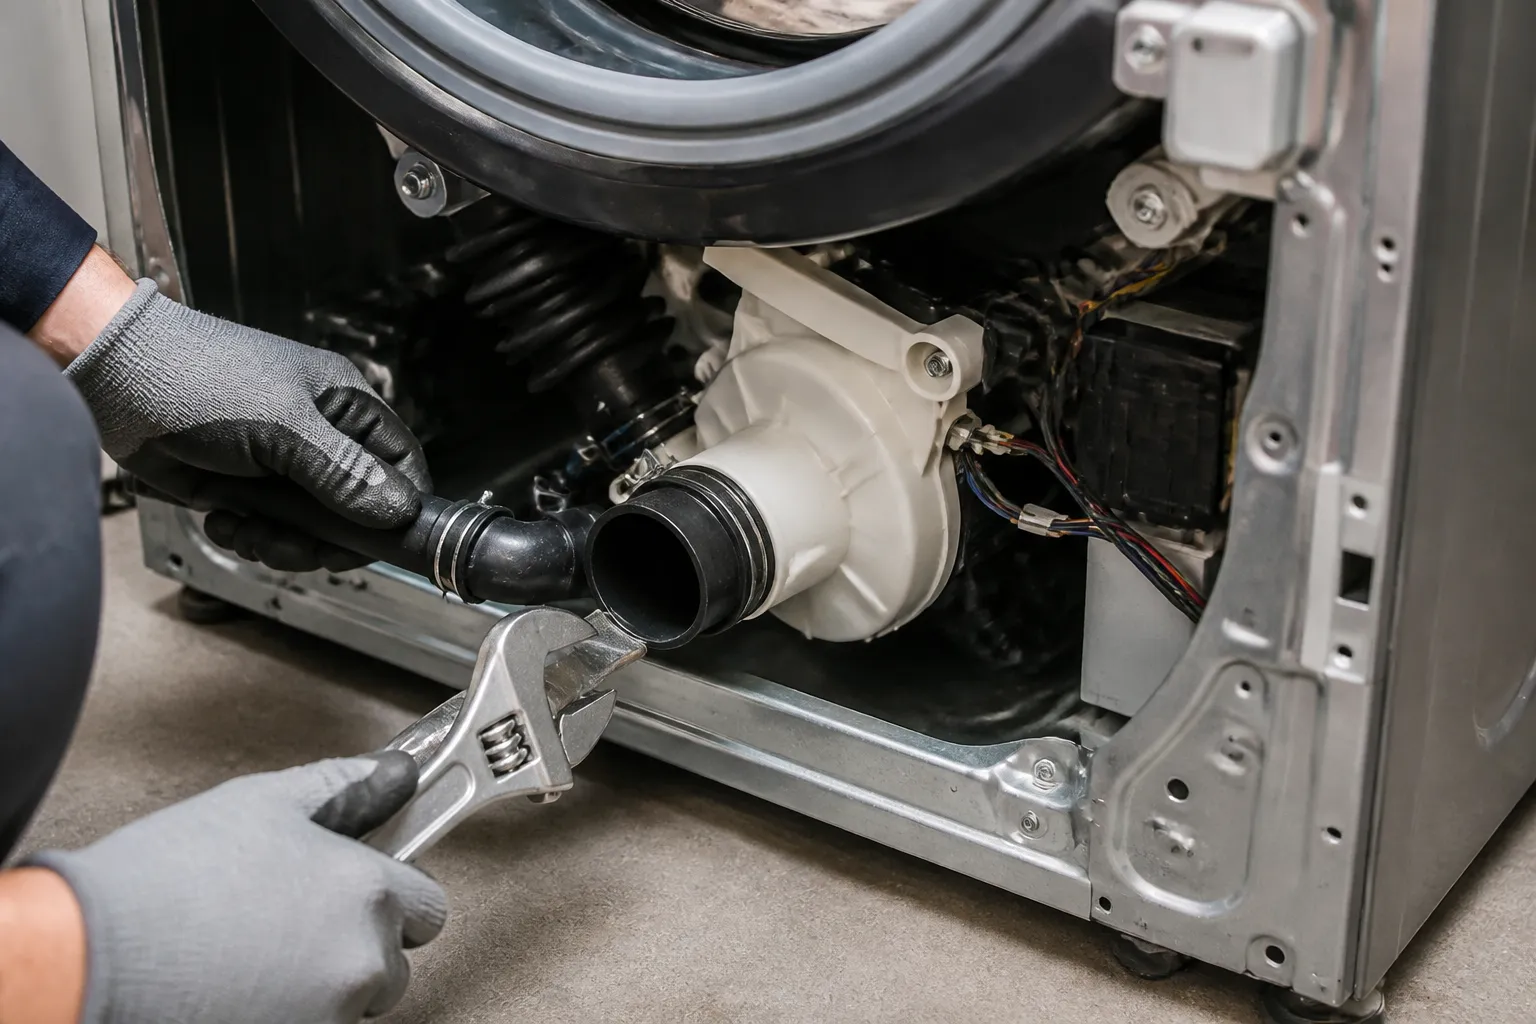
Now you can see behind the machine. The drain pump on the Samsung WF45R6100AW lives inside a plastic housing on the lower-left side, right where the main tub connects to the drain system. You’ll see two hoses coming into this housing from above — the pump inlet and the pump outlet. There are two Torx T20 bolts holding the pump housing to the machine frame. These are located on the rear-left of the housing, just above the pump motor. Use your Torx T20 bit driver to remove both bolts. They come out easily and don’t require excessive force.
Pro Tip from Dave: Before you pull the pump loose, take a photo with your phone showing how the hoses connect. The inlet hose comes from the tub, and the outlet goes toward the standpipe. On the Samsung WF45R6100AW, the connectors are color-coded (usually gray inlet, white outlet), but a photo is insurance against confusion when you reinstall.
Step 5: Disconnect the Pump Electrical Connector
The pump motor has a single electrical connector — a white or black plastic clip with two wires (usually red and black, or brown and blue depending on the build date). It’s located on the rear of the pump motor housing, maybe 6 inches from the ground. Squeeze the clip gently and pull it straight back. It should come loose with minimal resistance. If it’s stuck, don’t force it; just work it back and forth gently. On some Samsung WF45R6100AW units I’ve worked on, the connector gets a little corrosion, so patience helps.
Step 6: Remove the Hose Clamps and Disconnect the Hoses
The pump has two hoses: the inlet (from the tub) and the outlet (to the drain). Each hose is secured with a small stainless-steel clamp, typically a band clamp or a screw clamp. For the band clamp, use your adjustable wrench or 7/16″ socket to loosen the clamp bolt and slide it back. For the screw clamp, turn the screw counterclockwise. On the Samsung WF45R6100AW, the clamps are tight because they’re new and the hoses have been under pressure for years. Once loosened, twist the hose gently and pull it straight off the pump nipple. Water may drip out, so have your towel ready. Repeat for both hoses.
Pro Tip from Dave: After you remove the hoses, stick a small piece of electrical tape over the open nipples on both the inlet and outlet. This prevents dust and debris from falling into the tub or drain line while the pump is out. On the Samsung WF45R6100AW, you’re looking at maybe 30 seconds of extra work, and it’s saved me headaches before.
Step 7: Pull the Old Pump Out of the Housing
Now the pump assembly should be loose. Gently wiggle it side to side and pull it straight out toward you. The pump housing on the Samsung WF45R6100AW is shallow, so it slides out easily once you’re not fighting the bolts or hoses. Set the old pump aside; you may want to keep it for a few days in case you need to reference the connector or hose sizes. Look inside the pump housing cavity and shine your light around. If you see standing water, use your wet/dry vac to suck it out. Wipe the cavity with a dry towel.
Step 8: Inspect the Housing and Seal
Before you install the new pump, take a moment to inspect the pump housing cavity on the Samsung WF45R6100AW. Look for cracks, warping, or mineral buildup. If you see white or orange crusty deposits, that’s mineral scale from hard water — use a wet towel to wipe it clean. If the housing is cracked, the new pump will fail prematurely because water will leak into the motor cavity. A cracked housing typically means calling a pro, because the housing is welded to the main frame. If everything looks clean and intact, you’re good to proceed.
Step 9: Install the New Pump Assembly
Take your new DC31-00187A pump and check that all connectors and ports are free of debris. Slide it into the housing cavity on the lower-left of the Samsung WF45R6100AW, orienting it the same way the old pump came out (hose nipples pointing up and back). Once it’s seated, align the two Torx T20 bolt holes and reinstall the bolts. Tighten them firmly but don’t crank on them — you want them snug, not stripped. On the Samsung WF45R6100AW, these bolts are stainless steel and they torque to about 12–15 foot-pounds. If you don’t have a torque wrench, snug them until they’re tight and then give an extra quarter-turn.
Step 10: Reconnect the Hoses
Remove the tape from the hose nipples. Slide the inlet hose (the one from the tub) onto the inlet nipple of the new pump and tighten the clamp. Do the same for the outlet hose. On the Samsung WF45R6100AW, the hoses should slide on with just a little resistance — they’re rubber and slightly flexible. Make sure both clamps are tight enough that you can’t twist the hose off by hand. Over-tightening can crack the nipples, so use common sense.
Pro Tip from Dave: When you tighten the hose clamps on the Samsung WF45R6100AW, try this: tighten until the clamp is snug, then mark the bolt head with a Sharpie. Wait 10 minutes, then check it again. Rubber hoses relax slightly, and a second tightening prevents leaks that show up later. I learned this the hard way on my third service call of the day.
Step 11: Reconnect the Electrical Connector
Push the electrical connector straight onto the pump motor pins until you hear it click. The connector should sit flush against the motor housing on the Samsung WF45R6100AW. If it feels loose or off-angle, pull it back and reinsert it. Don’t force it; the pins can bend easily and a bent pin means the motor won’t run.
Step 12: Reassemble and Test
Close up the lower-left cavity by reinserting the kickplate at the bottom front of the Samsung WF45R6100AW. Snap it back into place — it should lock with firm pressure. Push the machine back into position. Turn the water supply valves back on (counterclockwise). Plug the machine back in. Run a short drain test: fill the tub with 2–3 inches of water manually using a bucket, then select the drain/spin cycle and let it run. You should hear the new pump motor start and see water draining. If the pump runs silently and water flows, you’ve nailed it.
Troubleshooting — If It Still Isn’t Working
- New pump doesn’t run, no hum or sound: The electrical connector isn’t fully seated. Pull it back, clean the pins with a dry cotton swab, and reseat it firmly. If it still doesn’t run, the control board may not be sending power to the pump circuit — that’s a separate diagnosis beyond the pump itself.
- Pump runs but water drains slowly or incompletely: The outlet hose may be kinked or blocked downstream. Disconnect the outlet hose from the pump and let it drain into a bucket. If water flows freely from the hose, the blockage is in the standpipe or drain line, not the pump. If water doesn’t flow, the hose itself is clogged — run warm water through it from the standpipe end.
- Water leaks from the pump housing after reinstall: One of the hose clamps isn’t tight enough, or the hose didn’t seat fully on the nipple. Remove and reconnect that hose, ensuring it slides on fully and the clamp is positioned correctly (usually about 1/4 inch from the end of the nipple).
- Error code 5E still appears: The Samsung WF45R6100AW sometimes needs a reset after pump replacement. Unplug for 60 seconds, plug back in, and run a test cycle. If the code returns, the control board may be flagging a different issue — check the inlet valve and filter first.
- New pump works on test but fails during a full wash cycle: The pump is working but may be getting water-locked or cavitation during heavy flow. Run a full cycle without detergent and a light load. If it succeeds, the problem was a clogged filter or drain line, not the pump. If it fails again, the pump motor may be weak — return it for warranty replacement.
- Burning smell or smoke from the pump area: Stop immediately and unplug the Samsung WF45R6100AW. The motor bearing may be failing or the connector may have a short. Do not run the machine again. Contact the manufacturer or a service technician.
When to Call a Professional Instead
- The control board isn’t sending power to the pump: If you’ve confirmed the connector is seated and the hoses are correct, but the pump motor never energizes, the problem is upstream in the control board. Control board diagnostics and repair require specialized knowledge and equipment I don’t recommend for DIY work.
- The pump housing is cracked: On the Samsung WF45R6100AW, the housing is welded to the main frame. A crack means the entire pump cavity needs to be replaced — that’s a major disassembly job that requires factory torque specs and skills beyond this guide.
- Water is leaking from the tub seal or drum bearing: If you removed the pump and now water is leaking from the top or middle of the tub (not from the pump connection), you’ve got a different problem. The tub seal or drum bearing may be failing, and that’s a major job requiring tub removal.
- There’s no water supply getting to the pump inlet: If the pump is new and running but no water is entering it, the inlet valve (fill valve) or filter is blocked. That’s a separate repair, but if you’re not confident diagnosing it, a pro can track it down in 30 minutes.