How to Replace Spider Arm and Drum Bearing on LG WM9000HVA Front-Load Washer
The LG WM9000HVA is a high-capacity front-load washer that relies on a drum bearing assembly and spider arm to support the rotating drum during the wash and spin cycles. When either component fails, the entire drum support system becomes compromised, leading to serious mechanical damage if not repaired promptly. This comprehensive guide will walk you through the complete replacement process for both the spider arm and drum bearing on your WM9000HVA.
Safety Warning
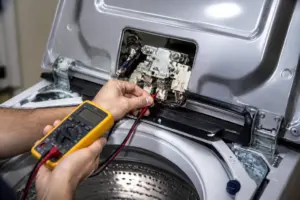
⚠️ ELECTRICAL HAZARD: Before beginning any repair work on your WM9000HVA, unplug the washer from the electrical outlet and shut off the water supply valves. The tub contains high-voltage components and residual electrical charge may remain in capacitors even after unplugging. Do not proceed until you have verified power is completely disconnected using a multimeter set to AC voltage.
⚠️ MECHANICAL HAZARD: The drum in a front-load washer is extremely heavy. Ensure you have adequate support equipment, including a floor jack rated for at least 300 pounds and appropriate jack stands. Never work under the washer without proper support.
⚠️ WATER HAZARD: Residual water may be present in the tub and drain system. Have towels and a drain bucket ready. A siphon pump or wet/dry vacuum will help remove trapped water before disassembly.
Symptoms of Failed Spider Arm or Drum Bearing on WM9000HVA
Understanding the warning signs of spider arm or drum bearing failure helps you catch problems before catastrophic damage occurs. The WM9000HVA will exhibit specific symptoms when these components are failing.
Loud Grinding or Squealing Noises
A failing drum bearing on the WM9000HVA produces a high-pitched squealing during the spin cycle, typically increasing in volume as the spin speed increases. If the bearing is severely worn, you may hear a grinding sound instead, indicating metal-to-metal contact. This noise typically starts as an intermittent sound and becomes continuous within days or weeks.
Metal Debris in Drain Filter
When the drum bearing on your WM9000HVA deteriorates, metal particles from the bearing races and balls shed into the wash water. You may find fine metallic dust or small metal fragments in the drain filter, tub seal area, or drain pump. This is a critical indicator of imminent failure.
Drum Wobbling or Eccentricity
If you manually rotate the drum on a WM9000HVA with the door open, a worn spider arm or bearing causes the drum to wobble side-to-side or front-to-back rather than rotating smoothly and concentrically. You may feel play or looseness when pushing on the drum from the front.
Drum Dragging or Rubbing
A severely compromised spider arm or bearing on the WM9000HVA allows the drum to settle downward, causing the drum to rub against the front tub seal or the tub housing itself. During operation, you may hear a dragging, scraping, or rubbing sound, typically heard from the front-bottom area of the machine.
LE Error Code
The WM9000HVA displays an “LE” error code when the washer detects excessive drum oscillation, which can result from spider arm or bearing failure. This error may appear intermittently at first, then become constant as the failure progresses.
Understanding Spider Arm and Drum Bearing Function
What is the Spider Arm?
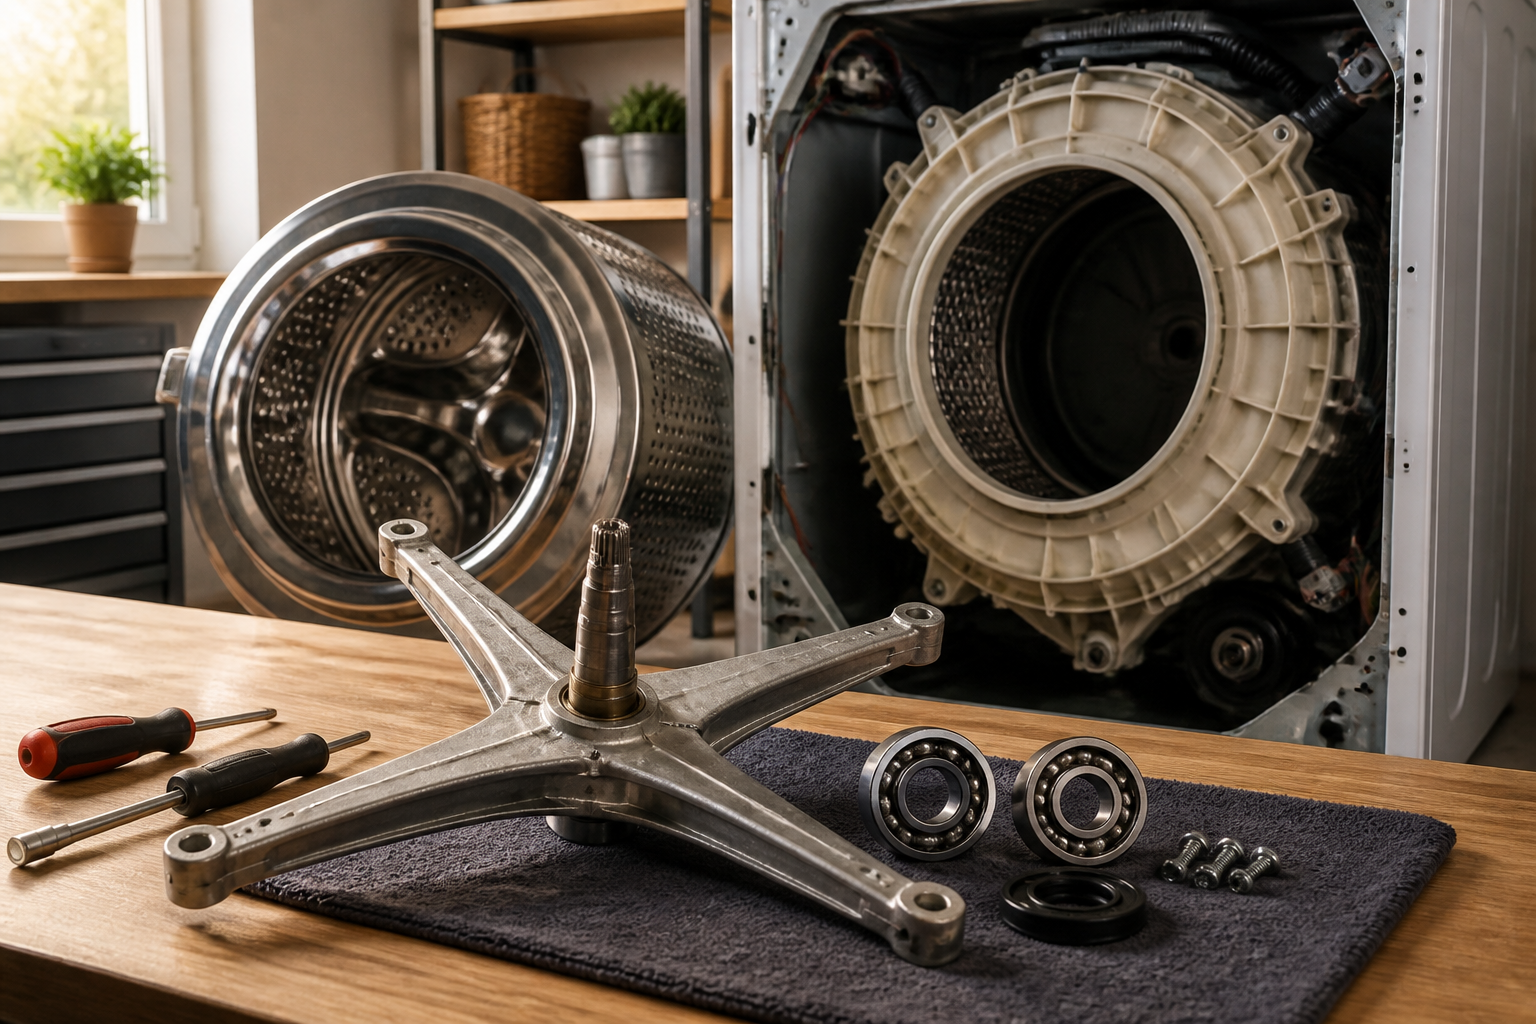
The spider arm (also called a drum support spider or bearing carrier) is a three-pronged metal component that bolts to the rear tub housing and supports the drum bearing assembly. On the WM9000HVA, the spider arm is made from cast aluminum alloy and has three equally-spaced arms extending from a central hub. The drum bearing and seal assembly attach to the central hub. The spider arm distributes the entire weight and rotational forces of the drum across three mounting points on the rear tub.
Spider arms fail due to metal fatigue, corrosion, or casting defects. The repetitive stress of spin cycles causes micro-fractures that eventually lead to complete cracking of one or more arms. When an arm cracks on a WM9000HVA, the drum loses support, leading to eccentric rotation and accelerated bearing wear.
What is the Drum Bearing?
The drum bearing is a sealed, permanently-lubricated ball bearing assembly that mounts to the rear of the drum and rotates within the spider arm hub. The WM9000HVA uses a double-row ball bearing sealed on both sides. This bearing supports the entire weight of the drum (approximately 150 pounds) and accommodates rotational speeds up to 1400 RPM during the spin cycle.
Drum bearings fail when the protective seals degrade, allowing water and detergent into the bearing chamber. This contamination combines with wear, causing the bearing balls and races to corrode and deteriorate. Unlike sealed bearings in motors, washer drum bearings cannot be relubricated—once they fail, replacement is the only solution.
Why They Fail Together
The spider arm and drum bearing on a WM9000HVA form an integrated support system. When the bearing wears out, the increased play and wobbling accelerates spider arm fatigue. Conversely, a cracked spider arm causes the drum to move excessively, which rapidly destroys an otherwise healthy bearing. Most professional technicians replace both components simultaneously when either has failed, as replacing only one typically results in premature failure of the remaining component.
Tools and Equipment You’ll Need
Essential Tools
- Multimeter (to verify power is disconnected)
- Socket set including 8mm, 10mm, 13mm, and 16mm sockets
- Ratchet wrench (3/8-inch drive)
- Socket extensions (3-inch and 6-inch)
- Screwdrivers (Phillips head and flat head, various sizes)
- Needle-nose pliers
- Adjustable wrench
- Torque wrench (0-100 Nm range)
- Drain pump or wet/dry vacuum
- Floor jack rated for 300+ pounds
- Jack stands (pair)
- Towels and drain bucket
- Work light or headlamp
Specialized Tools
- Bearing Press Tool: A hydraulic press rated for 10+ tons (20-ton recommended for the WM9000HVA). Alternatively, a bearing puller tool or shop press
- Drum Removal Tool (Optional): A large rubber mallet helps break the drum bearing loose from the shaft
- Sealant and Lubricant: Threadlocker (Loctite 243 or equivalent) and high-temperature grease compatible with rubber seals
Complete Disassembly Sequence for WM9000HVA
Step 1: Preparation and Safety
- Unplug the WM9000HVA from the electrical outlet
- Use your multimeter set to AC voltage to verify no power is present at the outlet
- Close the water supply shutoff valves behind the washer (turn clockwise until snug)
- Open the washer door and place a towel on the floor to absorb residual water
- If water is present in the tub, use a siphon pump or wet/dry vacuum to extract it completely
- Position the floor jack under the center-rear of the washer base and raise it until the rear wheels are 2-3 inches off the ground
- Place jack stands securely under the rear frame rails on both sides
- Lower the jack partially so weight transfers to the stands (keep the jack in place for emergency lowering)
Step 2: Front Panel Removal
The front panel of the WM9000HVA must be removed to access the drum from the front. This panel includes the detergent dispenser, soap drawer, and access cover.
- Locate the two Phillips-head screws at the top-inside of the door opening, just under the frame lip (one on each side)
- Remove both screws using your Phillips screwdriver
- Grasp the front panel firmly and pull it straight toward you, applying steady pressure until the clips release
- Disconnect the water level sensor electrical connector (if present on your WM9000HVA model) by carefully pulling the white clip toward you
- Disconnect the door latch micro-switch connector (unclip the housing)
- Set the front panel aside in a safe location
Step 3: Door Boot Seal Removal
The rubber door boot seal on the WM9000HVA creates a watertight seal between the front tub opening and the door. This seal must be removed to access the drum mounting bolts and bearing.
- Locate the boot seal clamp ring (a circular metal ring that holds the boot to the tub)
- The clamp is typically held by three or four Phillips-head screws spaced around the circumference
- Remove all screws and carefully peel back the rubber boot seal
- If the seal is bonded with adhesive or silicone, gently work a flat-head screwdriver under the edge to break the bond
- Set the boot seal aside; you can inspect it for tears or degradation (replace if damaged)
- Clean the tub opening with a damp cloth to remove lint and debris
Step 4: Drum Access from the Front
With the front panel and boot seal removed, you now have access to the front of the drum on your WM9000HVA.
- Manually rotate the drum until you can see the three drum mounting bolts spaced 120 degrees apart around the rear of the drum hub
- These 16mm bolts connect the drum bearing to the spider arm inside the tub
- Before removing these bolts, use a marker or paint pen to mark the drum position relative to the tub opening (for reassembly alignment)
- Once marked, you can proceed with bolt removal
Step 5: Spider Arm Bolt Removal
The spider arm bolts on the WM9000HVA are among the most critical fasteners in the assembly. LG uses left-hand threads on some WM9000HVA models, meaning you turn clockwise to remove them (opposite of standard bolts). Always verify the thread direction before applying force.
- Using your 16mm socket and ratchet, attempt to loosen the first spider arm bolt by turning counterclockwise (standard right-hand threads)
- If the bolt resists and you feel normal torque resistance, it has right-hand threads; continue removing
- If the bolt turns freely counterclockwise without resisting, STOP immediately—these are left-hand threads (clockwise removal)
- For left-hand threads on the WM9000HVA, turn the socket clockwise to loosen and counterclockwise to tighten
- Once you determine the correct direction, remove all three spider arm bolts completely
- Place the bolts in a small container to prevent loss
- Carefully pull the drum straight forward (toward the front of the washer) to separate it from the spider arm and bearing
- If resistance is felt, the bearing may still be engaged; gently rock the drum side-to-side while pulling
- Set the drum aside on a clean surface where it won’t be damaged
Removing the Old Bearing and Spider Arm
Step 6: Spider Arm Removal from Tub
- From inside the tub, locate the three mounting bolts that attach the spider arm to the rear tub housing
- These are typically 13mm bolts spaced 120 degrees apart
- Use your 13mm socket and ratchet to remove all three bolts
- Carefully lower the spider arm assembly forward out of the rear tub housing
- Place it on a workbench for bearing removal
Step 7: Bearing Removal from Spider Arm
Removing the old bearing from the spider arm hub is the most mechanically demanding part of this repair. The bearing is a tight press fit and requires proper technique to avoid damaging the spider arm hub.
Method 1: Bearing Press (Recommended)
- Transport the spider arm to a machine shop with a hydraulic press, or use a 20-ton shop press if available in your facility
- Position the spider arm with the bearing hub facing upward
- Use a bearing puller attachment or a socket slightly larger than the bearing inner race (approximately 45mm) positioned to contact only the bearing inner race
- Apply downward pressure gradually until the bearing begins to separate from the hub shaft
- Continue pressing until the bearing is completely separated
- Inspect the hub shaft for damage or scoring; light surface marks are acceptable, but deep grooves require hub replacement
- Clean the hub with a lint-free cloth and light machine oil
Method 2: Bearing Puller Tool (Alternative)
- If a press is unavailable, use a three-jaw bearing puller designed for press-fit bearings
- Position the puller jaws around the bearing outer race
- Thread the center bolt hand-tight to make initial contact
- Tighten the center bolt 1/2 turn every 30 seconds, applying steady pressure rather than sudden force
- Continue until the bearing separates from the hub
- This method takes longer but avoids potential damage from rapid force application
Installing New Spider Arm and Bearing
Step 8: Installing the New Bearing onto Spider Arm
Installing the new bearing requires the same care and precision as removal. The bearing must be fully seated on the hub shaft with no gaps or misalignment.
Using a Bearing Press
- Clean the hub shaft thoroughly with degreaser and dry completely
- Inspect the bearing packaging to confirm it matches the OEM part number for your WM9000HVA (see part numbers section below)
- Position the spider arm in the press with the hub facing upward
- Place the new bearing onto the hub shaft by hand, ensuring it sits squarely (not cocked or tilted)
- Use a socket or bearing installation tool that contacts only the bearing inner race (not the outer race or balls)
- Apply steady downward pressure at approximately 1 ton per second until the bearing is fully seated
- You will feel a slight “catch” when the bearing reaches its final seated position
- Do not over-press; apply only enough force to seat the bearing completely (typically 8-12 tons total for the WM9000HVA bearing)
- Remove the spider arm from the press and inspect the bearing installation; it should be flush with the hub with no visible gaps
Step 9: Reinstalling Spider Arm to Rear Tub Housing
- From the rear of the washer, carefully position the spider arm assembly into the rear tub housing
- Align the three mounting bolt holes in the spider arm with the corresponding holes in the tub housing
- Insert the three 13mm bolts through the housing and into the spider arm hub
- Hand-tighten all three bolts, then use your torque wrench to tighten each bolt to 45 Nm (33 foot-pounds) in a star pattern (alternating between bolts to ensure even seating)
- Verify the spider arm is seated evenly and the bearing hub protrudes correctly from the tub opening
Step 10: Drum Bearing Seal Installation (If Separate from Bearing)
Some WM9000HVA models include a replaceable tub seal assembly separate from the bearing. If your model includes this component:
- Remove the old tub seal from the front tub opening (typically held by spring clips or a retaining ring)
- Clean the seal seat area thoroughly with a lint-free cloth
- Apply a thin bead of silicone sealant (automotive grade) around the seal mounting surface if specified by the parts diagram
- Position the new seal and secure with the retaining hardware
- Allow sealant to cure per manufacturer specifications before running water through the system
Step 11: Reinstalling Drum to Bearing
- Lift the drum and carefully align it over the bearing hub in the rear tub opening
- Lower the drum straight back until the bearing hub seats into the drum’s rear opening
- Apply slight inward pressure to fully seat the drum onto the bearing
- Insert the three 16mm mounting bolts through the drum hub and into the bearing assembly
-
Recommended Parts & Tools
Replacement Drum Bearing Kit for LG Front Load Washers
This bearing kit is essential for the drum replacement portion of your repair, as worn bearings are the primary cause of spider arm failure in LG washers. The kit includes all necessary seals and hardware to ensure a proper fit and long-lasting performance after reassembly. Check current pricing on Amazon.
Appliance Repair Socket Set with Torque Wrench
You’ll need a precision socket set and torque wrench to safely remove and reinstall the drum bolts and bearing hardware to manufacturer specifications without over-tightening. This specialized tool set prevents stripped bolts and ensures components are secured correctly during reassembly. Check current pricing on Amazon.
Drum Bearing Grease and Lubricant for Appliances
After installing new bearings, applying quality appliance-grade lubricant is crucial for smooth drum rotation and preventing premature wear of replacement parts. This high-temperature grease is specifically formulated for washer drum assemblies and helps extend bearing lifespan. Check current pricing on Amazon.
The Drum Bearing Kit That Stops That Metal-on-Metal Grinding in Your LG WM9000HVA
If you’re hearing a loud grinding or scraping noise during the spin cycle, the drum bearing has likely failed and needs to be replaced as part of this repair. This kit contains the exact bearing assembly the WM9000HVA needs, and it’s what you’ll install once you’ve removed the drum and spider arm.
What works
- OEM-spec bearing that fits the WM9000HVA drum shaft perfectly without modification or forcing—no wobble once seated.
- Comes pre-assembled as a complete unit, so you’re not hunting down multiple bearing races and seals separately.
- Significantly cheaper than ordering the bearing through LG directly, and the noise stops immediately after installation.
What doesn’t
- Installation is part of a larger job—you can’t replace just the bearing without pulling the entire drum and spider arm, which takes time.
- If the bearing failure has already damaged the drum shaft or housing, the new bearing won’t solve the problem and you’ll need additional parts.
I’ve seen homeowners order a bearing kit only to discover the spider arm was the actual failure point, so inspect both components carefully before you order—you may need the spider arm replacement at the same time to avoid a second teardown. When you’re ready, grab the Replacement Drum Bearing Kit for LG Front Load Washers and get it installed during this repair.
This post contains affiliate links. As an Amazon Associate, I earn from qualifying purchases at no extra cost to you.