⚠️ Safety Warning
Before attempting any repairs on your Electrolux EFME627UTT dryer, ensure safety protocols are followed. Disconnect power at the breaker and unplug the unit. Allow the dryer to cool completely before beginning work. Electric dryers operate on 240V circuits which can cause serious injury or death. If you’re uncomfortable working with electrical components, contact a professional technician.
Electrolux EFME627UTT Dryer Troubleshooting and Repair Guide
The Electrolux EFME627UTT is a front-loading electric dryer known for its efficiency and advanced moisture sensing technology. However, like all appliances, it can develop issues over time. This comprehensive repair guide covers the most common problems and provides step-by-step solutions to get your dryer running properly again.
Most Common Problems with the EFME627UTT
Not Heating Issues
The most frequent complaint with the EFME627UTT involves heating problems. Three primary components typically cause no-heat conditions:
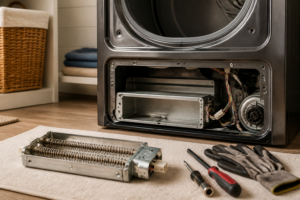
- Heating Element (Part #5303207119): Located in the heating element housing at the bottom rear of the unit, this component should read 9-12 ohms on a multimeter when functioning properly
- Thermal Fuse (Part #134120100): Positioned on the blower housing, this safety device should show continuity (0 ohms) when good and infinite resistance when blown
- Thermistor (Part #5303918423): Found near the heating element, should read approximately 10,000-11,000 ohms at room temperature (70°F)
Starting Problems
When your EFME627UTT won’t start, check these components in order:
- Door Switch (Part #5303943142): Located on the door frame, should show continuity when door is closed
- Main Control Board (Part #5304505682): Controls all dryer functions and may need replacement if other components test good
- Thermal Fuse: Also prevents starting when blown, not just heating
Extended Drying Times
Long drying cycles in the EFME627UTT often result from:
- Clogged exhaust vent: Check exterior vent flap for proper movement and airflow
- Moisture sensor malfunction (Part #5303918423): Prevents proper cycle termination
- Lint buildup in internal ductwork: Requires disassembly to access
Noise Issues
Unusual sounds typically indicate worn mechanical components:
- Drum Rollers (Part #5303281153): Located at the rear of the drum, should rotate smoothly without grinding
- Idler Pulley (Part #5303281082): Maintains belt tension, positioned below the drum on the right side
- Blower Wheel (Part #5304505528): Attached to motor shaft, should be free of lint and debris
Understanding EFME627UTT Error Codes
The EFME627UTT displays specific error codes to help diagnose problems:
- E64: Heating system malfunction – check heating element, thermal fuse, and thermistor
- E61: Heating element stuck on – often indicates failed relay on control board
- E63: Overheating condition – check for restricted airflow or faulty thermistor
- E4A: Temperature sensor open circuit – replace thermistor
- E5B: Door switch malfunction – test and replace door switch if necessary
Accessing Internal Components
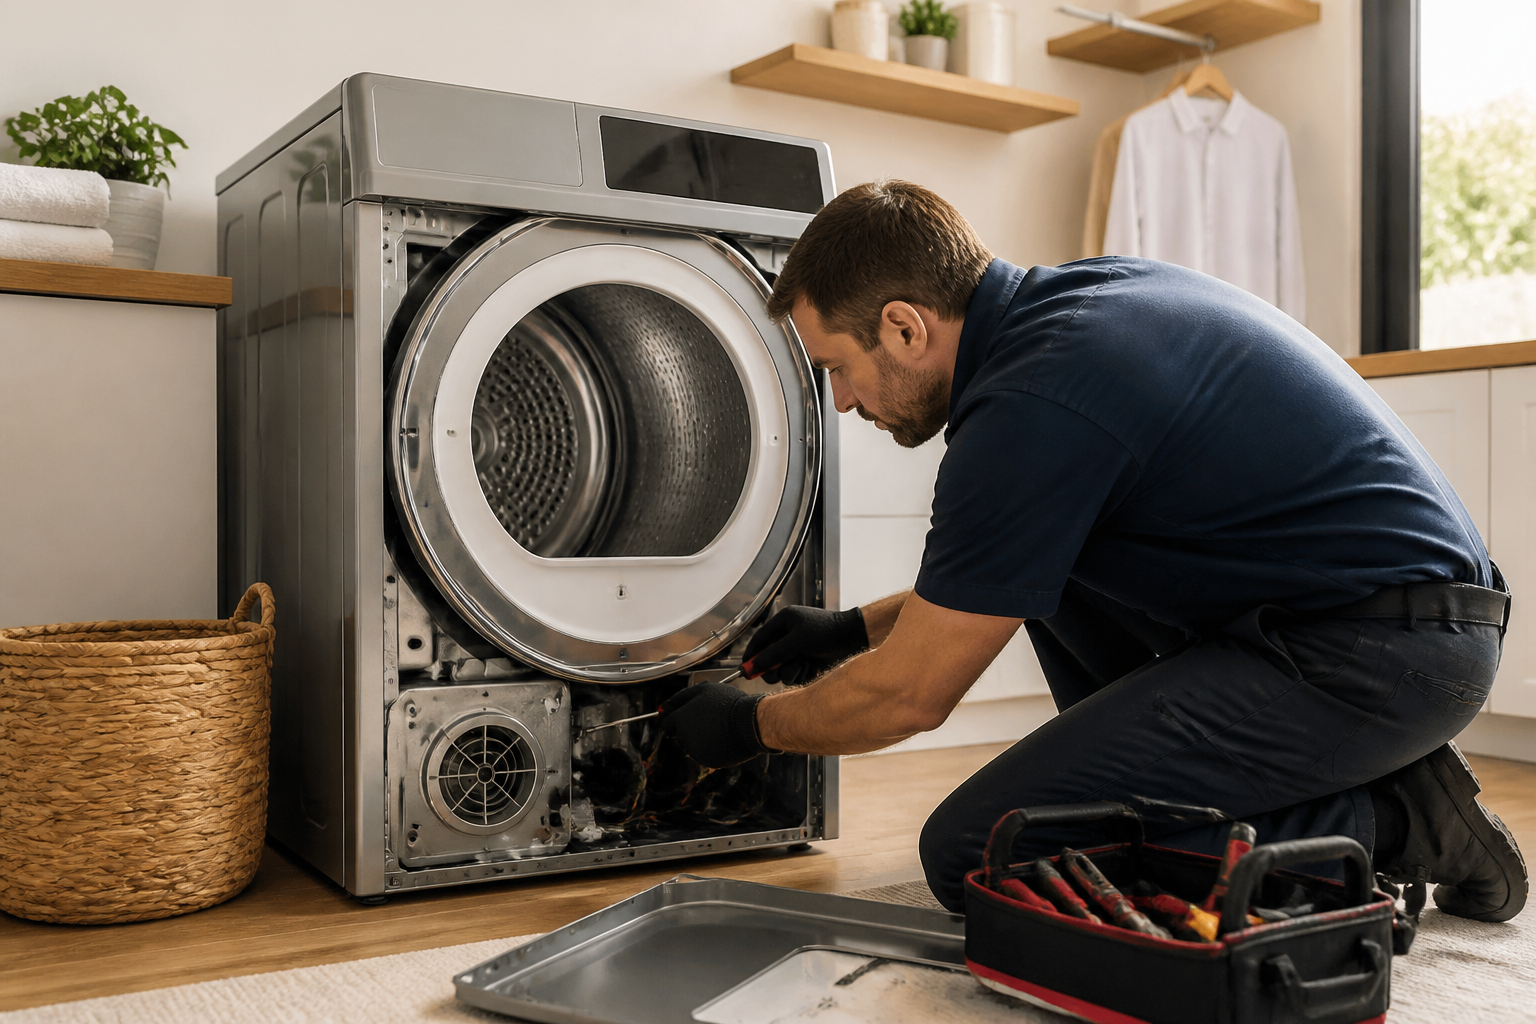
To repair the EFME627UTT, you’ll need to remove the front panel. This process differs from top-loading dryers:
- Disconnect power and pull dryer away from wall
- Remove two screws from the bottom front corners of the front panel
- Lift the front panel up approximately 1/4 inch, then pull forward to disengage the top clips
- Disconnect the door switch harness connector
- Set the front panel aside carefully to avoid damage
- For access to the heating element, remove the bottom front panel by releasing the plastic clips
Heating Element Testing and Replacement
The heating element in the EFME627UTT is a critical component that requires proper testing procedures:
Testing the Heating Element
- Access the heating element housing in the lower right front area
- Disconnect the white wire harness from the heating element terminals
- Set multimeter to ohms (Ω) setting
- Test between the two heating element terminals – should read 9-12 ohms
- Test each terminal to ground (heating element housing) – should read infinite resistance
- Replace element if readings are outside specifications
Heating Element Replacement
- Remove the heating element housing cover (usually 3-4 screws)
- Carefully pull out the heating element assembly
- Note the position of the thermal cut-off and thermistor before removal
- Transfer these components to the new heating element
- Install the new element, ensuring proper wire routing
- Reassemble housing and test operation
Drum Roller Replacement
Worn drum rollers cause squealing or grinding noises during operation. The EFME627UTT uses two rear-mounted drum rollers:
- Remove front panel as described above
- Remove drive belt from drum by pushing idler pulley toward motor
- Lift drum slightly and pull forward to remove from cabinet
- Access rear drum rollers mounted on bracket behind drum position
- Remove roller mounting screws and replace worn rollers
- Apply small amount of high-temperature grease to roller shafts
- Reinstall drum, ensuring proper belt routing around drum, idler pulley, and motor pulley
Door Switch Testing and Replacement
A faulty door switch prevents the EFME627UTT from starting:
Testing Procedure
- Remove front panel to access door switch
- Disconnect wire harness from door switch
- With door closed, test continuity across switch terminals
- Should show continuity (0 ohms) when door is closed
- Should show no continuity (infinite resistance) when door is open
Replacement Steps
- Remove mounting screws securing door switch to frame
- Install new switch in same position
- Reconnect wire harness
- Test door operation before reassembling front panel
Control Board Reset Procedure
Sometimes the EFME627UTT control board requires resetting to clear error codes or restore normal operation:
- Press and hold the “Start/Pause” and “Wrinkle Release” buttons simultaneously
- Hold for 3 seconds until display shows “CLS” (clear)
- Release buttons and press “Start/Pause” once
- Allow 5 minutes for complete reset
- If reset doesn’t resolve issues, control board may need replacement
Moisture Sensor Cleaning and Testing
The moisture sensing system in the EFME627UTT can malfunction due to fabric softener buildup:
- Locate moisture sensor strips inside drum (usually two metal strips)
- Clean with fine grit sandpaper or automotive metal polish
- Remove any fabric softener residue or oxidation
- Test thermistor resistance as described in heating section
- Replace moisture sensor assembly if cleaning doesn’t restore function
Blower Wheel Service
Lint accumulation on the blower wheel reduces airflow and increases drying times:
- Access blower housing by removing rear panel
- Disconnect motor wire harness
- Remove clamp securing blower wheel to motor shaft
- Clean lint and debris from wheel blades
- Check for cracks or damage requiring replacement
- Reinstall with proper shaft alignment
Thermal Fuse Testing and Replacement
The thermal fuse is a common failure point that completely disables the EFME627UTT:
- Locate thermal fuse on blower housing (small white component with two wires)
- Remove wire connectors and test for continuity
- Good fuse shows 0 ohms resistance
- Blown fuse shows infinite resistance
- Replace with exact part number 134120100
- Investigate cause of overheating before operation
Preventive Maintenance Tips
Keep your EFME627UTT running efficiently with regular maintenance:
- Clean lint filter after every load
- Inspect and clean exhaust vent annually
- Clean moisture sensors monthly with fine sandpaper
- Check door seal for lint accumulation
- Ensure proper installation clearances for airflow
- Use appropriate dryer settings for fabric types
Frequently Asked Questions
Why does my EFME627UTT keep shutting off mid-cycle?
Mid-cycle shutdowns typically indicate overheating conditions. Check the exhaust vent for blockages, clean the lint filter, and test the thermistor for proper resistance values. A restricted airflow path causes the thermal protection system to shut down the dryer.
What causes the E64 error code on the EFME627UTT?
Error code E64 indicates a heating system malfunction. Test the heating element for proper resistance (9-12 ohms), check the thermal fuse for continuity, and verify thermistor readings. Replace any component that tests outside specifications.
How do I know if the drum rollers need replacement?
Worn drum rollers produce squealing, grinding, or thumping noises during operation. Remove the front panel and manually rotate the drum while listening for irregular sounds. Rollers should turn smoothly without resistance or noise.
Can I replace just one drum roller or do I need to replace both?
Replace drum rollers in pairs to ensure balanced drum support. Installing only one new roller creates uneven wear patterns and may cause vibration or premature failure of the remaining old roller.
Why is my EFME627UTT taking much longer to dry clothes than normal?
Extended drying times result from restricted airflow, moisture sensor problems, or heating issues. Check the exhaust vent, clean the moisture sensors, verify proper heating element operation, and ensure the lint filter is clean.
What should I do if the control panel is completely dead?
A dead control panel usually indicates electrical supply problems or control board failure. Verify 240V power at the outlet, check the thermal fuse for continuity, and inspect wire connections. If power supply is good, the main control board likely needs replacement.
Is it normal for the EFME627UTT to make some noise during operation?
Normal operation includes gentle humming from the motor and air movement sounds. Unusual noises like squealing, grinding, or loud thumping indicate mechanical problems requiring immediate attention to prevent further damage.
How often should I have my EFME627UTT professionally serviced?
Professional service isn’t required on a schedule if you perform regular maintenance. However, if you experience recurring problems, unusual noises, or error codes, professional diagnosis can prevent costly repairs and ensure safe operation.
When to Call a Professional
Most of the repairs in this guide are within reach for a careful DIYer with basic tools. In my experience, if you’re seeing error codes related to the motor control board, the main electronic control board, or if the drum is physically seized and you’re hearing a grinding noise from the rear bearing, that’s the point where the labor, the specialty diagnostic tools, and the risk of cascading damage make a certified technician the smarter financial call. When in doubt, a diagnostic service call typically costs $80–$120 and can save you from a misdiagnosis that costs more in parts.
Recommended Parts & Tools
Dryer Lint Vent Trap Cleaning Kit
Essential for cleaning blocked vents and lint buildup in your Electrolux EFME627UTT dryer, which is a common cause of overheating and poor drying performance. This flexible brush kit reaches deep into vent systems to remove accumulated lint that standard cleaning can’t reach. Check current pricing on Amazon.
Whirlpool 279570 Dryer Door Strike
A common replacement part for Electrolux dryers when the door won’t latch properly or the dryer won’t start due to door sensor issues. This OEM-compatible door strike ensures proper door alignment and secure closure for safe operation. Check current pricing on Amazon.
Appliance Repair Tool Kit with Multimeter
Professional-grade tools needed for diagnosing electrical issues in your Electrolux dryer, including testing heating elements, thermal fuses, and door switches. The included multimeter helps identify faulty components while the screwdrivers and wrenches allow for safe disassembly and repair. Check current pricing on Amazon.