
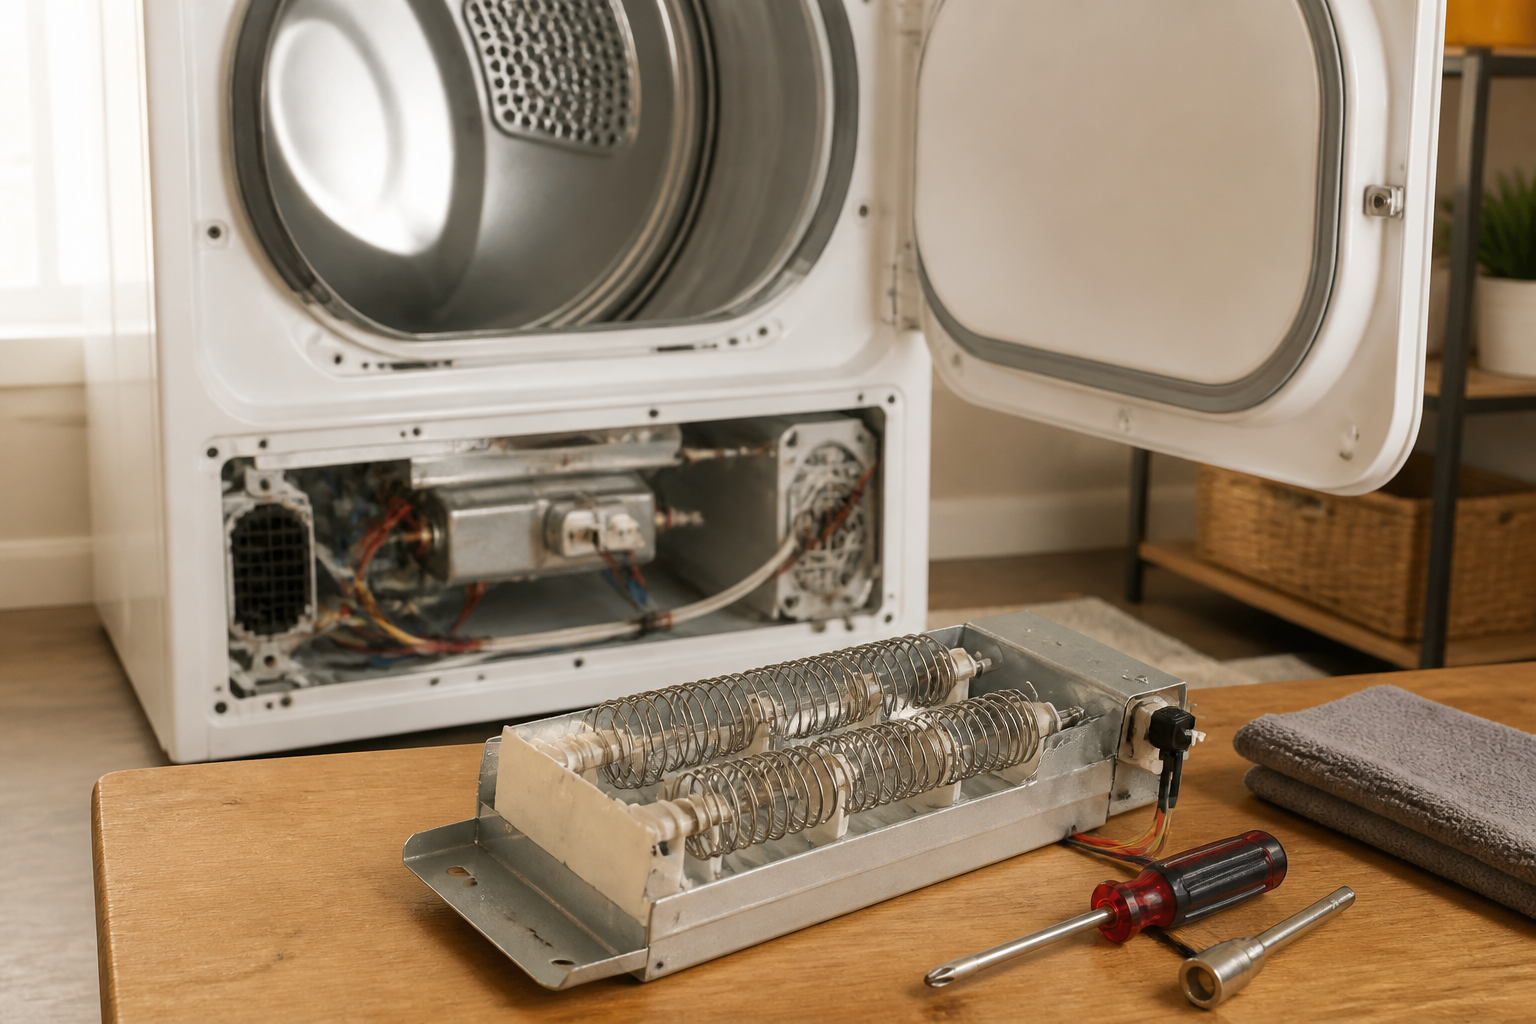
If you’re facing issues with your Maytag dryer model MEP6230HWO, replacing the heating element is a straightforward task that can save you a significant amount of money. A faulty heating element is often the culprit behind a dryer that’s not heating, blowing only cold air, or taking far too long to dry clothes. If you’ve noticed any of these symptoms, it’s likely time to replace the heating element.
As someone who’s worked extensively in appliance repair, I can assure you that replacing the heating element in the Maytag MEP6230HWO is a manageable DIY project. Just make sure you have the right replacement part and that the dryer is unplugged before you get started. The steps in this guide are tailored specifically for this model, so you can confidently follow along knowing you’re on the right track.
⚠️ Safety Warning
Before diving into any repair work on your Maytag MEP6230HWO dryer, it’s crucial to make sure the unit is completely disconnected from all power sources. Unplug the electrical cord from the wall outlet. Electric dryers operate on 240V circuits, which can cause serious injury or even death. Allow the dryer to cool down completely before beginning any work, and don’t forget to wear safety glasses and work gloves throughout the process.
Identifying Heating Element Problems in the Maytag MEP6230HWO
The Maytag MEP6230HWO relies on its heating element assembly to produce the heat necessary for drying your clothes. When this component fails, you’ll typically notice several signs indicating it’s time for a replacement.
Common Symptoms of a Failed Heating Element
- No heat production: The dryer runs, but clothes remain damp after a full cycle.
- Weak or inconsistent heating: Clothes take significantly longer to dry or only partially dry.
- Overheating then stopping: The dryer gets extremely hot initially, then shuts down due to thermal protection.
- Burning smell: A distinct electrical burning odor during operation.
- Visible damage: Broken or visibly damaged heating coils when inspecting the element.
Correct Replacement Part for the MEP6230HWO
The Maytag MEP6230HWO requires a specific heating element assembly that includes the heating coil, mounting bracket, and thermal protection components. The correct part number for this model is WP35001247 or the equivalent 35001247. This 5,400-watt heating element operates on 240V and is designed specifically for Maytag Performance Series dryers manufactured between 2001-2006.
The heating element housing assembly measures approximately 11 inches in length and 8 inches in height. It comes with the necessary ceramic insulator blocks and mounting hardware for installation in the MEP6230HWO’s rear-mounted heater box configuration.
Required Tools and Materials
Before commencing the repair on your Maytag MEP6230HWO, gather the following tools and materials:
- Digital multimeter capable of reading resistance (ohms)
- 1/4-inch and 5/16-inch nut drivers
- Phillips head screwdriver
- Flathead screwdriver
- Needle-nose pliers
- Work light or flashlight
- Safety glasses and work gloves
- Replacement heating element (WP35001247)
- Camera or smartphone for reference photos
- Shop vacuum for debris cleanup
Testing the Current Heating Element
Before removing the old heating element from your MEP6230HWO, it’s important to verify that it has indeed failed. This testing process will help you understand what readings to expect from the new element as well.
Multimeter Testing Procedure
- Ensure the dryer is unplugged and completely cool.
- Remove the lower front panel by lifting up and pulling forward.
- Locate the heating element housing on the right side of the dryer cabinet.
- Disconnect the two wire terminals connected to the heating element.
- Set your multimeter to the resistance (ohms) setting, typically marked with the Ω symbol.
- Touch the multimeter probes to the two heating element terminals.
- A functional heating element should read between 10-12 ohms of resistance.
- An infinite reading (OL on digital meters) indicates an open circuit and a failed element.
- A reading of 0 ohms indicates a shorted element that must be replaced.
Step-by-Step Heating Element Replacement
Accessing the Heating Element Assembly
- Unplug the MEP6230HWO from the electrical outlet and allow it to cool completely.
- Remove the lint filter and any clothes from the drum.
- Open the dryer door and locate the two screws at the bottom of the door opening.
- Remove these screws using a 1/4-inch nut driver.
- Insert a putty knife or flat tool 2 inches from each front corner to release the spring clips.
- Lift the top panel up and prop it against the wall or secure it in the open position.
- Disconnect the door switch wire harness located on the front left side.
- Remove the two screws securing the front panel to the side panels.
- Carefully lift the front panel up and away from the dryer cabinet.
Removing the Old Heating Element
- Locate the heating element housing on the right side of the MEP6230HWO’s cabinet.
- Take a reference photo of all wire connections before disconnecting anything.
- Disconnect the two main heating element wires, typically white and black.
- Remove the high-limit thermostat wire (usually a blue or white wire with a small terminal).
- Disconnect the cycling thermostat wire connection.
- Remove the three 1/4-inch screws securing the heating element housing to the cabinet.
- Carefully pull the heating element assembly straight out from the cabinet.
- Note the position of the thermal fuse and thermostats for reassembly reference.
Installing the New Heating Element
- Inspect the heating element housing for any debris or lint buildup and clean thoroughly.
- Position the new heating element assembly in the same orientation as the old unit.
- Align the mounting holes with the cabinet openings.
- Secure the heating element housing with the three 1/4-inch screws, tightening to finger-tight plus 1/4 turn.
- Reconnect the main heating element wires according to your reference photo.
- Attach the high-limit thermostat wire to its designated terminal.
- Connect the cycling thermostat wire.
- Ensure all connections are tight and properly seated.
Checking Related Components
While you’re replacing the heating element in your MEP6230HWO, it’s wise to inspect and test related thermal protection components that commonly fail alongside heating elements.
Thermal Fuse Testing
The thermal fuse on the MEP6230HWO is located on the heating element housing and appears as a small, oval component with two wire terminals.
- Disconnect both wires from the thermal fuse terminals.
- Set your multimeter to the continuity or lowest resistance setting.
- Touch the probes to each terminal on the thermal fuse.
- A good thermal fuse should show continuity (0 ohms or a beep on most meters).
- No continuity indicates a blown thermal fuse that requires replacement (part number 3392519).
High-Limit Thermostat Verification
The high-limit thermostat protects the MEP6230HWO from overheating and is mounted directly on the heating element housing.
- Locate the round, disc-shaped component with two terminals.
- Disconnect the wires and test for continuity with your multimeter.
- At room temperature, the thermostat should show continuity.
- Replace if no continuity is present (part number 3977767).
Cycling Thermostat Assessment
This component regulates the heating element’s on/off cycling during the drying process.
- Test for continuity across the terminals at room temperature.
- The cycling thermostat should show continuity when cool.
- Replace if testing reveals an open circuit (part number 3398671).
Reassembly and Final Testing
Reassembling the MEP6230HWO
- Double-check that all electrical connections are secure and properly positioned.
- Verify that no wires are pinched or stretched during reassembly.
- Position the front panel and align it with the side panels.
- Reinstall the two screws securing the front panel.
- Reconnect the door switch wire harness.
- Lower the top panel and ensure it clicks into place.
- Reinstall the two screws at the bottom of the door opening.
- Replace the lint filter.
Testing the Repair
- Plug the MEP6230HWO back into the electrical outlet.
- Load the dryer with a small load of damp towels.
- Select a normal heat setting and start the dryer.
- After 5-10 minutes, check that the drum feels warm to the touch.
- Listen for any unusual noises or burning smells.
- Allow the cycle to complete and verify proper drying performance.
- Monitor the first few cycles to ensure consistent heating.
Maintenance Tips for Extended Heating Element Life
To maximize the lifespan of your new heating element in the Maytag MEP6230HWO, follow these maintenance recommendations:
- Clean the lint filter after every load to maintain proper airflow.
- Inspect and clean the exhaust vent annually to prevent overheating.
- Avoid overloading the dryer, which can cause extended run times.
- Use appropriate heat settings for different fabric types.
- Address any unusual noises or performance issues promptly.
- Schedule professional maintenance every 2-3 years for optimal performance.
Frequently Asked Questions
How do I know if my MEP6230HWO heating element is completely dead?
A completely failed heating element will show infinite resistance (OL) when tested across its terminals with a multimeter. You’ll also notice that clothes remain completely damp after a full drying cycle, even though the drum continues to turn and the motor runs normally. If the dryer runs but produces absolutely no heat, the heating element has likely failed completely.
Can I replace just the heating coil instead of the entire assembly?
While it’s technically possible to replace just the heating coil in some cases, I strongly recommend replacing the entire heating element assembly (part number WP35001247) on the MEP6230HWO. This complete assembly ensures proper fit, includes updated thermal protection components, and provides better long-term reliability than attempting to repair individual coil elements.
Why does my MEP6230HWO keep burning out heating elements?
Repeated heating element failures usually indicate an underlying airflow problem. Check for blocked exhaust vents, excessive lint buildup in the ductwork, or a damaged blower wheel. Poor airflow causes the heating element to overheat and fail prematurely. It’s also important to verify that the high-limit thermostat and thermal fuse are functioning properly, as failed thermal protection components can lead to dangerous overheating.
How long should a heating element last in the MEP6230HWO?
Under normal operating conditions with proper maintenance, a heating element in the MEP6230HWO should last 8-12 years. Factors that can reduce lifespan include poor ventilation, overloading, extended high-heat cycles, and inadequate lint filter maintenance. Regular cleaning and proper usage can significantly extend heating element life.
What’s the difference between the thermal fuse and high-limit thermostat?
The thermal fuse is a one-time safety device that permanently opens the circuit if the dryer overheats beyond safe limits (typically around 250°F). Once it blows, it must be replaced. The high-limit thermostat is a resettable component that temporarily stops the heating element when temperatures exceed approximately 220°F and resets automatically when temperatures drop. Both components protect against overheating but serve different functions in the MEP6230HWO’s safety system.
Should I clean the heating element housing during replacement?
Yes, thoroughly clean the heating element housing and surrounding area before installing the new element. Use a shop vacuum to remove lint buildup and debris. Accumulated lint can cause poor heat transfer and premature component failure. Pay special attention to the air intake areas and ensure all passages are clear for optimal airflow through the heating chamber.
Can a partially working heating element cause longer drying times?
Absolutely. A heating element with some broken coils will still produce heat but at a reduced capacity. This results in significantly longer drying times, uneven heating, and increased energy consumption. Even if your MEP6230HWO still produces some heat, testing with a multimeter will reveal if the element is operating at full capacity. A partially failed element should be replaced to restore normal performance and energy efficiency.
When to Call a Professional
Most of the repairs in this guide are within reach for a careful DIYer with basic tools. In my experience, if your dryer is tripping the 240V breaker, showing burn marks around the element housing, or if the drum itself shows any sign of heat damage or warping, those are red flags indicating a deeper electrical or venting issue. It’s best to call a certified technician for a diagnosis before replacing any parts. If you’re uncertain, a diagnostic service call typically costs $80–$120 and can save you from a misdiagnosis that ends up costing more in parts.
Recommended Parts & Tools
Maytag Dryer Heating Element Assembly WP35001247
This is the exact replacement heating element assembly designed for the Maytag MEP6230HWO dryer model. The OEM part ensures proper fit and performance, restoring your dryer’s ability to generate heat efficiently.
Klein Tools 32500 Multi-Bit Screwdriver
You’ll need a reliable screwdriver set to remove the dryer panels and access the heating element compartment safely. This multi-bit screwdriver includes all the common bits needed for appliance repair work.
Fluke 101 Basic Digital Multimeter
A multimeter is essential for testing the heating element’s continuity before and after replacement to ensure the repair was successful. This basic model provides accurate readings and is perfect for DIY appliance repairs.
The Heating Element That Actually Solves No-Heat on the MEP6230HWO
Once you’ve ruled out the thermal fuse and confirmed the element itself is open (you’ll see infinite resistance on a multimeter), ordering the correct OEM assembly is your next move. This Maytag part fits directly into the housing without adapter plates or workarounds, which saves you the frustration of discovering a compatibility gap mid-job.
What works
- Bolts straight into the heating housing on this model—no hunting for the right terminal configuration or dealing with loose connections after reassembly.
- Comes with the insulation sleeve and terminal block already seated, so you’re not trying to align tiny ceramic spacers inside a confined chamber.
- Resistance reads exactly where it should once installed—around 10–12 ohms cold—which gives you confidence the element will heat evenly and not cook itself in 500 hours.
What doesn’t
- If you order the bare element coil instead of the full assembly, you’ll end up removing your work to swap it out—the housing itself rarely fails, so buying the complete unit is the move.
- Shipping times can stretch 5–7 days on slower fulfillment, so order it before you pull the old one out if you’re on a tight timeline.
I’ve seen someone order a universal element thinking it would save $20, and the terminal layout didn’t match—we had to rig up an adapter bracket that threw off the alignment inside the housing. Grab the OEM Maytag Dryer Heating Element Assembly WP35001247 and avoid that headache.
About This Article

Written by Dave Holt. Dave Holt has been taking apart and fixing household appliances since he was a teenager who couldn't leave a broken one alone. Eighteen years later, after fixing things for neighbors, friends, and anyone who'd let him, he's seen almost every failure mode there is. When he writes a repair guide here, it's based on the actual job, not a manufacturer overview. More about this site.
Scope and limits. Dave is a self-taught repairer, not a certified appliance technician. Unplug before you open anything, and leave sealed refrigeration systems, gas connections, and hardwired circuits to a qualified technician.

