Whirlpool WDT730PAHZ Not Cleaning Dishes Properly: Complete Troubleshooting Guide
The Whirlpool WDT730PAHZ is a reliable built-in dishwasher, but poor cleaning performance can stem from several common issues. Unlike modern sensor-based models, the WDT730PAHZ relies on proper maintenance and correct loading to deliver spotless dishes. This guide walks you through every diagnostic step and repair procedure to restore your dishwasher’s cleaning power.
Quick Diagnostic Checklist: The Three Essential Functions
Before diving into complex repairs, verify these three critical functions are working. If any fail, you’ve identified the problem area.
Step 1: Listen for Spray Arm Rotation
Open the dishwasher door during the wash cycle and listen carefully for a distinctive spinning sound. You should hear a smooth, continuous rotation. Place your hand near (but not touching) the lower spray arm to feel for rotational motion. On the WDT730PAHZ, the lower and middle spray arms spin during normal operation. If you hear nothing or feel no movement, the spray arms are not rotating—indicating either a clogging issue or pump failure.
Step 2: Check Water Temperature During Wash
Run a complete wash cycle while periodically opening the door and carefully touching the inside wall or a dish. The water should feel hot (ideally 120°F to 140°F). Cold or lukewarm water significantly reduces detergent effectiveness and cleaning performance. If water temperature feels low, the heating element or water inlet valve may be malfunctioning.
Step 3: Verify Detergent Dispenser Operation
Run a cycle with the door unlatched slightly (held open with your hand—do not close it fully) so you can observe the detergent dispenser during the wash. At approximately 25-35 minutes into the cycle, the dispenser door should pop open, releasing detergent. If it remains closed, detergent never enters the wash chamber, guaranteeing poor cleaning results.
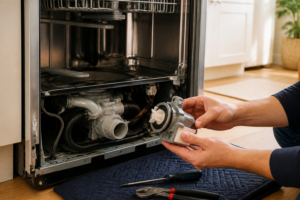
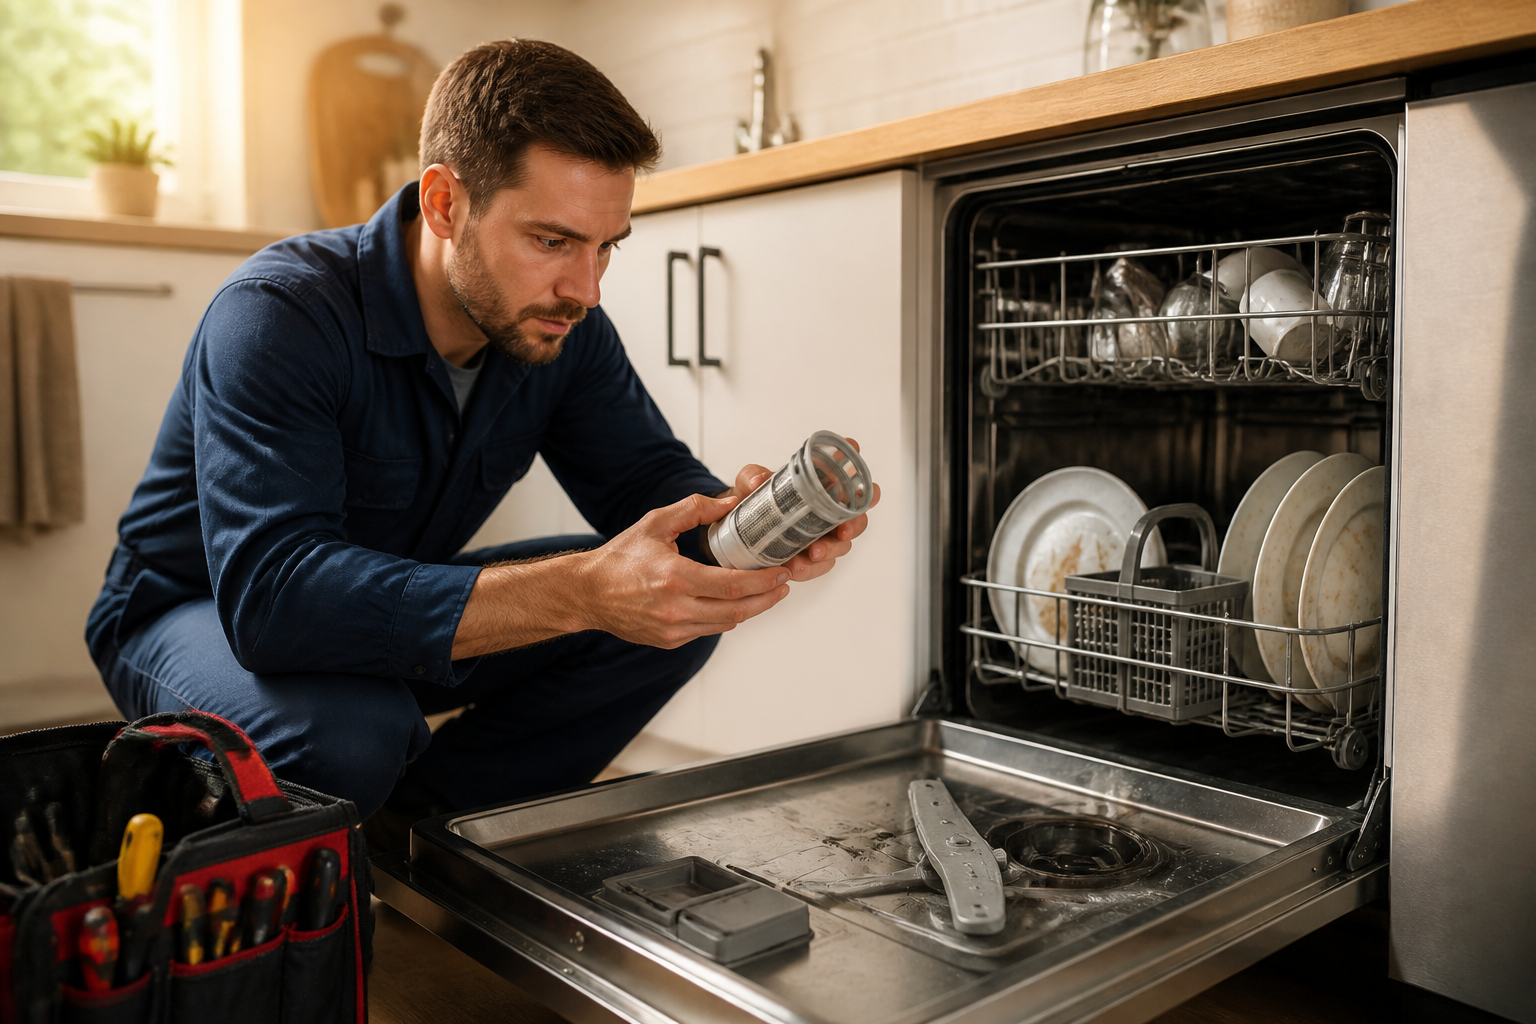
Spray Arm Clogs: The Most Common WDT730PAHZ Cleaning Problem
The WDT730PAHZ features three separate spray arms: lower, middle, and upper. Each has multiple jet openings that can become blocked by mineral deposits, food particles, or debris. Clogged spray arms are the leading cause of poor cleaning on this model.
Removing and Cleaning the Lower Spray Arm
The lower spray arm sits at the bottom of the wash chamber directly above the sump.
- Open the dishwasher door fully and remove all dishes.
- Locate the lower spray arm at the bottom center of the tub. It attaches via a quick-disconnect collar beneath the arm.
- Grasp the spray arm firmly at the base and rotate it counterclockwise approximately one full turn. The collar will disengage and the arm lifts straight out.
- Place the spray arm on a clean work surface. Inspect all seven to nine jet holes around the arm’s underside using a flashlight. Look for white mineral buildup or debris blocking the openings.
- Fill a sink with equal parts white vinegar and warm water. Submerge the lower spray arm completely for 30 minutes to dissolve mineral deposits.
- Use a straightened paper clip or thin wire (approximately 0.032 inches diameter) to gently probe each jet hole. Push through slowly—do not apply excessive force as the plastic can crack. You should feel slight resistance as debris clears.
- Rinse the spray arm thoroughly under running hot water, directing water through each jet hole from the top side.
- Reinstall by positioning the arm in the sump and rotating the collar clockwise until snug. Do not overtighten.
Removing and Cleaning the Middle Spray Arm
The middle spray arm (also called the secondary arm on the WDT730PAHZ) mounts on the side of the wash chamber. Some models position it on the right wall, approximately 8 inches from the bottom.
- Open the dishwasher door fully. Locate the middle spray arm bracket on the interior sidewall.
- The arm attaches with a single Phillips head screw (typically 1/4 inch). Using a Phillips screwdriver, remove this screw and set it aside in a safe location.
- Gently pull the spray arm away from the bracket, twisting slightly if needed to clear any guide pins.
- Soak the middle spray arm in the vinegar-water solution for 30 minutes.
- Using your wire probe, clear each jet hole thoroughly. The WDT730PAHZ middle arm typically has five to seven jets.
- Rinse completely and dry with a soft cloth.
- Reinstall by aligning the arm with the bracket, inserting the Phillips screw, and tightening firmly but not excessively.
Removing and Cleaning the Upper Spray Arm
The upper spray arm on the WDT730PAHZ mounts from above inside the door assembly. This is the most accessible arm and easiest to clean.
- Open the dishwasher door fully.
- Look up inside the door at the top of the wash chamber. You’ll see the upper spray arm mounted horizontally, typically 2-3 inches below the door gasket.
- The upper arm connects via a bayonet-style collar. Grasp the arm firmly and rotate counterclockwise approximately one-quarter turn. The arm will disengage and lift out easily.
- Immediately inspect the mounting bracket area (step 7 below addresses a common cracking issue on this bracket).
- Soak the upper spray arm in the vinegar-water solution for 30 minutes.
- Clear all jets with your wire probe. Most upper arms have four to six jets arranged in a circle.
- Rinse thoroughly and reinstall by positioning the arm into the collar and rotating clockwise one-quarter turn until it seats securely with an audible click.
Upper Spray Arm Mount Cracks on the WDT730PAHZ: A Model-Specific Issue
The Whirlpool WDT730PAHZ has a documented weak point: the upper spray arm mounting bracket frequently cracks with age and normal use. This crack prevents proper water pressure from reaching the upper jets, severely reducing cleaning performance on dishes loaded in the upper rack.
How to Inspect the Upper Arm Bracket
After removing the upper spray arm (see procedure above), look directly at the mounting bracket where the arm connects. The bracket is typically black plastic, approximately 2 inches long. Run your fingers over both the top and bottom surfaces, feeling for any crack lines. Look for hairline cracks extending from the connection point, or visible damage around the bayonet collar.
If you discover a crack, water is likely bypassing the upper jet system entirely. The WDT730PAHZ will show dramatically improved cleaning in the lower rack while the upper rack remains dirty.
Repairing the Cracked Bracket
A cracked upper spray arm bracket requires replacement of the entire door water distribution assembly. This is not a field-weldable repair—plastic cracks cannot be permanently sealed with epoxy or other adhesives in a food-contact application.
Order the correct door assembly for your WDT730PAHZ model year (check your serial number plate inside the door jamb for the exact specification). Installation involves draining the dishwasher, removing the door (typically 4-6 bolts), and disconnecting the water supply line to the bracket. Many owners successfully perform this replacement with basic tools and a 2-3 hour time investment.
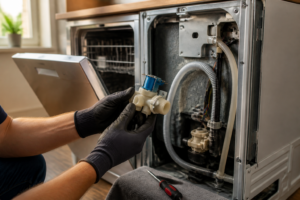
Water Inlet Valve: Insufficient Hot Water Delivery
The water inlet valve controls both flow rate and temperature on the WDT730PAHZ. If this valve partially fails, insufficient hot water enters the wash chamber, preventing detergent from dissolving properly and reducing cleaning effectiveness.
Testing the Water Inlet Valve
⚠️ SAFETY WARNING: The water inlet valve operates under 40-60 PSI water pressure. Before any testing, turn off the water supply to your dishwasher using the shutoff valve beneath your sink. Allow 30 seconds for residual pressure to dissipate.
The water inlet valve is located behind the toe kick panel (the removable panel at the very bottom front of the dishwasher). On the WDT730PAHZ, it’s a rectangular gray or black component approximately 3 inches long with two water line connections (inlet and outlet).
- Turn off the water supply at the shutoff valve beneath your sink.
- Remove the toe kick panel by unscrewing two Phillips bolts at the bottom corners.
- Locate the water inlet valve. You’ll see the inlet line (typically with a mesh screen fitting) and the outlet line going to the pump.
- Disconnect the inlet line by turning the compression fitting counterclockwise. Place a small container underneath to catch residual water.
- Turn the water supply back on briefly (5-10 seconds). Water should flow steadily from the inlet line connection point. If water dribbles or comes out in spurts, sediment is blocking the inlet screen.
- If sediment is present, remove the inlet line fitting completely. You’ll find a small mesh screen inside the fitting. Soak this screen in white vinegar for 15 minutes, then rinse thoroughly and reinstall.
- If water flow is normal but weak, the issue is likely the valve solenoid or internal diaphragm, requiring valve replacement. Order a replacement water inlet valve for the WDT730PAHZ (consult your model documentation for the exact part number—these vary by water pressure rating).
- Turn the water supply back off and reconnect the inlet line securely.
- Run a test cycle and monitor water temperature in the wash chamber. Water should feel noticeably hot within the first 2-3 minutes.
Heating Element and Wash Water Temperature
The WDT730PAHZ relies on an electric heating element immersed in the sump to raise water temperature to the minimum 120°F required for effective detergent action. If the heating element has failed, water remains lukewarm or cool throughout the cycle.
Testing Water Temperature During Cycle
Run a complete wash cycle. At the 15-minute mark, open the door and carefully insert a food-grade thermometer into the water near the bottom of the tub (avoid touching the heating element directly). The water should read 120°F minimum, with 130°F to 140°F being ideal. If temperature is below 120°F, the heating element is not functioning.
Electrical Test of the Heating Element
⚠️ SAFETY WARNING: The heating element operates on 240V electrical power and can retain heat for hours after the cycle ends. Do not touch the element. Ensure the dishwasher is completely powered down and allow 1-2 hours for cooling before any work.
The heating element connects to the control board via two push-on terminals. On the WDT730PAHZ, it’s mounted on the bottom sump, accessible from beneath the dishwasher.
- Unplug the dishwasher from the electrical outlet (or turn off the circuit breaker controlling the circuit).
- Remove the toe kick panel to access the sump area.
- Locate the heating element (a metal tube approximately 6-8 inches long with two push-on wire terminals).
- Using a multimeter set to the Ohms (resistance) setting, touch one probe to each terminal. The heating element should show between 15 and 40 Ohms of resistance. If you read “OL” (open line/infinite resistance), the element has failed and requires replacement.
- To replace, disconnect both wire terminals (they pull straight off). Remove the element mounting bracket bolts (typically two Phillips bolts). Slide the old element out of the sump and insert the new one in the same orientation.
- Reconnect both terminals firmly—they should not come off with light finger pressure when properly seated.
- Restore power and run a test cycle, monitoring temperature as described above.
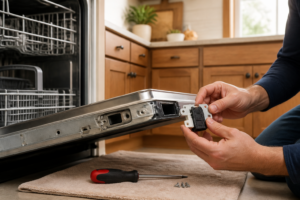
Detergent Dispenser Door: When Detergent Never Releases
The WDT730PAHZ detergent dispenser has a spring-loaded door that opens automatically during the wash cycle, releasing detergent into the chamber. If this door sticks closed, no detergent enters the wash water, regardless of how much you add.
Identifying a Stuck Dispenser Door
The detergent dispenser is located on the interior of the dishwasher door, slightly to the right of center, at approximately shoulder height when the door is fully open. It’s a white or gray plastic box, approximately 4 inches wide and 2 inches tall.
To test if the door opens during the cycle: run a wash cycle while holding the door slightly ajar (use your hand to keep it open approximately 4-6 inches—do not latch it fully). At approximately 25-35 minutes into the cycle, you should see the dispenser door pop open. If it remains closed, the mechanism has failed.
Manually Releasing and Cleaning the Dispenser
- Open the dishwasher door fully. Locate the detergent dispenser on the interior of the door.
- Look at the front face of the dispenser box. You’ll see a latch mechanism (typically a small plastic lever or tab on the right side).
- Press this latch firmly inward and the dispenser door should pop open. If it resists, apply steady pressure for 5-10 seconds—do not force it violently as the plastic latch can break.
- Once open, inspect the interior cavity for crystallized detergent buildup, mineral deposits, or debris. Use a soft brush or cloth to clean thoroughly.
- Check the spring that powers the door (it’s usually visible as a small metal coil on the left side of the cavity). Make sure the spring is intact and not corroded.
- Also inspect the door itself and the latch point where they connect. Look for cracked plastic or worn connection points.
- Close the dispenser door manually by pushing it until it latches with an audible click.
- Run a test cycle with the door held slightly open to verify the door now opens during the wash phase.
Replacing the Detergent Dispenser on the WDT730PAHZ
If the dispenser door is cracked, the spring is broken, or the latch mechanism is permanently jammed, the entire dispenser assembly must be replaced. This is a straightforward job requiring only Phillips screwdrivers.
- Open the dishwasher door fully.
- Inside the door, locate the two Phillips screws holding the dispenser to the door panel (one near the top and one near the bottom of the dispenser box).
- Remove both screws and set them aside.
- Gently pull the dispenser box straight out away from the door panel. You may need to wiggle it slightly side to side.
- Disconnect the wire connector (a small push-on connector) from the dispenser motor. Some WDT730PAHZ models do not have a motor—in these cases, skip this step.
- Insert the new dispenser into the opening, aligning the mounting holes.
- Reconnect the motor wire connector if applicable.
- Install and tighten the two Phillips screws.
- Test the dispenser door—it should open and close smoothly by hand, and should open automatically during a test wash cycle.
Water Pressure and Incoming Water Temperature
The WDT730PAHZ is designed to operate with water supply pressure between 20 and 100 PSI. Low incoming water pressure reduces flow to the spray arms, resulting in weak spray patterns and poor cleaning. Additionally, if your home’s water heater is set too low, the dishwasher cannot heat the water sufficiently during the cycle.
Testing Water Pressure
Water pressure is easiest tested at your home’s main water shutoff valve (typically located near the street side of your property or at the foundation). You can purchase an inexpensive water pressure gauge at any home improvement store.
- Turn off all water-using appliances in your home.
- Screw the pressure gauge onto the main water shutoff valve or onto a conveniently located outdoor faucet.
- Record the pressure reading. It should be between 40-80 PSI for optimal dishwasher performance.
- If pressure is below 20 PSI, contact your water supplier—this indicates a utility-side problem.
- If pressure exceeds 100 PSI, your home needs a pressure-reducing valve installed on the main supply line. High pressure can damage the WDT730PAHZ water inlet valve over time.
Water Heater Temperature Settings
Your home’s water heater should be set to 120°F minimum (ideally 130°F to 140°F). The WDT730PAHZ heats incoming water during the cycle, but starting with hotter incoming water improves overall cleaning. Check your water heater’s temperature dial (usually located on the tank’s lower left side) and adjust if needed. Allow 2-3 hours after adjustment before testing to allow the tank to stabilize.
Loading Errors: Blocking Spray Arm Access
Even perfectly functioning spray arms cannot clean dishes if large pots, baking sheets, or tall items block their path. The WDT730PAHZ requires clear spray arm paths for optimal performance.
Proper Loading for the WDT730PAHZ
- Upper Rack: Reserve for delicate items, small bowls, and glasses. Never place tall items here—they block water flow from the upper spray arm to the lower rack.
- Lower Rack: Load plates with the soiled side facing toward the center (where the lower spray arm rotates). Never place large baking sheets or cookie sheets in the front—they block the lower spray arm’s rotation entirely.
-
Recommended Parts & Tools
Whirlpool Dishwasher Spray Arm Assembly
A clogged or damaged spray arm is one of the most common reasons a Whirlpool WDT730PAHZ fails to clean dishes properly. This OEM replacement spray arm ensures water is distributed evenly across all dishes during the wash cycle. Check current pricing on Amazon.
Affresh Dishwasher Cleaner Tablets
Before replacing parts, it’s essential to deep clean your dishwasher to remove mineral deposits and buildup that can block spray holes and affect cleaning performance. These cleaning tablets dissolve and clean the entire interior system. Check current pricing on Amazon.
IFIXIT Pro Tech Toolkit
Disassembling the spray arm and accessing internal components requires the right tools to avoid damage. This comprehensive toolkit includes precision screwdrivers and other essentials needed to safely remove and reinstall dishwasher parts. Check current pricing on Amazon.
The Spray Arm Replacement That Fixes Most WDT730PAHZ Cleaning Failures
If your dishes are coming out with food residue or spotty coverage, a blocked or worn spray arm is often the culprit—and this is the first part I pull on this model before diagnosing anything else. The WDT730PAHZ depends entirely on water pressure from intact spray arms to reach every rack position.
What works
- Exact fit for the WDT730PAHZ upper and lower arms—no adapter guessing required, and the clips engage cleanly without forcing.
- The spray holes are properly sized and angled, so water distribution returns to the original factory pattern instead of spraying weak or uneven.
- Replacement takes about 15 minutes with a Phillips head screwdriver—you don’t need special tools, and the old arm comes out without breaking plastic clips.
What doesn’t
- Won’t solve poor cleaning if the real problem is a clogged wash arm inlet or failed pump—you still need to rule out water supply issues first.
- Some aftermarket arms have slightly thinner plastic, so if you’re buying used or third-party, inspect the spray holes for deformation before installation.
I once replaced an upper arm thinking that was the fix, only to find the lower arm was actually blocked with mineral buildup—so always inspect both arms before ordering. If the original arm is intact but just clogged, a soak in vinegar might save you the cost. But if it’s cracked or the holes are permanently enlarged, Whirlpool Dishwasher Spray Arm Assembly is the reliable replacement.
This post contains affiliate links. As an Amazon Associate, I earn from qualifying purchases at no extra cost to you.