
How to Replace and Clean the Drain Catch on the LG WM4500HBA Front-Load Washer
Today I’m diving into the drain catch — also known as the pump filter or coin trap — on your LG WM4500HBA front-load washer. Knowing how to access, clean, and replace this part will keep your washer running smoothly for years and save you from costly repairs. Let’s get started with this step-by-step guide that covers everything you need to know.
What the Drain Catch Does on the WM4500HBA
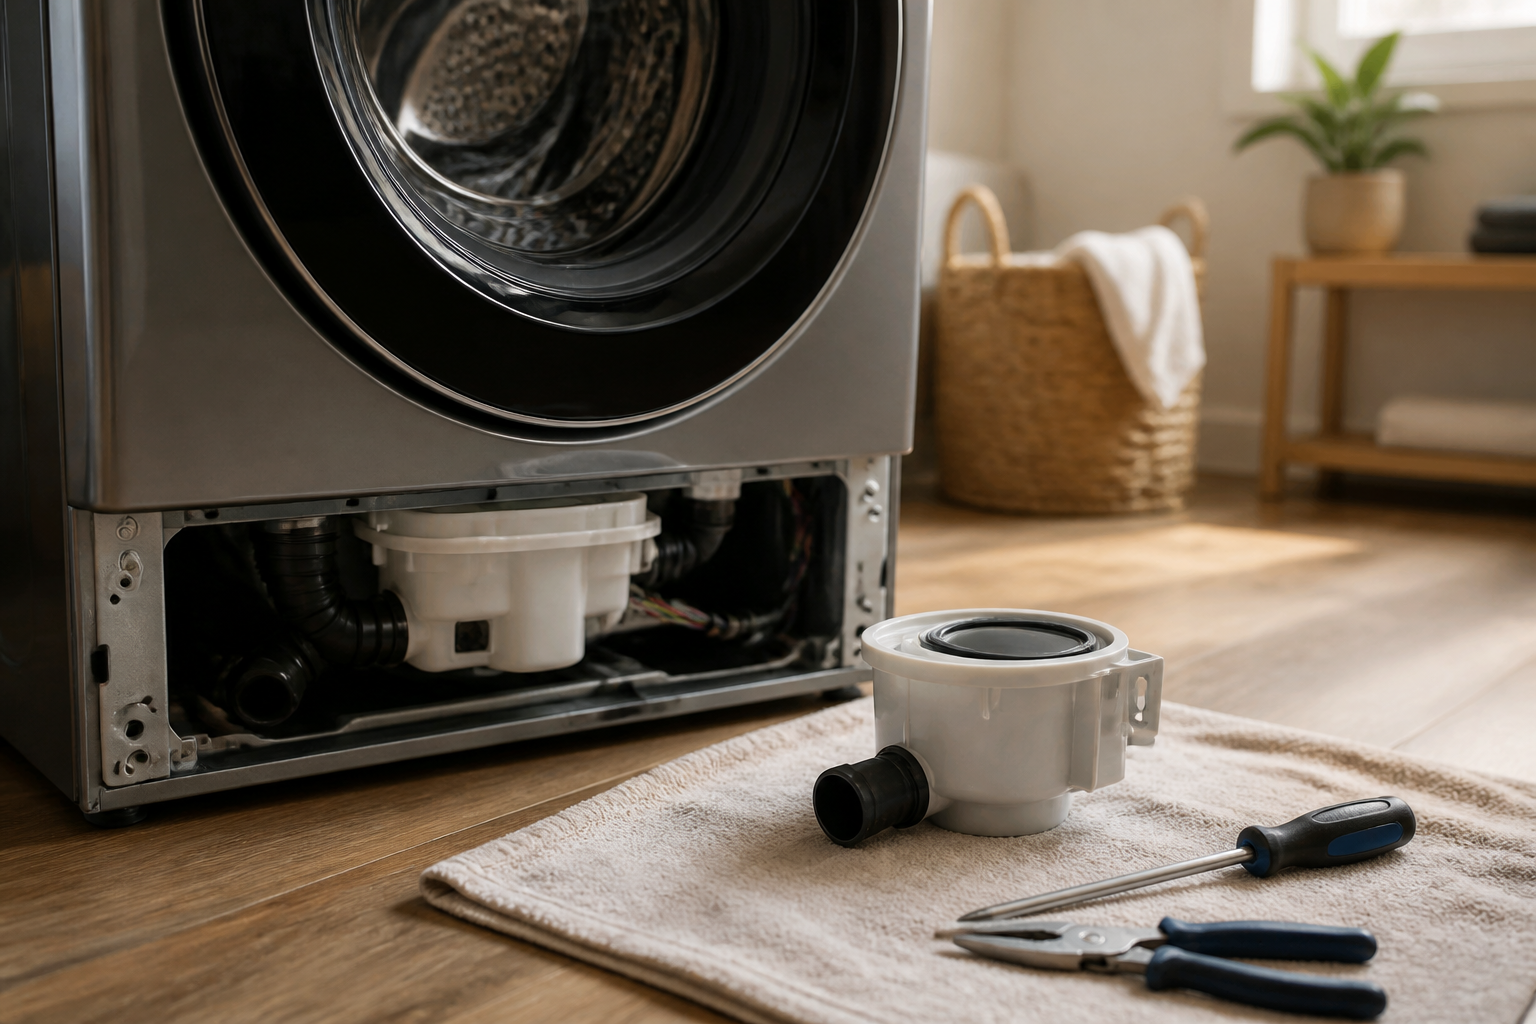
The drain catch on your LG WM4500HBA is a cylindrical filter housing located right in front of the drain pump assembly. Its primary job is to trap foreign objects before they reach the pump impeller. I’ve seen it all—coins, buttons, lint, and hair can all wreak havoc on your pump. When washing clothes, tiny items often escape from pockets and seams into the wash basket. The drain catch helps prevent these nuisances from causing expensive damage to the pump or clogs in your plumbing. If you neglect to clean it regularly, it can become clogged with lint and hair, leading to slow draining or worse, a complete stoppage.
The drain catch assembly is made up of a clear or translucent plastic housing with a fine mesh screen and a threaded cap. As water drains from the tub, it passes through this mesh, catching debris while allowing water to flow freely to the pump. Consistent maintenance is key to keeping your washer in top shape.
Locating the Access Panel on the WM4500HBA
To access the drain catch, you’ll need to remove the bottom-front kick panel—the trim piece located beneath the door. This design choice makes it easy to access the drain system without needing to disassemble the entire washer.
Step-by-step location process:
- Stand in front of your WM4500HBA and look directly below the door opening.
- You should see a horizontal plastic panel about 4 inches above the floor.
- This kick panel is secured by two to three plastic tabs or clips—one in each corner and occasionally one in the center.
- The drain catch housing is usually located behind this panel, typically on the left side of the washer.
- Look for a small drain hose extending from the pump assembly that exits through the same access area.
In most cases, you won’t need tools to remove the kick panel. Just pull firmly upwards from the bottom edge to release the tabs. If your model has a screw in the center bottom, be sure to check for that first.
Manual Water Drainage Before Accessing the Drain Catch
Before you start handling the drain catch, it’s essential to drain any water left in the wash tub and pump assembly. This two-step process involves the emergency drain hose and the drain catch housing itself.
Step 1: Using the Emergency Drain Hose
Your LG WM4500HBA includes a small rubber or plastic hose coiled near the drain pump assembly, separate from the main drain system. This emergency drain hose is about 12-18 inches long and is your first line of defense for removing any standing water.
- After removing the kick panel, locate the small hose clipped near the pump assembly—it will be smaller in diameter than your main drain hose.
- Place a shallow pan, bucket, or large towel beneath the opening.
- Unclip the hose from its retaining bracket.
- Direct the hose into your pan or bucket and let the water drain completely—this usually takes 30-60 seconds and can yield 1-3 gallons of water.
- Once the water stops flowing, you can either reclip the hose to its original position or leave it directed into your bucket if water is still dripping.
Step 2: Draining Water from the Drain Catch Housing
After using the emergency hose, the drain catch housing might still have some water left. It features a small hole or weep opening near its base. You can release additional water by gently tilting the housing or slightly opening the cap—but only after using the emergency hose to avoid spillage.
- Keep your bucket or towel positioned below the drain catch.
- Locate the threaded cap at the bottom of the housing—that’s the part you’ll need to remove.
- Slowly turn the cap counterclockwise a quarter turn (90 degrees) only—do not remove it completely just yet.
- Allow any remaining water to drip into your bucket for 10-15 seconds.
- Once the dripping stops, you can fully remove the cap and access the filter mesh.
Removing and Cleaning the Drain Catch Filter on the WM4500HBA
Now that the water has been drained, you can safely remove and inspect the drain catch assembly on your WM4500HBA.
Removal Process
- Using your hand (no tools needed), grip the threaded cap firmly and rotate it counterclockwise—the WM4500HBA uses standard right-hand threads, so counterclockwise means “open.”
- After approximately 4-5 full rotations, the cap will come free from the housing.
- Be prepared for a small amount of residual water as you remove the cap—keep your bucket positioned below.
- The cap assembly includes the mesh screen, which is either molded into or attached to the underside of the cap.
- Set the cap and mesh aside on a clean surface for inspection.
What to Look For Inside the Drain Catch Housing
Now take a look inside the open housing of your WM4500HBA. You’ll see where debris collects. Common items include:
- Lint and hair—typically forms a wet mat that clings to the interior walls.
- Coins—often found at the very bottom; the WM4500HBA’s drain catch has caught many people’s loose change.
- Buttons and snaps—these often fall from garments during the wash cycle.
- Small plastic fragments—from broken zippers or undissolved detergent pods.
- Sand and dirt—especially common if you wash work clothes or outdoor gear.
- Pet hair—if you wash pet bedding or clothing with animal hair.
- Hard water deposits—mineral buildup that appears as white or tan crusty material.
Cleaning the Filter Mesh and Cap
- Remove any large debris by hand from inside the housing—reach in with your fingers and pull out accumulated lint and hair.
- Discard this material in a trash can—do not flush it down a sink or toilet.
- Take the cap assembly with its attached mesh screen under warm running water.
- Use your fingers or a soft brush to gently rub the mesh surface under the running water, working from both sides to dislodge trapped lint.
- For stubborn lint or mineral deposits, soak the cap in warm water with a small amount of white vinegar for 15-20 minutes, then scrub again.
- Avoid abrasive scrubbers or harsh chemicals that might scratch or damage the plastic mesh.
- Rinse the cap thoroughly until water runs clear through the mesh.
- While the cap is clean, wipe the inside of the housing with a damp cloth to remove any remaining debris or sludge.
- Inspect the interior walls of the housing for cracks or damage.
Inspecting and Replacing the Drain Catch Housing
With the drain catch removed from your WM4500HBA, take a good look at both the cap assembly and the housing for any signs of cracks, splits, or damage that may require replacement.
Signs the Housing Needs Replacement
- Visible cracks in the plastic—even small hairline cracks can eventually lead to leaks.
- Cloudy or discolored areas—may indicate structural weakness or stress.
- Threads that are stripped or damaged—this can prevent the cap from sealing tightly, causing leaks.
- Mesh screen with holes or tears—that defeats the entire purpose of the drain catch.
- Persistent leaking from the drain catch area—even after thorough cleaning.
- Cracks around the base where the housing connects to the pump—indicates stress failure.
If you spot any of these issues, it’s time to order a replacement housing assembly. The part number for the LG WM4500HBA drain catch housing is 5221EA2001T. Just remember to verify this with your specific model number before ordering. This is the complete housing with integrated mesh and cap.
If only the cap or mesh is damaged but the main housing is intact, you may be able to order just the cap assembly. However, I recommend replacing the entire housing as a unit for optimal reliability.
Reinstalling the Drain Catch on the WM4500HBA
Once you’ve cleaned or replaced the drain catch components, putting everything back together is straightforward.
- Make sure both the cap assembly and the housing opening are completely dry.
- Align the threaded cap with the opening on the drain catch housing.
- Begin turning the cap clockwise by hand—you’ll feel it catch the threads.
- Continue turning clockwise until the cap is snug—avoid overtightening with tools as this can crack the plastic housing.
- The cap should be tight enough that you can’t easily turn it with your fingers, but you shouldn’t need pliers or wrenches.
- Ensure the seal is even all the way around—the cap should sit flush against the housing lip.
When to Replace the Entire Drain Pump vs. Just Cleaning the Filter
For most cases, cleaning the drain catch resolves drainage issues. However, sometimes the problem lies deeper within the pump assembly itself.
When Cleaning the Drain Catch Is Sufficient
- Your WM4500HBA drains slowly or not at all, but the catch is obviously clogged with lint and debris.
- You find coins or buttons in the drain catch that may have been blocking flow.
- After cleaning, your washer drains normally again.
- There are no error codes displayed on the control panel.
- You hear normal pump operation sounds after reassembly.
When You Need to Replace the Drain Pump
Consider replacing the entire pump assembly on your WM4500HBA if you observe any of these conditions:
- Grinding or squealing noises coming from the pump area during the drain cycle—this indicates bearing or impeller damage.
- Visible water leaking from cracks in the pump housing (not the catch).
- Error codes displayed—specifically dE, OE, or PE codes indicating drain issues that persist after cleaning the catch.
- Water backing up into the tub even after thoroughly cleaning the catch and verifying the drain hose is not clogged.
- The drain catch is clean but water won’t drain—this suggests the pump impeller is seized or broken.
- Visible debris inside the pump beyond what the drain catch was designed to catch—this may indicate impeller damage.
The drain pump assembly for the WM4500HBA includes the catch housing, pump motor, and impeller as a single unit. The part number is usually 4681EA2001T, but always verify compatibility with your specific machine.
Reassembly and Leak Testing
After reinstalling the drain catch on your WM4500HBA, it’s important to test for leaks before running a full wash cycle.
Pre-Test Checks
- Replace the kick panel by aligning it with the bottom of the washer cabinet and pressing upward until the plastic tabs lock into place.
- Close and lock the washer door.
- Set the cycle to a short drain-only test or the smallest wash cycle available.
- Do not use hot water for this test—stick to cold water only.
- Start the cycle and let it fill slightly, then move to the drain phase.
Leak Inspection During Test Cycle
- As soon as the drain cycle begins, pause the machine if possible or discreetly check the kick panel for leaks.
- Look for water dripping from the drain catch assembly, the threads, or the cap.
- Check the area around the pump connection for any spray or leaking.
- If you see any leaks, immediately stop the cycle and tighten the cap slightly more—but don’t over-torque.
- If leaking continues after tightening, the housing may be cracked and require replacement.
- If no leaks appear, let the full drain cycle complete.
- Once the cycle is finished, inspect one more time while the machine is empty but before running a full wash.
Full Cycle Test
Finally, run a complete wash cycle on your WM4500HBA with a small load of towels or similar items. This tests the drain catch under full load conditions where maximum water volume flows through the system. After the cycle completes and the machine has drained, check the kick panel area one last time for any signs of leakage.
Maintenance Schedule: How Often to Clean the Drain Catch
The frequency with which you should clean the drain catch on your WM4500HBA depends on how often you use it and what you wash.
Recommended Cleaning Frequency
- Heavy usage households (washing daily or near-daily)—clean every 1 month.
- Moderate usage households (washing 3-5 times per week)—clean every 1-3 months.
- Light usage households (washing 1-2 times per week)—clean every 3-6 months.
- If you have pets that shed—increase frequency to monthly regardless of washer usage.
- If you wash work clothes, sports gear, or outdoor clothing—clean every 1-2 months.
Warning Signs Your WM4500HBA Needs Immediate Drain Catch Cleaning
- Slow draining that wasn’t present before.
- Water remaining in the tub after a cycle completes.
- Gurgling or drain sounds during operation.
- Visible lint or debris floating in the standing water.
- A musty or moldy smell coming from the washer.
- Error codes related to drainage appearing on the display.
As a best practice, inspect the drain catch on your WM4500HBA every month, even if you don’t plan on a full cleaning. A quick look can alert you to debris buildup before it becomes a significant problem.
Frequently Asked Questions
What is the exact location of the drain catch on the LG WM4500HBA?
The drain catch is located behind the bottom-front kick panel of the WM4500HBA, accessible without tools. It’s a clear or translucent cylindrical housing with a threaded cap at the bottom, positioned on the left side of the washer when facing it. The housing sits just above the floor and connects directly to the drain pump assembly.
Do I need any special tools to remove the drain catch from my WM4500HBA?
No special tools are required. The drain catch cap on the WM4500HBA unscrews by hand—you simply grip it firmly and turn counterclockwise. The kick panel is also removed by hand, although some models may have a single center screw that you should check for. A bucket or towel for water is essential, but no wrenches, pliers, or screwdrivers are needed.
How much water will drain out when I open the drain catch on my WM4500HBA?
After using the emergency drain hose first (which removes 1-3 gallons), the drain catch itself typically holds less than 1 liter of water. Most residual water will have drained through the emergency hose, but always keep a bucket handy as some water may still drip when you open the housing.
Can I clean the drain catch on the WM4500HBA without removing it?
To effectively clean the drain catch, you must remove the cap assembly. While you could theoretically flush water through it while it’s still installed, you would miss any coins, buttons, or debris trapped inside. The proper procedure takes less than five minutes on the WM4500HBA.
Recommended Parts & Tools
LG Washing Machine Drain Catch Tub Assembly
This is the exact replacement drain catch component for the LG WM4500HBA model. Installing a new drain catch assembly ensures proper water drainage and prevents debris from damaging your pump.
Flathead and Phillips Head Screwdriver Set
You’ll need both flathead and Phillips head screwdrivers to remove the access panel and disconnect the drain catch assembly from your washing machine. A quality screwdriver set ensures you won’t strip screws during disassembly.
White Vinegar and Baking Soda Cleaning Solution
Before reinstalling the new drain catch, use vinegar and baking soda to clean the drain pump area and remove any lint or debris buildup that may have accumulated. This preventative cleaning helps extend the life of your new component.
The Drain Catch Assembly That Actually Stops Leaks and Odors on the WM4500HBA
If you’re replacing the drain catch because the old one is cracked, warped, or no longer seals properly, ordering the correct OEM assembly saves you from repeated leaks and the frustration of water pooling under your washer. This is the part that does the actual work—cleaning won’t fix a damaged housing.
What works
- Exact fit for the WM4500HBA—no adapter guessing or forcing clips into place like with generic knockoffs.
- The sealing gasket is thicker and more durable than aftermarket versions, so you won’t see water leaking from the access panel again after three months.
- Comes with the internal mesh screen already installed, so you don’t waste an hour trying to source and fit a compatible filter separately.
What doesn’t
- More expensive than generic drain traps, but the cost difference disappears fast when a cheap one fails and soaks your laundry room floor.
- If your actual problem is a clogged inlet hose or kinked drain line, swapping the catch won’t help—diagnosis matters first.
I’ve seen homeowners order the wrong assembly three times because they thought the leak was just a loose filter—take five minutes to confirm the catch housing is actually cracked or the seal is gone before ordering. Once you’ve verified damage, grab the LG Washing Machine Drain Catch Tub Assembly and your leak problem is solved for real.
About This Article

Written by Dave Holt. Dave Holt has been taking apart and fixing household appliances since he was a teenager who couldn't leave a broken one alone. Eighteen years later, after fixing things for neighbors, friends, and anyone who'd let him, he's seen almost every failure mode there is. When he writes a repair guide here, it's based on the actual job, not a manufacturer overview. More about this site.
Scope and limits. Dave is a self-taught repairer, not a certified appliance technician. Unplug before you open anything, and leave sealed refrigeration systems, gas connections, and hardwired circuits to a qualified technician.


