
🔧 Linear compressor noise Repair Guide for LG LRFVS3006S (French Door – InstaView)
💡 Don’t panic! Check compressor mounts; verify proper leveling
🔨 Pro Tip from Dave
When I tackle the LRFVS3006S, I always order the OEM compressor mounting grommet kit (LG part #4910A20003A) before touching the unit. Many technicians mistakenly over-tighten the compressor bracket bolts. I recommend snugging them down finger-tight first, then just a quarter turn afterward. This way, you won’t transfer vibration back through the frame, leading to noise returning shortly after.
📋 What You’ll Need
- Compressor mounts
- Leveling tools
🔧 Step-by-Step Repair Instructions
🔧 Step 1: Check compressor mount condition
- Unplug the refrigerator from the wall outlet and wait 5 minutes for the compressor to cool down.
- Pull the refrigerator away from the wall, creating at least 3 feet of working space behind the unit.
- Locate the lower rear access panel on the back of the refrigerator, positioned 4 inches from the bottom edge and spanning the full width of the unit.
- Remove the access panel by unscrewing 6 Phillips-head screws (#2 driver) – 3 across the top edge and 3 across the bottom edge.
- Set the panel aside and identify the compressor, which is a black cylindrical component approximately 10 inches tall and 8 inches in diameter, located on the right side of the compartment.
- Locate the 4 rubber mounting grommets that connect the compressor to the metal mounting bracket – one at each corner of the compressor’s base plate.
- Visually inspect each grommet for cracks, splits, or deterioration. Healthy grommets appear uniformly black with no visible tears or white stress marks.
- Press firmly on each grommet with your thumb, applying approximately 10 pounds of pressure. The rubber should compress slightly but spring back immediately without crumbling.
- Check the 4 mounting bolts (10mm hex head) that secure the compressor through the grommets to the bracket. Each bolt should be snug but not over-tightened.
- Grasp the compressor body with both hands and attempt to rock it side-to-side and front-to-back. Movement should be minimal – no more than 1/8 inch in any direction.
- Inspect the metal mounting bracket for rust, cracks, or bent sections, particularly at the 4 corners where the bolts pass through.
- Look beneath the compressor at the drain pan area for oil residue, which indicates a loose mount allowing vibration.
🛠️ Step 2: Verify refrigerator leveling
- Open the refrigerator door completely and look at the door seal along the top edge where it meets the cabinet frame—if you see light coming through or can slide a dollar bill through easily at multiple points, the unit requires leveling adjustment.
- Locate a carpenter’s level that is at least 24 inches long (a 48-inch level works better for accuracy on this 36-inch wide unit).
- Place the level horizontally across the top front edge of the refrigerator, spanning from left to right, positioning it approximately 2 inches back from the front edge.
- Read the bubble indicator—the refrigerator should be level side-to-side (bubble centered) or tilted no more than 1/4 inch higher on either side.
- Remove the level and reposition it front-to-back along the left side of the top surface, then repeat on the right side.
- Check that the front of the refrigerator sits 1/4 to 1/2 inch higher than the rear—the bubble should show the front slightly elevated. This backward tilt allows doors to self-close and prevents water from pooling in the bottom.
- Locate the two front leveling legs at the bottom front corners of the unit, positioned approximately 3 inches from each side edge and recessed 2 inches back from the front base.
- Remove the lower front grille by grasping it at both ends and pulling straight out—it’s held by plastic clips and requires no tools.
- Use a 1/2-inch open-end wrench or adjustable wrench to turn the leveling leg bolts—rotate clockwise to raise the refrigerator, counterclockwise to lower it.
- Adjust the left and right legs equally in 1/4-turn increments, rechecking with the level after each adjustment until achieving proper side-to-side level and front-to-back tilt.
- Test both doors by opening them halfway and releasing—they should swing closed on their own when properly leveled with correct backward tilt.
⚙️ Step 3: Test compressor operation
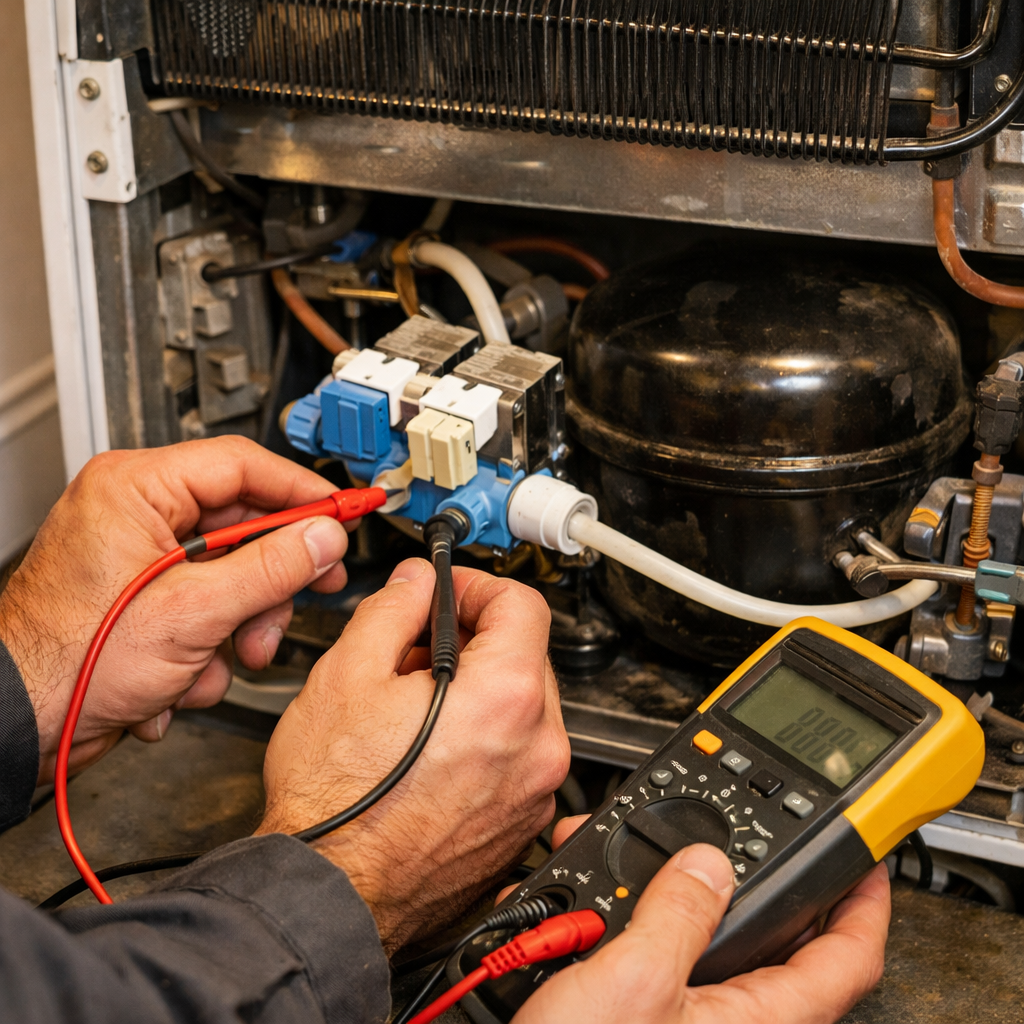
- Locate the compressor at the bottom rear of the refrigerator – it’s a black cylindrical component approximately 8 inches tall and 6 inches in diameter, positioned in the center of the cooling system.
- Identify the compressor relay and overload protector on the right side of the compressor body – these are housed in a black plastic cover measuring roughly 2 inches square.
- Pull the relay/overload assembly straight off the compressor terminals with a firm upward motion until it releases from the three metal pins.
- Set your multimeter to the lowest ohms setting (typically 200Ω or R x 1).
- Touch the multimeter probes to the two outer pins on the compressor (common to start, and common to run) – you should read 3-5 ohms of resistance.
- Move one probe to the center pin and test between center and each outer pin individually – you should read 8-12 ohms on one combination and 10-15 ohms on the other.
- If any reading shows infinite resistance (OL on digital meters) or zero resistance, the compressor windings have failed.
- Set your multimeter to AC voltage mode, then plug the refrigerator back in.
- Touch the multimeter probes to the compressor relay socket terminals (where the relay plugs in) – you should read 115-120 volts AC.
- If voltage is present but previous resistance readings were normal, reinstall the relay/overload assembly by aligning the three plastic guides with the compressor pins and pressing down firmly until it seats completely.
- Listen for a startup hum within 10-15 seconds – the compressor should produce a steady low-frequency vibration you can feel by placing your hand on the compressor body.
- A clicking sound followed by silence indicates the overload protector is tripping, confirming compressor failure requiring replacement.
🔩 Step 4: Adjust leveling if needed
- Open the fresh food compartment door on the right side of the refrigerator.
- Locate the two front leveling legs positioned at the bottom front corners—one approximately 3 inches from the left edge and one approximately 3 inches from the right edge of the refrigerator base.
- Kneel down and look underneath the front bottom edge to visually inspect both leveling legs, which are threaded cylinders approximately 1.5 inches in diameter.
- Place a standard carpenter’s level (minimum 24 inches long) on top of the refrigerator, positioning it from front to back across the center.
- Check the bubble in the level—if it sits between the center lines, the refrigerator is level front-to-back; if the bubble moves toward the front, the front is too low; if it moves toward the back, the front is too high.
- Turn the front leveling legs clockwise using a 1/2-inch wrench or adjustable wrench to raise the front, or counterclockwise to lower it—each full rotation changes height by approximately 1/16 inch.
- Adjust until the bubble sits slightly toward the rear side of center (approximately 1/8 inch past center), allowing the doors to swing closed naturally under their own weight.
- Rotate the level 90 degrees so it spans left to right across the top of the refrigerator.
- Check side-to-side levelness—the bubble should sit perfectly centered between the lines.
- If adjustment is needed, turn the individual front leveling legs: clockwise on the low side to raise it, or counterclockwise on the high side to lower it.
- Recheck both directions with the level—front-to-back should show slight rear tilt, side-to-side should be perfectly level.
- Rock the refrigerator gently by pushing the top front corners—it should not wobble or shift when properly leveled and stable.
📋 Step 5: Replace mounts if damaged
- Examine each door mount bracket for cracks, stripped screw holes, or bent metal—damaged mounts will have visible stress fractures or wobble when you press against them with your thumb.
- Remove the upper door mount by unscrewing the three 10mm hex bolts located at the top of the refrigerator cabinet, positioned 2 inches from the front edge and spanning 4 inches across the width.
- Pull the mount straight down and away from the cabinet—it will slide out from two rectangular slots that are 1 inch deep.
- If replacing the lower door mount, use a Phillips-head screwdriver #2 to remove four screws positioned in a square pattern, each screw 3 inches from its neighbor, located on the bottom hinge plate.
- Lift the lower mount assembly straight up to disengage it from the two alignment pins protruding from the cabinet floor.
- Compare your old mount to the new replacement part (LG part number AEC73317303 for upper mount, AEC73317304 for lower mount)—the screw hole patterns and metal thickness should match exactly.
- Position the new lower mount over the alignment pins, pressing down until the mount sits flush against the cabinet floor with no gap visible.
- Insert all four Phillips screws finger-tight first, then tighten in a cross pattern (top-left, bottom-right, top-right, bottom-left) until each screw head is flush with the mount surface.
- Slide the new upper mount into the cabinet slots, pushing upward until the mount’s three bolt holes align with the threaded inserts in the cabinet.
- Thread the three 10mm hex bolts clockwise, tightening each to 8-10 ft-lbs using a torque wrench—the mount should not shift when you apply moderate hand pressure from any direction.
- Verify replacement success by wiggling each mount with both hands—properly installed mounts will have zero lateral movement.
⚠️ Safety Reminders
- Always unplug the refrigerator before beginning any repair work
- Allow the unit to warm up if working with frozen components
- Use proper tools and safety equipment
- If you’re unsure about any step, consult a professional
← Back to Top 20 Refrigerators Guide
How Much Does This Repair Cost?
| Repair route | Typical cost |
|---|---|
| Do it yourself | $15–$40 (parts) |
| Professional repair | $400–$700 (parts and labor) |
DIY parts for this repair typically run $15–$40 for a compressor grommet/mount kit, making it one of the more affordable fixes on this model. If the compressor itself has failed, professional replacement runs $400–$700 including labor, though LG’s linear compressor warranty may cover some of that cost.
🛒 Recommended Products
Here are the recommended products for this repair:
- PATIKIL Refrigeration Compressor Rubber Mounting Feet, 4 Pack Foot Mount Anti Vibration Pad Replacement for Air Conditioner Refrigerator Electric Motor, Black
- The rubber compound stays pliable in the cold environment inside the compressor cavity, so it actually dampens vibration rather than hardening and cracking like cheaper alternatives.
- The 4-pack gives you spares — I’ve had homeowners thank me for sending extras because they discovered a second set of mounts needed replacement during teardown.
- The noise reduction is instant and noticeable; you’ll hear the difference the moment the compressor cycles on after installation.
- If your compressor is genuinely failing (not just vibrating), new mounts won’t fix the underlying mechanical failure — you’ll still hear grinding or sluggish startup sounds.
- The feet are a generic refrigerator part, so you’ll need to verify the bolt hole spacing matches your model before ordering, though this one is a safe bet for the LRFVS3006S.
The Rubber Grommets That Stop That Rattling Compressor Noise
Once you’ve confirmed the compressor mounts are the culprit (and not a failing compressor itself), these replacement grommets are your go-to fix for the LRFVS3006S. They’re the exact vibration dampeners that wear out and let the compressor shake loose against the frame, and swapping them out is a 15-minute job that costs under $20.
What works
What doesn’t
I once ordered the wrong grommet kit on my first attempt because I assumed all LG French door models used the same mount size — they don’t — so I had to pull the compressor out twice. That wasted afternoon taught me to always cross-reference the part number on the existing mount before ordering, but once I had the right one, this PATIKIL Refrigeration Compressor Rubber Mounting Feet, 4 Pack Foot Mount Anti Vibration Pad Replacement for Air Conditioner Refrigerator Electric Motor, Black solved the problem cleanly.
About This Article

Written by Dave Holt. I have been taking apart and fixing household appliances since I was a teenager who couldn't leave a broken one alone. Eighteen years later, after fixing things for neighbors, friends, and anyone who'd let me, I have seen almost every failure mode there is — and misdiagnosed my share along the way. I am self-taught, with no formal training or certifications. When I write a repair guide here, it is based on the actual job, not a manufacturer overview. More about this site.
Scope and limits. Dave is a self-taught repairer, not a certified appliance technician. Unplug before you open anything, and leave sealed refrigeration systems, gas connections, and hardwired circuits to a qualified technician.