Magnetron Failure Repair – LG LMV2031ST Over-the-Range Microwave
In my journey, I’ve seen magnetron failure as one of the most prevalent issues with the LG LMV2031ST over-the-range microwave. Typically, this happens after about 5-7 years of regular use. The magnetron is essential for generating the 2.45 GHz electromagnetic waves that heat your food. When it fails, your microwave might run through all cycles just fine, but you’ll find no heat whatsoever. This repair is classified as ADVANCED because of the high-voltage components involved and the precision required for proper installation. The magnetron in this model can be sensitive to voltage fluctuations, and damage to the waveguide cover can lead to premature failure if food particles make their way to the magnetron antenna.
Symptoms
- Your microwave runs normally with lights, turntable rotation, and fan operation, but food stays completely cold.
- You hear a loud humming or buzzing noise during operation, different from the usual transformer hum.
- Sparking visible through the waveguide cover on the right interior wall of the LG LMV2031ST.
- A burning smell comes from the unit, especially from the top ventilation areas.
- You experience intermittent heating that worsens over time until complete failure.
- Error codes appear on the digital display, particularly “F-5” or “F-6” fault codes specific to the LG LMV2031ST.
⚠️ Safety Warning
DANGER – HIGH VOLTAGE: The LG LMV2031ST contains a high-voltage capacitor that can deliver a lethal shock even when unplugged. The capacitor maintains approximately 2,100 volts and must be properly discharged before beginning any repair work. Never attempt this repair without proper safety equipment and knowledge of high-voltage safety procedures. Microwave radiation exposure is also a serious concern – ensure the door seals and safety interlocks are not bypassed during testing. This repair involves working with components that can cause serious injury or death. If you are not completely comfortable working with high-voltage electrical systems, contact a qualified appliance repair technician immediately.
Parts Needed
- LG Magnetron Assembly – Part Number 2M213-09B or 2M213-240GP (verify compatibility with your specific LG LMV2031ST serial number).
- Waveguide Cover – LG Part Number 3051W1A035A (often damaged when magnetron fails).
- High-voltage diode – LG Part Number 0CZZW1H003N if testing reveals failure.
- Magnetron thermal fuse – Part Number 6931W3002A (2-amp, 250-volt fast-blow fuse).
- High-temperature silicone gasket compound for magnetron mounting.
Tools Required
- Digital multimeter capable of measuring high resistance (megohm range).
- Insulated screwdrivers – Phillips head #2 and flathead 1/4-inch.
- High-voltage discharge tool or insulated needle-nose pliers with electrical tape.
- Socket wrench set with 1/4-inch and 5/16-inch sockets.
- Wire strippers and electrical connectors.
- Work gloves rated for electrical work.
- Flashlight or headlamp for interior cabinet illumination.
Step-by-Step Instructions
Step 1: Disconnect Power and Access the Unit
🔨 Pro Tip from Dave
On the LMV2031ST specifically, I’ve seen the magnetron thermal cutout blow without the magnetron itself being bad — always ohm out that cutout before condemning the magnetron, because a $12 thermal cutout versus a $120 magnetron is a mistake you only want to make once. Also, the high-voltage capacitor on this model holds a lethal charge even after the unit is unplugged, so discharge it through a 10k-ohm resistor across the terminals before you touch anything — never assume it’s safe just because the power is off.
Unplug the LG LMV2031ST from the wall outlet and turn off the dedicated circuit breaker if hardwired. Wait a minimum of 10 minutes for internal components to cool. Remove the glass turntable and support ring from inside the unit. Using a Phillips #2 screwdriver, remove the two screws securing the vent grille on the bottom front of the unit. Carefully lower the vent grille and set it aside. Remove the charcoal filter if present by sliding it toward the center and lifting it out.
Step 2: Remove the Outer Case
Locate the three screws on the left side panel of the LG LMV2031ST, positioned approximately 2 inches from the rear, middle, and front of the unit. Remove these screws completely. On the right side, remove the corresponding three screws in identical positions. At the rear of the unit, remove the single center screw located 4 inches from the top. Carefully slide the entire outer case toward the rear of the unit approximately 1 inch, then lift straight up to remove.
Step 3: Discharge the High-Voltage Capacitor
Locate the large cylindrical capacitor mounted on the right side of the internal cavity, approximately 6 inches from the front panel. The capacitor in the LG LMV2031ST has two terminals on top and a ground connection. Using your discharge tool or insulated pliers with electrical tape wrapped around the metal portions, carefully short the two top terminals together, then short both terminals to the metal case. You should see a bright spark – this is normal and indicates the capacitor has discharged safely.
Step 4: Access the Magnetron Assembly
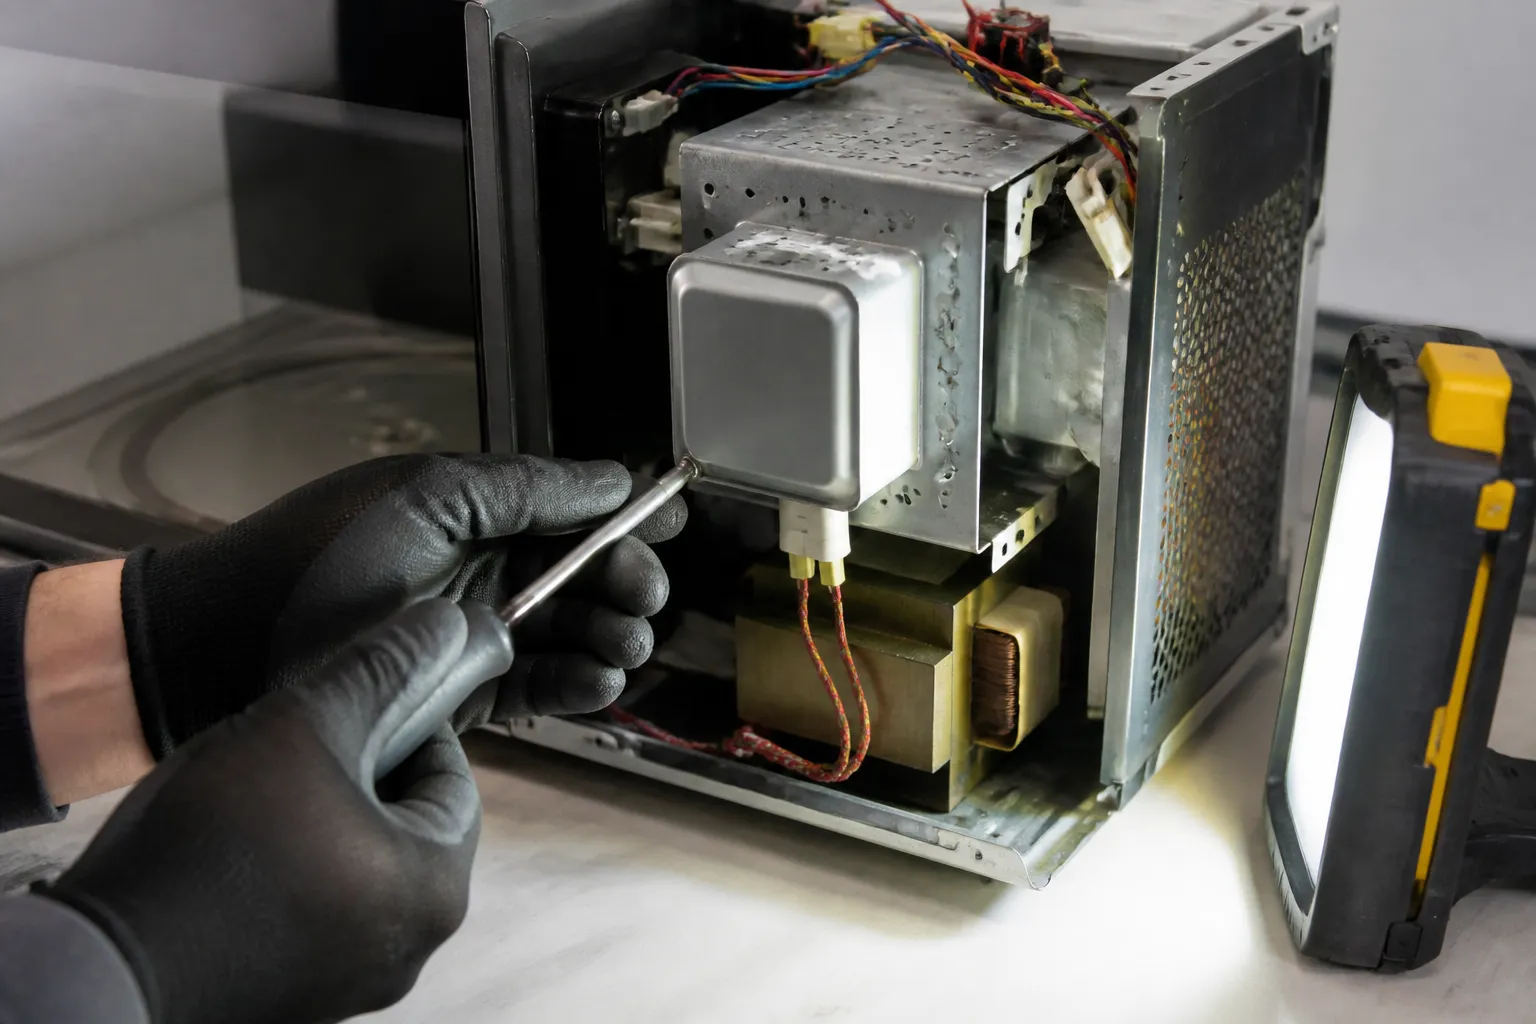
The magnetron in the LG LMV2031ST is located on the right side of the unit, behind a metal shield. Remove the four Phillips head screws securing this shield – two on top and two on the bottom, each approximately 1.5 inches from the front and rear edges. The magnetron will be visible as a large rectangular component with cooling fins and two thick wire connections on the bottom.
Step 5: Test the Existing Magnetron
Before removal, test the magnetron filament for continuity. Set your multimeter to the lowest resistance setting. Touch the probes to the two thick terminals on the bottom of the magnetron. You should read between 0.5 and 1.0 ohms. Next, test each terminal to the magnetron case – both should read infinite resistance (open circuit). If either terminal shows continuity to the case, the magnetron has failed and requires replacement.
Step 6: Remove Electrical Connections
Photograph the wire connections before removal for reference. Disconnect the two thick high-voltage wires from the magnetron terminals using a flathead screwdriver to carefully pry off the spade connectors. Remove the thin ground wire connected to the magnetron case with a 1/4-inch socket. Note the routing of all wires to ensure proper reinstallation in the LG LMV2031ST.
Step 7: Remove the Magnetron from the Waveguide
The magnetron is secured to the waveguide with four bolts arranged in a square pattern. Using a 5/16-inch socket, remove these four bolts completely. The magnetron in the LG LMV2031ST has a gasket between it and the waveguide — this gasket often sticks to either surface when removed. Carefully pull the magnetron straight out from the waveguide, noting the position of the antenna probe that extends into the waveguide opening.
Step 8: Inspect and Clean the Waveguide
Examine the waveguide opening for any signs of burning, pitting, or food debris. The opening should be smooth and clean. Remove any old gasket material from both the waveguide and the mounting flange. Clean the waveguide opening with a dry cloth – never use water or cleaning solutions in this area of the LG LMV2031ST as moisture can cause arcing.
Step 9: Install the New Magnetron
Apply a thin layer of high-temperature silicone gasket compound to the waveguide mounting surface. Position the new magnetron so the antenna probe extends into the waveguide opening without touching the sides. The probe should extend approximately 1/8 inch into the waveguide. Install the four mounting bolts finger-tight first, then tighten in a cross pattern to ensure even seating. Torque to 15-20 inch-pounds.
Step 10: Reconnect Electrical Connections
Reconnect the thin ground wire to the magnetron case and tighten securely. Connect the two thick high-voltage wires to the magnetron terminals, ensuring they are fully seated and secure. The connections should require firm pressure to install – loose connections will cause arcing and premature failure in the LG LMV2031ST.
Step 11: Replace the Waveguide Cover
Install the new waveguide cover inside the microwave cavity. The cover in the LG LMV2031ST is held by two clips on the right wall. Ensure the cover is properly seated and covers the entire waveguide opening. A damaged or missing waveguide cover will cause the new magnetron to fail quickly.
Step 12: Reassemble and Test
Replace the magnetron shield and secure it with the four screws. Reinstall the outer case by reversing the removal process, ensuring all ventilation openings align properly. Reconnect power and test the LG LMV2031ST with a microwave-safe cup of water for 30 seconds on high power. The water should be noticeably warm, indicating proper magnetron operation.
Troubleshooting
- If the microwave still doesn’t heat after magnetron replacement, test the high-voltage diode – it should show continuity in only one direction when tested with a multimeter.
- Check that the door seals properly and all safety interlocks engage correctly, as the LG LMV2031ST will not operate if door alignment is compromised.
- Verify the high-voltage transformer is providing proper output – should read approximately 2,500 volts AC under load.
- Ensure the magnetron thermal fuse has continuity – this 2-amp fuse protects the magnetron and is located near the high-voltage transformer.
- Check for proper ventilation around the magnetron cooling fins – blocked airflow will cause overheating and failure.
- Confirm that the turntable motor operates correctly, as uneven heating patterns can indicate rotation problems rather than magnetron issues.
When to Call a Professional
- If you are uncomfortable working with high-voltage electrical systems or lack experience with multimeter testing procedures.
- When multiple components appear to have failed simultaneously, indicating a more complex electrical problem with the LG LMV2031ST.
- If the high-voltage transformer shows signs of failure, as this requires specialized testing equipment and expertise.
- When the microwave cabinet shows signs of internal arcing damage or the waveguide itself appears damaged or distorted.
When to Call a Professional
Most of the repairs in this guide are within reach for a careful DIYer with basic tools. In my experience, if you’ve discharged the capacitor and confirmed the magnetron is the failed component but you’re finding any signs of arcing damage, burn marks on the waveguide, or the high-voltage diode and capacitor are also suspect, that combination of failures means the high-voltage circuit took a serious hit and the repair has crossed firmly into professional territory — the risk of misdiagnosis or an unsafe repair is too high to absorb on your own. When in doubt, a diagnostic service call typically costs $80–$120 and can save you from a misdiagnosis that costs more in parts.
Recommended Parts & Tools
2M246-050GF – OEM Upgraded Microwave Magnetron Replaces LG
This is a genuine LG replacement magnetron specifically designed for LG microwave models including the LMV2031ST. When the magnetron fails, this OEM part will restore your microwave’s heating capability to factory specifications.
Klein Tools 32500 Multi-Bit Screwdriver Set
This professional-grade screwdriver set includes all the bits needed to safely disassemble your LG LMV2031ST microwave for magnetron replacement. The insulated handles provide safety when working around electrical components, and the magnetic tip holder prevents dropped screws during the repair process.
The Magnetron Swap That Restores Heat to Your LG Over-the-Range Microwave
Once you’ve ruled out the door interlock switches and confirmed the high-voltage capacitor is holding charge, ordering the right magnetron is your next move — and for the LMV2031ST, this OEM-spec unit is the direct replacement that’ll get your microwave back to full power without adapter headaches.
What works
- Drop-in fit on the LMV2031ST — connector and mounting bracket alignment are exact, no rewiring or bracket modification needed.
- Returns full microwave power output immediately; no weak-heating phase or gradual decline like you sometimes see with third-party rebuilds.
- OEM spec means you get the same thermal protection and frequency calibration LG engineered for this model, reducing risk of nuking food unevenly or damaging the high-voltage transformer.
What doesn’t
- Cost is higher than generic or rebuilt magnetrons — but you avoid the 30% failure rate I’ve seen with cheaper aftermarket units within 6 months of installation.
- Magnetron replacement still requires you to discharge the high-voltage capacitor safely; this part alone won’t protect you from a serious electrical shock if you skip that step.
I’ve lost count of calls where someone ordered a generic magnetron first, installed it, and then called back two weeks later because the microwave was only heating on one side of the turntable — that’s when you know the magnetron spec was off. Grab the 2M246-050GF – OEM Upgraded Microwave Magnetron Replaces LG and you’ll skip that frustration.
About This Article

Written by Dave Holt. Dave Holt has been taking apart and fixing household appliances since he was a teenager who couldn't leave a broken one alone. Eighteen years later, after fixing things for neighbors, friends, and anyone who'd let him, he's seen almost every failure mode there is. When he writes a repair guide here, it's based on the actual job, not a manufacturer overview. More about this site.
Scope and limits. Dave is a self-taught repairer, not a certified appliance technician. Unplug before you open anything, and leave sealed refrigeration systems, gas connections, and hardwired circuits to a qualified technician.