
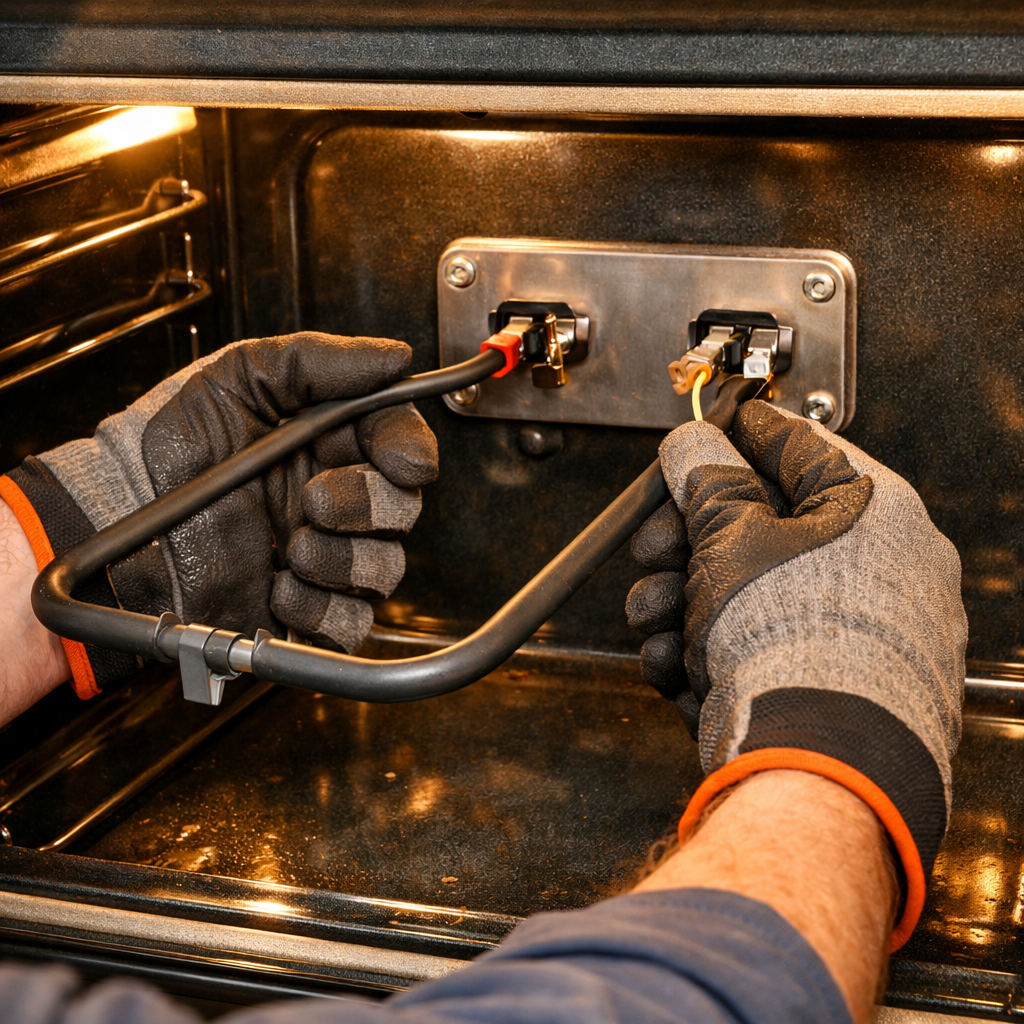

🔩 Cooktop Element (Coil) Repair Guide for Kenmore 790.9735 Series (Electric Range)
🔨 Pro Tip from Dave
When replacing elements on the 790.9735, don’t just swap the bad coil and call it a day—always wiggle and inspect the drip bowl receptacle block where the element prongs plug in. In Kenmore models, the receptacle contacts can easily get scorched or pitted from arcing, and plugging a new element (316442300 for 8″ or 316075101 for 6″) into a damaged receptacle will burn out your brand-new part in no time. Replacing the receptacle block at the same time costs only a few extra bucks and saves you from a repeat repair.
🔍 Symptoms
Element won’t heat
🔧 Part Numbers
- 316442300 (8″)
- 316075101 (6″)
🔧 Required Tools
- None
✔️ Difficulty & Cost
Difficulty: Very Easy
Estimated Cost: $15-35
✔️ Repair Steps
Step 1: Ensure range is cool
1. Switch off the double-pole breaker serving the range at your electrical panel and lock or tag it off, then confirm the range is dead with a contact voltage tester. Don’t rely on the cord: many 790.9735 units are hardwired, and in those that are cord-connected, the receptacle sits behind the range where you can’t reach it without pulling the appliance out.
2. If your range is cord-connected and you can reach the receptacle, pull the plug for an extra layer of safety — grip the plug body, not the cord, and pull straight out. This step is optional; the breaker is what makes the repair safe.
3. Move to the front of the range and visually inspect all four burner coils. Look for any discoloration or shimmer in the air above the elements, indicating residual heat.
4. Hold your palm down about 6 inches above each burner element for 3-5 seconds. You shouldn’t feel any warmth radiating upward. Test all four elements (left front, right front, left rear, right rear).
5. If any element feels warm, wait 15 minutes and retest with the hand-hover method described in sub-step 4.
6. Touch the metal drip pan beneath the element you plan to replace with the back of your fingers. You should feel room temperature metal with no warmth.
7. Locate the glass cooktop surface between the elements and touch it with your palm. It should feel cool to the touch, matching room temperature (approximately 65-75°F).
8. Check the oven door handle by wrapping your full hand around it. It should feel room temperature. If it’s warm, the oven was recently used—wait an additional 30 minutes before proceeding, as residual oven heat can transfer to the cooktop area.
9. Open the oven door and place your hand inside the oven cavity, about 12 inches from the door. The interior air should feel room temperature with no detectable warmth.
Troubleshooting Tips for This Step
If the element still feels warm after 30 minutes: The element may have been on high heat. Large 8-inch elements can retain heat for 45-60 minutes. Wait an additional 15 minutes and retest.
Finding the right breaker: Locate your home’s electrical panel (typically in the basement, garage, or utility room). Look for the breaker labeled “Range,” “Stove,” or “Kitchen Appliance”—it’ll be a double-pole breaker (two switches connected together) rated for 40-50 amps. Flip both switches to the OFF position; they should move to the opposite direction with a definitive click.
To verify power is off: Return to the range and attempt to turn any control knob to a heating position. No indicator lights should illuminate, and elements should remain completely cold after 2-3 minutes.
If indicator lights remain on after cutting power: This indicates a control board capacitor holding a residual charge. Wait 5 minutes for capacitors to fully discharge before touching any components.
Step 2: Lift element
1. Grasp the outer edge of the coil element with both hands, positioning one hand on each side of the coil about 3-4 inches from where it enters the terminal receptacle.
2. Lift the element straight up about 1 inch until you feel resistance. The element will pivot slightly but shouldn’t require force.
3. Pull the element straight toward you (away from the backsplash) with steady pressure. The element terminals will slide out of the receptacle about 1-2 inches. You’ll see two metal prongs (terminals) that were inserted into the receptacle.
4. Once the terminals are 1 inch clear of the receptacle, lift the element upward at a 45-degree angle to fully remove it from the cooktop surface. The element should now be completely free.
5. Examine the two metal terminals on the element. These are flat blade-style connectors, about 1/4 inch wide and 1 inch long. Look for any burn marks, pitting, corrosion, or discoloration on the metal surface.
6. Look into the terminal receptacle (the ceramic block where the element plugs in). You’ll see two metal contact slots. Check for carbon buildup, melted plastic, or damaged metal contacts inside.
Troubleshooting Tips for This Step
If the element won’t lift or pull out: The element may be corroded to the receptacle. Gently rock it side-to-side (not up and down) while pulling to break the connection. – Apply penetrating oil around the base of the terminals where they enter the receptacle. Wait 5 minutes, then attempt removal again. – Never force the element; excessive force can damage the receptacle, which requires a more complex repair.
If a terminal breaks off during removal: The receptacle will need to be replaced along with the element. The terminal receptacle is held by two screws accessible from underneath the cooktop. – A broken terminal can’t be reattached—you must replace the entire element.
If the receptacle pulls out with the element: This indicates the receptacle mounting screws have loosened. Set the element and receptacle aside as one unit. You’ll need to access underneath the cooktop to reattach the receptacle before installing the new element.
Verification of successful removal: The element should be completely free from the cooktop. Both terminals should be intact and straight, not bent or broken. The receptacle should remain firmly mounted in the cooktop opening.
Common mistakes: – Pulling at an upward angle immediately without first pulling straight out can lead to terminal binding. – Twisting the element while removing can bend terminals or damage receptacle contacts. – Applying excessive upward force before the terminals clear the receptacle can break the ceramic receptacle block.
Step 3: Pull out from receptacle
1. Locate the element terminal block at the end of the element coil, where two metal prongs (terminals) insert into the porcelain or ceramic receptacle block mounted to the cooktop surface.
2. Grip the element firmly with both hands—place one hand on the outer coil ring about 3-4 inches from the terminal block, and your other hand on the terminal block itself.
3. Pull the element straight outward (away from the receptacle) using steady, even pressure. Apply about 5-10 pounds of force. The terminals should slide out smoothly from the receptacle slots.
4. If the element resists being pulled out, rock it gently side-to-side (no more than 1/4 inch in each direction) while maintaining outward pressure. This helps break any corrosion seal between the terminals and receptacle contacts.
5. Continue pulling until the terminals are completely clear of the receptacle—you’ll see two brass or chrome-plated prongs, each about 1/4 inch wide and 1 inch long, fully exposed.
6. Once the terminals clear the receptacle by at least 2 inches, pivot the element upward and lift it completely out of the drip pan area.
Wire Connections (For Models with Hardwired Elements)
Some 790.9735 variants use hardwired elements instead of plug-in terminals. If your element has wires instead of prongs:
7. You’ll see 2 wires connected to spade terminals on the element: one black wire (hot/line) and one white wire (hot/line—both carry 240V split-phase power). There’s no neutral or ground wire on surface elements.
8. Note which wire connects to which terminal before disconnecting—the black wire typically connects to the left terminal, white to the right, though electrical polarity doesn’t affect element function.
9. Press down on the spring tab of each spade connector while pulling the connector straight off the element terminal. The connector will require 3-5 pounds of pulling force once the tab releases.
Troubleshooting This Step
Element won’t pull out: Check that you completed Step 2 (removing mounting screws or clips). Verify no retaining hardware still secures the element. Apply penetrating oil around the terminals if corrosion is visible, wait 5 minutes, then attempt removal again.
Terminal breaks off during removal: Stop pulling immediately. The receptacle must be replaced along with the element. The broken terminal will remain inside the receptacle—you’ll replace both parts together in Step 4.
Spade connector pulls wire out of connector: Strip 1/2 inch of insulation from the wire end. Crimp a new spade connector onto the bare wire using a wire crimping tool, matching the original connector size (typically 1/4-inch female spade). Ensure the wire seats fully into the connector barrel before crimping—the wire shouldn’t pull out when you tug with 10 pounds of force.
Can’t identify which wire goes where: The element will function correctly regardless of which wire connects to which terminal, as both wires carry hot 240V power with no polarity requirement. Connect either wire to either terminal.
Step 4: Plug in new element
1. Hold the new coil element by its outer metal ring, keeping the two prongs (terminals) facing toward the cooktop surface where the receptacle is located.
2. Locate the receptacle block on the cooktop – this is a white or cream-colored ceramic block mounted to the drip pan with two metal slots, positioned about 2-3 inches from the edge of the cutout hole.
3. Align the two flat metal prongs on the element with the two slots in the receptacle block. The prongs are about 1/4 inch wide and spaced about 1 inch apart. They will only fit one way—the wider flat side of each prong faces up and down, not side to side.
4. Push the prongs straight into the receptacle slots with firm, steady pressure. Apply 5-10 pounds of force—you should feel initial resistance, then the prongs will slide in smoothly for about 3/4 to 1 inch until they stop.
5. Listen and feel for the connection to seat completely. You’ll feel a slight click or firm stop when the prongs are fully inserted into the spring clips inside the receptacle.
6. Verify the element is fully seated by ensuring the metal mounting bracket (where the prongs attach to the element) sits flush against the front face of the ceramic receptacle block with no gap visible.
7. Gently pull outward on the element ring with 3-5 pounds of force to test the connection. The element shouldn’t pull out. If it slides out easily, the prongs didn’t engage the spring clips—repeat steps 3-5 with more force.
8. Position the element so it sits level in the drip pan. The coil should rest evenly without tilting. If it tilts, the prongs aren’t fully inserted—push harder until the bracket sits flush against the receptacle.
Troubleshooting: Connection Problems
If the element won’t push in fully: – Check that you removed all packaging material from the new element prongs – Verify the prongs are aligned with the slots (not offset by 90 degrees) – Look inside the receptacle slots for debris or burned material from the old element—use a flashlight and remove any obstruction with needle-nose pliers.
If the element pulls out easily after connecting: – The spring clips inside the receptacle may be worn. Push the element in and rock it up and down slightly (1/4 inch movement) while applying inward pressure—this can help the clips grab the prongs. – If clips are severely damaged, the receptacle block must be replaced before the element will stay connected.
If the element sits crooked: – One prong isn’t fully inserted. Remove the element and inspect both prongs for bending. Straighten any bent prongs with pliers before reinserting.
How Much Does This Repair Cost?
| Repair route | Typical cost |
|---|---|
| Do it yourself | $15–$25 (parts) |
| Professional repair | $75–$150 (parts and labor) |
Replacing coil elements for the Kenmore 790.9735 usually costs between $15 and $25 for the 6″ element and $20 to $35 for the 8″ element. If you hire a professional, expect to shell out $75 to $150 total after factoring in the service call fee and labor. This makes it one of the best repairs you can tackle yourself.
Recommended Products
These are the parts and tools I recommend for this repair, based on compatibility and customer reviews:
- 316442301 Electric Range Burner fit for Frigidaire, 8” Coil Surface Element MP26YA fit for Kenmore, 2600w 240v 5 Turn Stove Burner FEP310BW REG46NW 318372214 316048600 222T025 AP4356467 By prime&swift
- 316442300 8″ Element Replacement for Kenmore/Sears 790.93002311 – Compatible with 316442300 Range Element
- S-Union 4 Pack MP22YA Electric Range Burner Element Unit Set – 2 pcs MP15YA 6″ and 2 pcs MP21YA 8″ Replacement for Hardwick & Kenmore & Maytag & Norge & Whirlpool Electric Range Stove
The 8″ Coil Element That Solves Most Dead-Burner Calls on This Model
For the Kenmore 790.9735 series, the 8″ surface element is usually your go-to fix when a cooktop burner won’t heat. I often order this one before even pulling the old coil out of the socket—nine times out of ten, this is the part that’s actually failed.
What works
- Drops straight into the terminal block with zero fiddling—the prongs align properly and seat flush, which is crucial when you’re working in tight quarters on a rangetop.
- Specs match the 790.9735 nameplate exactly, so there’s no guesswork about whether this will power on at full 2600W or throttle down due to a mismatch.
- The coil itself is tightly wound with no visible manufacturing defects—I’ve come across cheaper replacements that arrive with loose blisters that fail within weeks.
What doesn’t
- Shipping can be slow on some SKUs for this part—if your range is completely down, factor in 5–7 business days rather than Prime 2-day, which matters for a household that cooks daily.
- This is just the burner element; if your problem is a bad terminal block or internal wiring, this won’t light up your coil, and you’ll end up ordering again.
The one mistake I see is assuming the element is bad when it’s really the terminal block—people order multiple replacement elements before realizing the socket itself was burned. Test the terminal block continuity with a multimeter first, or you might end up with a spare coil in the drawer. Beaquicy 316442300 8″ Surface Element
About This Article

Written by Dave Holt. I have been taking apart and fixing household appliances since I was a teenager who couldn't leave a broken one alone. Eighteen years later, after fixing things for neighbors, friends, and anyone who'd let me, I have seen almost every failure mode there is — and misdiagnosed my share along the way. I am self-taught, with no formal training or certifications. When I write a repair guide here, it is based on the actual job, not a manufacturer overview. More about this site.
Scope and limits. Dave is a self-taught repairer, not a certified appliance technician. Unplug before you open anything, and leave sealed refrigeration systems, gas connections, and hardwired circuits to a qualified technician.



