
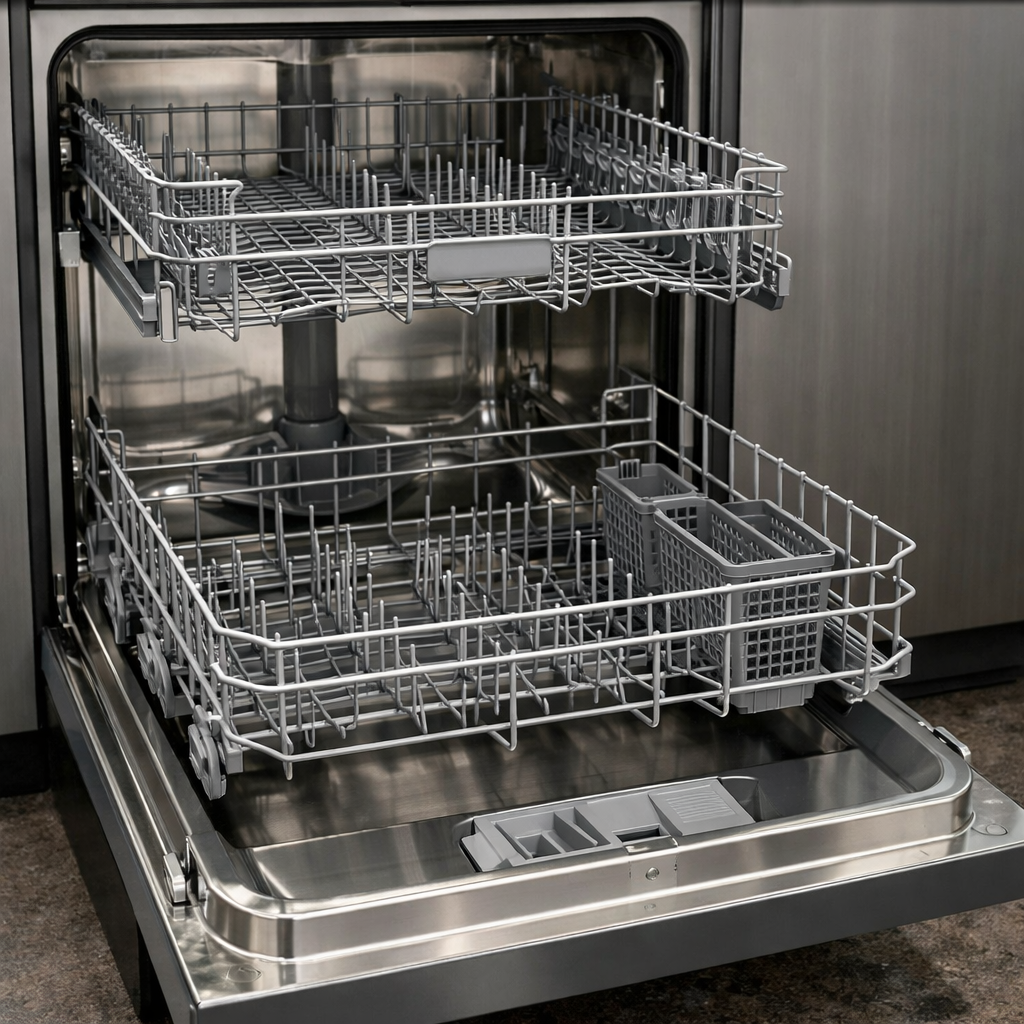
Third Rack Alignment
In this step-by-step guide, I’m going to walk you through fixing third rack alignment on your LG LDF7774ST. With the right tools and parts, most homeowners can tackle this repair in just 1–2 hours and avoid a costly service call.
🔨 Pro Tip from Dave
One common mistake I notice homeowners make on the LDF7774ST is replacing just the rack itself without checking the side rail mounting tabs — part number AEC73756101. These can wear down and cause the rack to sit crooked even after you replace it. Also, make sure the tub mounting holes for the rail brackets aren’t cracked or stripped. Forcing a new rack into damaged mounting points just resets the issue within months.
Part of our Top 20 Dishwasher Models & Common Repair Issues Guide. Browse all dishwasher repair guides for related models and issues.
Common Symptoms & Causes
If you’re having third rack alignment problems on your LG LDF7774ST, you might notice these symptoms:
- The third rack slides unevenly or catches when pulling it out
- Spray arm beneath the third rack spins inconsistently or appears tilted
- Dishes on the third rack come out poorly washed or still dirty after a full cycle
- The rack visibly sits lower on one side or refuses to stay level on its tracks
Typically, this issue is caused by worn or cracked rack glides, bent side rails, or a misaligned spray arm bracket due to normal wear and heavy use over time.
Safety First
- Unplug the dishwasher from the power outlet before starting any repair — never work on a live appliance.
- Shut off the water supply valve before disconnecting any water lines or hoses.
- Wear work gloves when handling metal brackets, sheet metal edges, or sharp components.
- Take photos with your phone before disconnecting any wiring harnesses or connectors.
- Work in a well-lit area with enough floor space to lay removed panels flat.
Tools & Parts Needed
Essential Tools
- Phillips #2 screwdriver
- Torx T20 screwdriver
- Needle-nose pliers
- Multimeter
- Flashlight
Replacement Parts
- Third rack rail adjuster kit
- Rack wheels (set)
- Phillips screwdriver
Step-by-Step Repair Instructions
Step 1
Start by sliding the third rack (silverware/utensil tray) all the way out of the dishwasher. Inspect both side rail wheels because cracked or missing wheels are the most common culprits for the rack binding, tilting, or refusing to seat properly. Examine each wheel closely for visible cracks, chips, or if they’re completely absent. Even one damaged wheel can throw the rack off its track. Pro tip: perform this inspection with the dishwasher door fully open and the interior light on for better visibility.
Step 2
If you find any cracked or missing wheels, replace them by snapping the old wheel off its axle pin and pressing a new replacement wheel firmly until you hear a click — this will restore smooth, level movement along the rail. Be sure to use the correct LG-compatible replacement wheels, as off-brand wheels may not seat securely and can pop off during the wash cycle. Safety note: the axle pins have sharp edges, so handle them carefully to avoid cuts.
Step 3
With the third rack out, take a look at the rail channels along the upper interior tub wall for any food debris, broken glass chips, or mineral buildup. Even a small obstruction can cause the rack to catch or bind during insertion and removal. Use a damp cloth or a soft brush to clear any material from inside the channel grooves, working from front to back. Keeping these channels clean during routine maintenance will help prevent binding from returning after the repair.
Step 4
If you find that tall glasses loaded on the second rack are physically contacting the third rack above them, you’ll need to raise the third rack’s height using the built-in height adjuster. Running the dishwasher with items pressing against the third rack can shift it mid-cycle, resulting in poor cleaning. Press the height adjuster tabs on both sides of the rack simultaneously, then lift the rack to the higher position until the tabs lock. Always adjust both sides evenly to keep the rack level and prevent it from riding crooked in the rails.
Step 5
Once you’ve made adjustments, slide the third rack fully in and out several times to confirm it travels smoothly without catching on the second rack, tub walls, or any loaded items. This simulates what happens during a wash cycle and helps reveal any remaining alignment issues before you run the machine. If the rack still catches, double-check that both rail wheels are fully seated and that the height adjustment locked properly on both sides. This step will save you from discovering a problem mid-cycle when water and heat make diagnosis harder.
Step 6
Finally, run a complete Normal cycle with the third rack loaded with silverware or utensils to verify both cleaning performance and rack stability under real wash conditions. After the cycle ends, check that the silverware is clean and that the rack has not shifted out of position. If the rack has moved or items are still poorly cleaned, re-inspect the wheels and rail channels before running another cycle.
Where to Buy Replacement Parts
- LG LDF7774ST third rack adjusters rail wheels replacement
- LG dishwasher upper third rack height adjustment
- LG dishwasher third rack tine guide replacement
When to Call a Professional
If you’ve tried all the steps above and the issue still persists, the problem may involve a failed main control board, a seized circulation or drain pump, or wiring issues that need specialized diagnostic equipment. In that case, it’s best to contact a licensed appliance technician — and remember to shut off the water supply valve before any work that opens the fill or drain circuit.
How Much Does This Repair Cost?
| Repair route | Typical cost |
|---|---|
| Do it yourself | $10–$40 (parts) |
| Professional repair | $150–$300 (parts and labor) |
Fixing third rack alignment on your LG LDF7774ST yourself typically costs between $10–$40 for replacement clips, rails, or adjustment parts. A professional service call for the same repair usually runs $150–$300 once you factor in labor and fees. Choosing the DIY route can save you over $100 while restoring your dishwasher’s full capacity.
Frequently Asked Questions
Why does my LG LDF7774ST third rack keep sliding out of alignment?
The third rack rails may be worn, bent, or have debris buildup preventing proper seating. Clean the rail tracks and inspect the plastic glides for damage that may need replacement.
Can I realign the third rack without professional help?
Absolutely! Most alignment issues on the LDF7774ST are straightforward DIY fixes that require no special tools. Just remove the rack fully and carefully reseat it into both rail tracks simultaneously.
Will a misaligned third rack affect washing performance?
Yes, poor alignment can block the upper spray arm, reducing water coverage throughout the dishwasher. Correcting the alignment ensures proper water distribution and thorough cleaning on all racks.
Recommended Products
Here are the parts and tools I recommend for this repair, based on compatibility and customer reviews:
- LG AEC73337401 Guide Assembly, Rail
- Upgraded 3751DD1001J 3751DD1001C Dishwasher Lower Rack
- Upgraded 3751DD1001J 3751DD1001C Dishwasher Lower Rack
- Dishwasher Lower Rack Wheels for LG Replacement Parts, 4 Pcs Dishrack Roller Compatible with LG Dishwasher Replaces 4581DD3003B/C 4581DD9002B 1372292 AP4437752 EA3523051 AH3523051 PS3523051
The Rail Guide Assembly That Stops Third Rack Wobble on the LG LDF7774ST
If you’ve ruled out worn wheels and the rack still won’t sit level or slides sideways during the wash cycle, a bent or damaged guide rail is almost always the culprit on this model. This is the part that actually keeps the third rack tracking straight, and once it’s compromised, no amount of wheel replacement will fix the alignment.
What works
- Direct OEM fit — this assembly clicks into the existing mounting points without modification or shimming, so the rack sits exactly where LG engineered it to sit.
- Eliminates the guesswork when alignment issues persist — swapping the guide assembly tells you definitively whether the problem was mechanical wear or something else entirely.
- Stops the side-to-side drift that happens mid-cycle — the new guide maintains consistent spacing between the rack and the tub walls, which is what actually controls alignment.
What doesn’t
- Won’t fix loose or worn wheels — if your wheels are shot, you’ll still have engagement problems even with a new guide assembly, so inspect those first.
- Requires removal of the entire upper rack assembly to access, which means emptying the dishwasher and working with some awkward angles inside the tub.
I’ve seen people order wheel kits first thinking that was the fix, only to find the rack still won’t track straight — that’s usually when the rail guide is actually bent. It’s worth inspecting the guide visually for warping or visible damage before you start the swap. LG AEC73337401 Guide Assembly, Rail
About This Article

Written by Dave Holt. Dave Holt has been taking apart and fixing household appliances since he was a teenager who couldn't leave a broken one alone. Eighteen years later, after fixing things for neighbors, friends, and anyone who'd let him, he's seen almost every failure mode there is. When he writes a repair guide here, it's based on the actual job, not a manufacturer overview. More about this site.
Scope and limits. Dave is a self-taught repairer, not a certified appliance technician. Unplug before you open anything, and leave sealed refrigeration systems, gas connections, and hardwired circuits to a qualified technician.



