
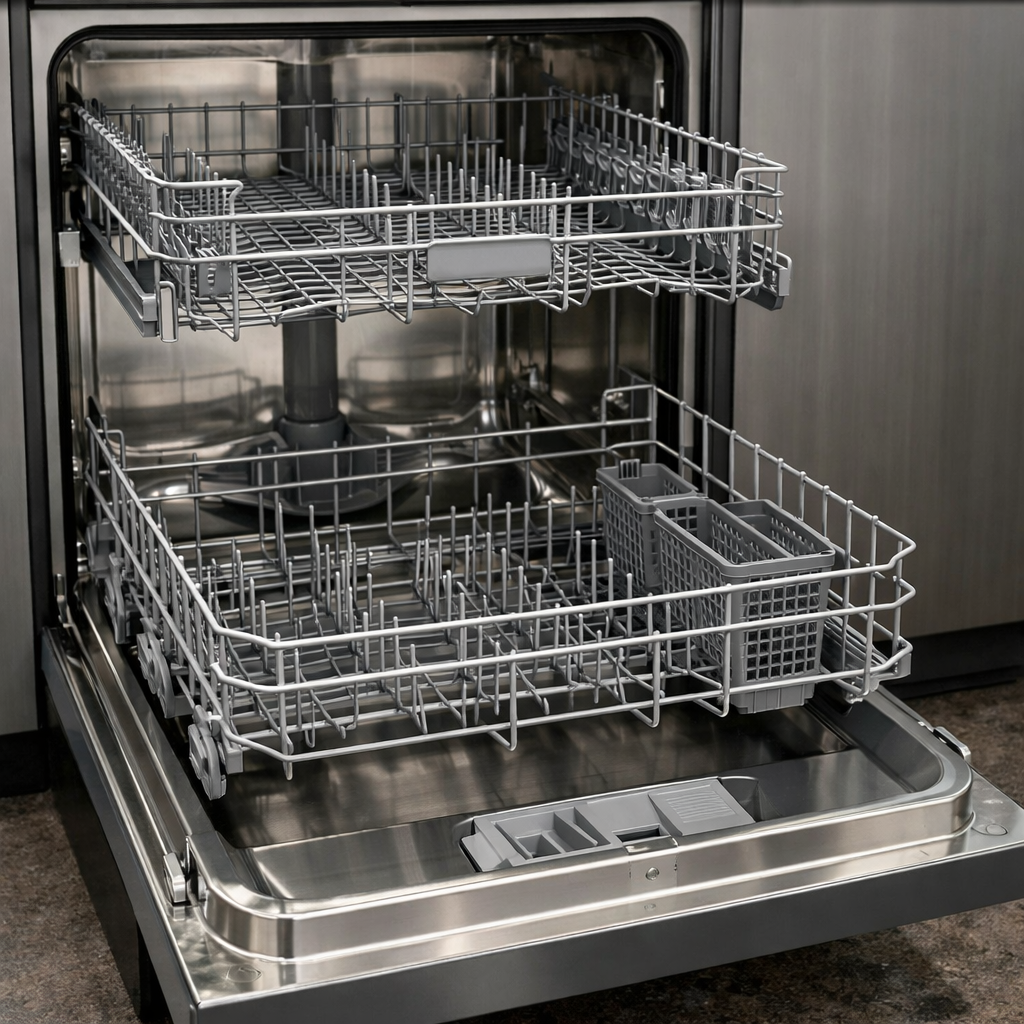
Float switch stuck
This step-by-step repair guide will help you fix a float switch stuck on your KitchenAid KDFE204KPS. With the right tools and parts, most homeowners can tackle this repair in 1–2 hours and save themselves a costly service call.
🔨 Pro Tip from Dave
On the KDFE204KPS, the float assembly (part number WPW10144820) sits in the front-left corner of the tub. Many DIYers only clean the float cap without checking the actuator stem underneath. The stem can corrode and bind against its housing, which causes the switch to stay triggered even after cleaning. Pull out the lower rack and give that stem a gentle wiggle before assuming the float itself is the issue.
Part of our Top 20 Dishwasher Models & Common Repair Issues Guide. Browse all dishwasher repair guides for related models and issues.
Common Symptoms & Causes
If your KitchenAid KDFE204KPS dishwasher has a stuck float switch, you may notice one or more of the following signs:
- The dishwasher stops filling with water mid-cycle or refuses to fill at all
- Standing water remains at the bottom of the tub after the cycle ends
- The control panel displays an error code such as F8 E4 indicating a water supply fault
- The dishwasher runs continuously without advancing past the fill stage
This issue is typically caused by debris or mineral buildup jamming the float in the raised position, a warped float body, or a failed float switch assembly that is no longer sending accurate water-level signals to the control board.
Safety First
- Unplug the dishwasher from the power outlet before starting any repair — never work on a live appliance.
- Shut off the water supply valve before disconnecting any water lines or hoses.
- Wear work gloves when handling metal brackets, sheet metal edges, or sharp components.
- Take photos with your phone before disconnecting any wiring harnesses or connectors.
- Work in a well-lit area with enough floor space to lay removed panels flat.
Tools & Parts Needed
Essential Tools
- Phillips #2 screwdriver
- Torx T20 screwdriver
- Needle-nose pliers
- Multimeter
- Flashlight
Replacement Parts
- Float switch
- float dome
- needle-nose pliers
- soft cloth
Step-by-Step Repair Instructions
Step 1
Before you start, disconnect power at the breaker or unplug the unit. Working on a live dishwasher can lead to electric shock. Remove the lower rack to clear your path, then locate the anti-flood float: it’s a small plastic dome at the front-left or front-right corner of the tub. This float triggers an automatic shutoff if water rises too high, so if it’s stuck in the raised position, it will cause the dishwasher to stop filling prematurely or not fill at all.
Step 2
Carefully lift the float dome straight up off its stem and wipe both the stem and the housing with a damp cloth. Food debris and mineral scale are often the culprits for a stuck float. Even a thin layer of residue can bind the stem enough to keep it in the raised (overfill) position. A cotton swab or old toothbrush can work wonders for scrubbing inside the housing channel where buildup tends to accumulate.
Step 3
With the housing clean, put the float dome back on the stem and press it up and down several times. It should move freely without any resistance or grinding. If it still binds, check the stem for cracks or warping, as a physically damaged float must be replaced rather than cleaned. If it moves smoothly, then the mechanical side of the float is likely not the problem.
Step 4
To test the float switch, carefully tilt the dishwasher back to access the underside of the tub floor where two wires connect to the switch body. Set your multimeter to Rx1 (resistance times 1) and probe the two terminals. With the float dome pressed down to its normal fill position, the switch should read closed (continuity). When the float is lifted to simulate overfill, it should read open (no continuity). If the switch reads open in both positions or closed in both, it’s faulty, and that’s why the dishwasher thinks it’s overflowing.
Step 5
To replace a failed switch, unplug the two-wire harness connector and remove the single Phillips mounting screw securing it to the tub floor bracket. Make a note of the wire orientation or snap a photo to ensure you reconnect the harness correctly on the new switch. Seat the replacement switch, reinstall the screw snugly (but don’t overtighten it into the plastic bracket), and plug the harness back in until it clicks.
Step 6
Restore power and run a Normal cycle, watching closely during the first few minutes to confirm the tub fills with water. A successful repair means the dishwasher fills to the correct level without triggering a false overfill cutoff, allowing it to proceed through the wash cycle normally. If the unit still won’t fill after replacing the switch, the next components to check are the water inlet valve and the control board that interprets the float switch signal.
Where to Buy Replacement Parts
- KitchenAid KDFE204KPS float switch WP8193836 replacement
- KitchenAid dishwasher anti-flood float dome cleaning
- KitchenAid dishwasher not filling float stuck up
When to Call a Professional
If the issue persists after following all these steps, the problem might involve a failed main control board, a seized circulation or drain pump, or wiring that needs specialized diagnostic equipment. At that point, it’s best to contact a licensed appliance technician. Just remember to shut off the water supply valve before any work that opens the fill or drain circuit.
How Much Does This Repair Cost?
| Repair route | Typical cost |
|---|---|
| Do it yourself | $10–$35 (parts) |
| Professional repair | $150–$300 (parts and labor) |
Replacing a float switch on a KitchenAid KDFE204KPS usually costs $10–$35 for the part if you do it yourself. A professional repair service call will typically run $150–$300 once you factor in labor and diagnostic fees. By tackling this repair yourself, you could save well over $100 while getting your dishwasher back up and running quickly.
Frequently Asked Questions
How do I know if the float switch is stuck on my KitchenAid KDFE204KPS?
If your dishwasher won’t fill with water or stops mid-cycle, a stuck float switch is a likely cause. You can visually inspect the float assembly at the bottom of the tub to see if it moves freely up and down.
Can I fix a stuck float switch myself without a technician?
Absolutely! This is a straightforward DIY repair that doesn’t require special tools. Just remove any debris blocking the float and clean around its base to restore normal movement.
Will a stuck float switch damage my KitchenAid KDFE204KPS if left unrepaired?
Yes, a float switch stuck in the raised position can prevent your dishwasher from filling, making it unable to complete a wash cycle. Addressing it promptly will help prevent unnecessary wear on other components.
The Float Switch Replacement That Stops the “Overfill” Cycle on Your KDFE204KPS
If you’ve cleaned out the float dome and the switch still won’t move freely, or if the dishwasher keeps stopping mid-cycle with that overfill error, you’re likely looking at a worn or electrically dead float switch. This part actually tells your control board when the water has reached the right level—once it fails, no amount of cleaning will fix it.
What works
- Drop-in replacement for the WP8193836—clips into the same housing, no adapters or modifications needed on this model.
- The actuator arm moves with noticeably less resistance than aged OEM switches, so you can actually feel the difference when you test it by hand before reinstalling.
- Solves both the stuck-float symptom and the electrical continuity problem in one swap—when the float switch is genuinely the culprit, this ends it.
What doesn’t
- Won’t help if your real problem is a cracked float dome or a blocked water inlet valve—misdiagnosis can lead to ordering this when you actually need the dome.
- Installation requires removing the lower front panel and the tub assembly clips; not a five-minute job if you’re doing it for the first time, and you’ll need a torque wrench to reassemble correctly.
I’ve seen people order the float dome first, only to discover the switch itself had already failed electrically—the float moves fine but the control board never gets the “full” signal. Before you buy, open the lower panel and manually test the switch arm; if it swings freely but the dishwasher still won’t drain past the overfill point, grab this float switch replacement instead.
About This Article

Written by Dave Holt. Dave Holt has been taking apart and fixing household appliances since he was a teenager who couldn't leave a broken one alone. Eighteen years later, after fixing things for neighbors, friends, and anyone who'd let him, he's seen almost every failure mode there is. When he writes a repair guide here, it's based on the actual job, not a manufacturer overview. More about this site.
Scope and limits. Dave is a self-taught repairer, not a certified appliance technician. Unplug before you open anything, and leave sealed refrigeration systems, gas connections, and hardwired circuits to a qualified technician.



