Rack rail not sliding
This step-by-step repair guide walks you through fixing rack rail not sliding on your Bosch SHSM63W55N (300 Series). With the right tools and parts, most homeowners can complete this repair in 1–2 hours and avoid a costly service call.
🔨 Pro Tip from Dave
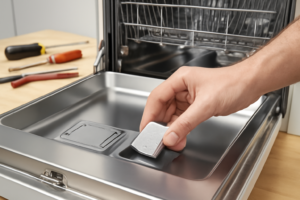
On the SHSM63W55N, always inspect the rack adjuster assembly part number 00611475 before ordering anything else — Bosch used a slightly revised clip design on this 300 Series run that tends to snap at the locking tab under heavy loads. A common mistake is forcing the rack instead of releasing both side adjusters simultaneously; doing that cracks the housing and turns a $15 fix into a $60 one.
Part of our Top 20 Dishwasher Models & Common Repair Issues Guide. Browse all dishwasher repair guides for related models and issues.
“`html
Common Symptoms & Causes
If your Bosch SHSM63W55N is experiencing rack rail issues, you may notice one or more of the following symptoms.
- The upper or lower dish rack sticks or jerks when pulling it out
- The rack rail refuses to extend fully, stopping midway on the track
- You hear a grinding or scraping noise when sliding the rack in or out
- The rack visibly tilts or sags to one side during use
These issues are most commonly caused by worn or cracked rack rail rollers, debris buildup along the rail track, or a warped rail bracket that has degraded over time with regular use.
“`
Safety First
- Unplug the dishwasher from the power outlet before starting any repair — never work on a live appliance.
- Shut off the water supply valve before disconnecting any water lines or hoses.
- Wear work gloves when handling metal brackets, sheet metal edges, or sharp components.
- Take photos with your phone before disconnecting any wiring harnesses or connectors.
- Work in a well-lit area with enough floor space to lay removed panels flat.
Tools & Parts Needed
Essential Tools
- Phillips #2 screwdriver
- Torx T20 screwdriver
- Needle-nose pliers
- Multimeter
- Flashlight
Replacement Parts
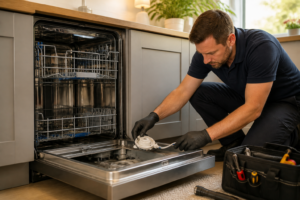
Step-by-Step Repair Instructions
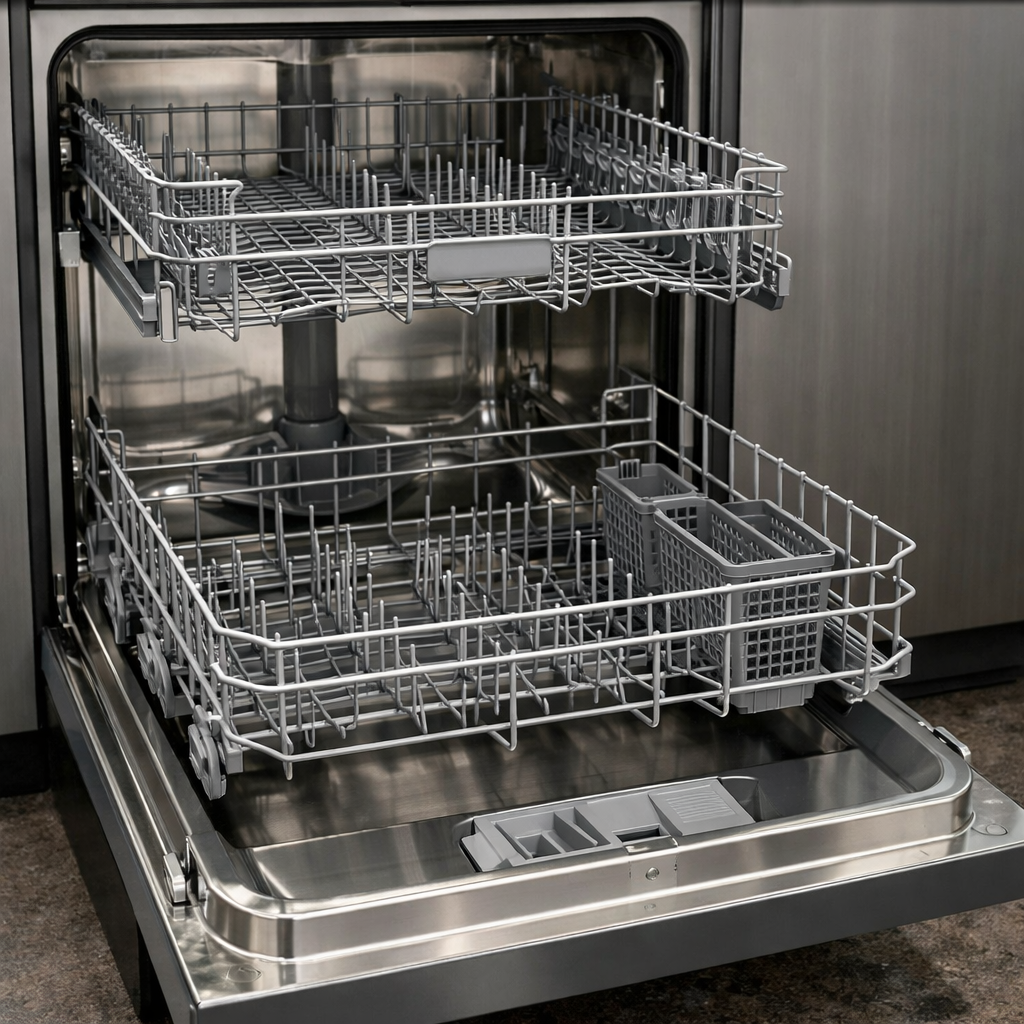
Step 1
Pull the upper rack all the way out and inspect all four rack wheels (two on each side) for cracks or flat spots, because a damaged wheel causes the rack to tilt unevenly and bind against the rail rather than rolling smoothly. Grip each wheel and try to wobble it — a cracked wheel will feel loose or visibly deformed. To replace a faulty wheel, snap the old one off its mounting post and press the new one firmly until it clicks into place; no tools are required.
Step 2
With the rack removed, visually inspect the full length of both rail channels along the tub interior for debris, detergent buildup, or fragments of broken wheel plastic, because any obstruction in the channel will catch the wheels mid-slide and stop the rack dead. Wipe each channel thoroughly with a soft damp cloth, reaching all the way to the back wall. Pro tip: a flashlight makes it much easier to spot small plastic fragments lodged at the rear of the channel.
Step 3
Locate the height adjuster on the side of the upper rack — it is either a lever you push or a button you press — and check that it moves freely and holds its position, because a broken adjuster can lock the rack at the wrong height and cause it to scrape the tub or bind against the upper spray arm. Try shifting the adjuster through both height positions; if it feels loose, snaps off, or fails to hold, the adjuster assembly needs to be replaced before the rack will operate correctly. Replacement adjusters are rack-specific, so confirm the part number against your SHSM63W55N before ordering.
Step 4
If the rack rolls but still feels stiff or produces a binding-then-catching sensation, the rails are likely dry and need lubrication. Apply a light, even coat of food-safe silicone spray along the full length of both rail channels, then wipe away any excess so it does not pool at the bottom of the tub. Important: never use WD-40, cooking oil, or any petroleum-based lubricant, as these degrade over time, attract grime, and are not safe for contact with dishwasher water and dishes.
Step 5
Slide the upper rack back into both rail channels slowly and evenly, keeping it level so neither side gets ahead of the other, because inserting it at an angle is the most common cause of re-binding immediately after a repair. Once fully seated, pull the rack in and out several times with light hand pressure — smooth, resistance-free movement confirms all wheels are seated properly and the rails are clean and lubricated. If binding returns at the same spot each time, remove the rack again and re-inspect that section of the rail channel for a missed obstruction.
Step 6
With the rack operating correctly, set the height position that fits your current load: push the adjuster lever upward to raise the upper rack to the high position, which creates extra clearance in the lower rack for tall glasses, large pots, or bottles. Remember to return the rack to the lower position afterward if you regularly wash items that need the upper spray arm closer for effective cleaning. Cycling through both positions a few times after any repair also helps confirm the adjuster is functioning reliably.
Where to Buy Replacement Parts
Find genuine OEM and aftermarket replacement parts for your Bosch SHSM63W55N (300 Series) on Amazon:
- Bosch SHSM63W55N upper rack adjuster WD-4800-2 replacement
- Bosch dishwasher upper rack wheel replacement 00611475
- Bosch dishwasher rack glide rail replacement 00704949
When to Call a Professional
If the issue persists after completing all steps above, the problem may involve the sealed refrigerant system, a failed main control board, or wiring that requires specialized diagnostic equipment. Contact a licensed appliance technician — attempting sealed-system repairs without EPA 608 certification is illegal and unsafe.
“`html
How Much Does This Repair Cost?
Replacing a rack rail on a Bosch 300 Series dishwasher typically costs $15–$50 in parts when you do it yourself. A professional service call for the same repair usually runs $150–$300 once you factor in labor and fees. Tackling this repair yourself can save you $100 or more.
“`
## Frequently Asked Questions
### Why won’t my Bosch SHSM63W55N rack rail slide smoothly even after cleaning it?
Food debris and mineral buildup are the most common culprits, but a bent or cracked rail glide can also cause sticking. Inspect the plastic rollers and rail track closely for physical damage and replace any worn components.
### Can I fix the rack rail myself, or do I need a technician?
Most rack rail issues on the Bosch 300 Series are straightforward DIY repairs requiring only basic tools. Replacement rail kits are widely available and simply snap or screw into place.
### How do I know if the rack rail needs replacing versus just cleaning?
If the rail still binds after thorough cleaning and lubrication, check for visible cracks, warping, or broken rollers. Any structural damage means the rail assembly should be replaced rather than repaired.
Recommended Products
These are the parts and tools we recommend for this repair, based on compatibility and customer reviews:
- 8Pcs Dishwasher Upper Wheel Assembly 611475 Replacement for Bosch Dishrack Upper Rack Wheel Replace# bsh-00611475 1559847 AH3477735 AH8727387 Grey (Upper Rack Wheel)
- 6-Pack Dishwasher Upper Wheel Upper Dishrack Roller Assembly 611475 Replacement for Bosch Dishrack Upper Rack Wheel Replace# bsh-00611475 1559847 AH3477735 AH8727387 (Upper Rack Roller)
- 8Pcs Dishwasher Upper Wheel Assembly 611475 Replacement for Bosch Dishrack Upper Rack Wheel Replace# bsh AH3477735 AH8727387 00611475 1559847 Grey (Upper 8p)
As an Amazon Associate, I earn from qualifying purchases.