Pump filter clog
This step-by-step repair guide walks you through fixing pump filter clog on your LG LDF7774ST. With the right tools and parts, most homeowners can complete this repair in 1–2 hours and avoid a costly service call.
🔨 Pro Tip from Dave
On the LDF7774ST, the cylindrical filter (part #5231ED3003A) has a fine mesh inner screen that most homeowners miss entirely during cleaning — food debris packed in there will keep causing slow drains even after you clean the outer housing. Also, when you reinstall the filter, make sure it locks with a firm clockwise turn; an improperly seated filter will let debris bypass straight into the pump and cause repeat clogs within weeks.
Part of our Top 20 Dishwasher Models & Common Repair Issues Guide. Browse all dishwasher repair guides for related models and issues.
“`html
Common Symptoms & Causes
If your LG LDF7774ST is experiencing a pump filter clog, you may notice one or more of the following warning signs.
- Dishes come out dirty or covered in gritty residue after a full wash cycle
- Standing water remains at the bottom of the dishwasher tub after draining
- The dishwasher displays an “OE” drain error code during or after a cycle
- Unusual humming or straining noise coming from the bottom of the unit while running
This issue is typically caused by a buildup of food debris, grease, and mineral deposits inside the pump filter over time, restricting proper water flow and drainage.
“`
Safety First
- Unplug the dishwasher from the power outlet before starting any repair — never work on a live appliance.
- Shut off the water supply valve before disconnecting any water lines or hoses.
- Wear work gloves when handling metal brackets, sheet metal edges, or sharp components.
- Take photos with your phone before disconnecting any wiring harnesses or connectors.
- Work in a well-lit area with enough floor space to lay removed panels flat.
Tools & Parts Needed
Essential Tools
- Phillips #2 screwdriver
- Torx T20 screwdriver
- Needle-nose pliers
- Multimeter
- Flashlight
Replacement Parts
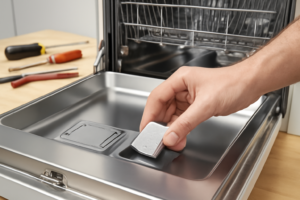
- Filter assembly
- O-ring seal
- soft brush
- white vinegar
Step-by-Step Repair Instructions
Step 1
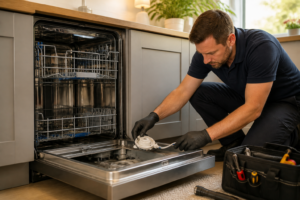
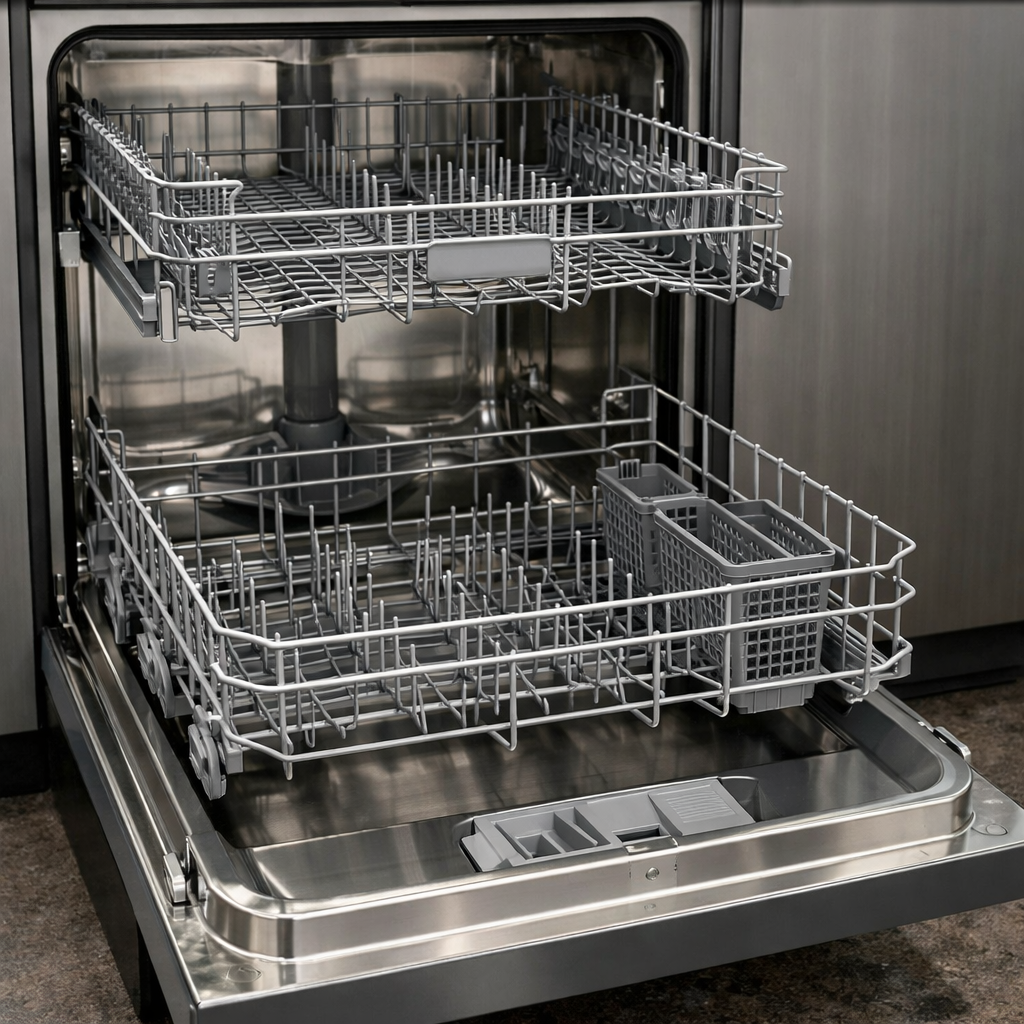
Pull out the lower dish rack completely to give yourself clear access to the tub floor, then remove the lower spray arm by twisting it counter-clockwise until it releases. Locate the round filter assembly in the center of the tub floor — it has a center handle and is the primary line of defense against food debris reaching the pump. Skipping spray arm removal risks knocking it loose during filter work and misaligning it on reinstall.
Step 2
Twist the filter assembly counter-clockwise a quarter turn to unlock it, then lift it straight up and separate the fine mesh inner filter from the coarse outer filter. These two filters work together — the coarse filter catches large debris while the fine mesh stops smaller particles from entering the pump, and a clog in either one restricts drainage and can leave standing water in the tub. Handle the fine mesh filter gently, as forcing the two pieces apart can bend or tear the mesh.
Step 3
Rinse both filters under warm running water and scrub gently with a soft brush to dislodge food particles, being careful not to use anything abrasive that could damage the mesh. If you see white mineral scale or a greasy film — both of which restrict water flow through the filter �� soak the filters in undiluted white vinegar for 15 minutes, then rinse thoroughly. Do not use bleach, as it can degrade the mesh material over time.
Step 4
Before reinstalling, carefully inspect the O-ring seated around the base of the filter for cracks, deformation, or absence — this small rubber seal is critical because a compromised O-ring allows dirty, debris-laden water to bypass the filter entirely and flow directly to the pump. If the O-ring looks damaged or is missing, replace it before proceeding; a correct replacement O-ring for the LDF7774ST is inexpensive and available from LG parts suppliers. Pro tip: lightly moisten the O-ring with water before reinstall to help it seat properly and prevent tearing.
Step 5
Use a soft brush or damp cloth to clean out the filter housing recess in the tub floor, removing any debris or buildup that has accumulated there. This step matters because leaving gunk in the housing means the tub floor residue will immediately re-clog your freshly cleaned filter, and it can also prevent the filter from sitting flush and locking correctly. Take a moment to also wipe around the housing rim where the O-ring will seat to ensure a clean, secure seal.
Step 6
Reinstall the filter assembly by inserting it into the housing and twisting clockwise a quarter turn until it locks firmly — an unlocked filter can vibrate loose during a cycle, allowing unfiltered water to reach the pump and cause damage. Reattach the lower spray arm by positioning it over its mount and twisting clockwise until you feel and hear it click into place, confirming it won’t spin off mid-cycle. Finally, run a Normal cycle and observe the wash for proper drainage and water pooling issues to confirm the clog has been resolved.
Where to Buy Replacement Parts
Find genuine OEM and aftermarket replacement parts for your LG LDF7774ST on Amazon:
- LG LDF7774ST filter assembly 5231DD3003B replacement
- LG dishwasher sump filter mesh cleaning coarse fine
- LG dishwasher filter O-ring replacement kit
When to Call a Professional
If the issue persists after completing all steps above, the problem may involve the sealed refrigerant system, a failed main control board, or wiring that requires specialized diagnostic equipment. Contact a licensed appliance technician — attempting sealed-system repairs without EPA 608 certification is illegal and unsafe.
“`html
How Much Does This Repair Cost?
Clearing a pump filter clog on the LG LDF7774ST is virtually free as a DIY repair, requiring no replacement parts in most cases. If a damaged filter needs replacing, expect to spend $10–$30 for the part. Hiring a professional typically runs $150–$300, making the DIY approach a smart way to save significant money.
“`
Frequently Asked Questions
How often should I clean the pump filter on my LG LDF7774ST?
Clean the pump filter on your LG LDF7774ST every one to two months to prevent clogs and maintain optimal washing performance. If you notice standing water or poor cleaning results, check the filter immediately.
Where is the pump filter located on the LG LDF7774ST?
The pump filter is located at the bottom of the dishwasher tub, beneath the lower spray arm. Remove the spray arm and filter cover to access it.
Can a clogged pump filter damage my LG LDF7774ST?
Yes, a severely clogged filter can strain the pump motor, leading to premature failure and costly repairs. Cleaning it regularly protects the appliance and extends its lifespan.
Recommended Products
These are the parts and tools we recommend for this repair, based on compatibility and customer reviews:
- GenuineOEMLG OEM LG Dishwasher Mesh Filter for LDF7551ST, LDF7774ST, Silver
- Allstare 3751DD1001J 3751DD1001C Dishwasher Lower Rack Replacement Parts for LG Dishwasher Parts Lower Dishrack LDF7774ST LDF5545ST MGR47998602 LG Bottom Dishwasher Rack Wheels Dish Washer Tray Drawer
- Dishwasher Filter Compatible with LG Model Numbers LDF7551BB, LDF7551ST, LDF7551WW, LDF7561ST, LDF7774BB, LDF7774BD, LDF7774ST
As an Amazon Associate, I earn from qualifying purchases.