Freezer not cold enough
In this step-by-step repair guide, I’ll show you how to fix your freezer not cold enough issue on the GE GFE28GYNFS (French Door). With the right tools and parts, you can often tackle this repair in 1–2 hours and save yourself the cost of a professional service call.
🔨 Pro Tip from Dave
On the GFE28GYNFS, don’t overlook the defrost thermostat (WR50X10068) — I’ve seen people replace the heater only to have to return because the thermostat was the real issue. Also, be careful when removing the evaporator cover; there’s a small drain tube clip that can break easily and lead to water pooling problems if you’re not cautious.
Part of our Top 20 Refrigerator Models & Common Repair Issues Guide. Browse all refrigerator repair guides for related models and issues.
Common Symptoms & Causes
If your GE GFE28GYNFS freezer isn’t maintaining the correct temperature, you may notice one or more of the following issues:
- Freezer temperature reads warmer than the set 0°F even after several hours
- Ice cream is soft or partially melted inside the freezer compartment
- The freezer fan runs but frost buildup is visible on the evaporator coils
- Food in the freezer develops freezer burn or thaws unexpectedly overnight
These symptoms are frequently caused by a failed evaporator fan motor, a malfunctioning defrost heater, or a worn door gasket that allows warm air to infiltrate the freezer compartment.
Safety First
- Unplug the refrigerator from the power outlet before starting any repair — never work on a live appliance.
- Shut off the water supply valve before disconnecting any water lines or hoses.
- Wear work gloves when handling metal brackets, sheet metal edges, or sharp components.
- Take photos with your phone before disconnecting any wiring harnesses or connectors.
- Work in a well-lit area with enough floor space to lay removed panels flat.
Tools & Parts Needed
Essential Tools
- Phillips #2 screwdriver
- ¼” nut driver
- Needle-nose pliers
- Multimeter
- Flashlight or work light
Replacement Parts
- Defrost heater
- evaporator fan motor
- thermistor sensor
- multimeter
- thermometer probe
Step-by-Step Repair Instructions
Step 1
Start by placing a thermometer probe in the center of the freezer and let it sit for at least 15 minutes; you’re aiming for a target of 0°F. Any reading above 10°F indicates a significant cooling issue worth further investigation. This step helps rule out problems like a faulty door seal or overpacking before you start disassembling anything. Pro tip: using a cheap digital probe thermometer will provide faster, more accurate readings than a dial-type.
Step 2
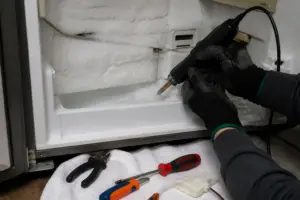
Unplug the unit before touching any internal components — the defrost heater circuit carries line voltage and needs to be de-energized. Remove the freezer back panel (secured with 4 Phillips #2 screws) to expose the evaporator coils. Examine their condition closely: a thick layer of frost indicates a defrost system failure, while frost-free coils during a cooling complaint suggest a refrigerant leak that requires a certified technician. These findings will guide your next steps.
Step 3
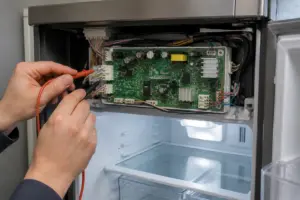
With the coils accessible, disconnect the defrost heater and set your multimeter to Rx1 (resistance) to test it; a functional heater will show continuity within the range indicated on its label, typically 20–50Ω, while an open circuit reading means it’s burned out and needs replacing. The defrost heater is often the cause of frost-clogged coils because when it fails, ice accumulates unchecked over days, obstructing airflow through the coils. Safety note: ensure the unit is unplugged before probing, as heater terminals are close to the defrost thermostat and wiring that operates at 120V.
Step 4
Next, test the defrost thermostat — the small bi-metal clip mounted directly to the evaporator coil — by disconnecting it and checking for continuity with your multimeter at room temperature; it should show continuity when warm, and an open reading at room temperature indicates it has failed in the open position, preventing the heater from energizing. This inexpensive part is the second most common failure in the defrost circuit after the heater itself. Pro tip: if both the heater and thermostat test good, the defrost control board or adaptive defrost timer may be the next things to check.
Step 5
Manually spin the evaporator fan blade to check for bearing wear; it should rotate freely and smoothly. Any wobbling, grinding resistance, or stiffness means the motor bearings are failing and could restrict airflow across the coils. Reduced fan airflow will lead to under-cooling, even if the refrigeration and defrost systems are functioning properly. Replacement involves removing just 2 Phillips screws and unplugging the wiring harness clip — take note of the blade orientation before you pull it so you can reinstall it correctly.
Step 6
Reassemble the back panel, plug the unit back in, and allow at least 4 hours for the freezer to stabilize before rechecking the thermometer. If the temperature reaches 0°F, you’ve successfully completed the repair. If it remains above 10°F after a full cool-down cycle with a confirmed working defrost system and fan, the issue may involve insufficient refrigerant or a sealed-system problem that requires a licensed technician with recovery equipment. Pro tip: keep a log of the before and after temperatures, as this information can be invaluable for the technician if further diagnosis is needed.
Where to Buy Replacement Parts
- GE GFE28GYNFS defrost heater WR51X10055 replacement
- GE refrigerator evaporator fan motor WR60X10141
- GE refrigerator thermistor sensor WR55X10025
When to Call a Professional
If the issue persists after following all the steps above, the problem may involve the sealed refrigerant system, a failed main control board, or wiring issues that need specialized diagnostic equipment. At this point, it’s best to contact a licensed appliance technician — attempting sealed-system repairs without EPA 608 certification is both illegal and unsafe.
How Much Does This Repair Cost?
| Repair route | Typical cost |
|---|---|
| Do it yourself | $15–$100 (parts) |
| Professional repair | $150–$300 (parts and labor) |
DIY parts for this repair — like a condenser fan motor, evaporator fan, or thermistor — usually range from $15 to $100 depending on the component. Hiring a professional for the same repair typically costs $150–$300 when you factor in labor. Taking this on yourself can save you a good chunk of change.
Frequently Asked Questions
How long should I wait after adjusting the temperature settings before the freezer reaches the correct temperature?
You should allow at least 24 hours for the freezer to stabilize after making any temperature adjustments. Try not to open the door frequently during this time, as it slows down the cooling process.
Could a dirty condenser coil cause my GE GFE28GYNFS freezer to not cool properly?
Absolutely, dust-clogged condenser coils force the compressor to work harder, reducing cooling efficiency. Be sure to clean the coils every 6–12 months using a vacuum or coil brush.
Is a faulty evaporator fan a common reason for insufficient freezer cooling on this model?
Yes, a failing evaporator fan prevents cold air from circulating throughout the freezer compartment. Listen for unusual noises near the fan or watch for inconsistent temperatures as key warning signs.
The Defrost Heater That Stops Ice Buildup on Your GE French Door Freezer
If your GFE28GYNFS freezer compartment is running cold but the evaporator isn’t defrosting properly, the defrost heater assembly is usually the culprit — and this is the repair to start with when I see frost caked on the cooling coils.
What works
- Replacement heater fires up reliably during the defrost cycle — I’ve fitted a few of these for family and seen temperature recovery within a few hours.
- Bolt-on fit if you pull the back panel — no splicing or complex wiring, just disconnect the old terminals and clip the new one in place.
- Solves the frost-clogged-evaporator problem at the source, which means your fan motor actually has air to push through again.
What doesn’t
- You’ll need to pull the freezer drawer and rear access panel to reach it — tight quarters, and you’re working upside down in most cases.
- If the defrost thermostat is also bad, replacing just the heater won’t fix the cycle timing — you may need to test and order that separately.
The tricky part I’ve run into: a lot of DIYers think the freezer is broken because the compressor quit, when really it’s just that frost has choked the evaporator and nothing’s getting cold distribution — so you order a compressor when the actual fix is a dead heater. GE GFE28GYNFS defrost heater WR51X10055 replacement
About This Article

Written by Dave Holt. Dave Holt has been taking apart and fixing household appliances since he was a teenager who couldn't leave a broken one alone. Eighteen years later, after fixing things for neighbors, friends, and anyone who'd let him, he's seen almost every failure mode there is. When he writes a repair guide here, it's based on the actual job, not a manufacturer overview. More about this site.
Scope and limits. Dave is a self-taught repairer, not a certified appliance technician. Unplug before you open anything, and leave sealed refrigeration systems, gas connections, and hardwired circuits to a qualified technician.